Introducing GrovePi With Scratch
 We wanted to make it easy to connect sensors to the Raspberry Pi. With the GrovePi, we accomplished the hardware side of that a year ago: no more wires, smoked electronics, confusing diagrams, or funny pullups. We have over 100 different sensors you can add to your Pi, without breaking out the soldering iron!
Today, we’d like to show you how you can use the graphical programming language Scratch to control those sensors, LED’s and other electrical components with your Pi.
As part of our recent software update, Nicole and Karan have been working overtime to bring Scratch programming to the GrovePi.
Scratch Graphical Startup
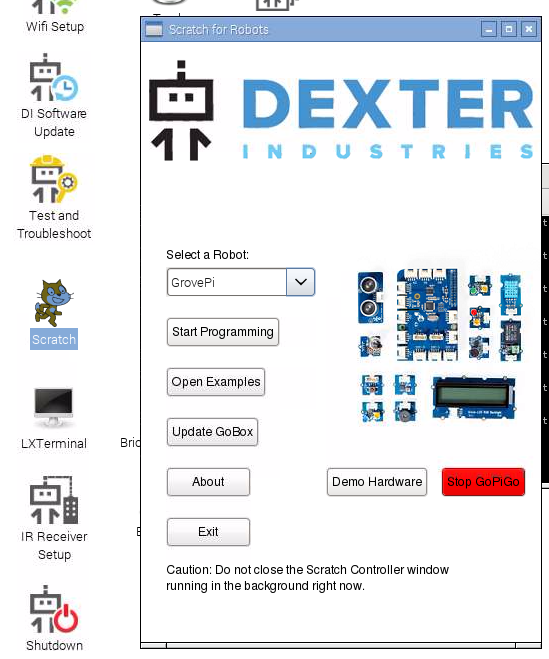 The biggest improvement that we’ve made to the software side of things is that now starting and running Scratch on your GrovePi is all done through a few simple clicks.
Previously, you had to start Scratch, and run a python program in the background. Not anymore, my friends.
With our new Scratch controller, you simply select the robot you want to work on in the control window, and start programming. The robot is automatically set up in the background.
Reference Guide Commands
All of our commands and sensors are listed here and in Github. We are still adding sensors, and as we add them, we will put them in this graphic.
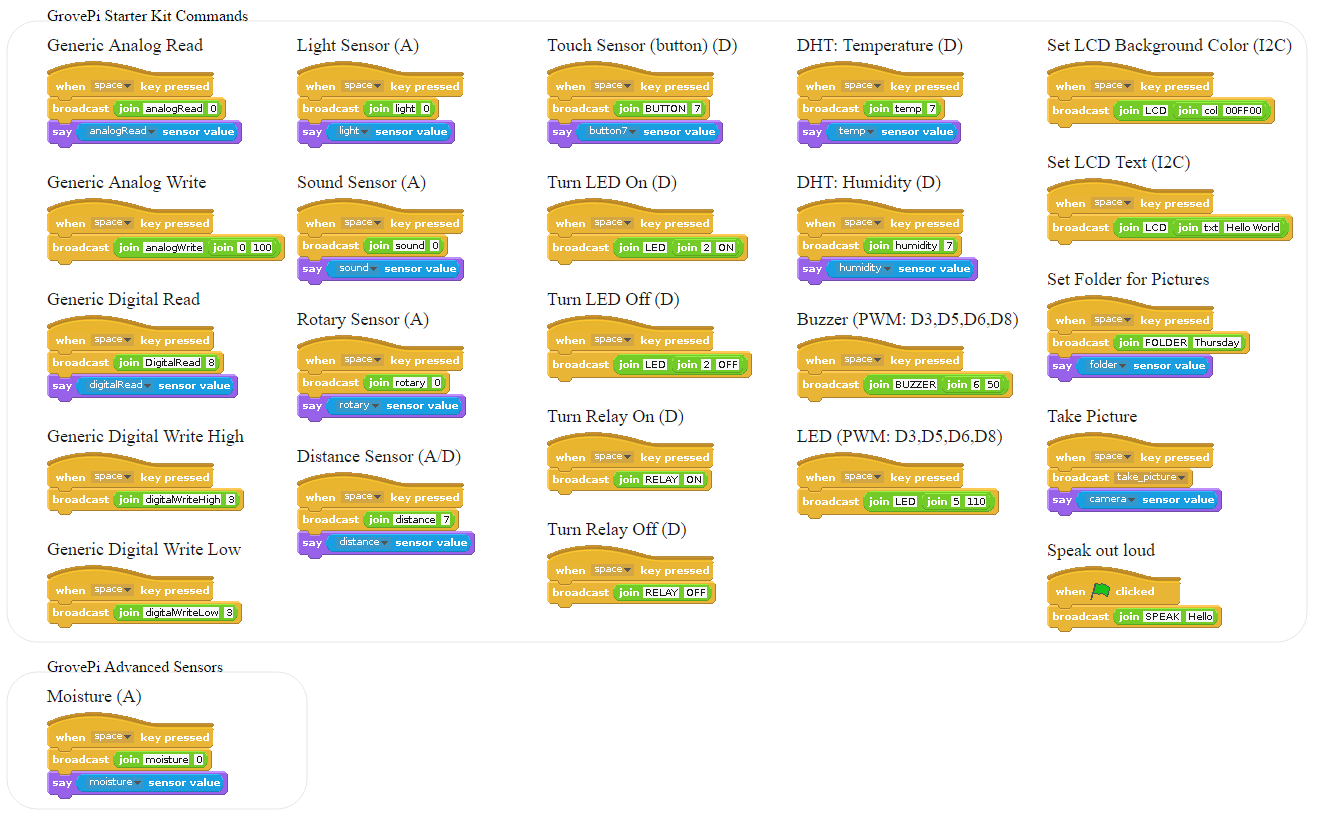
Click for a larger view!
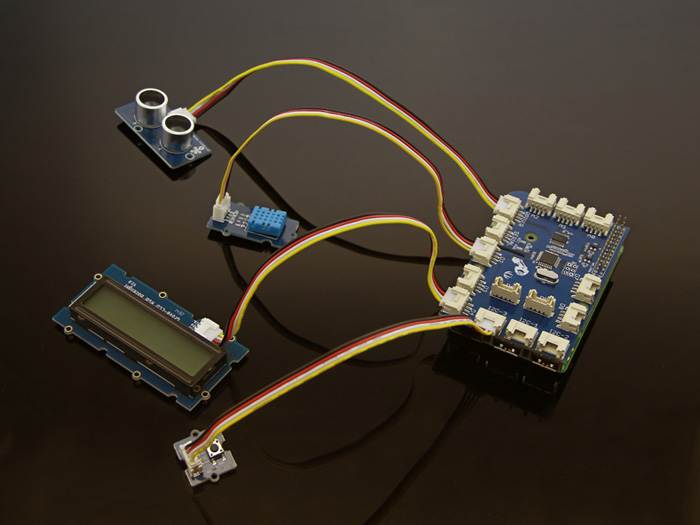
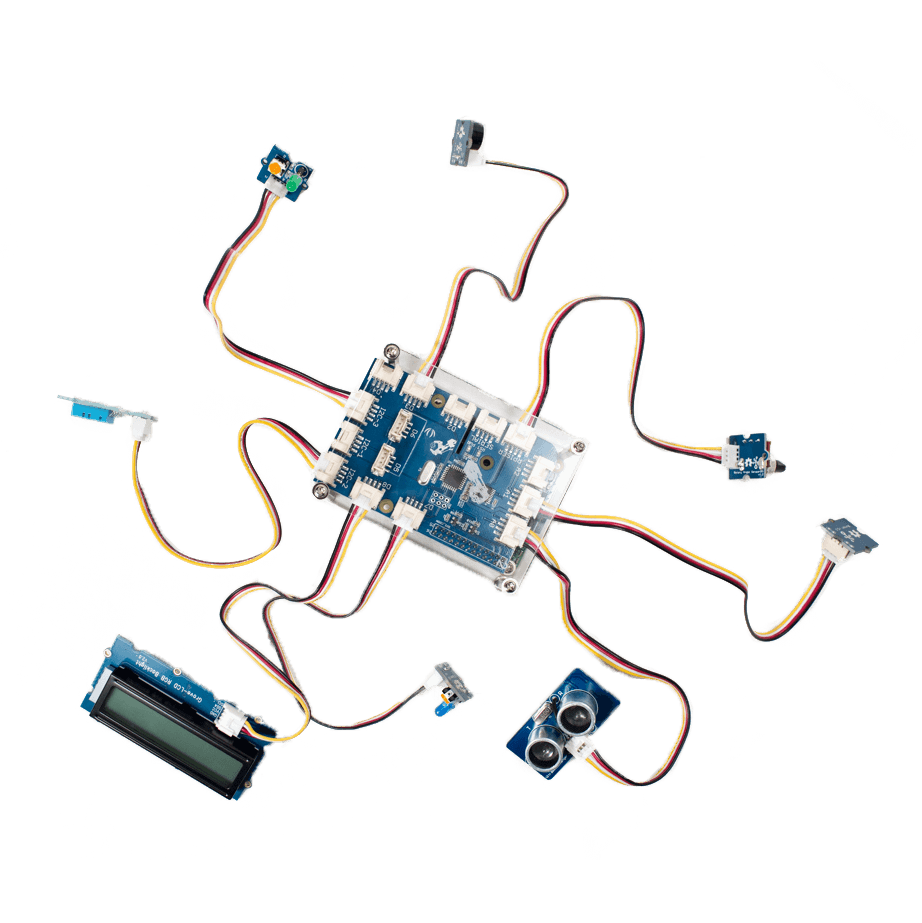
Supported sensors can be found in our GrovePi Base Kit, and include the Temperature sensor, the Humidity sensor, the Ultrasonic sensor, the Color LCD, the Light sensor, the Sound sensor, the Rotary sensor, the Button, LED’s, the relay, and the Buzzer.
Some Example Programs
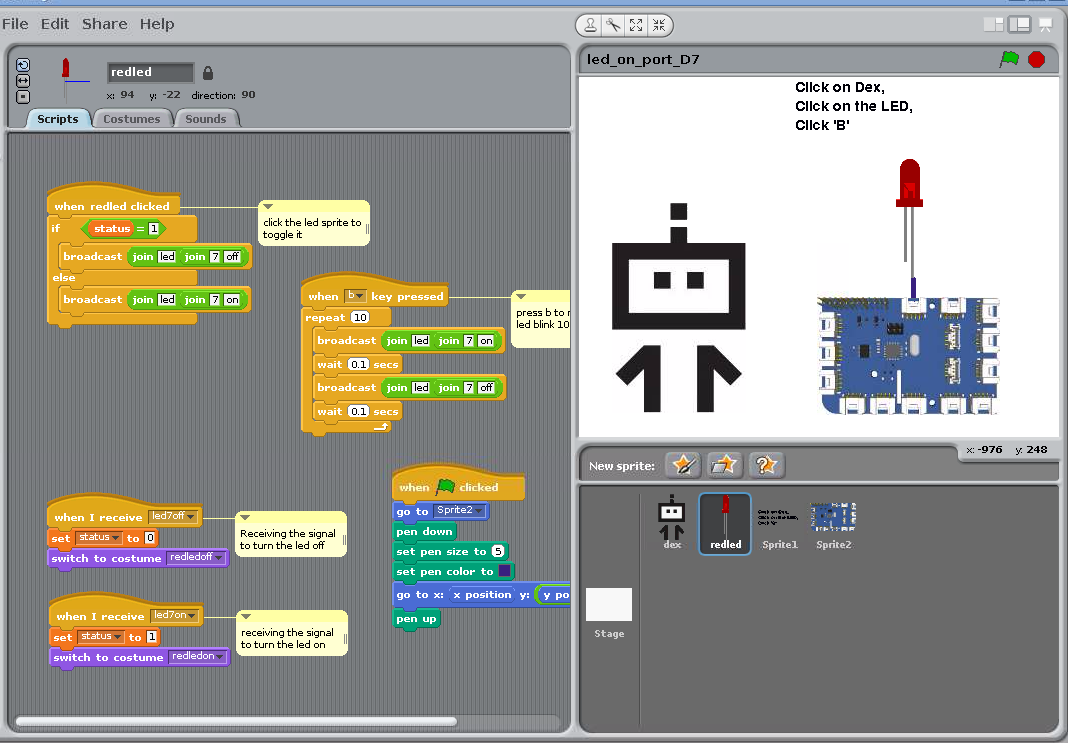
We have a few example programs in Scratch that Nicole has done a fantastic job annotating. To get started with Scratch and see how it works, we recommend just opening one of these example programs. Notes on how the program works, and how to connect the hardware are all inside the example programs.
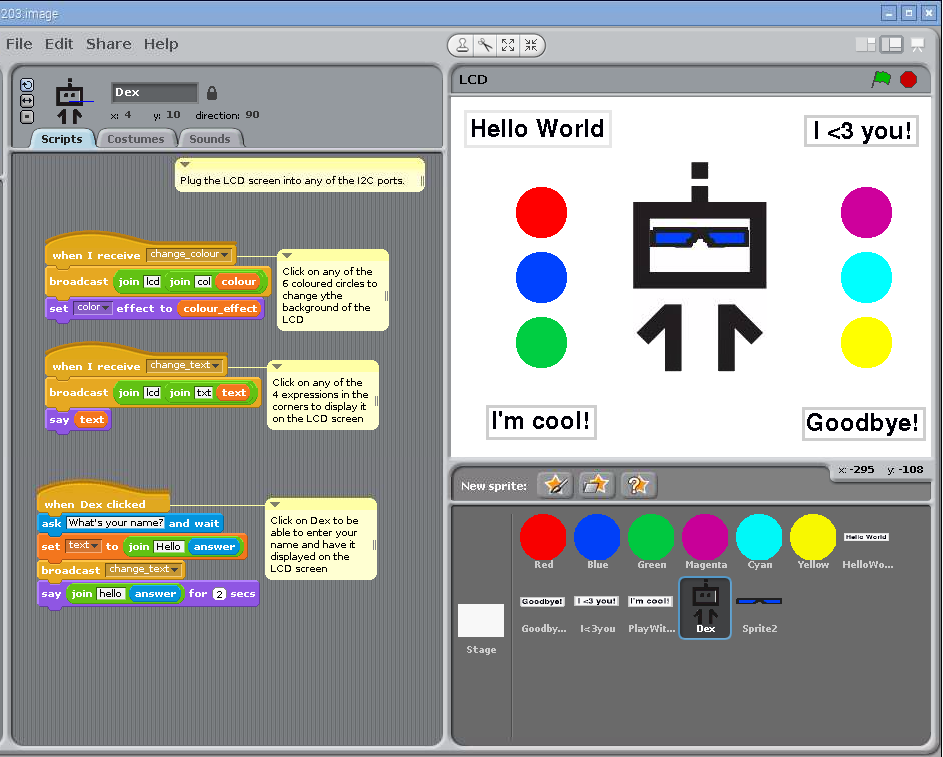
For example, we have a project of using the LED. In the example below, you simply plug the LED in to Port D7, and click on Dex. This will turn the LED on and off.
In another program, we have Dex controlling the color of the LCD Screen. You can change the color of the LCD Screen by clicking on any of the colored circles you see. Dex’s sunglasses change color as your LCD Screen changes color!
How to Get It
You can get this software for free! See our previous post about the new updates, or head over to our short tutorial on installing Raspbian for Robots, our custom software that works with all of our robots (Raspberry Pi operating system).

Why Did We Do This?
 When we set out to develop the GrovePi, we wanted to create an easy and fast way to connect sensors to the Raspberry Pi. We think the GrovePi becomes even easier to use with Scratch, and opens up the GrovePi to the youngest users of the Pi!
We would really like to hear from more teachers:
How would you use the GrovePi in the classroom? How can we make it even easier to use? Head over to DexterEd and let us know, we would LOVE to hear your thoughts!
Write to us about DexterEd!
Related Articles


0 Comments
Leave a reply
You must be logged in to post a comment.