What is Cinch?
 We’ve released a new version of our robot software for the Raspberry Pi called Cinch. Cinch is designed to make it even easier to connect to your robot and start programming! Often homes and schools have complex wifi setups that make it hard to connect to the Raspberry Pi.
The Cinch Operating System solves this problem for Raspberry Pi Robots by allowing you to connect to your robot directly over wifi. You can use any wifi enable device (such as a laptop, PC, a phone, or a tablet). Cinch works by creating a wifi network with the Raspberry Pi, and allowing a computer to log-on to the Raspberry Pi. This is often called wifi tethering, and it allows you to quickly and easily set up a connection with the Raspberry Pi and bypass any complex network issues on your school or home network.
A short table of contents:
- How to Set up and Connect to Cinch
- Changing the Robot Name
- Using Cinch with a Tablet or Phone
- Using Cinch with a Chromebook
- How to Update Cinch
 How to Get Cinch
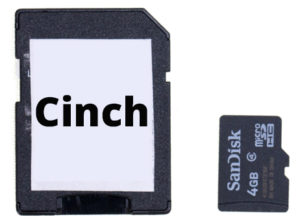
You can purchase an SD Card with Cinch already installed from Dexter Industries. You can also download Cinch for free here and use our instructions for installing the software on your 8 GB microSD Card here.
How to Set up and Connect to Cinch
1. Build your robot. You can find instructions for the GoPiGo here, the BrickPi Here, and the GrovePi here.
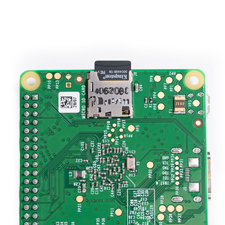
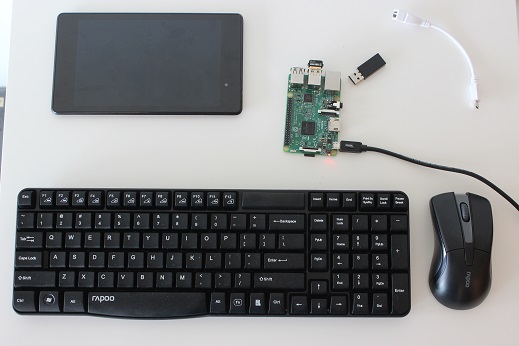
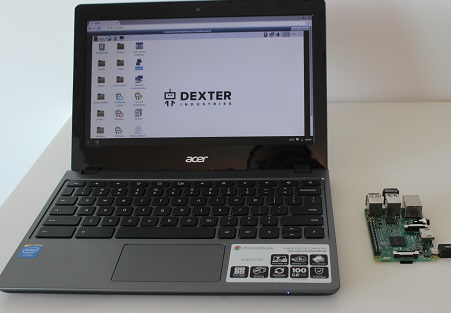
2. Insert the Cinch microSD card into the Green Raspberry Pi board. (Please notice this picture just shows the Raspberry Pi green board, but the this green board should be connected to your robot (BrickPi, GrovePi, GrovePi, PivotPi) as you move through the next steps!)
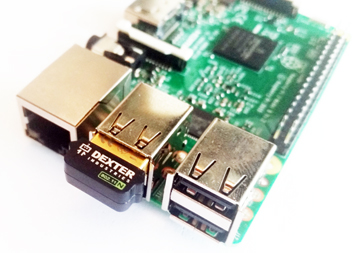
3. Insert the Wifi Dongle into the Green Raspberry Pi board. Do NOT plug in the Ethernet cable.
4. Power up your Robot (plug in power adapter or connect batteries and turn on the switch!).
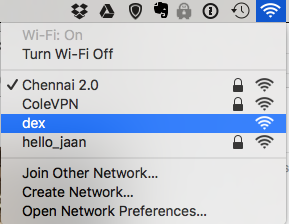
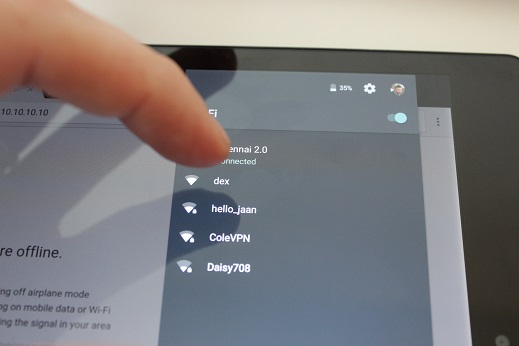
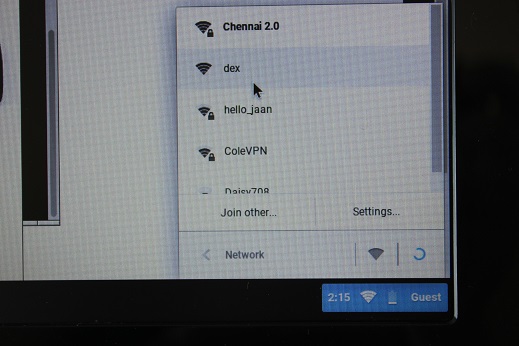
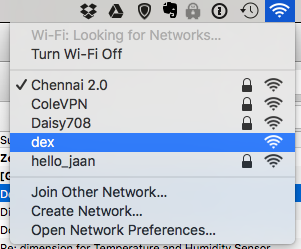
5. Look for the wifi network “dex” on your computer & connect to it. There is no password required to connect to Cinch over wifi. The wifi network may take a few minutes to appear.
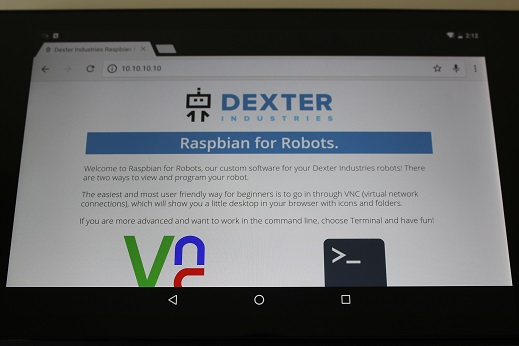
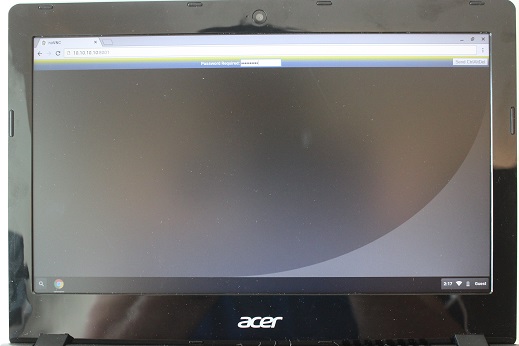
7. Once connected to the “dex” wifi network, open a web browser and go to “http://dex.local”. We recommend using Chrome, but for touchscreen laptops, you might want to use Firefox. (Note: sometimes if you can’t find “dex.local” try the address “http://10.10.10.10”)
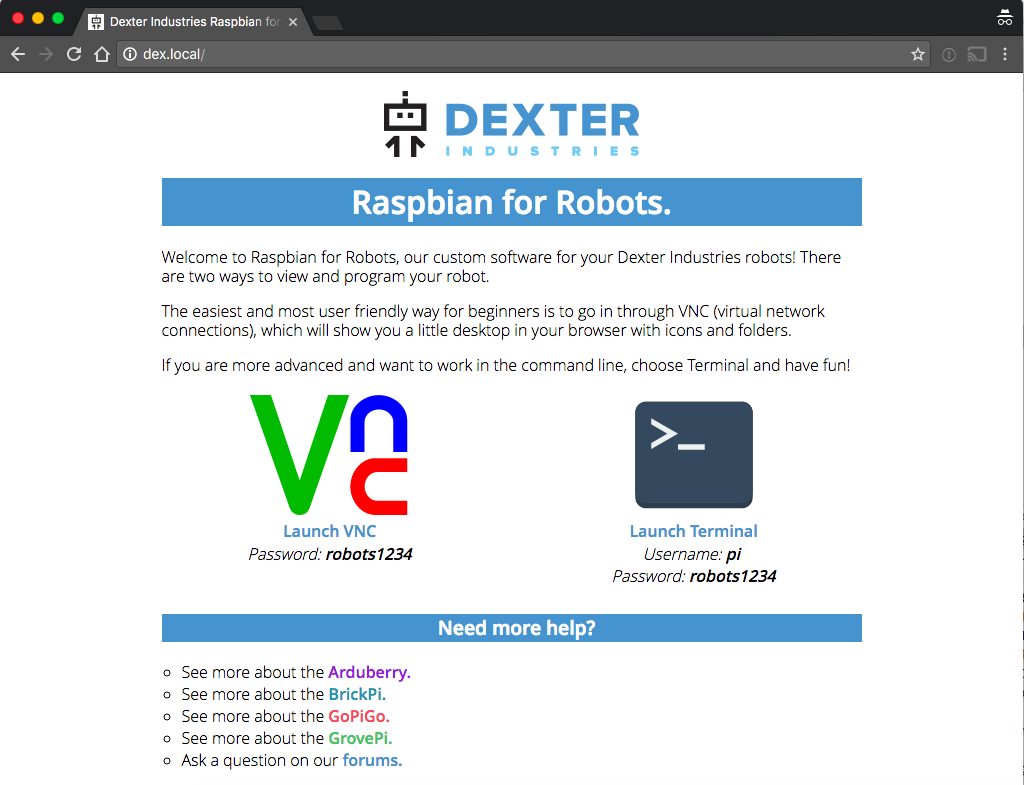
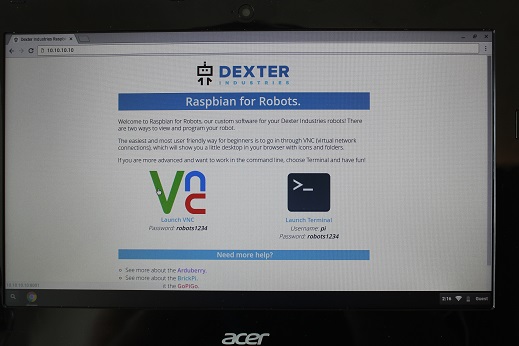
8. Now you can choose VNC (to get to the Dexter Desktop, which is probably where you want to go) or Terminal.
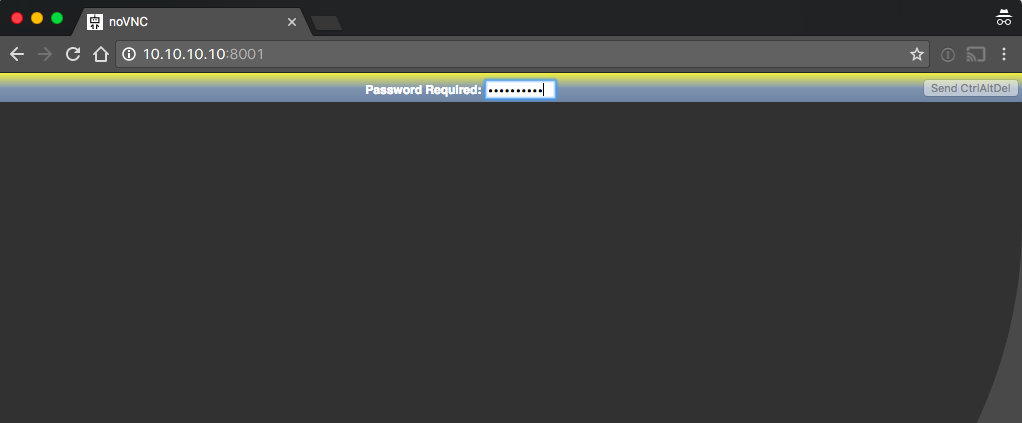
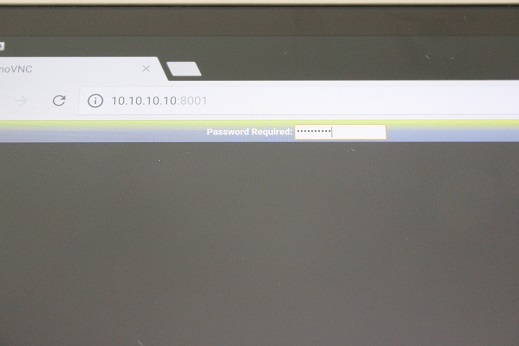
9. If you choose VNC, you’ll be prompted to enter the password at the top. Enter password “robots1234”, then hit enter. (To enter Terminal you will also need the username, “pi”.)
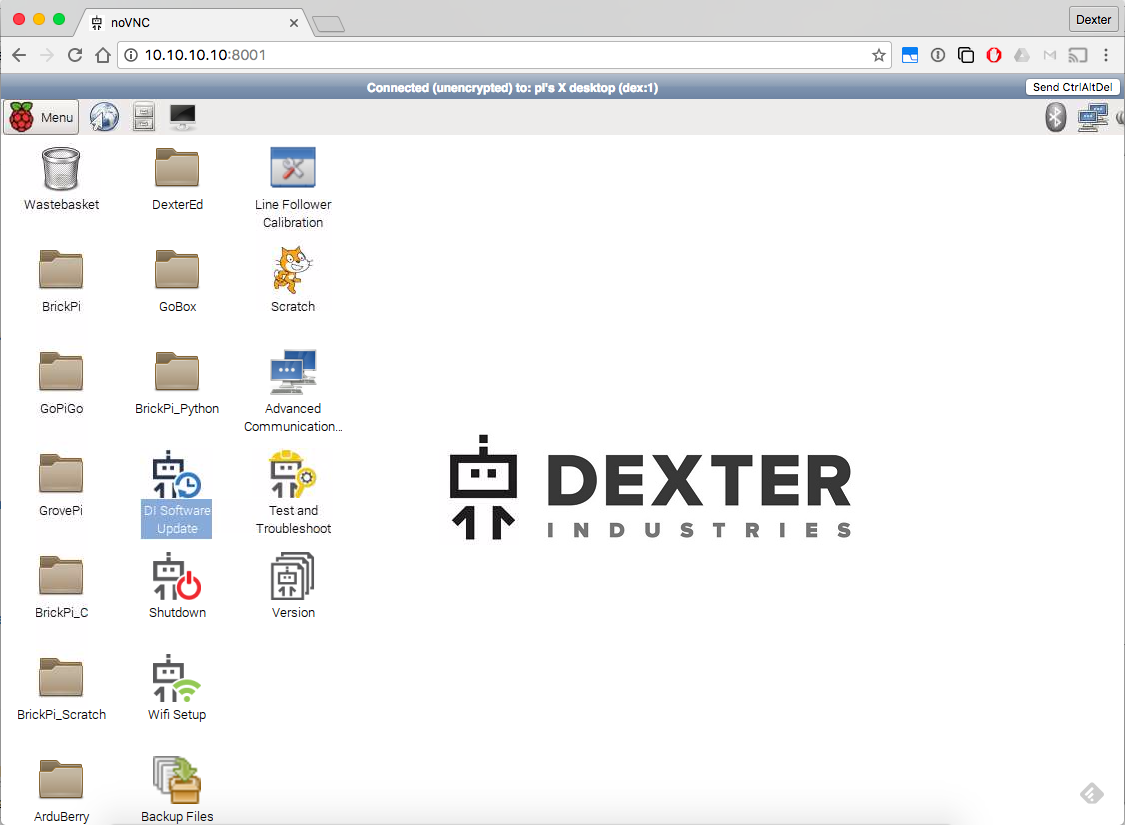
10. Now you can see the Dexter Desktop, and can open Scratch (or another programming language)! For GoPiGo, continue here. For BrickPi, continue here.

Cinch is now offered as a product to buy an SD card here; you can also download it here and put it on your SD card yourself with directions found here!
Changing the Robot Name
- Turn on your GoPiGo (you can only change the name of one GoPiGo at a time). This first boot can take 2 or 3 minutes.
- Use your computer to connect to the “dex” wifi network, open a web browser (Chrome preferably) and go to this address:
http://10.10.10.10 - Select the noVNC icon on the left. Type in the password:
robots1234 - Now it’s time to change the robot name:
- Click on the little Raspberry Menu in the top left corner of the screen.
- Click on Preferences.
- Click on Raspberry Pi Configuration.

- Click the “OK” button.

- Change the name (“dex” in this picture) to what you want it to be (for example “dex1”). Only use basic character (letter and numbers) – no punctuation and no spaces. Once you’ve entered your new name, click the “OK” button.

- Now you have to restart the robot. You will be presented with the “Reboot needed” dialog window automatically. Click the “Yes” button and let the robot reboot. This will take a few minutes.

- After a couple of minutes, the new name you chose will show up as a new wifi network for you to connect to. You can confirm that everything went well by connecting to the new wifi network once more and opening noVNC in your web browser. Sometimes an extra reboot may be necessary.
- Please note that some computers can “see” a wifi network in the list of available networks for a few minutes after it has actually disappeared. So, you might even see the old name and new name show up for a minute or two. Just turn off your wifi on the computer, and turn it back on, and that should help clear out the old wifi network so you only see the real, live one with the new robot name.
- That’s it! Now your robot has a new name and you can move on to the next one.


Using Cinch with a Tablet or Phone
Cinch is the perfect operating system if you want to us your Raspberry Pi Robot with a phone or tablet. By simply adding a keyboard and mouse to your tablet, you can control robots, program robots, and do everything you might want to with the Raspberry Pi. To connect with a phone or tablet, you will need the following:
- A Raspberry Pi, powered
- A Dexter Industries Wifi Dongle
- The Cinch Operating System
- An Android Tablet or Phone
- A Dexter Industries On The Go Cable
- A wireless keyboard and mouse
Once you have the necessary supplies, you can begin connecting!
1. Power up the Raspberry Pi running the Cinch Operating system.
2. Connect your wireless mouse and keyboard receiver to your OTG Cable.
3. Connect your OTG Cable to your tablet.
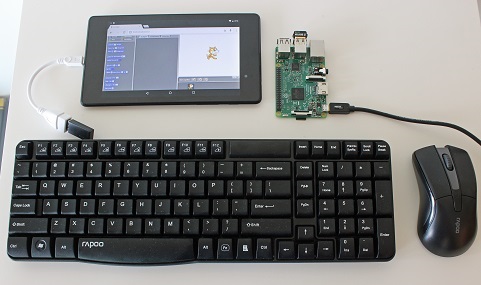
4. Connect your tablet to “dex” over wifi. You should be able to find it in the list of available wifi SSID on your tablet.
5. In your browser, enter “http://10.10.10.10” with your keyboard.
6. Select noVNC and Login! The standard password is “robots1234”
Using Cinch with a Chromebook
Cinch is the perfect operating system if you want to us your Raspberry Pi Robot with a Chromebook. With a Chromebook and Cinch running on a Raspberry Pi, you can quickly setup and control robots, program robots, and do everything you might want to with the Raspberry Pi. To connect with a Chromebook, you will need the following:
Once you have the necessary supplies, you can begin connecting!
1. Insert the microSD Card with Cinch installed into the Raspberry Pi.
2. Place the Dexter Industries wifi dongle into the Raspberry Pi.
3. Power up the Raspberry Pi. It can be connected to any one of our robots, including the GoPiGo, the GrovPi, and the BrickPi.
4. After a few minutes, select the wifi network from your Chromebook called “dex”. Select to connect to it.
5. In your browser, type “http://10.10.10.10”
6. Form your browser select noVNC.
7. Enter your password (the default is robots1234)
8. You are connected!

How to Update Cinch
At Dexter Industries we are constantly updating our software, our examples, and the operating system. From time to time you may want to update your software for better performance.
To update the software, you will need to put your Raspberry Pi on the internet. There are two ways to do this:
- You can connect your Pi to a network using Ethernet,
- You can connect through a computer that’s connected to the internet.
Once your Raspberry Pi is on the internet, you can update the Raspbian for Robots Software using the normal update method for Raspbian for Robots.
Option 1: Connect Your Cinch Pi Directly Into An Internet-Connected Router.
- Power off your Raspberry Pi. You can leave it connected to your robot, or you can remove it from the robot.
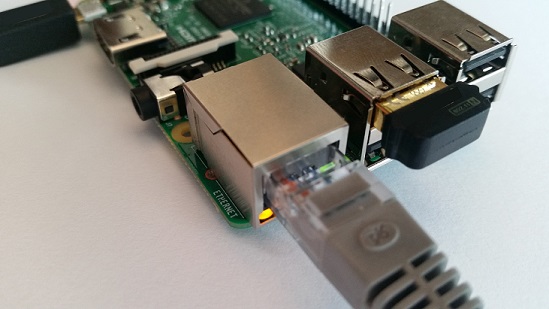
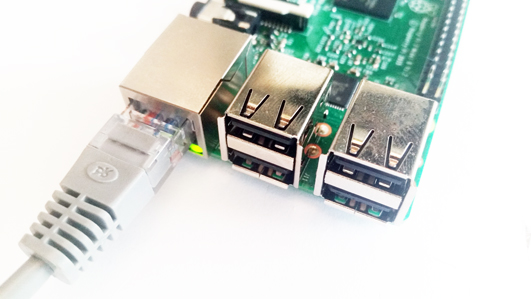
- Connect your Pi to your home wifi-router or school wifi-router via an Ethernet cable. If you are updating at school you may need help from your systems administrator with this step. One end of the Ethernet Cable should go into your Raspberry Pi, and one end into your router.
- Place the wifi dongle in the Raspberry Pi.
- Power on the Pi.
- You should see the lights next to the Ethernet port turn on. You should see the light inside the wifi dongle start to blink.
6. Connect to Cinch over wifi from your computer. In other words, connect your computer’s wifi to the “dex” ssid. This is the same way you normally connect to Cinch from a computer.
7. On your computer, connect to Cinch using your browser. Use the address 10.10.10.10:8001 (The colon and 8001 are very important).
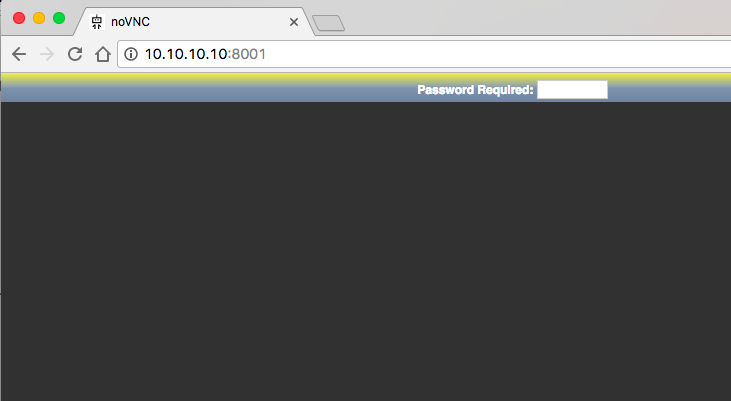
8. You should see noVNC come up. Login using the password “robots1234”.
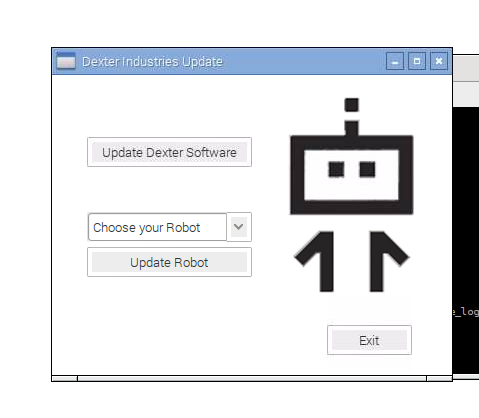
9. Run the DI Update Software.
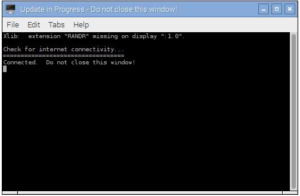
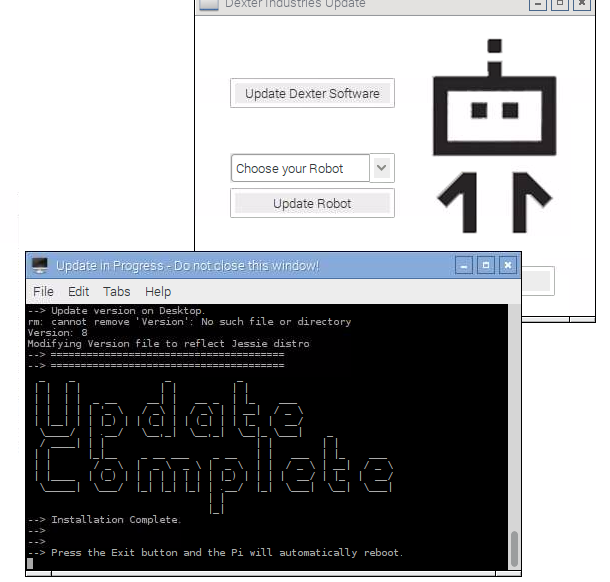
10. Wait for the update to complete. At the end of the update you should see a large text banner in the terminal window showing “Update Complete”.
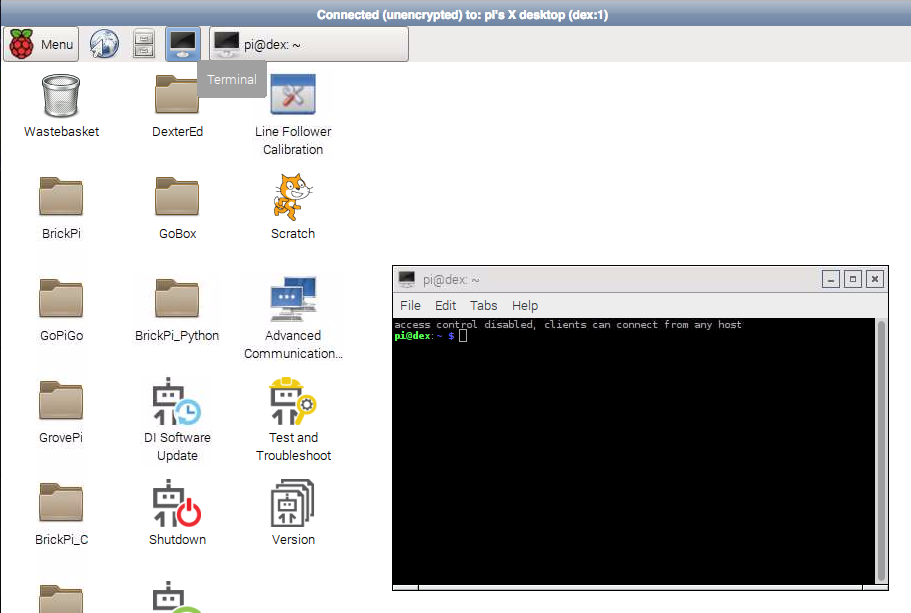
11. Once the update is complete, open the terminal program.
12. In the command line, you can copy and paste the following command: sudo sh /home/pi/di_update/Raspbian_For_Robots/upd_script/wifi/cinch_setup.sh
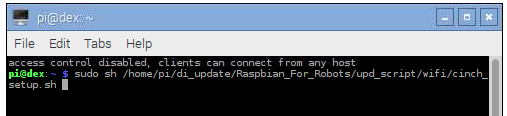
13. After the update is complete you should see the command prompt again. In the picture below that is the line that starts with “pi@dex”
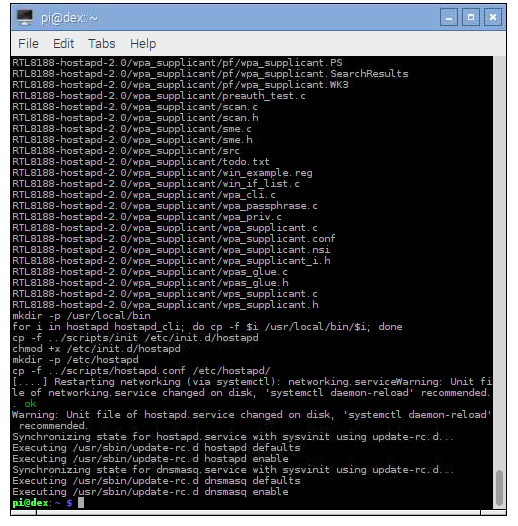
14. Disconnect the Ethernet cable and reboot your pi. Cinch should be updated and you should be able broadcasting at the ssid name “dex”!
Option 2: Share Your Computer’s Internet Connection With the Pi.
1. Connect your PC or Mac to an internet-connected wifi network.
2. Remove your wifi dongle from the Pi.
3. Connect the Pi to your computer with an Ethernet cable. Plug one end of the Ethernet Cable into your PC or Mac, and one end into your Raspberry Pi.
4. Power up the Raspberry Pi.
5. Share your computer’s internet access with the Pi:
PC – Share Your Computer’s Internet Access With the Pi
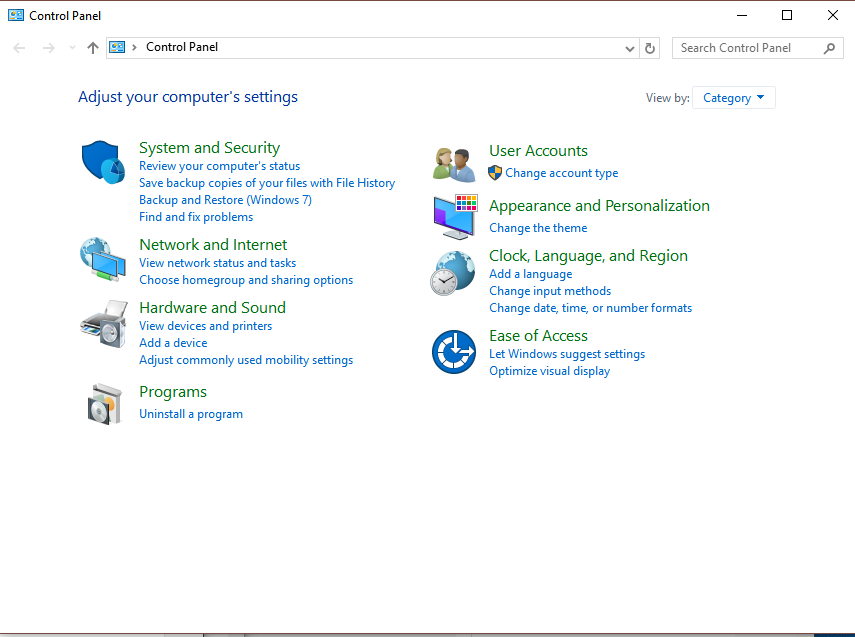
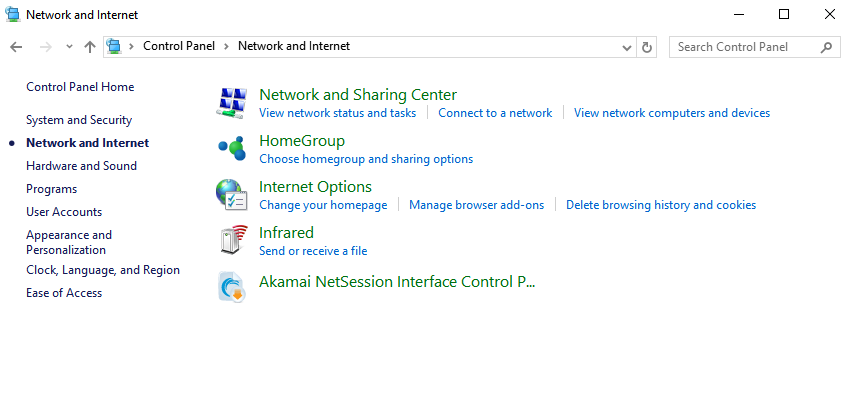
1. Open Control Panel –> Network and Internet –> Network Connections
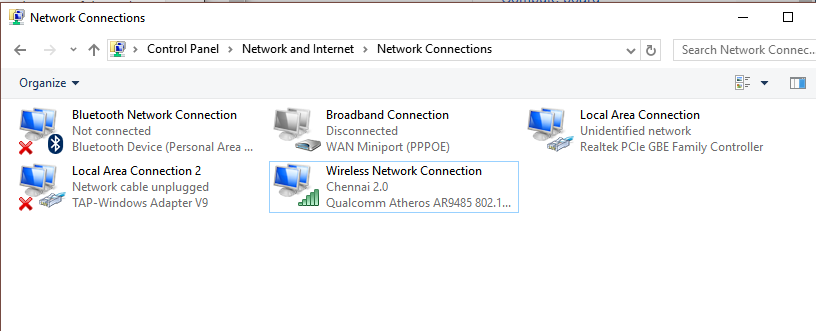
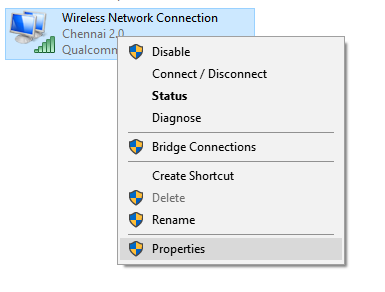
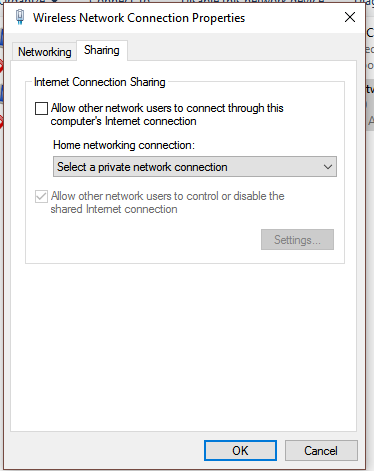
2. Find your Wireless Network Connection and right click it, select “Properties”
3. Click the “Sharing” tab at the top.
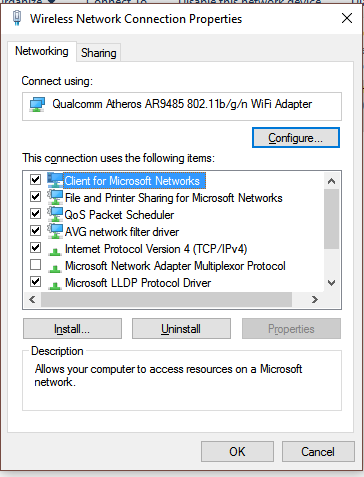
4. Click “Allow other network users to connect through this computer’s internet connection”
5. Click “Local Area Connection”
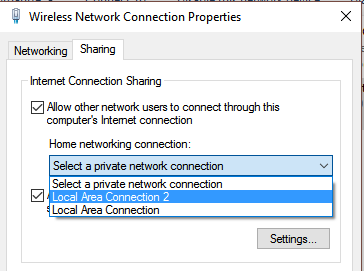
6. Click “OK”
7. After changing the properties, dex.local may disconnect from your browser. It may take a minute or two for dex.local to become available.
8. Refresh dex.local:8001
9. You should be able to perform your update now!
Mac – Share Your Computer’s Internet Access With the Pi
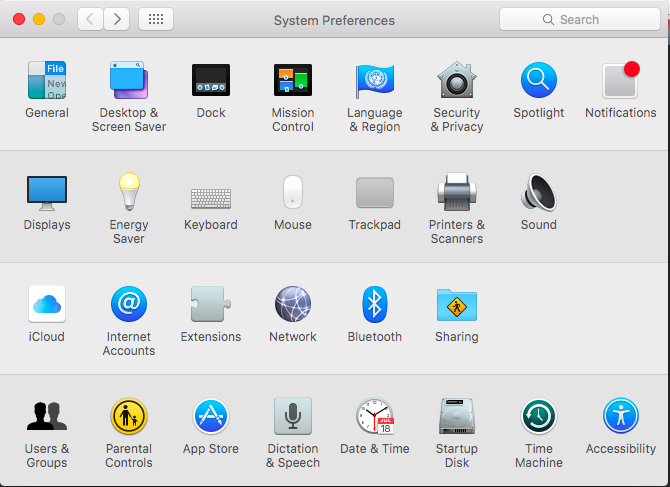
1. Open System Preferences on your Mac.
2. In System Preferences, under Internet & Wireless, go into the Sharing menu.
3. Click “Internet” on the left hand side.
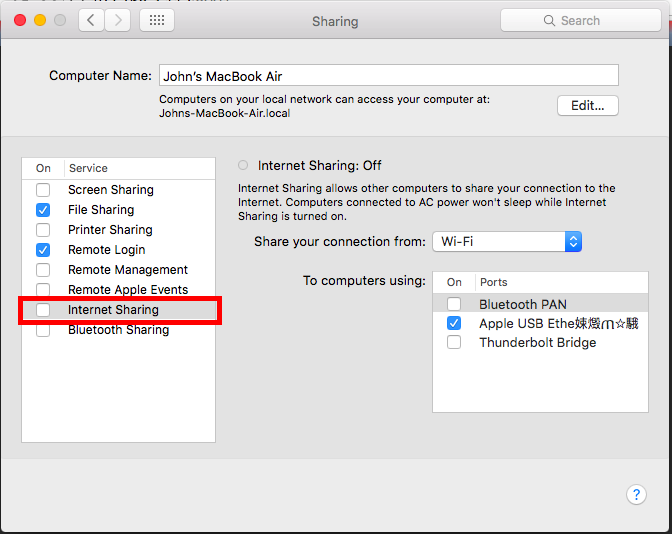
4. In the box “To computers using ” select Ethernet.
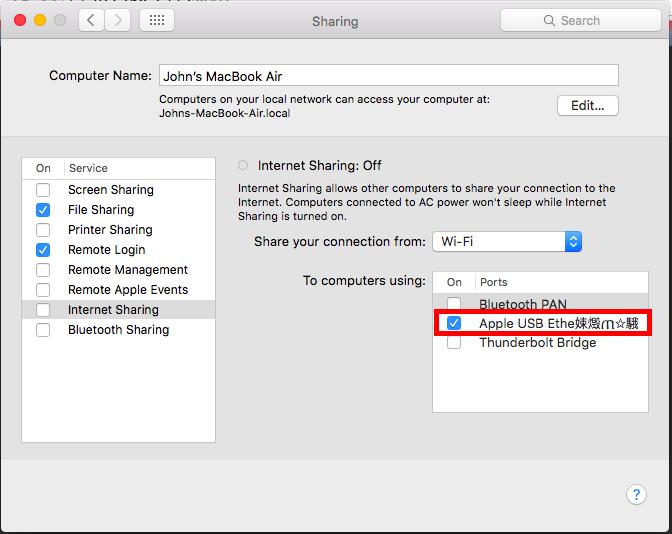
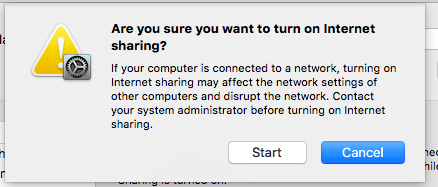
5. Click “Internet” again.

6. Click “Start” when asked if you’re sure you want to turn on internet sharing.
7. Wait a minute for the connection to register.
8. Reload dex.local:8001
After the Pi is connected to the internet, run the update on your Raspberry Pi:
1. On your computer, connect to Cinch using your browser. Use the address 10.10.10.10:8001 (The colon and 8001 are very important).
8. You should see noVNC come up. Login using the password “robots1234”.
9. Run the DI Update Software.
10. Wait for the update to complete. At the end of the update you should see a large text banner in the terminal window showing “Update Complete”.
11. Once the update is complete, open the terminal program.
12. In the command line, you can copy and paste the following command:
sudo sh /home/pi/di_update/Raspbian_For_Robots/upd_script/wifi/cinch_setup.sh
13. After the update is complete you should see the command prompt again. In the picture below that is the line that starts with “pi@dex”
14. Disconnect the Ethernet cable and reboot your pi. Cinch should be updated and you should be able broadcasting at the ssid name “dex”!
Questions
Have a question? Ask on our forums here!
![]()
Learn More!
If you liked this tutorial, consider buying the SD Card with CINCH here.
EDUCATORS
Check out our DexterEd page to learn about our Classroom Kits, Curriculum and Teacher Trial program.