Introduction:
To do anything with your Raspberry Pi, you’ll need to send it commands. If you’ve got a spare monitor, keyboard, and mouse laying around, great! You can plug all that stuff in and be up and running–after all, your Pi is a teeny little computer. For a detailed tutorial on how to set up your Pi in this way, see here.
For those of us with more limited resources, another easy way to control the Pi is virtually, through another computer. This could be your laptop, or a computer at your local library. Be careful on public computers though, because Internet security settings vary, and accessing your Pi virtually may be a bit more complicated.
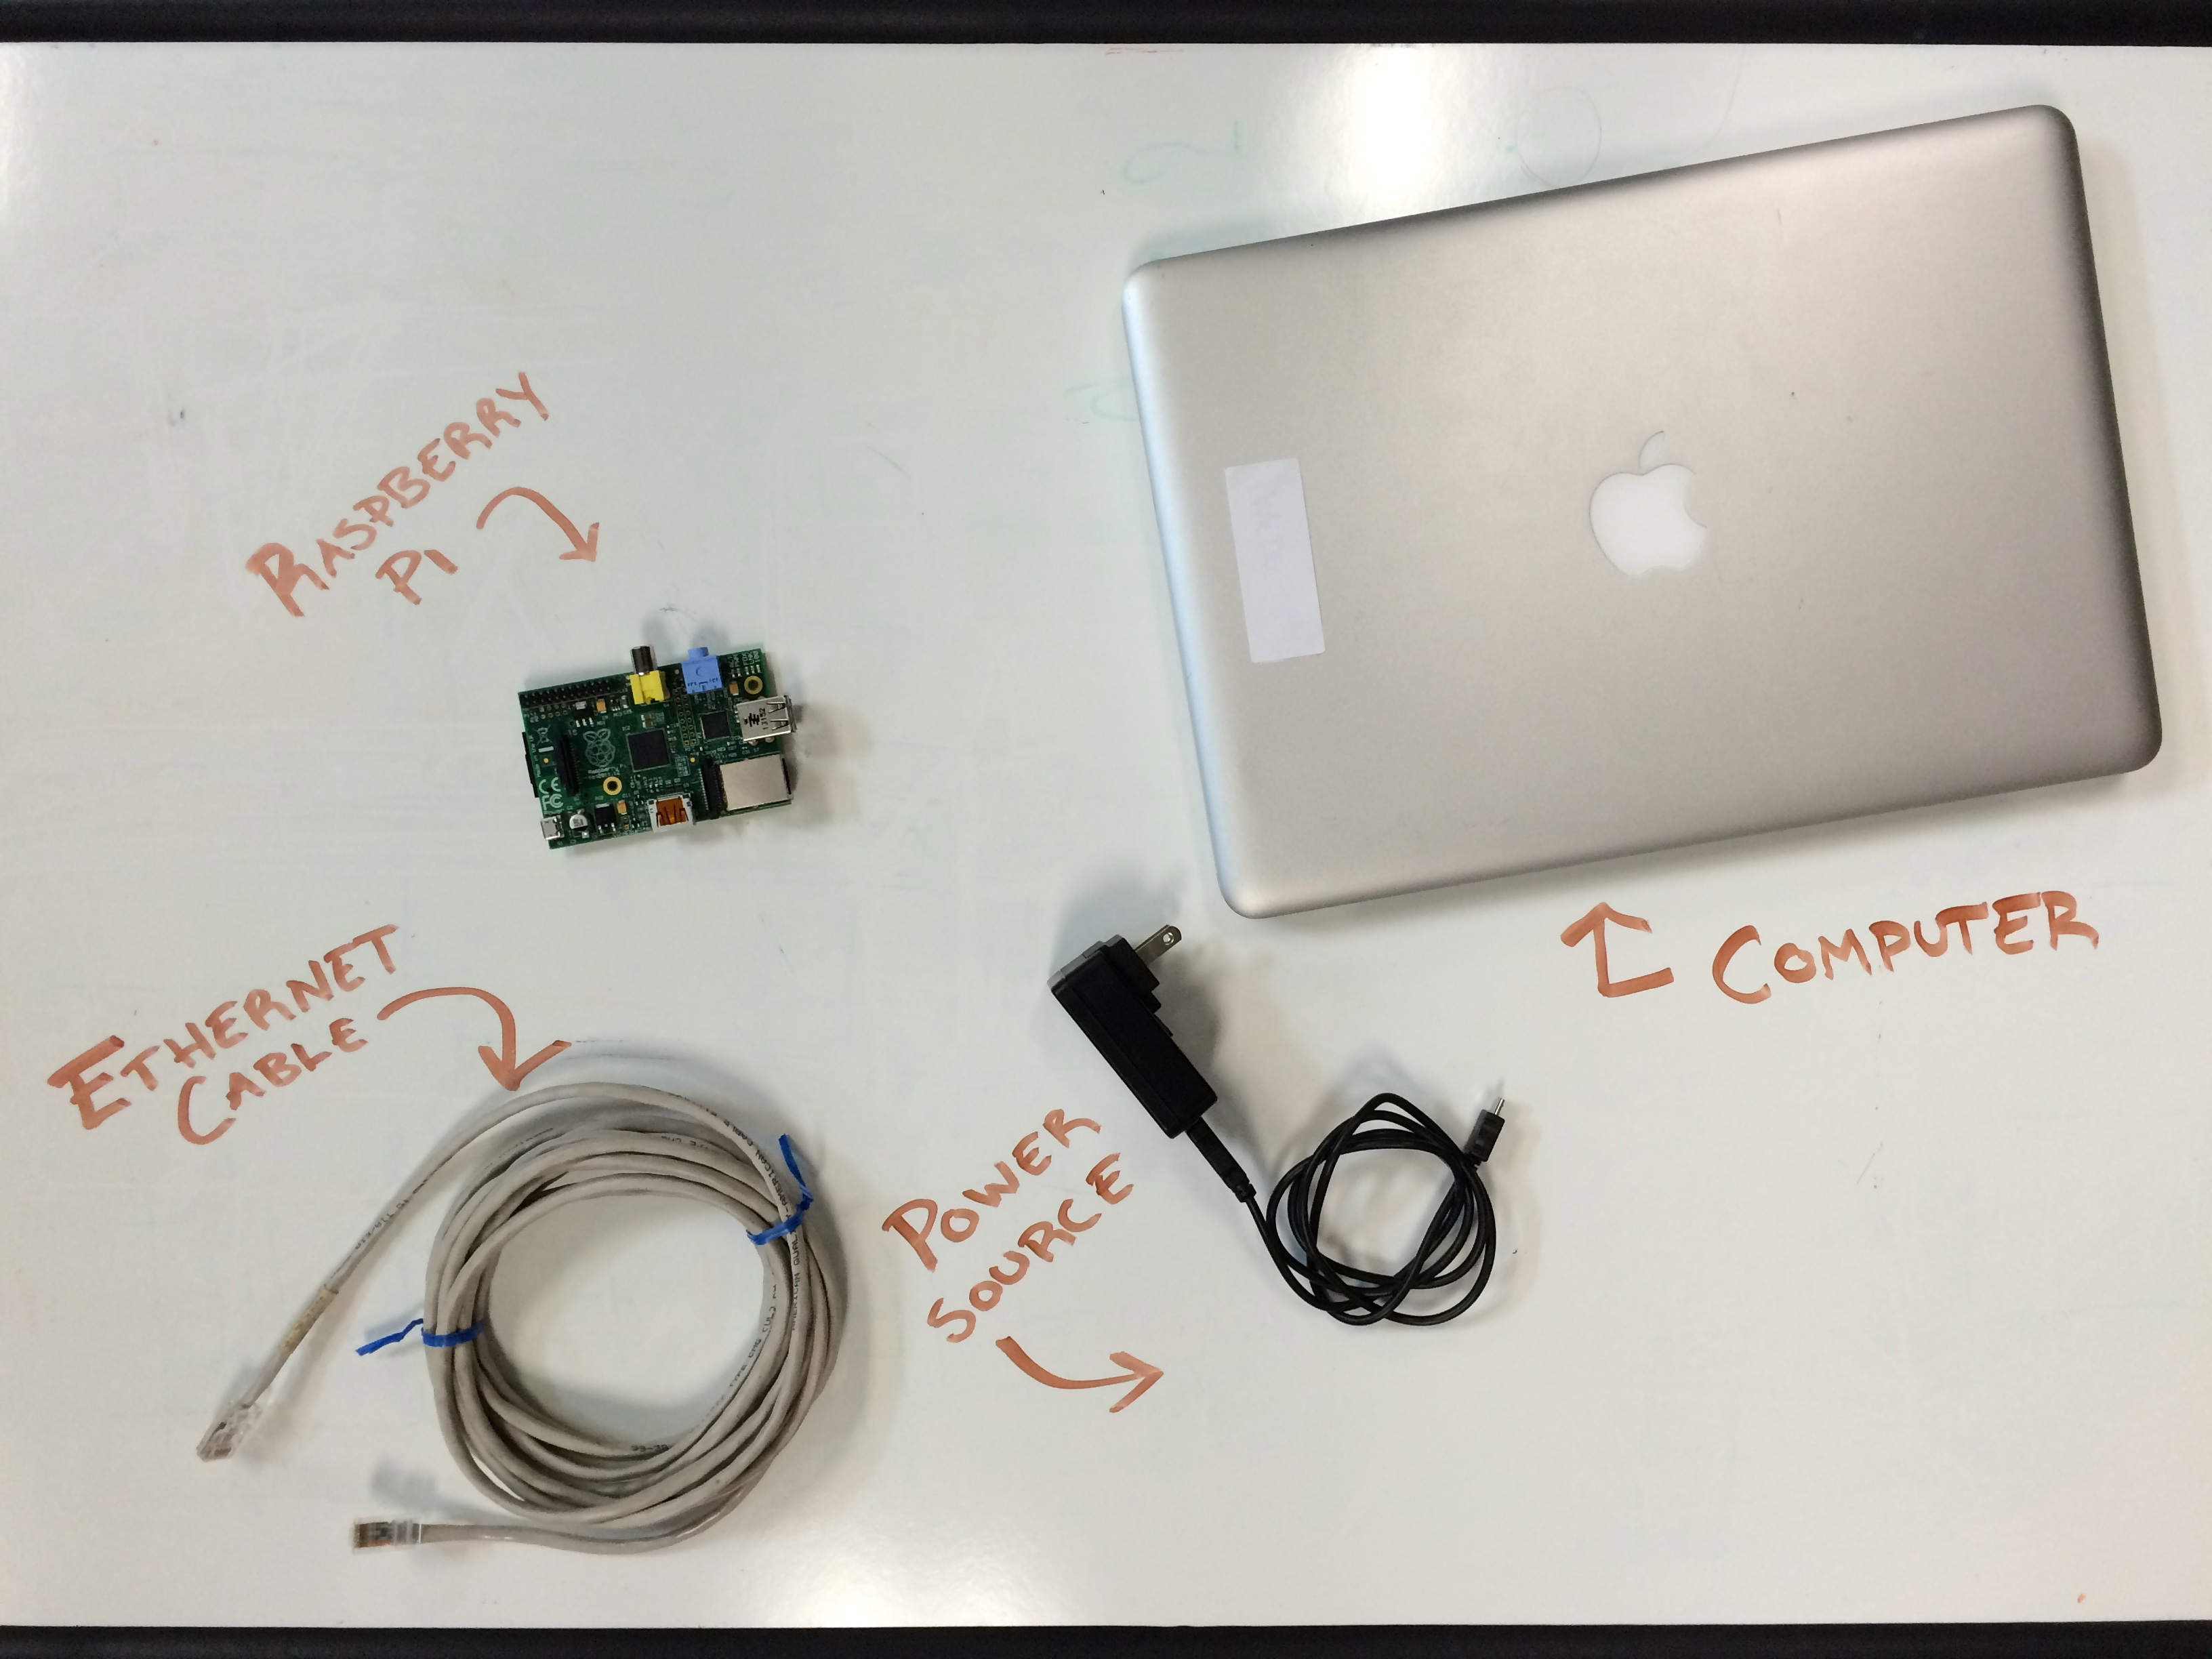
YOU WILL NEED:
- A Raspberry Pi (with SD card) — all models (B, B+, and 2) will work.
- An ethernet cable
- A way to power your Pi (for suggestions, see here.)
Useful Acronyms:
GUI: Graphical User Interface — any visual way of accessing a computer or program. For example, the desktop on your Mac or PC is a GUI. It is filled with icons and visual indicators.
VNC: Virtual Network Computing— a graphical desktop sharing system. This is the program you will use to bring up the Raspberry Pi GUI on another computer.
SSH: Secure Shell– a text-based way of virtually accessing another computer. “SSH-ing in” to another computer or microprocessor will do the same thing as using the VNC, but you will have to type commands in through the terminal.
In this tutorial, “SSH-ing in” will be useful for making sure you are connected to your pi correctly. If you like programming through the terminal, you can do all sorts of other stuff through SSH also. For more information on using the Pi via SSH, see here.
INSTRUCTIONS
Step 1: Setup your Pi + Access via SSH
You must have the Dexter Industries image fully functional on your Pi’s SD card. For instructions on how to do this, see here. To check that your image is working properly, power up your pi and “SSH in” by following these steps:
- Make sure your computer runs Bonjour. Mac computers and any computer that runs iTunes already run Bonjour. If you have Windows and do not run iTunes, download Bonjour here.
- If you are on a Mac or Linux machine, you are all set– skip this step. If you are on a Windows machine, you’ll have to install special software to let you access the Pi through SSH. The most common program to use is called “Putty”– find instructions for getting set up here.
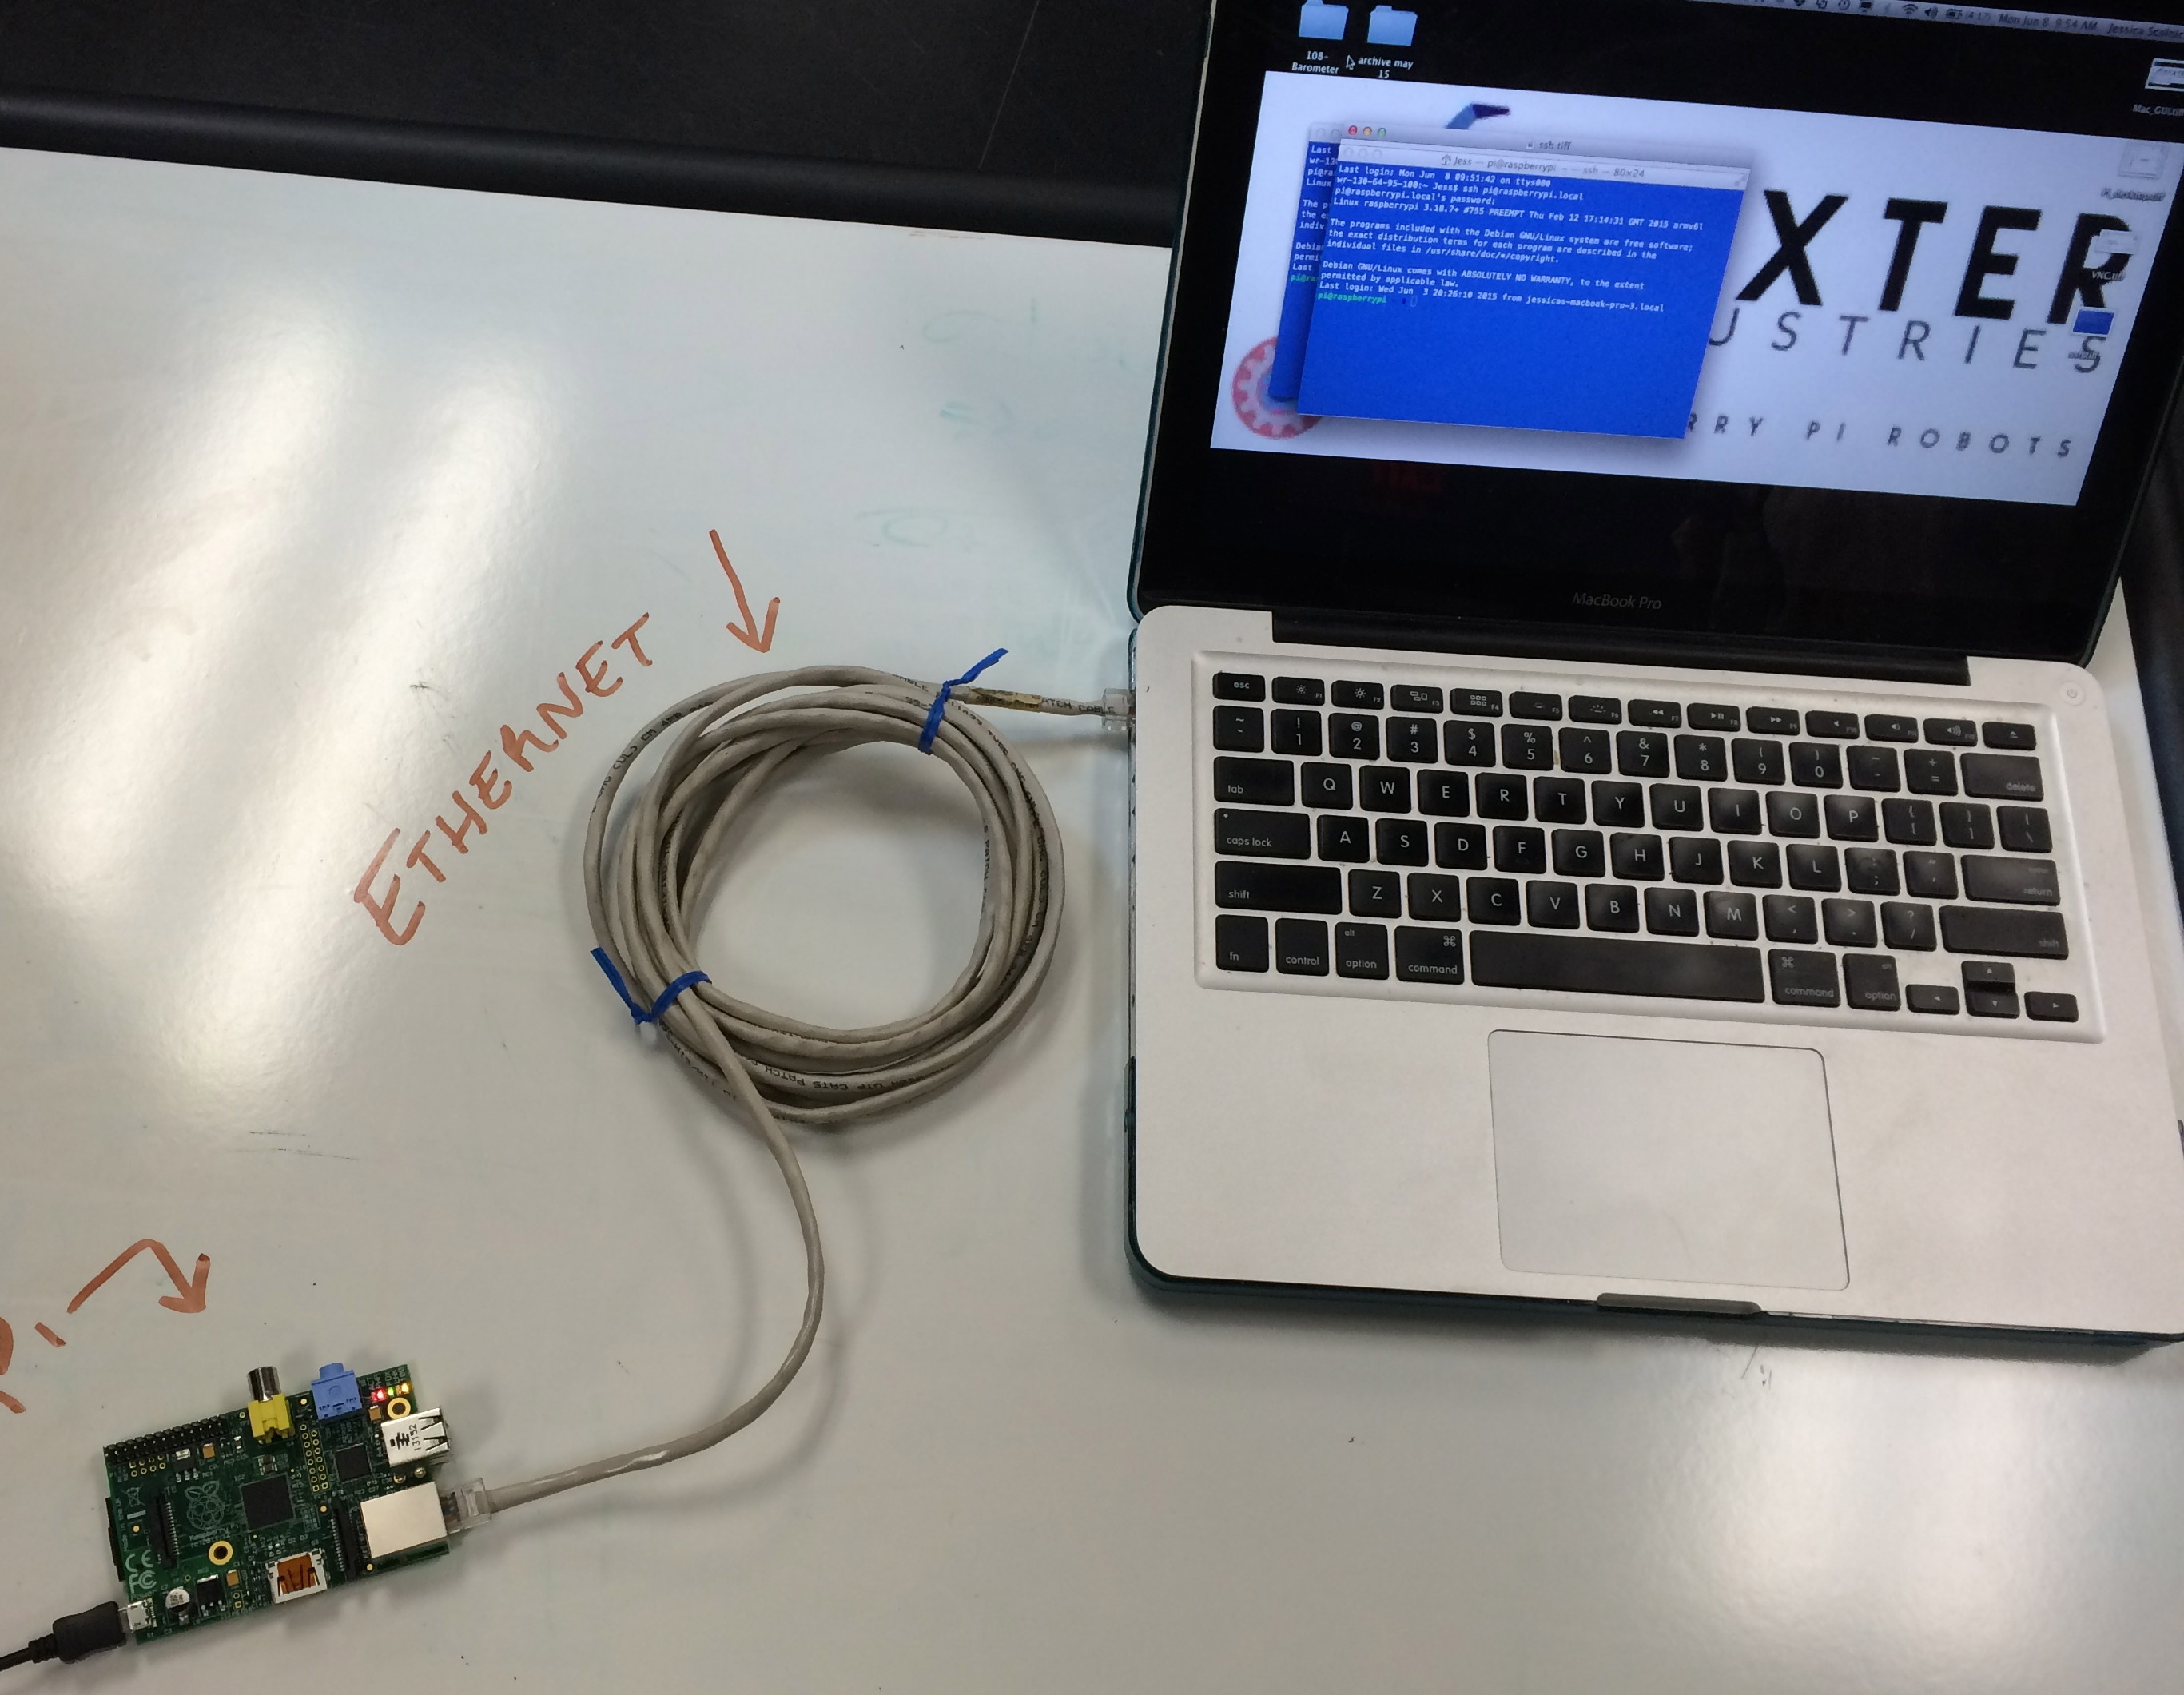
- Make sure your Pi and your computer are on the same network. The easiest way to do this is plug your Pi into your computer using an ethernet cable.
- Open the Terminal. On a Mac, Terminal is found under “Utilities,” or you can search for it.
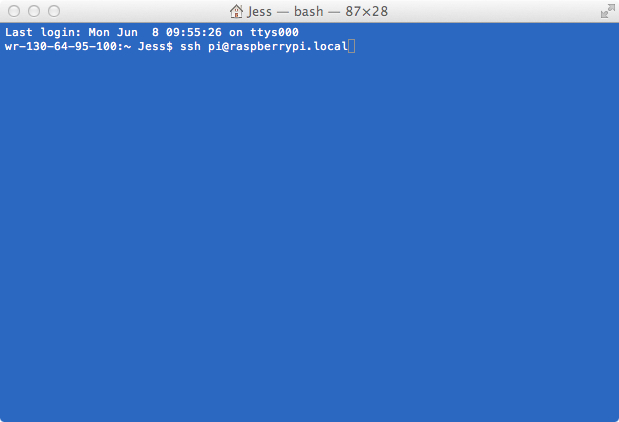
- On Raspbian for robots, type in ssh pi@dex.local
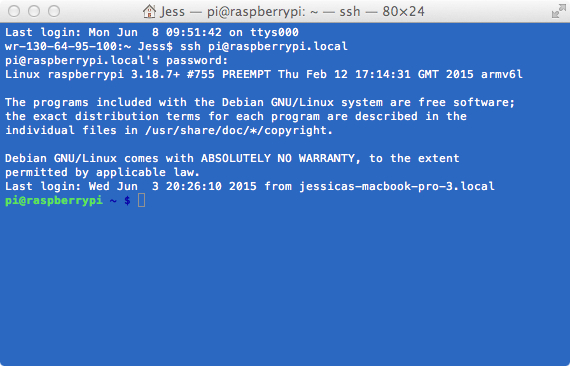
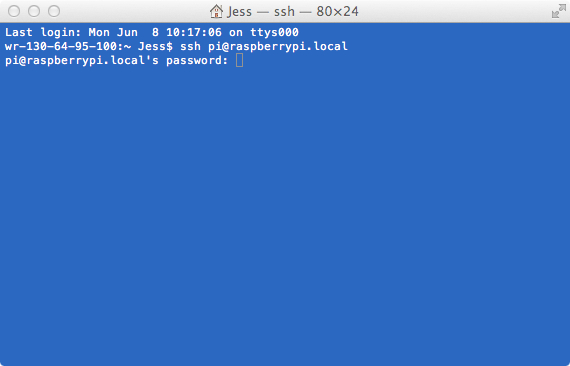
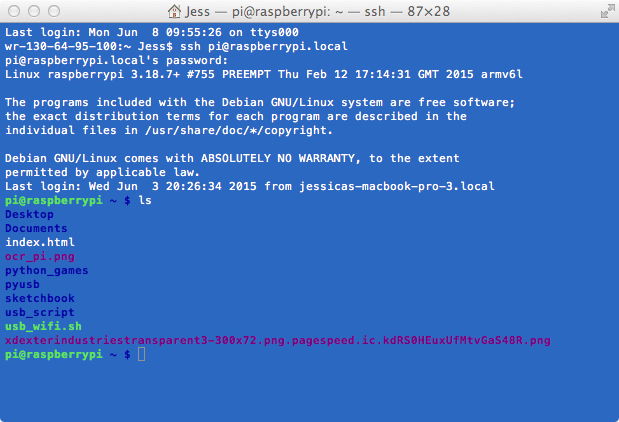
On a regular Raspbian, type in:ssh pi@raspberrypi.local as seen here:
If your image is working and you are connected on the same network, you will be prompted for a password. On Raspbian for Robots, type in: robots1234 while on a regular raspbian type in: raspberry
You may not see any characters appear in your terminal as you type–that’s okay! It’s still working. Just type it in and hit enter.
- You should see something like the following:
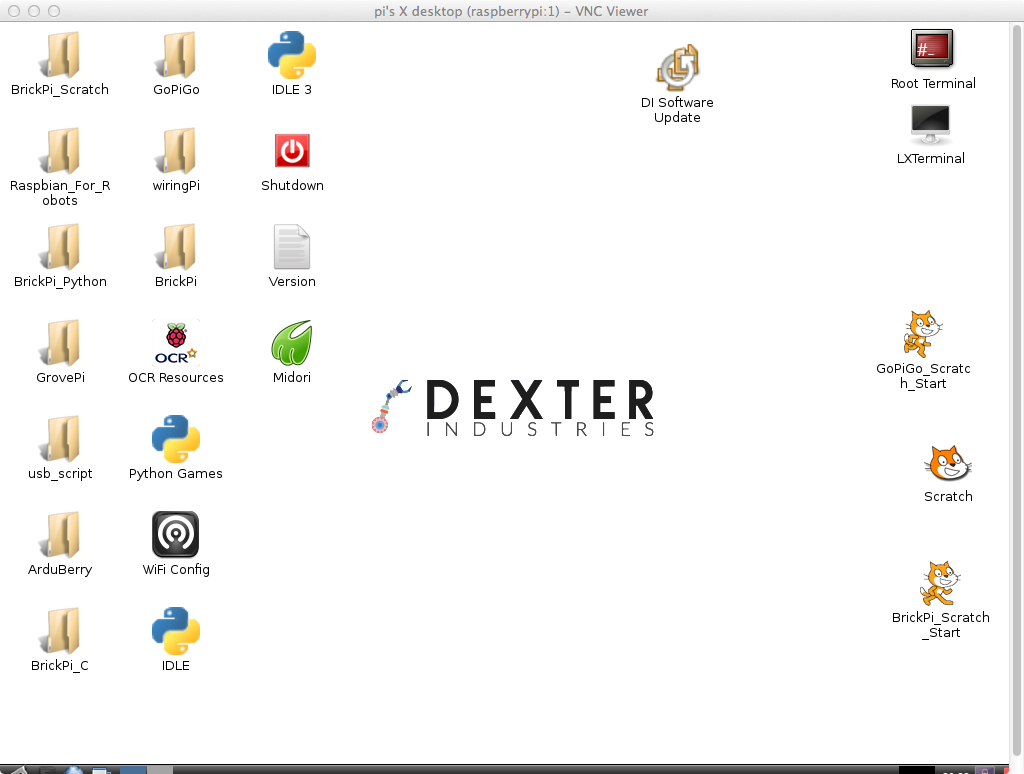
This means you are in! A good first command to type in is “ls” — this will return a list of all the main menus on your Pi, and should look something like this:
SSH-ing can be useful, especially if you want to learn about working through the Terminal. For wider Pi access and a GUI, read on to find out about using VNC.
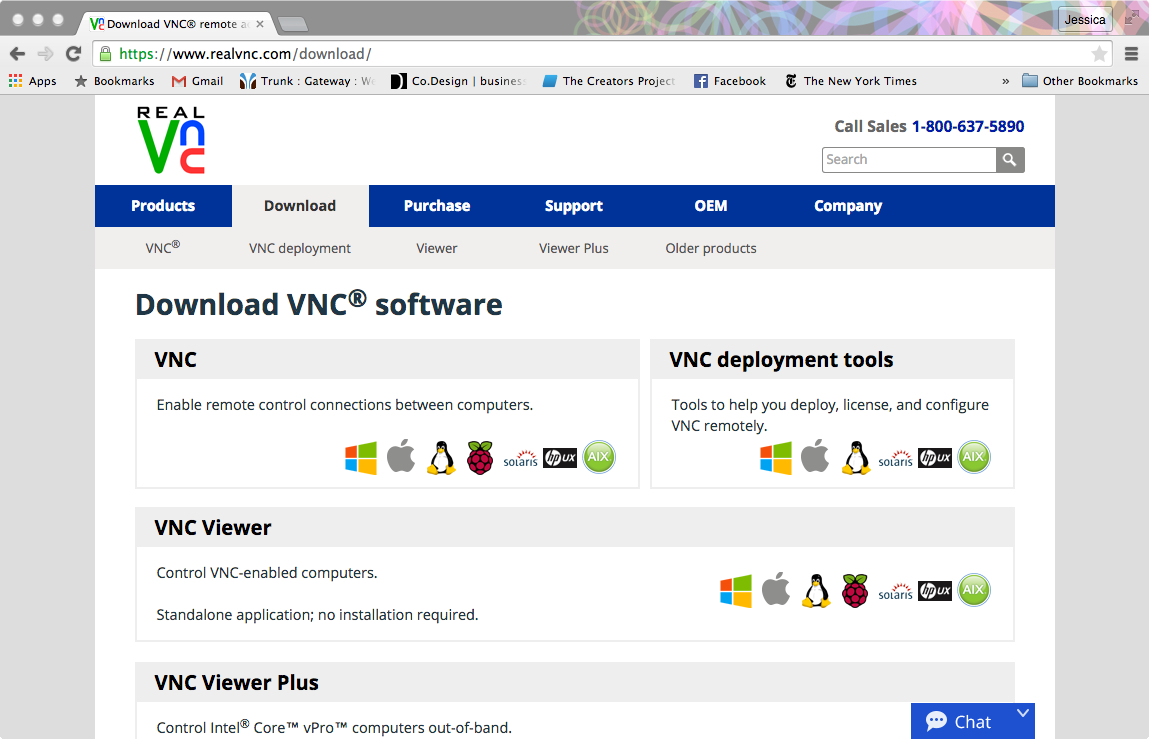
Step 2: Download and install VNC Viewer on your Mac or PC.
You can find the download here. Be sure to download the version of the VNC Viewer for the computer you are going to use to virtually control the Pi (there is a version listed for Raspberry Pi– don’t download this one. If your computer is a Mac, download the Mac version!)
Step 3: Run VNC Viewer
Once you’ve downloaded the VNC viewer and followed all the installation procedures, you can open the program. Once you click to open it, you should see the following screen:
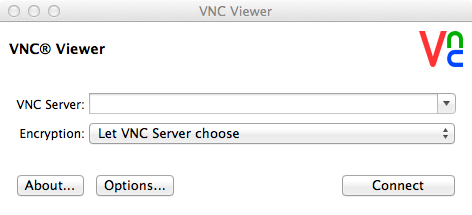
Type in the following:
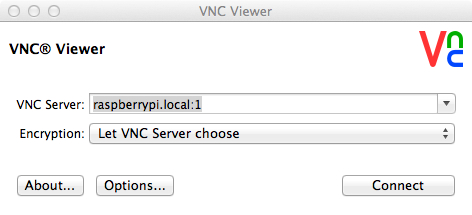
and click “Connect.” You will be prompted for a password. Type in: raspberry

and click “ok.” The following screen should appear:
Meaning you are in! You should now be able to get on the internet, program in scratch, and work on all your Pi projects. Have fun!!
Troubleshooting:
- You may need to restart your Pi when moving on to new steps. For example, once you have installed the Dexter Industries image on your SD card, you may need to unplug and re-plug in your Pi.
- When your Pi is successfully connected to the network and powered up, the PWR, FDX, LNK, and 100 lights should be on (the LNK may flash a little, that’s fine.) If your lights look different, and you are having trouble getting connected, do some internet searching for what the different LEDs can tell you! Start here.
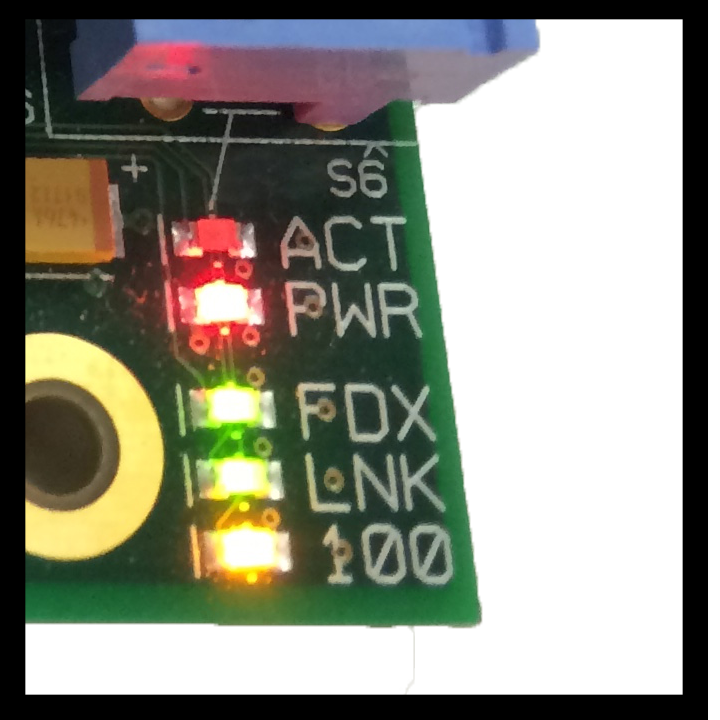
The LEDs on a functioning Pi (Model B).
- Check your internet permissions. If you are doing this project at school or at a library, your Pi’s access to the network may be blocked by a password or a firewall. If you are having problems and think this is the case, the easiest solution may be finding a spare monitor, keyboard, and mouse to plug into your Pi. Once you do that, try and open a web browser–usually something will pop up to let you know if internet access is being blocked somehow.
Learn More!
If you liked this tutorial, consider getting the SD Card with Raspbian for Robots , Raspberry Pi, and Ethernet cable to try out this tutorial.