How to Transfer Files to Your Raspberry Pi From a PC.
In this tutorial we walk through five different ways to transfer files between your PC and your Raspberry Pi.
Using Samba to Transfer a File From Your PC to a Raspberry Pi
Using File Transfer Protocol (or FTP) to Transfer a File From Your PC to a Raspberry Pi
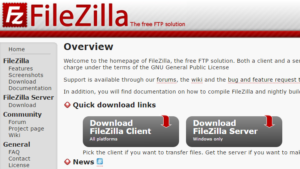
You can quickly transfer files back and forth from your PC to your Raspberry Pi using File Transfer Protocol (or FTP). We demonstrate how to do this with Filezilla, a free and open-source FTP program. You can download Filezilla for free here. You will need to download the Filezilla Client software and install it on your PC before you begin.
First, establish a connection between your Raspberry Pi and PC.
Next, connect to your Raspberry Pi. In the top navigation bar, enter in your Pi login information.

In the Host box, enter “dex.local”. In the Username box, enter “pi”. Enter your password, the default for Raspbian for Robots is “robots1234”. In the Port box, enter in “22”.
Now press “Quickconnect”.
You should see a successful connection in your dialog box, below the Quickconnect bar.

Once you’ve successfully connected with the FTP software, you can drag and drop files between the Raspberry Pi and the PC. You can drag files from your File Explorer window, and drop them into a directory on the Raspberry Pi. You can also drag files from your Raspberry Pi directory in FileZilla to your File Explorer window.
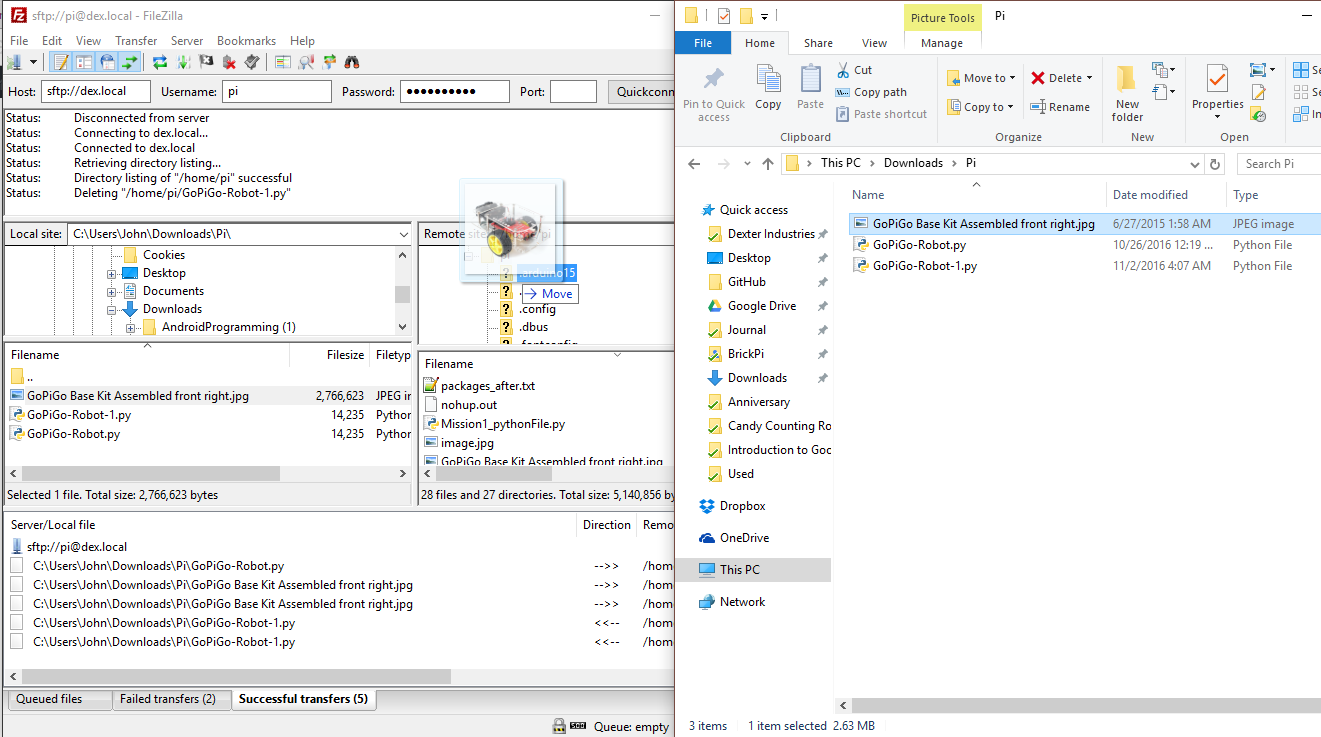
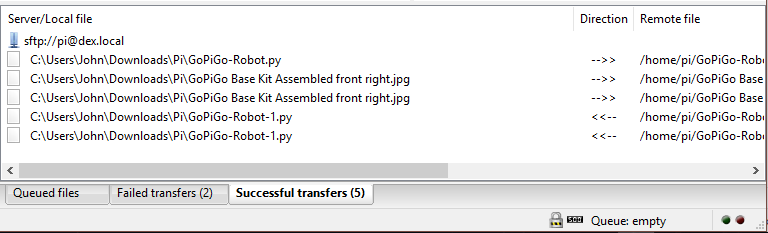
At the start of each file transfer, you should see a report in the lower transfer status window. Note that there are three tabs: Queued Files, Failed Transfers, and Successful Transfers. You can check that the file was successfully transferred by inspecting these three boxes.
Edit Using Notepad++
We made a short video below on how to use Notepad++ to transfer and edit files on your Raspberry Pi. Notedpad++ is, “a free source code editor which supports several programming languages running under the MS Windows environment.” It is a great tool for editing code and files on your PC, and also on your Raspberry Pi!
We made a short video that walks through setting up Notepad++ to work with the Raspberry Pi. You can also scroll down a little further and see the written step-by-step instructions as well.
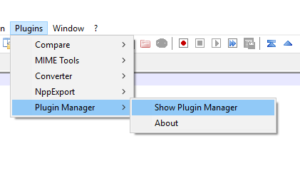
First, you will need to download and install Notepad++ from here. After installing Notepad++ on your PC, you’ll need to add a Notepad++ “NppFTP” plugin. First click on Plugins, then Plugin Manager.
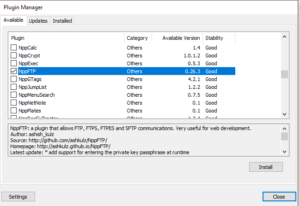
Find and select the NppFTP plugin.
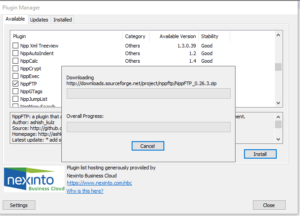
Click “Install”. You will see the plugin data begin to download and install.
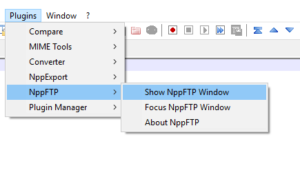
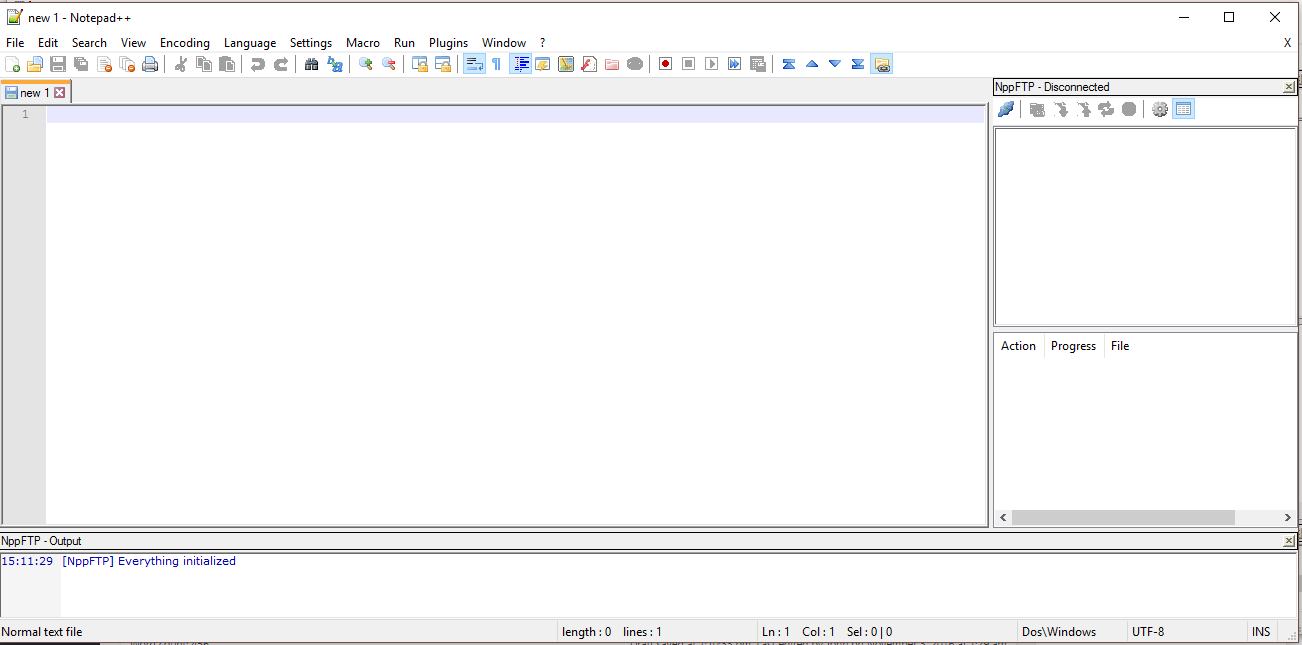
After installation, Notepad++ will restart. After the restart, go to Plugins –> NppFTP –> Show NppFTP Window.
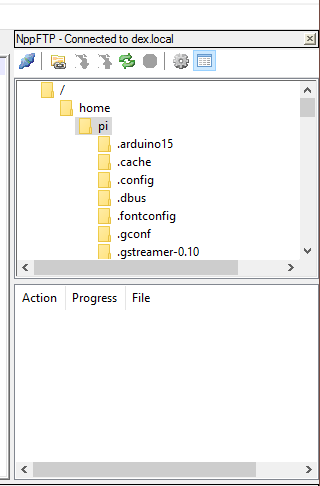
You should see a box appear to the right side of the screen, and a box at the bottom. The box at the bottom is an FTP dialog box, we will see messages here about our connection. On the right, once we connect, we will see a file directory.
Next, we will create a profile for dex.local to connect to our Raspberry Pi. Click the little gear icon in the upper right of the screen, and select “Profile Settings”.
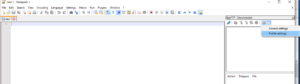
Enter in the login information for dex.local. Click “Add new” and add in the connection information:
- Hostname: dex.local
- Connection Type: SFTP
- Port: 22
- Password: robots1234
After closing, go back to the upper right hand corner of Notepad++, and click the connection icon (it is blue and looks like two sockets coming together). You should see your profiles drop down. Select dex.local and click on it.
After the connection is succesfully made, you should see a file tree appear in the box on the right hand side. This is the file system on the Raspberry Pi. You can now navigate around, find the file you want to work on, and double click it. It should now appear in your local text editor!
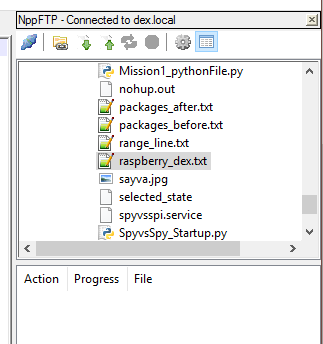
Below we scrolled down to find the file raspberry_dex.txt. When we double click it, we can edit it.
Be sure to save! Always be sure to save. Once you save, you should see blue colored dialog in the bottom screen, indicating the file was succesfully updated on the Pi. Unsaved files will appear red in the tab bar at the top!
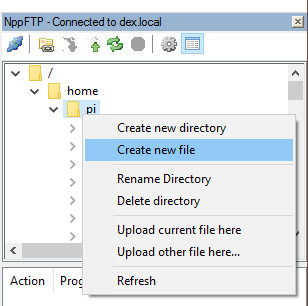
Finally, you can create a new file on your Raspberry Pi through Notepad+. Simply select the directory you want the file to be created in, right click it, and select “Create new file”. You can also perform other simple file tasks in Notepad++ on your Raspberry Pi such as creating a new directory, renaming a directory, or deleting a file, all simply by right clicking on the file or directory.
USB Drive
Learn More!
If you liked this tutorial, consider getting the Raspberry Pi here and SD Card with Raspbian for Robots here.
EDUCATORS
Check out our DexterEd page to learn about our Classroom Kits, Curriculum and Teacher Trial program.