 Give Your GoPiGo Smart Vision
What is Google Cloud Vision API? Check out the video by Google here:
Use Google Cloud Vision on the Raspberry Pi to take a picture with the Raspberry Pi Camera and classify it with the Google Cloud Vision API. First, we’ll walk you through setting up the Google Cloud Platform. Note: the Google Cloud Platform may change in the future and this is out of our control. We’ve updated this tutorial on April 2019.
Next, we will use the Raspberry Pi Camera to take a picture of an object, and then use the Raspberry Pi to upload the picture taken to Google Cloud.
Finally, we can analyze the picture in the cloud, and the cloud will either try to label the picture (tell us in text what’s going on in the picture), or try to find logos in the picture (company logos that are in the picture) or analyze faces in the picture (tell us everything from emotions on the face to where the face is on the picture). Skynet here we come!

These directions are meant to simplify getting started with Cloud Vision on your Raspberry Pi. They are derived from directions found here but modified to work with the Raspberry Pi, and simplify set up. We will use Google Cloud Vision on the Raspberry Pi to detect images with these three python examples.
 Tools
Tools
- Raspberry Pi (Pi3 or newer)
- Raspbian for Robots SD Card
- Power Supply
- Raspberry Pi Camera
- Google Cloud Account
The Google Cloud Account requires a credit card although low use projects will not incur charges. Do verify the billing information before going ahead. This is controlled by Google and we have no say in it. Verify pricing before going ahead with the project and know your limits!
These directions assume you’re using Raspbian for Robots on your SD Card. You can buy an SD Card with Raspbian for Robots on it, or you can download it for free and install it using our directions here.
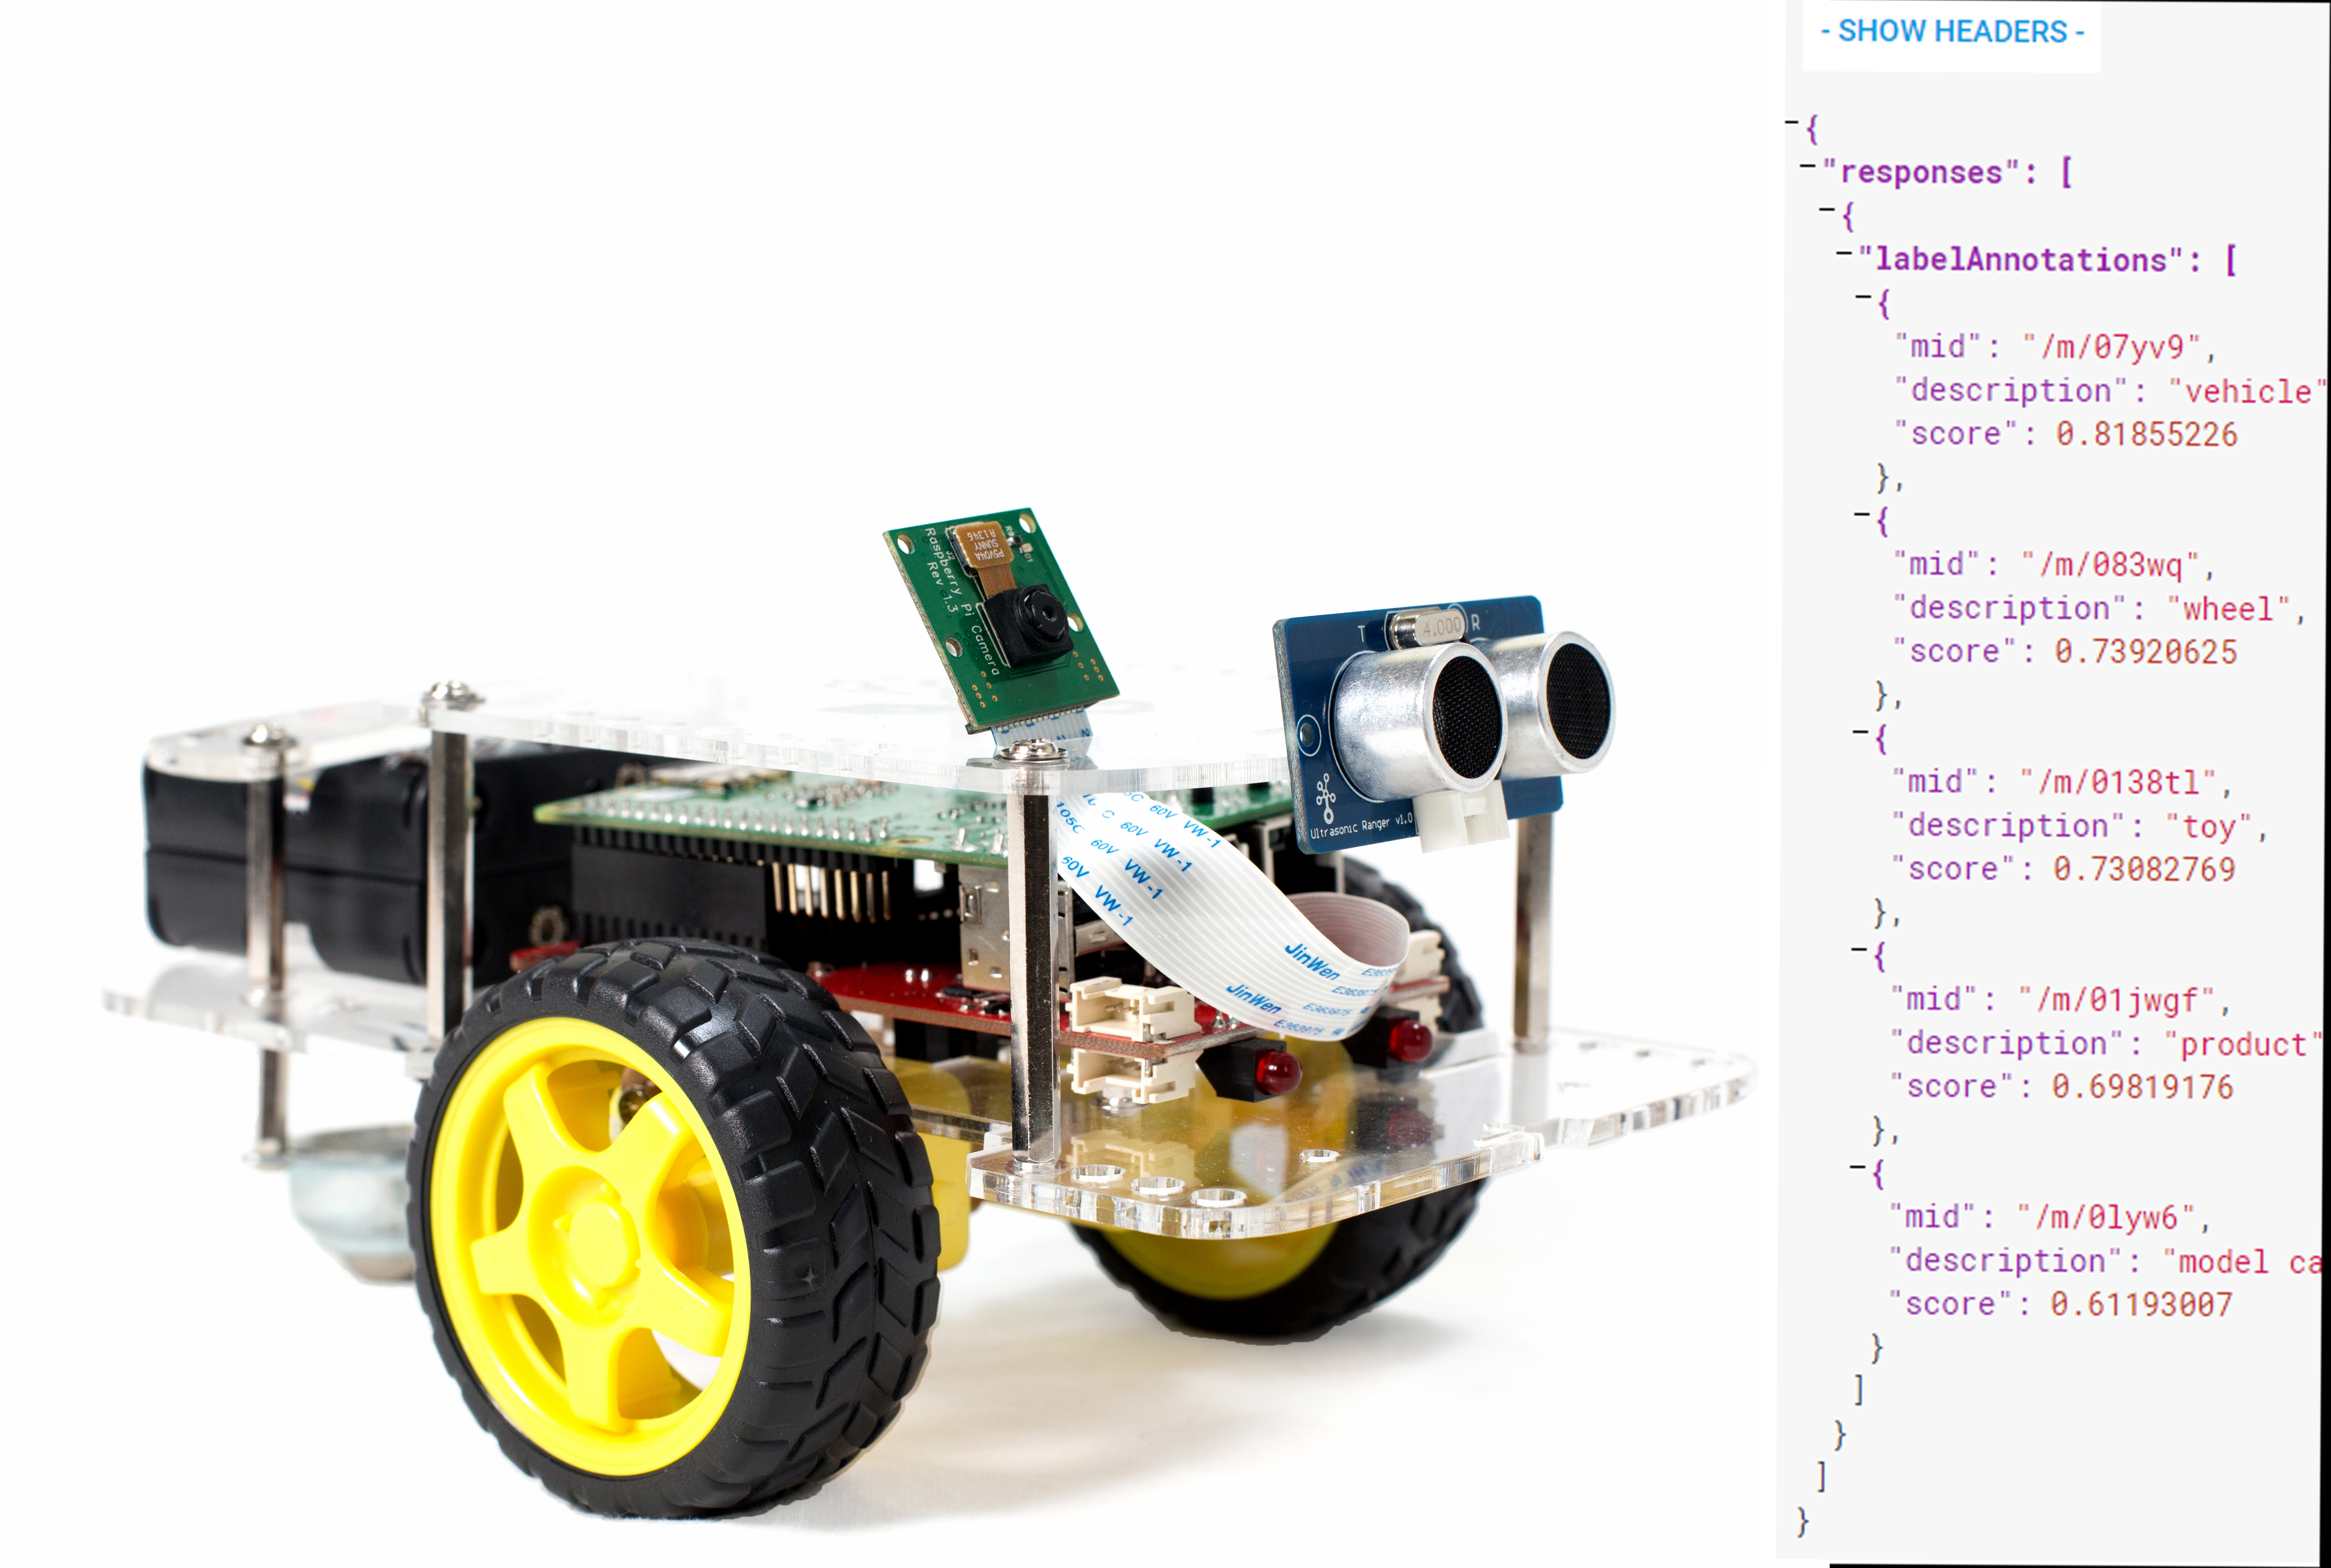
In this picture we’ve asked Google Cloud Vision to analyze the GoPiGo on the left, with the returned text response on the right. It returns “labels” (the things it sees in the picture) such as “vehicle”, “wheel”, “toy”, “product”, and “model car”. Pretty good job Google!
Google Cloud Set Up
The first step is to set up a Google Cloud Account. You can create an account here. You can create an account with either your Google or Gmail login.
You will need to follow the 3 setup steps on the Getting Started page. You do not need to create a Cloud Storage bucket unless you want to upload images directly.
Create a project:
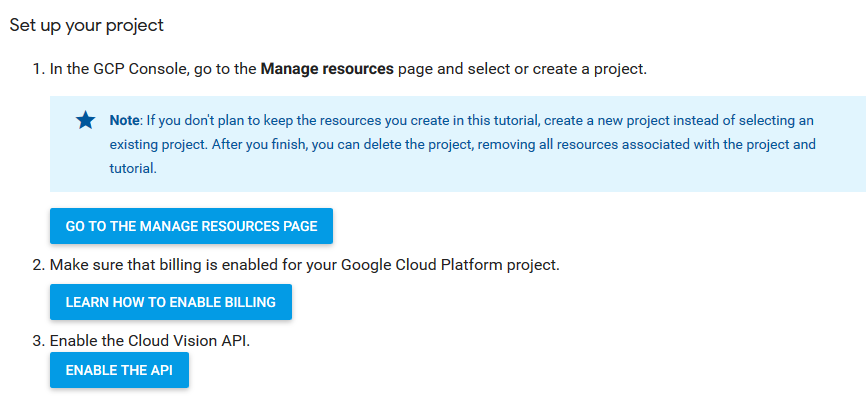
After you’ve created your account, you can set up a project and enable billing. First, click here to go to the Google Cloud Manage Resources Page.
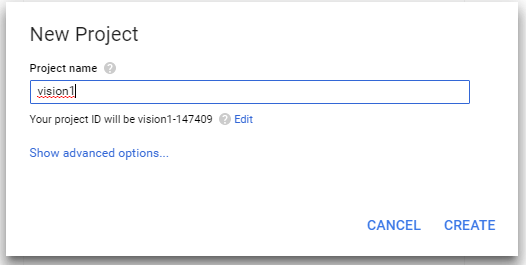
Create a new project.
![]()
In our example, we named it “vision1”
![]()
It will take a little bit before the project is created. Be patient.
Billing:
You will need to enable billing for your account (you won’t be charged if you keep it within the free limits). You can follow the appropriate instructions by clicking here. Go to the Cloud Platform Console here. Select the project “vision1” and click the hamburger in the upper left hand corner of the page.
Select Billing on the left hand side. From here, you can enable billing on your Google Cloud account.
If you want to ensure you’re not going to be hit by a huge bill, you can set a budget for your account. Read more about budgeting with the Google Platform. A budget will send you alerts but will not put a hard limit on your account. You can also set a hard limit by following capping instructions.
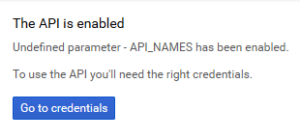
API:
Finally, we’ll enable the API. Click here to enable the API. Select the “vision1” account we created. Click “Continue”. You should get a message that API is enabled.
Getting a JSON Key
Now we want to get a JSON key to put on our Raspberry Pi. This JSON key will handle all the authentication to use our Google Cloud Account. Instead of a password, we can use the file to authenticate our account on the Raspberry Pi.
Caution: You should be careful where you store this key. Be sure to change the password on your Raspberry Pi before putting the JSON key on it, leaving your JSON key unprotected could expose you to something malicious! To change your Raspberry Pi passowrd, open a terminal and type:
sudo passwd
And follow the prompts to change the password on the Raspberry Pi.
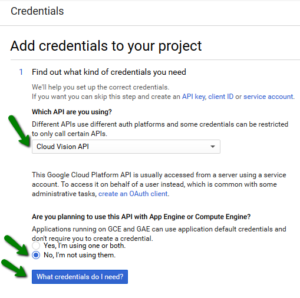
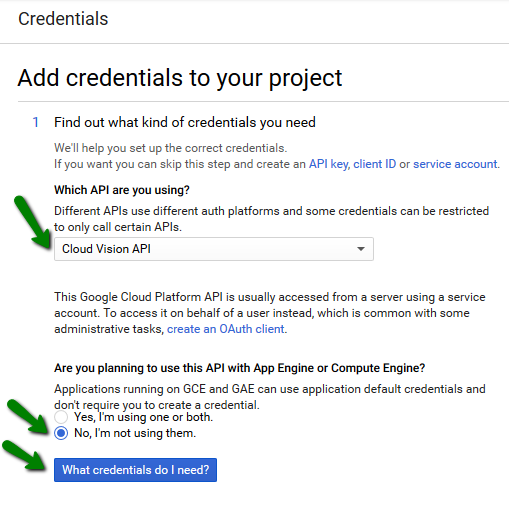
Get Your Credentials:
- Once the API is enabled, you will need your credentials. Click on the “Go to credentials” button.
- Ensure Cloud Vision is selected, we will not be using the GCE or the GAE. Click the “What credentials do I need?” button.
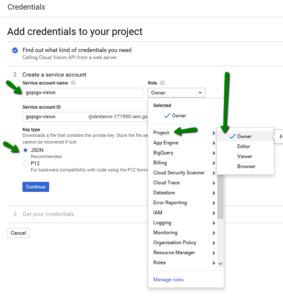
- Create the JSON file. Enter a name for the service account. Select a role: Project/Owner will give full control, not good for an actual project, but good enough for experimentation. Click the “Continue” button to download the json file.

A popup should come up telling you you have created a new key, and an automatic download of the JSON key should begin. Keep track of this file!
That should be it, you should have a service account key!
You should now use an FTP program (such as FileZilla) or Samba (see our tutorial here!) to move the JSON file over to your Raspberry Pi. Place the JSON file in the home directory /home/pi
Optional: Test the Account
Now that the account is set up, why not upload an image from your computer and test it here? You can follow this tutorial to try out a few images and see what Google thinks they are!
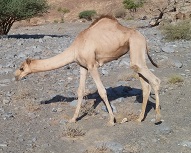
Use our picture above. Is it an animal? A reptile? Google will tell you!
Set Up the Hardware
The hardware is pretty simple! We’ll be using a Raspberry Pi Camera with the Raspberry Pi, here are some directions on setting up the camera.

These Raspberry Pi Camera setup directions assume you’re using Raspbian for Robots on your SD Card. You can buy an SD Card with Raspbian for Robots on it, or you can download it for free and install it using our directions here. If you’re not using Raspbian for Robots, you will need to take additional steps to enable and setup your camera; here are some directions on setting up the camera.
Prepare the Raspberry Pi
In this project, we’re assuming you’re using our image, Raspbian for Robots. If you’re not, you can download it here!
Next, we’ll upgrade a few things, just in case. Note that we are installing these libraries for Python3.
python3 -m pip install --user pip
Next, install Google API Python Client. Again in the command line, run:
python3 -m pip install --user google-cloud-vision
Next, install Python Imaging Library. Again in the command line, run:
python3 -m pip install --user Pillow
Next, install latest version of Picamera:
python3 -m pip install --user picamera
In the home directory, we will make the JSON file available to any application we’re running. Run the command:
export GOOGLE_APPLICATION_CREDENTIALS=/home/pi/filename.json
Be sure to substitute your JSON filename in this command with the name of the file you have on your Raspberry Pi.
Optional: Make Credentials Permanent
You can also make the Google Application Credentials permanent. You can make the JSON credentials from Google accessible to any python program running on your Raspberry Pi.
First, open the bashrc file:
sudo nano ~/.bashrc
Scroll to the very bottom of the file, and add the line:
GOOGLE_APPLICATION_CREDENTIALS="/home/pi/filename.json"
Be sure to replace the variable “filename” with the name of your file.
Now, load the credential by typing in the command line:
source ~/.bashrc
Finally, confirm that the credentials are set:
echo $GOOGLE_APPLICATION_CREDENTIALS
This should return the file path and name: ‘/home/pi/filename.json”
Get the Example Code
Get the example code: we have three python examples on Github here.
git clone https://github.com/DexterInd/GoogleVisionTutorials
Detect a Logo
![]()
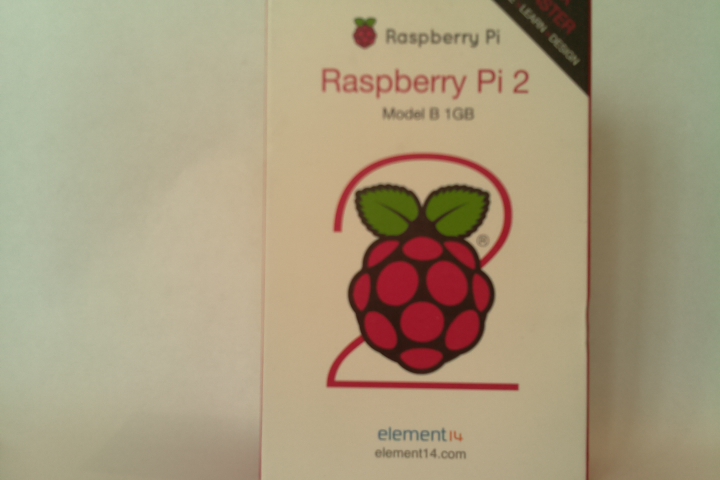
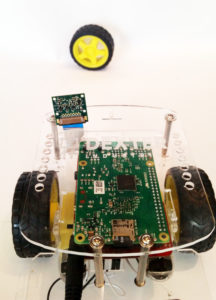
First, we’ll try to get the Raspberry Pi to detect the Raspberry Pi Logo. We’ll use the big Raspberry Pi label on the Raspberry Pi Box. Set the Pi box about 1 ft from the camera. We’ll be propping up the camera with a Raspberry Pi Robot, the GoPiGo. It holds the camera in place with the acrylic body, and we will use it later for some fun projects!
You might want to take a test picture to make sure the label is visible. In the command line, run
raspistill -o cam.jpg
If the picture looks ok, we’ll move along!
If not already done, we’ll make our JSON credentials available. In the command line, type (substitute filename with the actual filename you got from Google):
export GOOGLE_APPLICATION_CREDENTIALS=filename.json
And now, in the example directory, run:
python3 camera_vision_logo.py
You should get “Raspberry Pi” back!
![]()
Exciting stuff! Now you can go around the house looking for more corporate logos!
Label Pictures
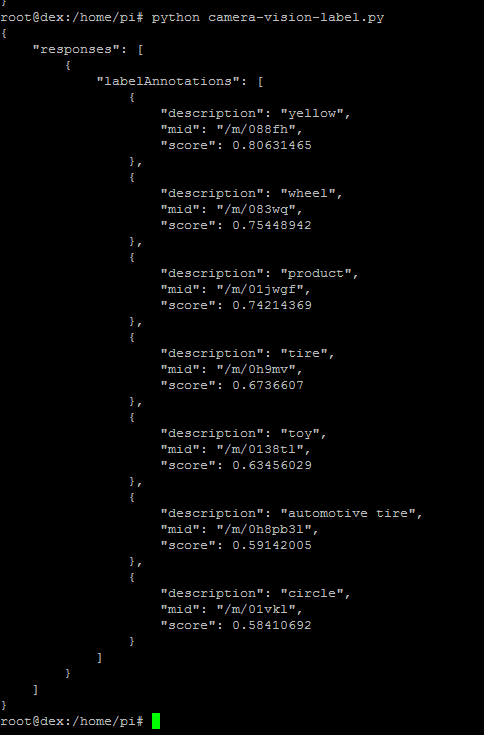
One of the cool things you can do with Google Vision is get the cloud to figure out what’s in the picture you take. Let’s take a picture of a GoPiGo Wheel and see what the cloud thinks it is.
Set up the camera and run the sample program. Again, we’ll be holding the camera in place with the GoPiGo robot kit.
python3 camera_vision_label.py
With the camera set up, we’ll take a test picture. Looks like the wheel is in there.
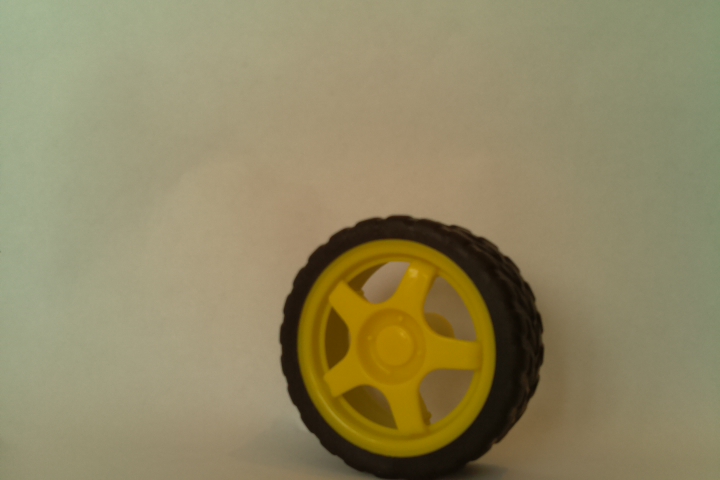
In this sample program we’ll return the entire JSON response. We get a few interesting results from the picture: “yellow” (with an 80% score), “wheel”, “product”, “tire”, “toy” and “automotive tire”.
Facial Detection With the Raspberry Pi
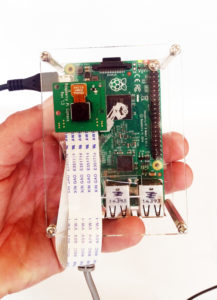
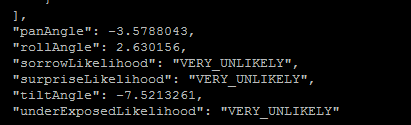
Here’s the scary part! Let’s detect a face and see if Google can detect some emotions! With Google Cloud Vision you can detect a range of emotions, headwear, some head coordinates, and other fun data. For this part, I made a special selfie-Pi using the GrovePi Case.
I ran the program in the command line:
python3 camera_vision_face.py
Here’s the picture I took:
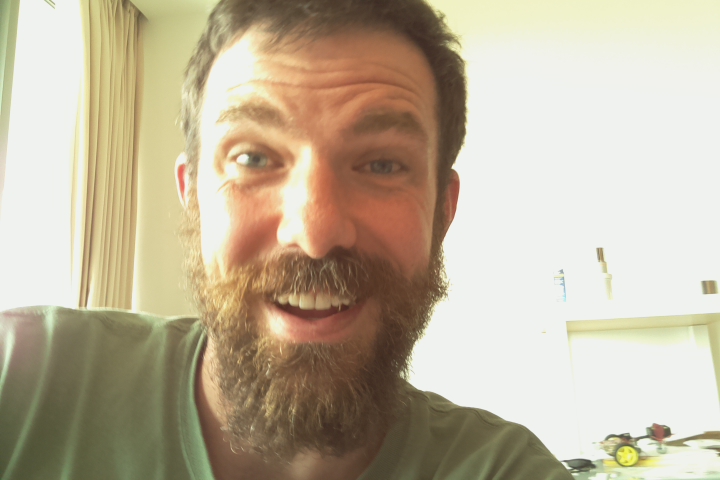
“Work is so much fun!”
Clearly I’m trying to smile a little for the camera! The response Google gives for facial analysis is pretty long, the JSON is very detailed, so I’m pulling the highlights below:

According to Google Vision, I’m not likely to be Angry (VERY_UNLIKELY)
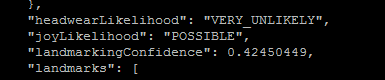
I’m not likely to be wearing headwear, however, it is possible that I’ve got joy (joyLikelihood is “POSSIBLE”).
Finally, I’m not likely to be sorrowful, and I’m not likely to be surprised. These are just some of the emotions that Google Cloud Vision will scan faces for and return information on.
 Conclusion
Google Cloud Vision is a really fun service to just play around with! Google Cloud Vision on the Raspberry Pi is perfect for projects with the Raspberry Pi and Raspberry Pi Camera, and adds in-context vision for the Raspberry Pi.
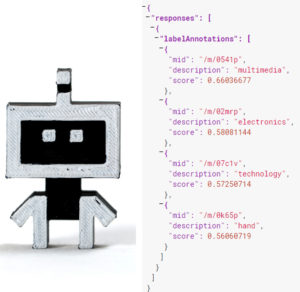
Above is a picture of “Dex” our company mascot, analyzed by Google for labels. You can see the computer correctly analyzes it as “electronics” and “technology”!
Troubleshooting
A few issues we’ve run into that might help you!
Optimal image size: The optimal image size for face recognition with Google Vision is 1600 x 1200 – you can set this using the python lines
camera = picamera.PiCamera()
camera.resolution = (1600, 200)
Clock and Date Issues: For proper authentication with the Google Cloud services, your clock must be correct (or darn near correct within about 12 hours). If it is not, you will see the following error:
raise HttpAccessTokenRefreshError(error_msg, status=resp.status)
oauth2client.client.HttpAccessTokenRefreshError: invalid_grant: Invalid JWT: Token must be a short-lived token and in a reasonable timeframe
If the python example throws this error, you need to update your clock. This can be tricky: it should be automatically updated if you boot the Pi while plugged into an ethernet network. However, if you are using wifi, or your network isn’t working properly, you can set the Raspberry Pi time manually with the command:
date -u 110316262016
This is using the format “MMDDhhmmCCYY” where M is the month, D is the day, h is the hour, m is the minute, C is the century (probably 20), and Y is the year (in 2016, this is 16).
Questions?
Learn More!
If you liked this tutorial, consider buying the SD Card with Raspbian for Robots here, Raspberry Pi Camera here and the GoPiGo Starter kit here.