 In this tutorial we will walk you through how to change your Raspberry Pi Hostname. This can be used for both Raspbian for Robots and Cinch.
In this tutorial we will walk you through how to change the name of your robot when using our software. The name of your robot is the wifi name that your robot will broadcast for you to connect to with your computer (if you’re using Cinch). The most common reason to do this is if you have more than one robot working in the same space at the same time. Classrooms with multiple robots are a great example. Each robot needs a different name (wifi name) so you know you are connected to the correct one!
What you will need
- microSD card 4GB or larger with CINCH software installed (directions for this are here).
- Fully assembled GoPiGo with Dexter Industries Wifi Dongle installed in the Raspberry Pi, CINCH microSD card securely in the Raspberry Pi , fully charged batteries (or USB power adapter plugged into the Pi).
- Computer with wifi.
Instructions for changing the robot name:
- Turn on your GoPiGo (you can only change the name of one GoPiGo at a time). This first boot can take 2 or 3 minutes.
- Use your computer to connect to the “dex” wifi network, open a web browser (Chrome preferably) and go to this address: “http://10.10.10.10”
- Select the noVNC icon on the left. Type in the password: robots1234
- Now it’s time to change the robot name:
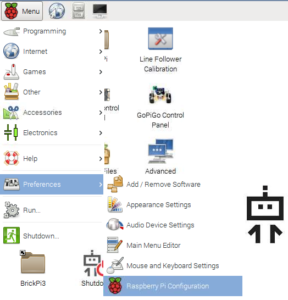
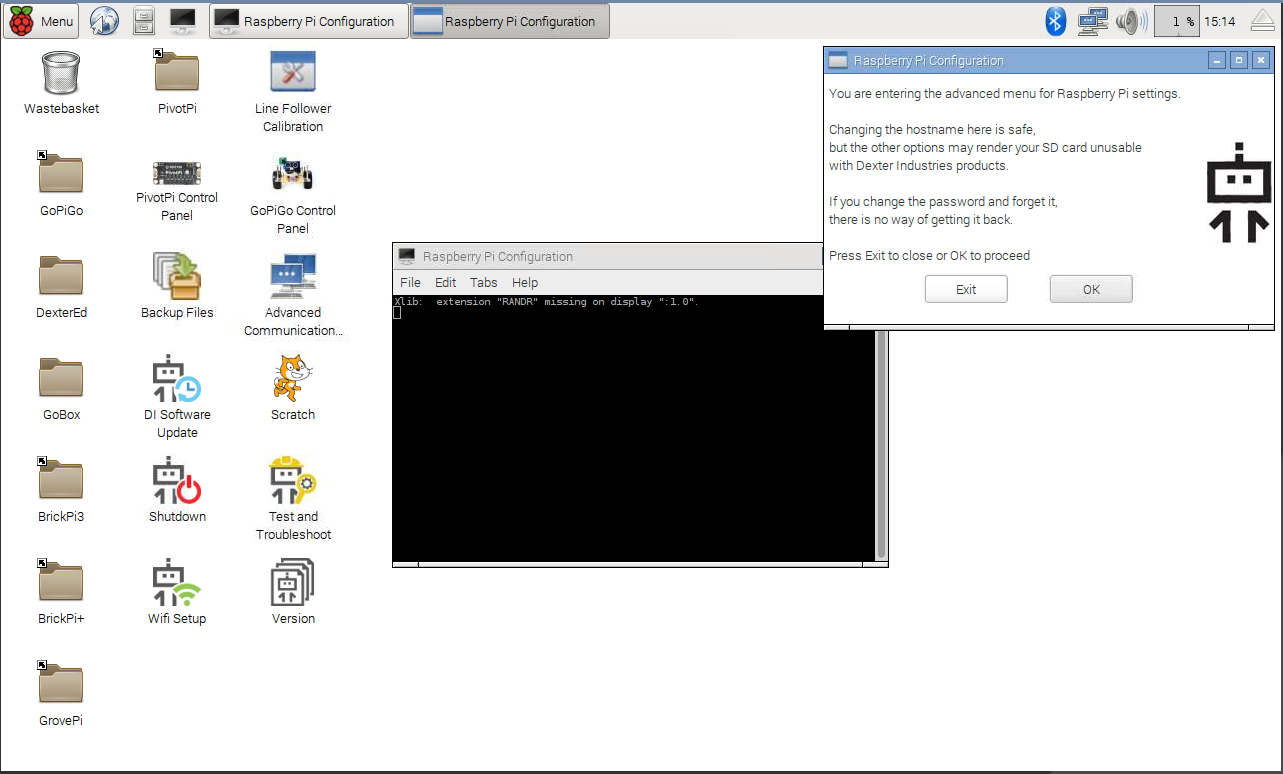
- Click on the little Raspberry Menu in the top left corner of the screen.
- Click on Preferences.
- Click on Raspberry Pi Configuration.
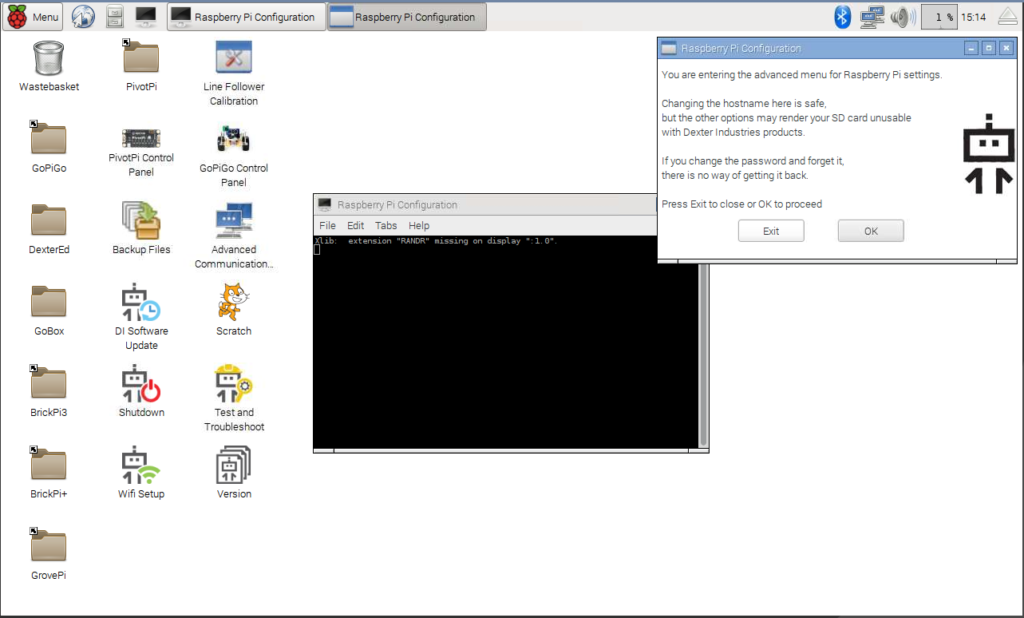
- Click the “OK” button.
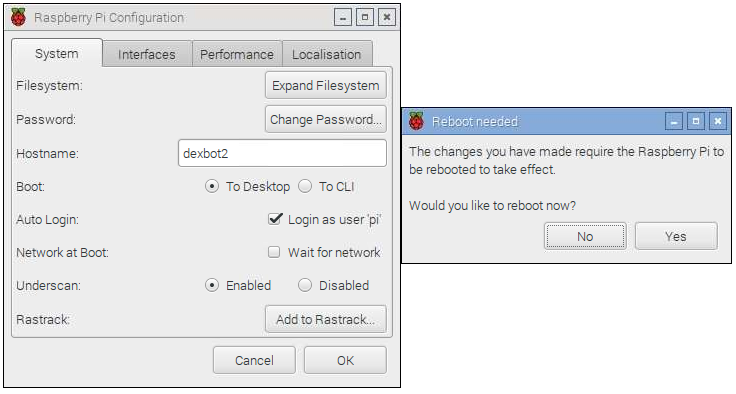
- Change the name (“dex” in this picture) to what you want it to be (for example “dex1”). Only use basic character (letter and numbers) – no punctuation and no spaces. Once you’ve entered your new name, click the “OK” button.
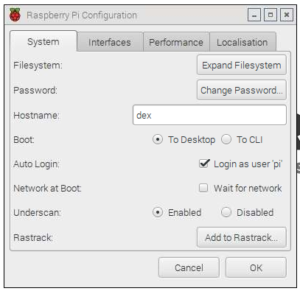
- Now you have to restart the robot. You will be presented with the “Reboot needed” dialog window automatically. Click the “Yes” button and let the robot reboot. This will take a few minutes.
- After a couple of minutes, the new name you chose will show up as a new wifi network for you to connect to. You can confirm that everything went well by connecting to the new wifi network once more and opening noVNC in your web browser. Sometimes an extra reboot may be necessary.
- Please note that some computers can “see” a wifi network in the list of available networks for a few minutes after it has actually disappeared. So, you might even see the old name and new name show up for a minute or two. Just turn off your wifi on the computer, and turn it back on, and that should help clear out the old wifi network so you only see the real, live one with the new robot name.
- That’s it! Now your robot has a new name and you can move on to the next one.


Questions?
Ask us a question in the forums about this subject!
Learn More!
If you liked this tutorial, consider buying the Wifi Dongle for the Raspberry Pi here.
EDUCATORS
Check out our DexterEd page to learn about our Classroom Kits, Curriculum and Teacher Trial program.
Advanced
Click below to see more advanced information on changing your Raspberry Pi hostname.
What is a hostname?
Default Names
Default names are the names the software or Raspberry Pi (the brain of your robot) operating system comes with. These are the names they come with, out of the box if you get it from Dexter Industries:
- The default name for your Raspberry Pi robot if you are running Raspbian for Robots with a name earlier than “2015.11.09” is raspberrypi.local
- The default name for your Raspberry Pi robot if you are running Raspbian for Robots with a name later than “2015.11.09” is dex.local
You will need to know this to connect to your Raspberry Pi robot.
Why would you want to change the Hostname on Raspbian for Robots?
There are a few reasons why you might want to change the hostname for your robot. If you are using a version before 2015.11.09, you may want to do this so that you are working off the same hostname as our new software, which is “dex.local”.
The biggest reason to change a hostname for your robot is if you are working with more than one robot on the same network. Classrooms, camps, meetup groups, and households with more than one robot being used, should change the hostname for each robot so they are different. This will allow you to know which one you are connecting to, so you aren’t confused when you are trying to program and control your robots over the same network connection (wifi network).
Changing the Hostname on Raspbian for Robots
We have two videos below to walk you through renaming the Hostname. If you prefer written directions and pictures, please scroll below!
Raspbian for Robots Version
If you have downloaded and installed Raspbian for Robots after November 2015,
OR you have a version dated “2015.11.09” or later and you have a sd card reader in your computer:
use the section “Changing the Hostname on the SD Card”.
If you do not have a sd card reader in your computer and/or are using “2015.03.20” or earlier:
skip down to “Changing the Hostname on the Raspberry Pi” below.
Changing the Hostname on the SD Card
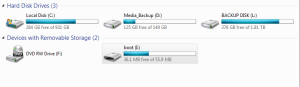
You will need a computer with a SD card reader. Put your SD card into your computer.
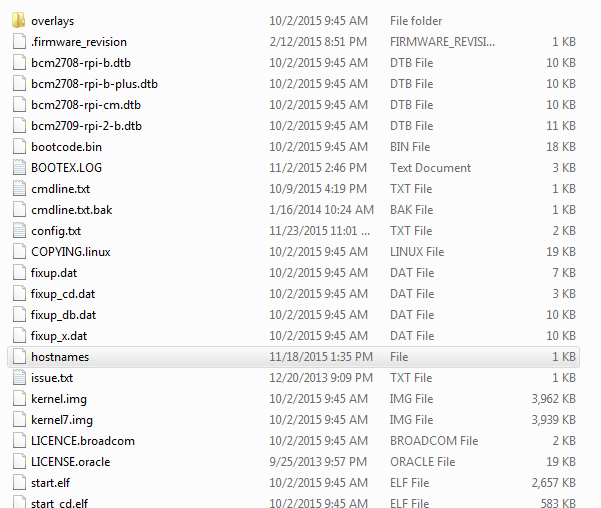
- Open your SD Card on your PC or Mac, as a drive.
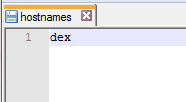
- In the SD card you should see a file named “hostnames”. It’s a text file. Open this file with your default text editor (like “TextEdit” on a Mac or “notepad” on a Windows PC).
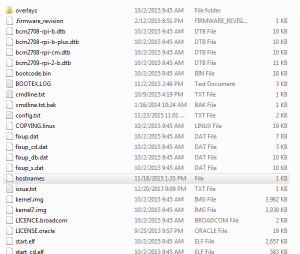
- When you open the file, you should see the name “dex”. This is your current hostname (as in “dex.local”). Change it to the new hostname you want it to be. Do not use spaces or characters, keep it to letters and numbers. Do not add a return at the end of the file.
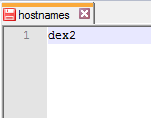
- In our case we renamed the hostname to “dex2”. Again, no returns or spaces. Save the file back to the SD Card. Do not add a “txt” extension, keep the name of the file “hostnames”.
- Eject the SD card from your computer.
- Make sure the power is off on your Raspberry Pi robot and put the SD card back into the slot on the Raspberry Pi (green board).
- Connect the ethernet cable to your computer and to the Raspberry Pi. Connect the power supply to the Raspberry Pi which will turn it on. Wait for 2-5 minutes, or until the Pi has fully booted (green lights should be blinking on the Pi, and the ethernet lights on the Pi should be lit up too). You can login to your Pi using the original hostname.
- Go to a web browser (Firefox if you are using a touchscreen laptop) and type in http://dex.local.
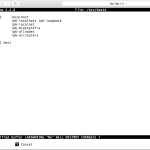
- Select “terminal” view. Login using “pi” as the username and “robots1234” as the password.
- Now we are going to power down the Raspberry Pi or reboot the Pi from the command line by typing “sudo reboot”.
- After reboot your Pi will be listening on the new address. So, now when you go to login, open a browser and type in http://dex2.local because in this case, we changed the hostname to “dex2”.

Changing the Hostname on the Raspberry Pi
Changing the hostname on an older version of Raspbian for Robots (before 2015.11.09) requires logging into the Pi and using the command line. Also, if your computer does not have an SD card reader, you can use this method with the newer image too.
1). Log on to the Pi.
First you have to login to the Raspberry Pi robot:
If you are using the newer version after 2015.11.09 and want to change the host name, go to a web browser and type in http://dex.local and choose Terminal. Login using username “pi” and password “robots1234”.
If you are using the older version, just login as you normally would through realVNC using your hostname raspberrypi.local and password “raspberry”.
2). Edit the Hosts file.
After logging into the Pi and opening up Terminal, type:
sudo nano /etc/hosts
(and hit enter)
This will pull up the file “hosts”. 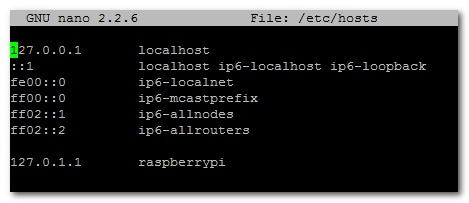
Where you see “raspberrypi” (or “dex” if you are using the newer version) replace this with the new hostname. Do not use spaces or characters, keep it to letters and numbers. Do not add a return at the end of the file.
Save the file and exit the editor by first hitting “ctrl x” which will bring you to a screen that asks you if you would like to save.
Hit the “y” button, to save. Then hit the return button to exit and it will take you back to the command line.
3. Edit the Hostname File
Next type:
sudo nano /etc/hostname
(and then hit enter)
This will be a single line file with just the old hostname, “raspberrypi” (or “dex” for the newer version). Change this to the new hostname. It should be the same one you entered in the previous step, with no returns or spaces in the file.
Save the file, exit the editor by hitting “ctrl x”, then “y”, and the return button.
NOTE: after you exit editing the hostname file, you may see an error “sudo:unable to resolve host dex”. That is Ok! Simply move on to the next step.
4. Commit the changes
Now you’ll want to commit all the changes you’ve made (this means you are getting the computer to confirm the changes that were made to the text files you just edited):
sudo /etc/init.d/hostname.sh
(and then hit enter)
Save the file, exit the editor by hitting "ctrl x", then "y", and the return button.
Again, after this step you may encounter the error message “sudo:unable to resolve host dex”. That is Ok! Simply move on to the next step.
sudo nano /etc/hostapd/hostapd.conf
(and then hit enter)

Save the file, exit the editor by hitting "ctrl x", then "y", and the return button.
5. Change the /boot/hostnames file
Now we will check for one more file. If it is present, we need to edit it as well. Run the following command:
ls -la /boot/hostnames
If the file is not present, you should receive the following response:
ls: cannot access /boot/hostnames: No such file or directory
If you receive this response, no problem! Just skip ahead and reboot the Pi. If the file is present, you should get the following back:
-rwxr-xr-x 1 root root 3 Oct 8 14:05 /boot/hostnames
Don’t worry about the date, but if the file is present, run the following command:
sudo nano /boot/hostnames
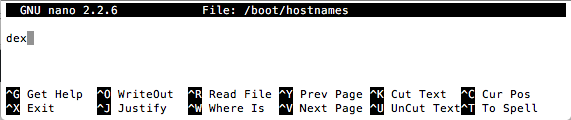
Change “dex” to your new hostname. Exit nano again with ctrl-x and select yes.
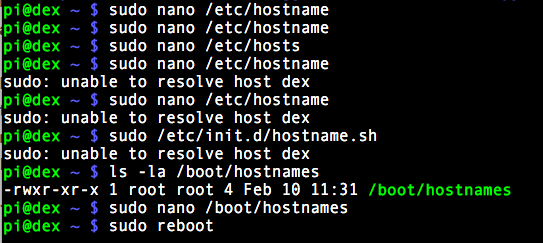
Before we reboot, make sure we followed all the steps! Below is a screenshot of the commands we made in the terminal on the Raspberry Pi. Notice that the error “sudo:unable to resolve host dex” was thrown after a few commands and we were still able to change the file successfully.
6. Reboot the Pi
The changes we made to the hostname will not take effect until we reboot the Pi. So, finally, reboot the Pi:
sudo reboot
(and then hit enter)
After rebooting, your Pi should be responding to the new hostname! This means you can now go to a web browser and type in http://yourhostname.local (yourhostname = dex1 or whatever you changed it to!) and login to your robot!
Tips
You can scan a network for available hostnames using two tools:
- Windows – We recommend Angry IP Scanner. Don’t let the name fool you, it’s a happy program that’s easy to use. You can download it here. The software is free and open source.
- Mac – We recommend Bonjour Browser. Install this free and open source software and begin to search your network for hostnames.