How to use the Raspberry Pi and BrickPi.
Because most robots end up moving, hooking up a monitor and micro USB cable power supply might be impractical. We have developed extra options to make network configuration quick with the BrickPi. Here we explain the options we have worked into the BrickPi Image for Network Configuration here and offer some hints on how to get started using the BrickPi.
These are “run once” operations. After setting up your BrickPi, you will be able to connect without making the changes again.
The last two options are for controlling your Raspberry Pi; once you have a connection setup, you can use the Putty Command Line or VNC to start programming.
Option 1: Set up with your computer through ethernet
This option explains how to connect to the Raspberry Pi using your computer and a LAN / ethernet cable. The option is almost as bullet-proof as Option 1, but it’s much less cumbersome than setting up a monitor, keyboard, and mouse. All you need is a separate computer with a LAN card and a LAN cable. Here’s a step by step set of instructions for connecting to your Raspberry Pi robot with an ethernet cable for Windows & Mac.
Option 2: Set up without a computer (need a monitor, keyboard & mouse)
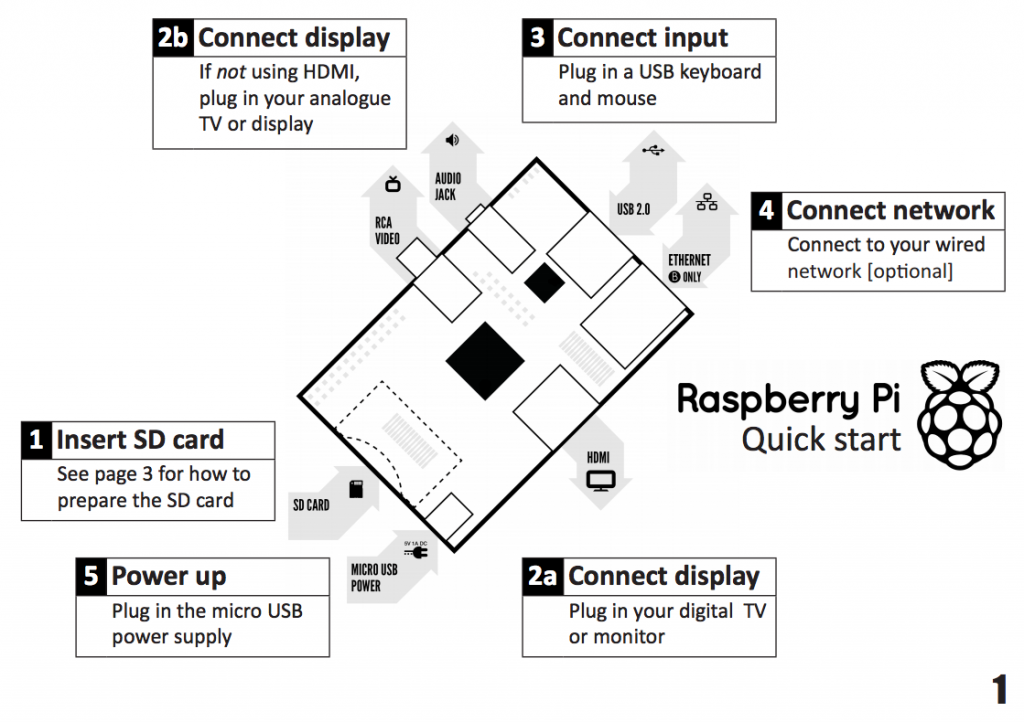 The bullet proof option is to use a monitor, mouse, and keyboard. The BrickPi case is designed to allow space for a keyboard, monitor, and mouse. You may find that you need a USB hub to add a Wi-Fi device to the BrickPi. The advantage of this configuration is that you don’t have to configure the Wi-Fi on the Raspberry Pi, or login remotely on the computer.
For more information on this, we recommend browsing the Raspberry Pi Foundations Quick Start Guide.