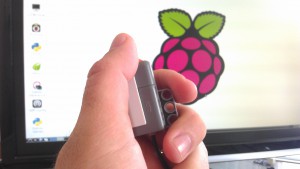
 We’ve written previously about connecting LEGO MINDSTORMS I2C sensor to the Raspberry Pi. This is another sensor post: how to get an NXT Touch Sensor working with the Raspberry Pi. Unlike the dIMU in our previous post, this sensor does not use digital communications like I2C. Rather it’s a simple on/off GPIO.
Wait, what’s a GPIO?
The acronym stands for General Purpose Input Ouput. Rather than have dedicated sensor ports like the NXT, the Raspberry Pi has pins (17 of them) that are highly configurable with software. In our other post, we showed how the GPIO’s could be used as an I2C interface. However, they can also be reconfigured through your software to do many different things: inputs, outputs, and different digital communications.
 The NXT Touch sensor is a simple sensor that detects when it is being touched and released. The sensor uses the analog pin to determine when it’s pressed: a circuit is made or broken. When the sensor button is pressed, the circuit is completed, pulling the voltage on the Analog pin of the MINDSTORMS Sensor high (it goes from 0V to 5V).
We divide this tutorial up into 3 parts. First, we’ll show you were to solder and connect on the GPIO pins of the Raspberry Pi. Then we’ll show you how to connect to the sensor. Finally, we’ll walk you through the Python Code.
 1). Soldering the Adapter
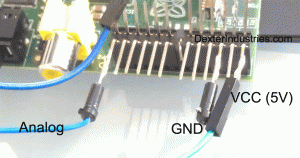
To use the NXT Touch Sensor with the Raspberry Pi, we need to solder up three pins. The first two, Ground and VCC (5V) are shown in the picture to the right as Green and White wires.
We’ll also need a general GPIO that we can access in Python. Not all of the GPIO pins are available for GPIO In. We selected Pin 7 for this project.
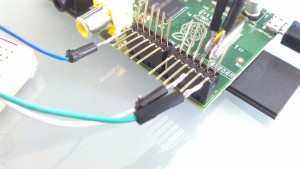 We did NOT solder directly to our GPIO pins, rather we used a female port we had lying around.
Hint 1: click on the picture to the right to enlarge and see the pins.
Hint 2: We know these GPIO pins are available for use with Python on the Raspberry Pi: 22, 21, 11, 7,
Hint 3: We know these GPIO pins are NOT available for use with Python on the Raspberry Pi: 0,1,4,17, 10, 9, 8
 2). Connect the Sensor
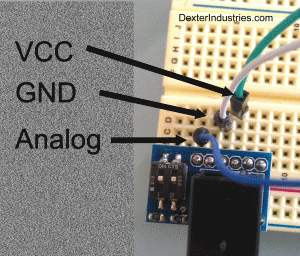
Connecting the sensor is super-easy with the Dexter Industries Breadboard Adapter.
In the diagram to the right, the 5V line is Green, the Ground Line is White, and the Analog line is Blue.
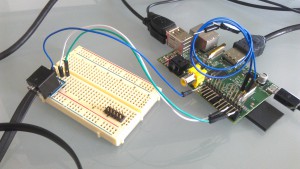 The Final setup might look something like the picture to the right:
3). Running the Python Program
The Python code for this program is much simpler than the I2C code. We’re simply going to detect when the Analog line on GPIO Pin 7 goes high or low. To setup the GPIO’s on the Raspberry Pi, we’re going to call “import RPi.GPIO as GPIO” at the top. GPIO’s can be inputs or outputs, so we initialize GPIO 7 as an input.
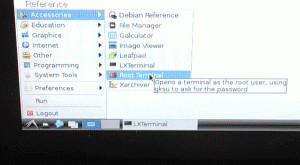 One important note: to be able to access the GPIO includes, you must run the Python program from LX Terminal with Root Permission. Not a big deal, but picture to the right on how to get there. We recommend NOT doing anything else in the root terminal.
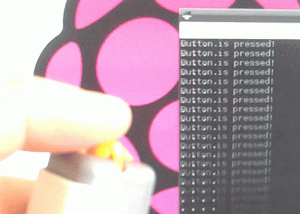 When you run the attached code, it will print “…” until the button is pressed. When the button is pressed it will print to screen “Button is Pressed!”
The full code can be downloaded here, or copied from below.
[sourcecode language=”python”] import RPi.GPIO as GPIOimport time
def setup_pin():
GPIO.setmode(GPIO.BCM) # Use Raspberry Pi Board Pin Numbers
GPIO.setup(7, GPIO.IN, pull_up_down = GPIO.PUD_UP) # Setup GPIO 7 as an input.
# GPIOS Available: 22, 21, 11, 7,
# GPIOS Unavailable: 0,1,4,17, 10, 9, 8
def main():
setup_pin()
time.sleep(1) # Sleep 1 second
print ” ”
while True:
if GPIO.input(7):
print “. . . .”
else:
print “Button is pressed!”
#time.sleep(0.5)
#if __name__==’__main__’:
main()
[/sourcecode]
Learn More!
If you liked this tutorial, consider purchasing the Breadboard Adapter for LEGO Mindstorms here.


