 In this tutorial, we’ll cover how to connect to C.H.I.P. in headless mode for the first time. Starting with CHIP is incredibly simple once you know how to set it up, and if you’re already a Linux user, you’ll feel right at home once you login. For many reasons, you might not have a way to boot up your C.H.I.P. with a monitor and keyboard, and you might be confused about how to get started. With no Ethernet port, no monitor, and one USB port, there are limited options for setting up.
In this tutorial we’ll take a C.H.I.P. right out of the box, login to it over USB from out PC, and set it up on the WiFi network. Then we’ll login to the C.H.I.P. SSH, to show that C.H.I.P. is now connected to the network over WiFi, and is ready to function as a standalone computer that can to computer things.
Wait, what’s C.H.I.P.?
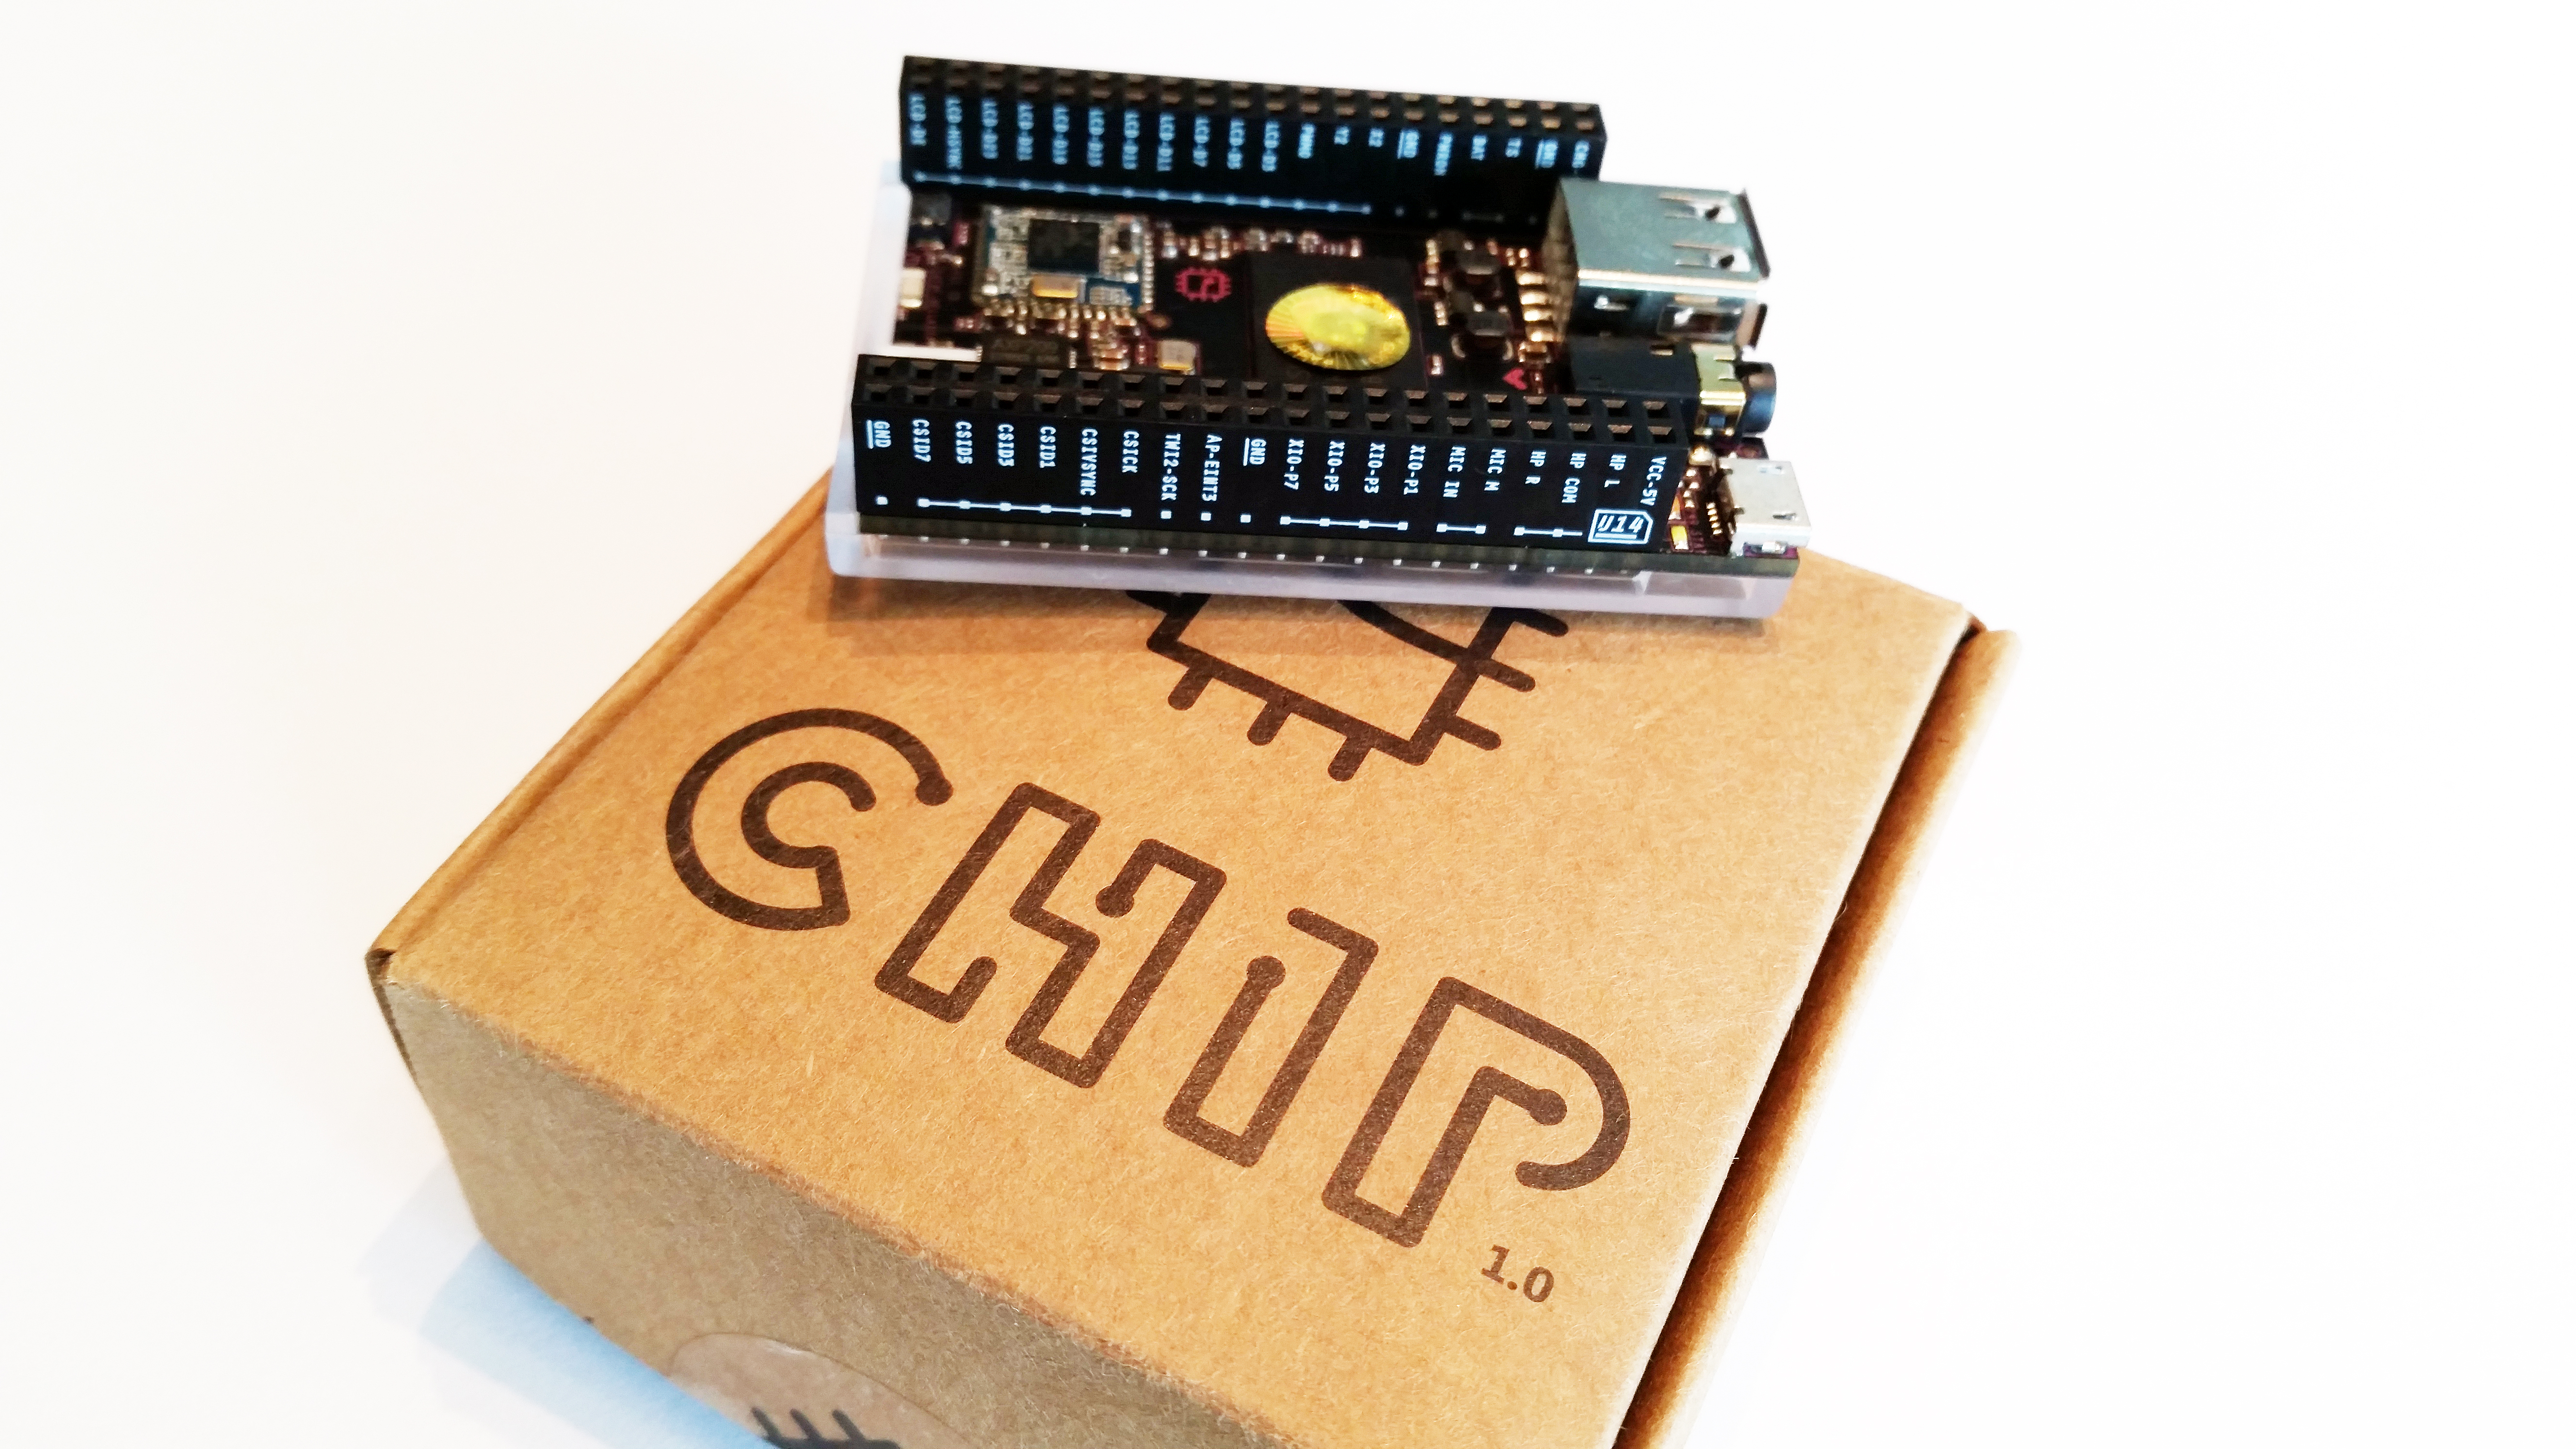
C.H.I.P. is a fun little computer that we backed on Kickstarter. We’re not sure which was more compelling: the ultra small size of C.H.I.P. or the ultra-low price of C.H.I.P. (it’s only $9). The board comes with WiFi, runs Linux, and has a ton of GPIO pins. Plus the hardware and software are fully open-source, making it really compelling for future projects. You can see more about the C.H.I.P. computer here on the Next Thing Co’s website.
Connect to C.H.I.P. in headless mode
Headless mode means that we’ll be using C.H.I.P. with no monitor, keyboard, or mouse connected.
To set up for this tutorial, you’ll simply need a C.H.I.P. right out of the box, and a micro USB cable. I’ll be using a Windows 10 PC.
Step 1: Connect C.H.I.P. To Your PC
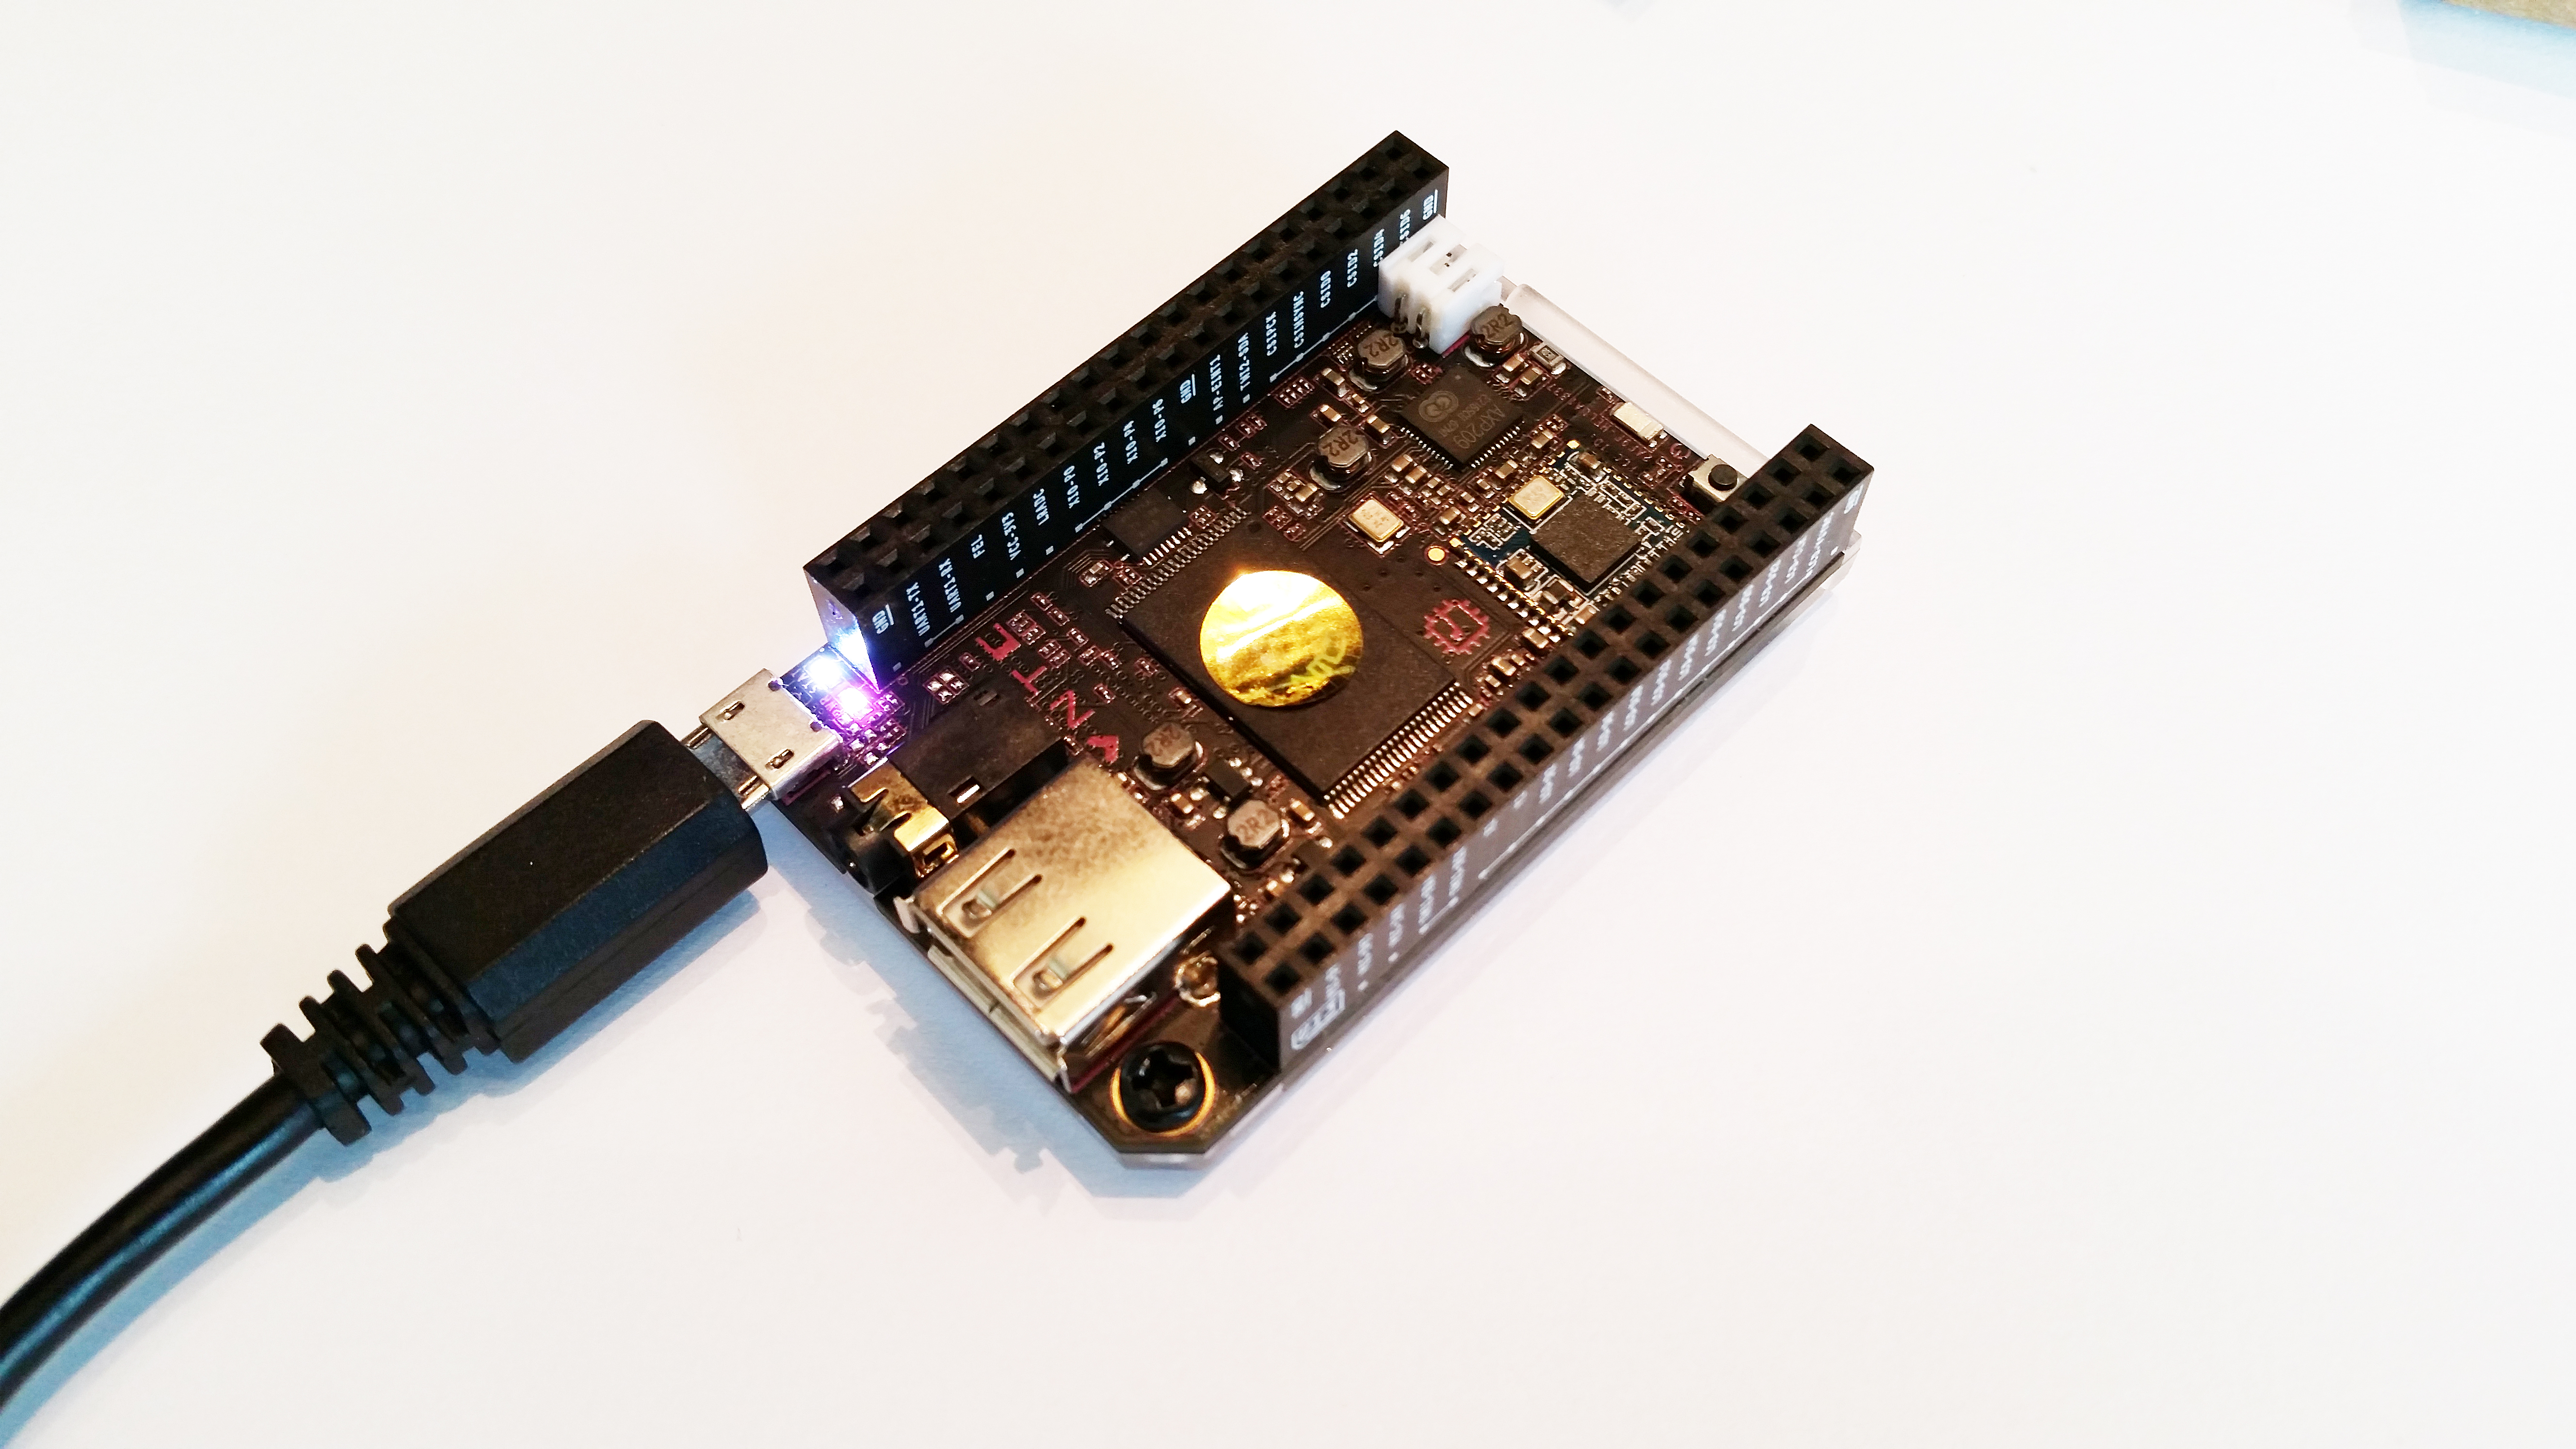
Connect micro USB of the C.H.I.P. to a USB port on your PC. That’s it for this step. The C.H.I.P. should now be powered and running.
Step 2: Find The Device COM Number
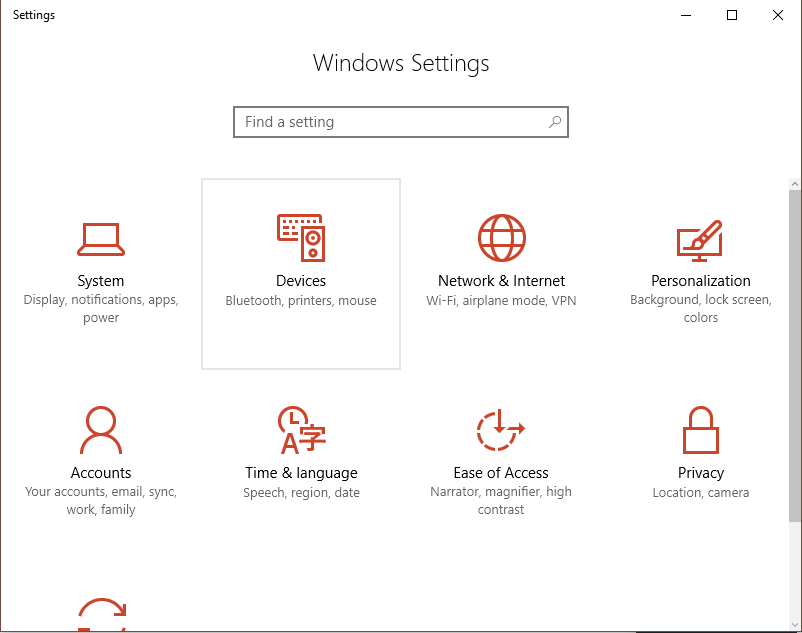
Open up Windows Settings. Click on Devices.
Select “Connected Devices” and you should see a list of USB devices connected to your PC. It may take a few seconds to show up, and if this is your first time connecting, you PC may want to install a driver or two.
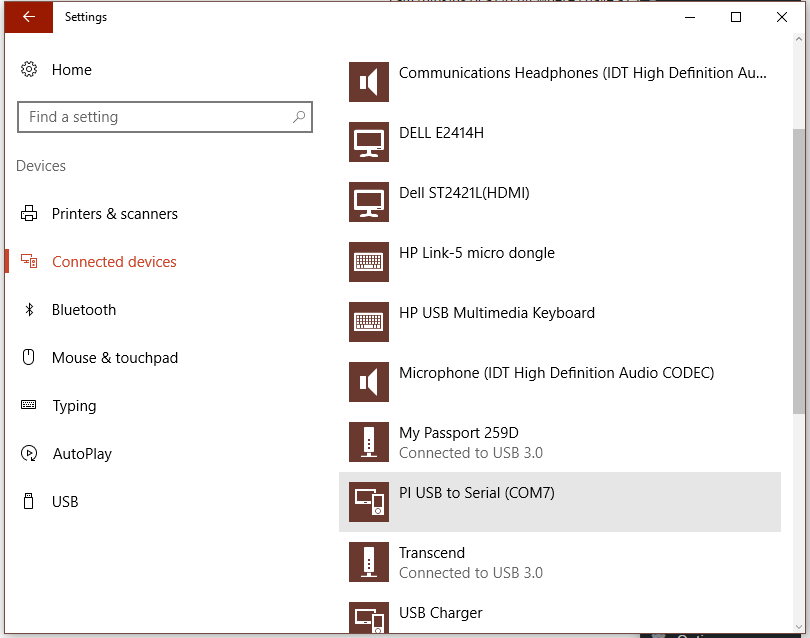
The C.H.I.P. shows up as “PI USB to Serial (COM7)”. Note that yours may show up as another “COM” number. Note the number!
Step 3: Connect Over The COM Port
We’ll be using PuTTY. This should work on other terminal emulators that allow serial connections as well. If you haven’t already, you can download the latest version of PuTTY here.
In PuTTY, we select the “Serial” option. It will automatically populate with “COM1” and Speed at “9600”. If your device showed up as another COM number, change the number to that value. In my case, we’ll change the value to “COM7”. We will leave the speed at 9600.
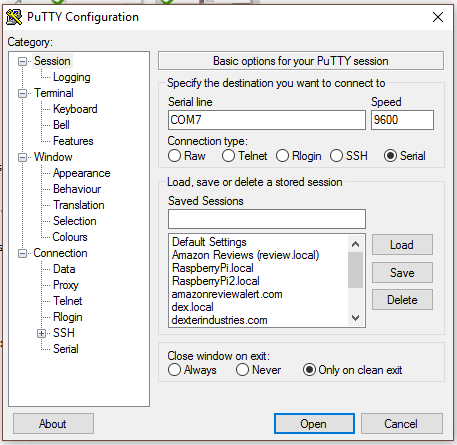
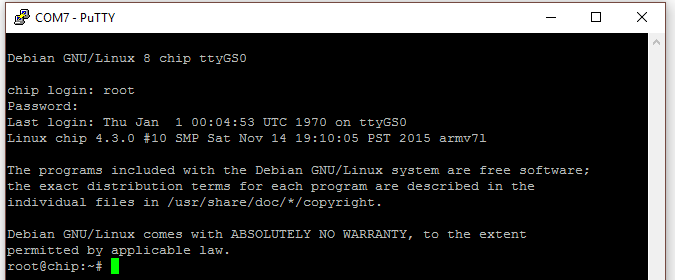
Click “Open”. Boom! We should have a login terminal.
The default user is “root” and the default password is “chip”. Enter them!
Set Up WiFi
C.H.I.P. has built-in WiFi. We can set it up to automatically connect to our local wifi network, and then we can run it headless across the network without plugging directly into the PC. We’ll be connected to the internet and ergo ready to do some awesome stuff!
To set up WiFi, simply run the command:
nmtui
This should launch us into the WiFi setup.
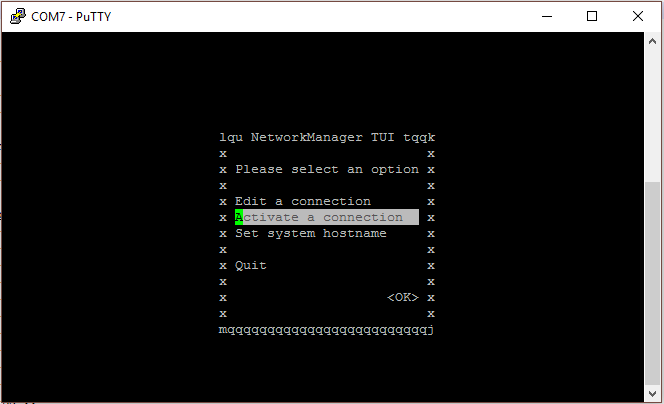
Select “Activate a connection”. A list of available WiFi networks should appear under “wlan0”, which is the WiFi device on the C.H.I.P.

Select the network, enter your WiFi Password, and connect! Once your network is connected, it should show up with an asterisk next to it “*”. You’re connected!
Now reboot: Remove the power. Put the power back in.
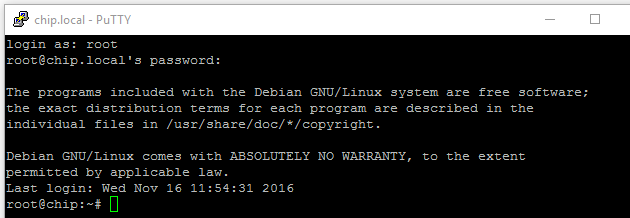
Connect to C.H.I.P. through the network using SSH
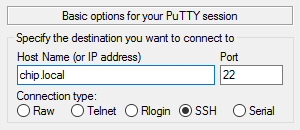
After giving the C.H.I.P. enough time to reboot, it should automatically connect to the WiFi network you just configured. Make sure your PC is connected to the same network as the WiFi you just configured, and then open up PuTTY again, and this time select SSH. The hostname we’ll be looking for is “chip.local” and we’ll be using Port 22. Click “Open”.
After a few seconds, you should be prompted for a login to C.H.I.P. Same credentials: the user is “root” and the password is “chip”.
Boom! C.H.I.P is now connected to the network through WiFi, and you are connected to your C.H.I.P. through SSH!
Networking Tips
One thing you’ll notice is that we used “chip.local” to find our device on the network. We can do this if you have Bonjour installed on your PC (or iTunes). If you don’t, you can still find your IP address on your network using Fing (check out this tutorial here), and substitute the IP address for “chip.local”.

Questions?
Want to make a robot with CHIP? See our tutorial here on how to make a robot with C.H.I.P.!
Head on over to our forums!
Learn More!
If you liked this tutorial, check out our tutorial on making a C.H.I.P. robot here.