 Here we will show you how to assemble the GoPiGo Line Follower Kit and attach it to your GoPiGo3.
The Line Follower is a sensor that attaches to the GoPiGo robot car which enables the GoPiGo follow a line on the floor.
You can use it to program your GoPiGo to serve a drink across a room, learn the basics of how automated warehouse or self-driving cars work!
What You’ll Need
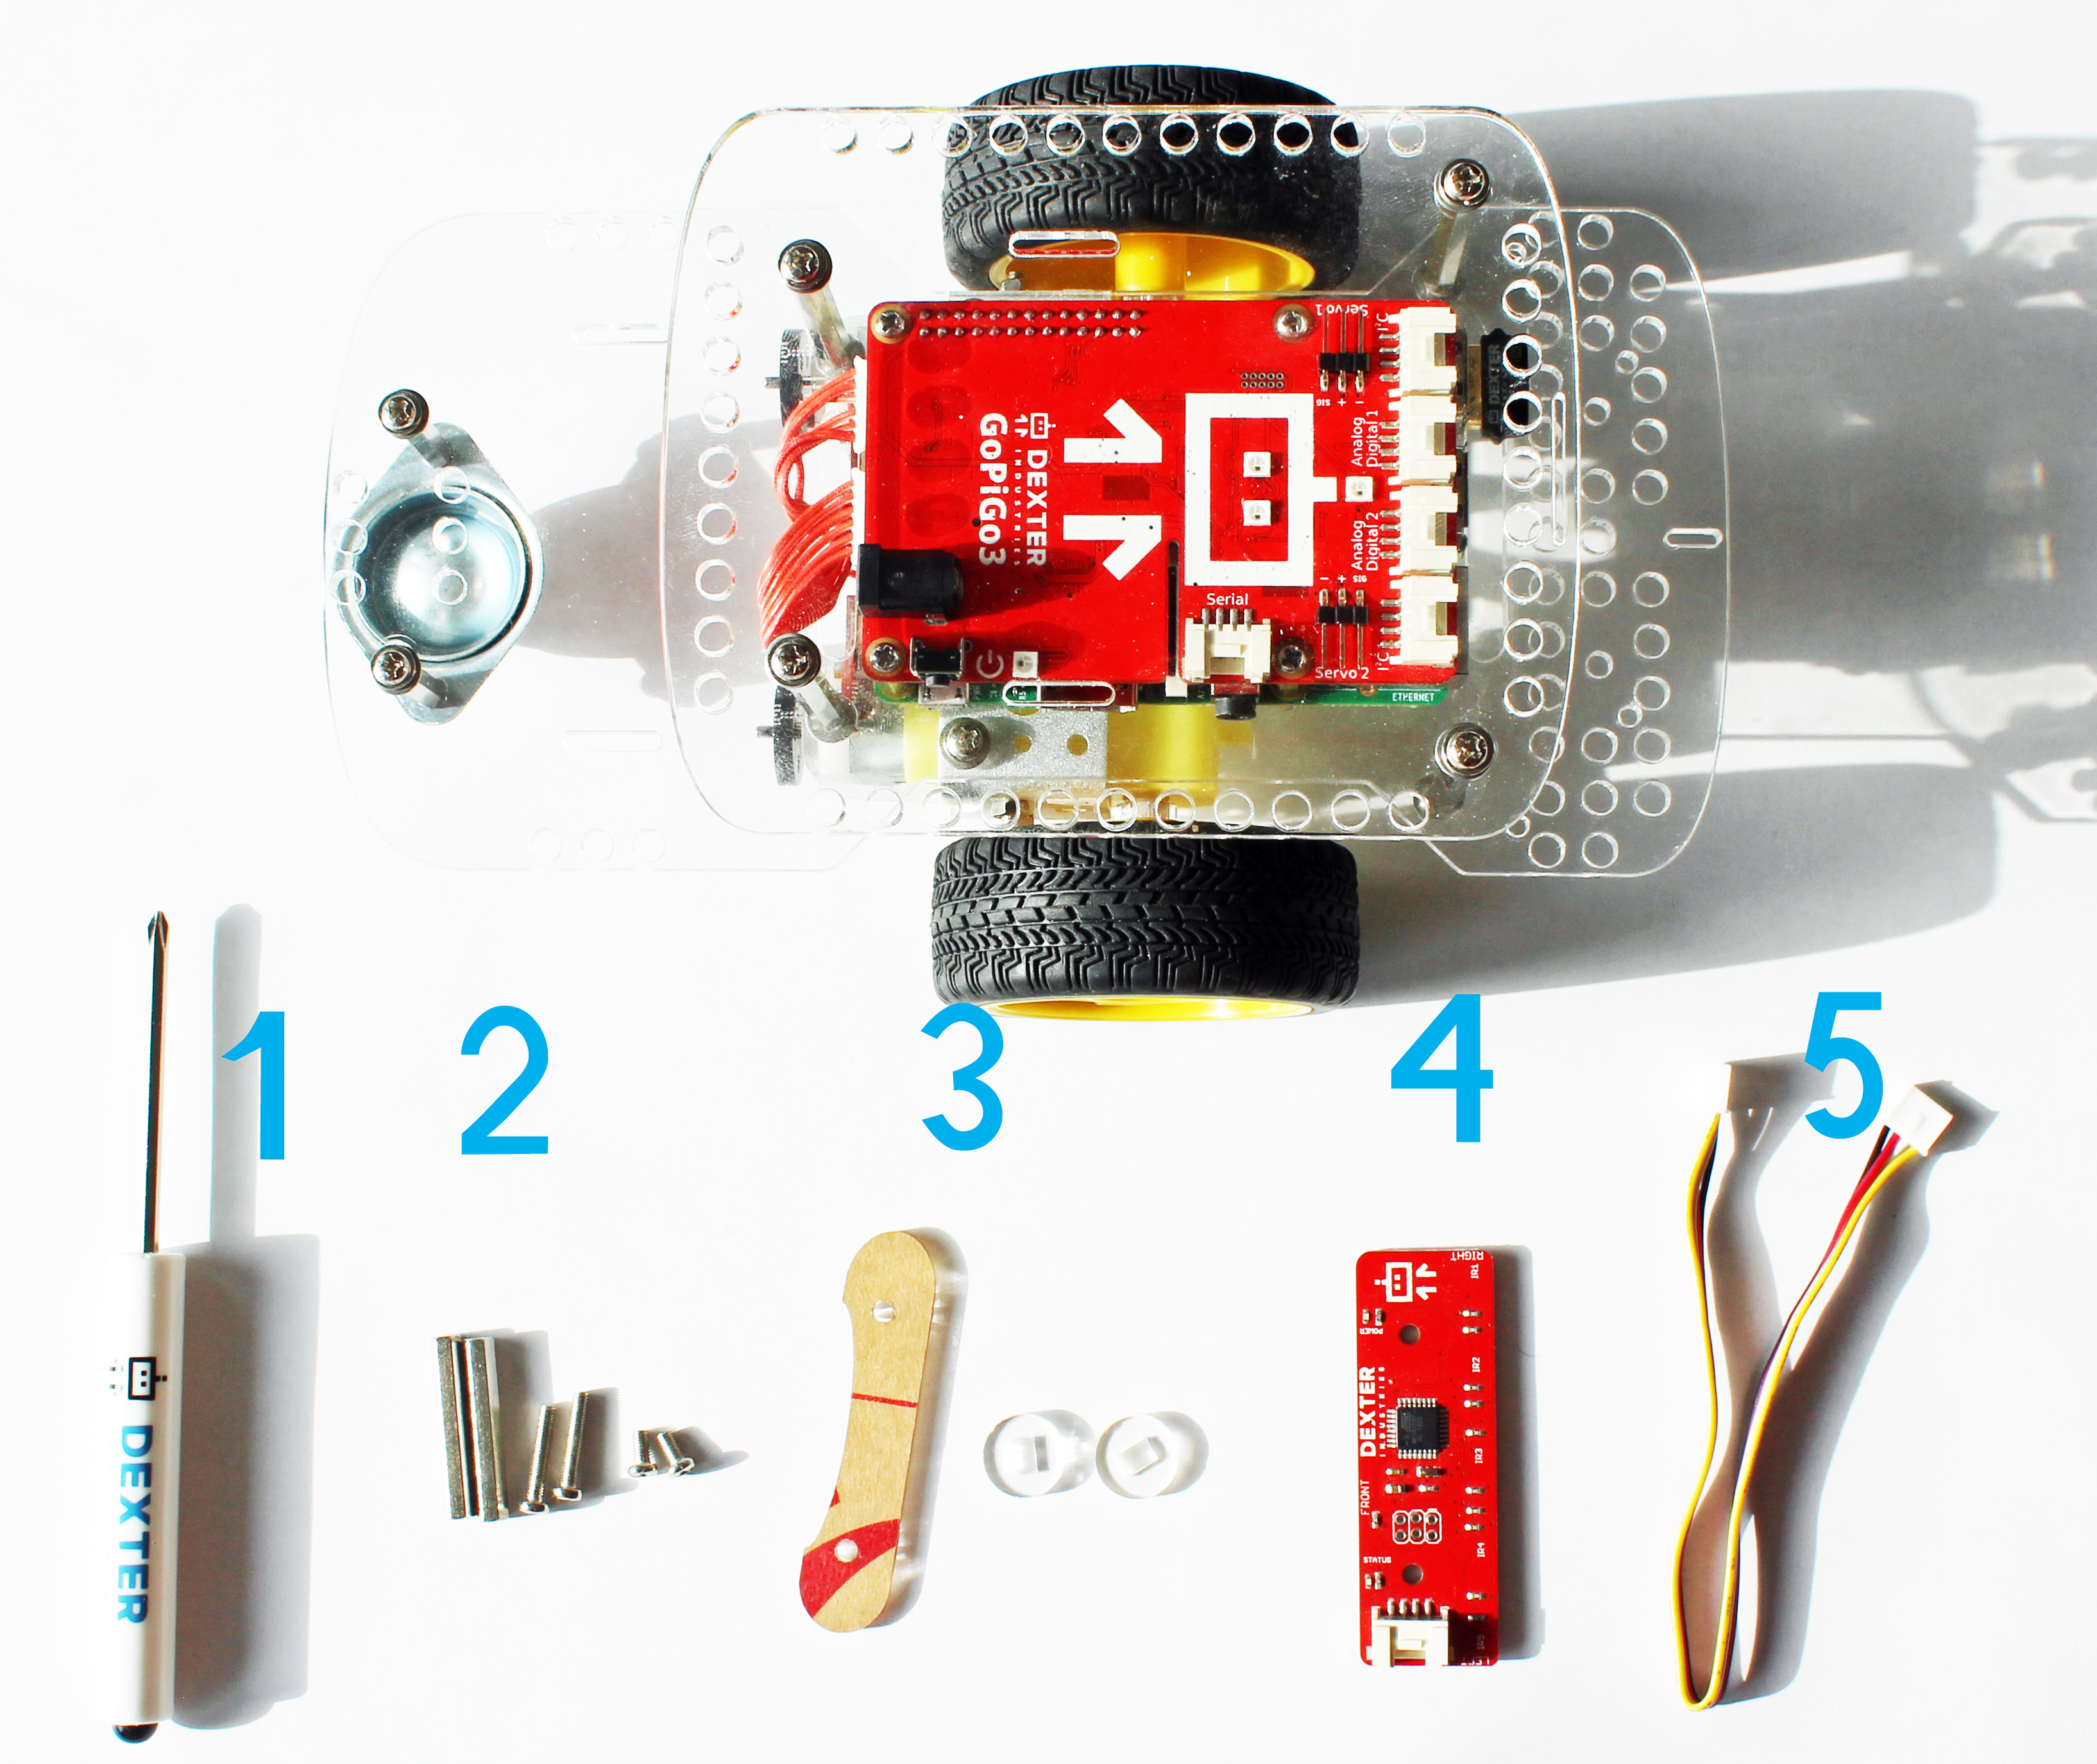 To assemble the GoPiGo Line Follower you will need the following:
- A Dexter Industries Screwdriver that came with your GoPiGo3 (1)
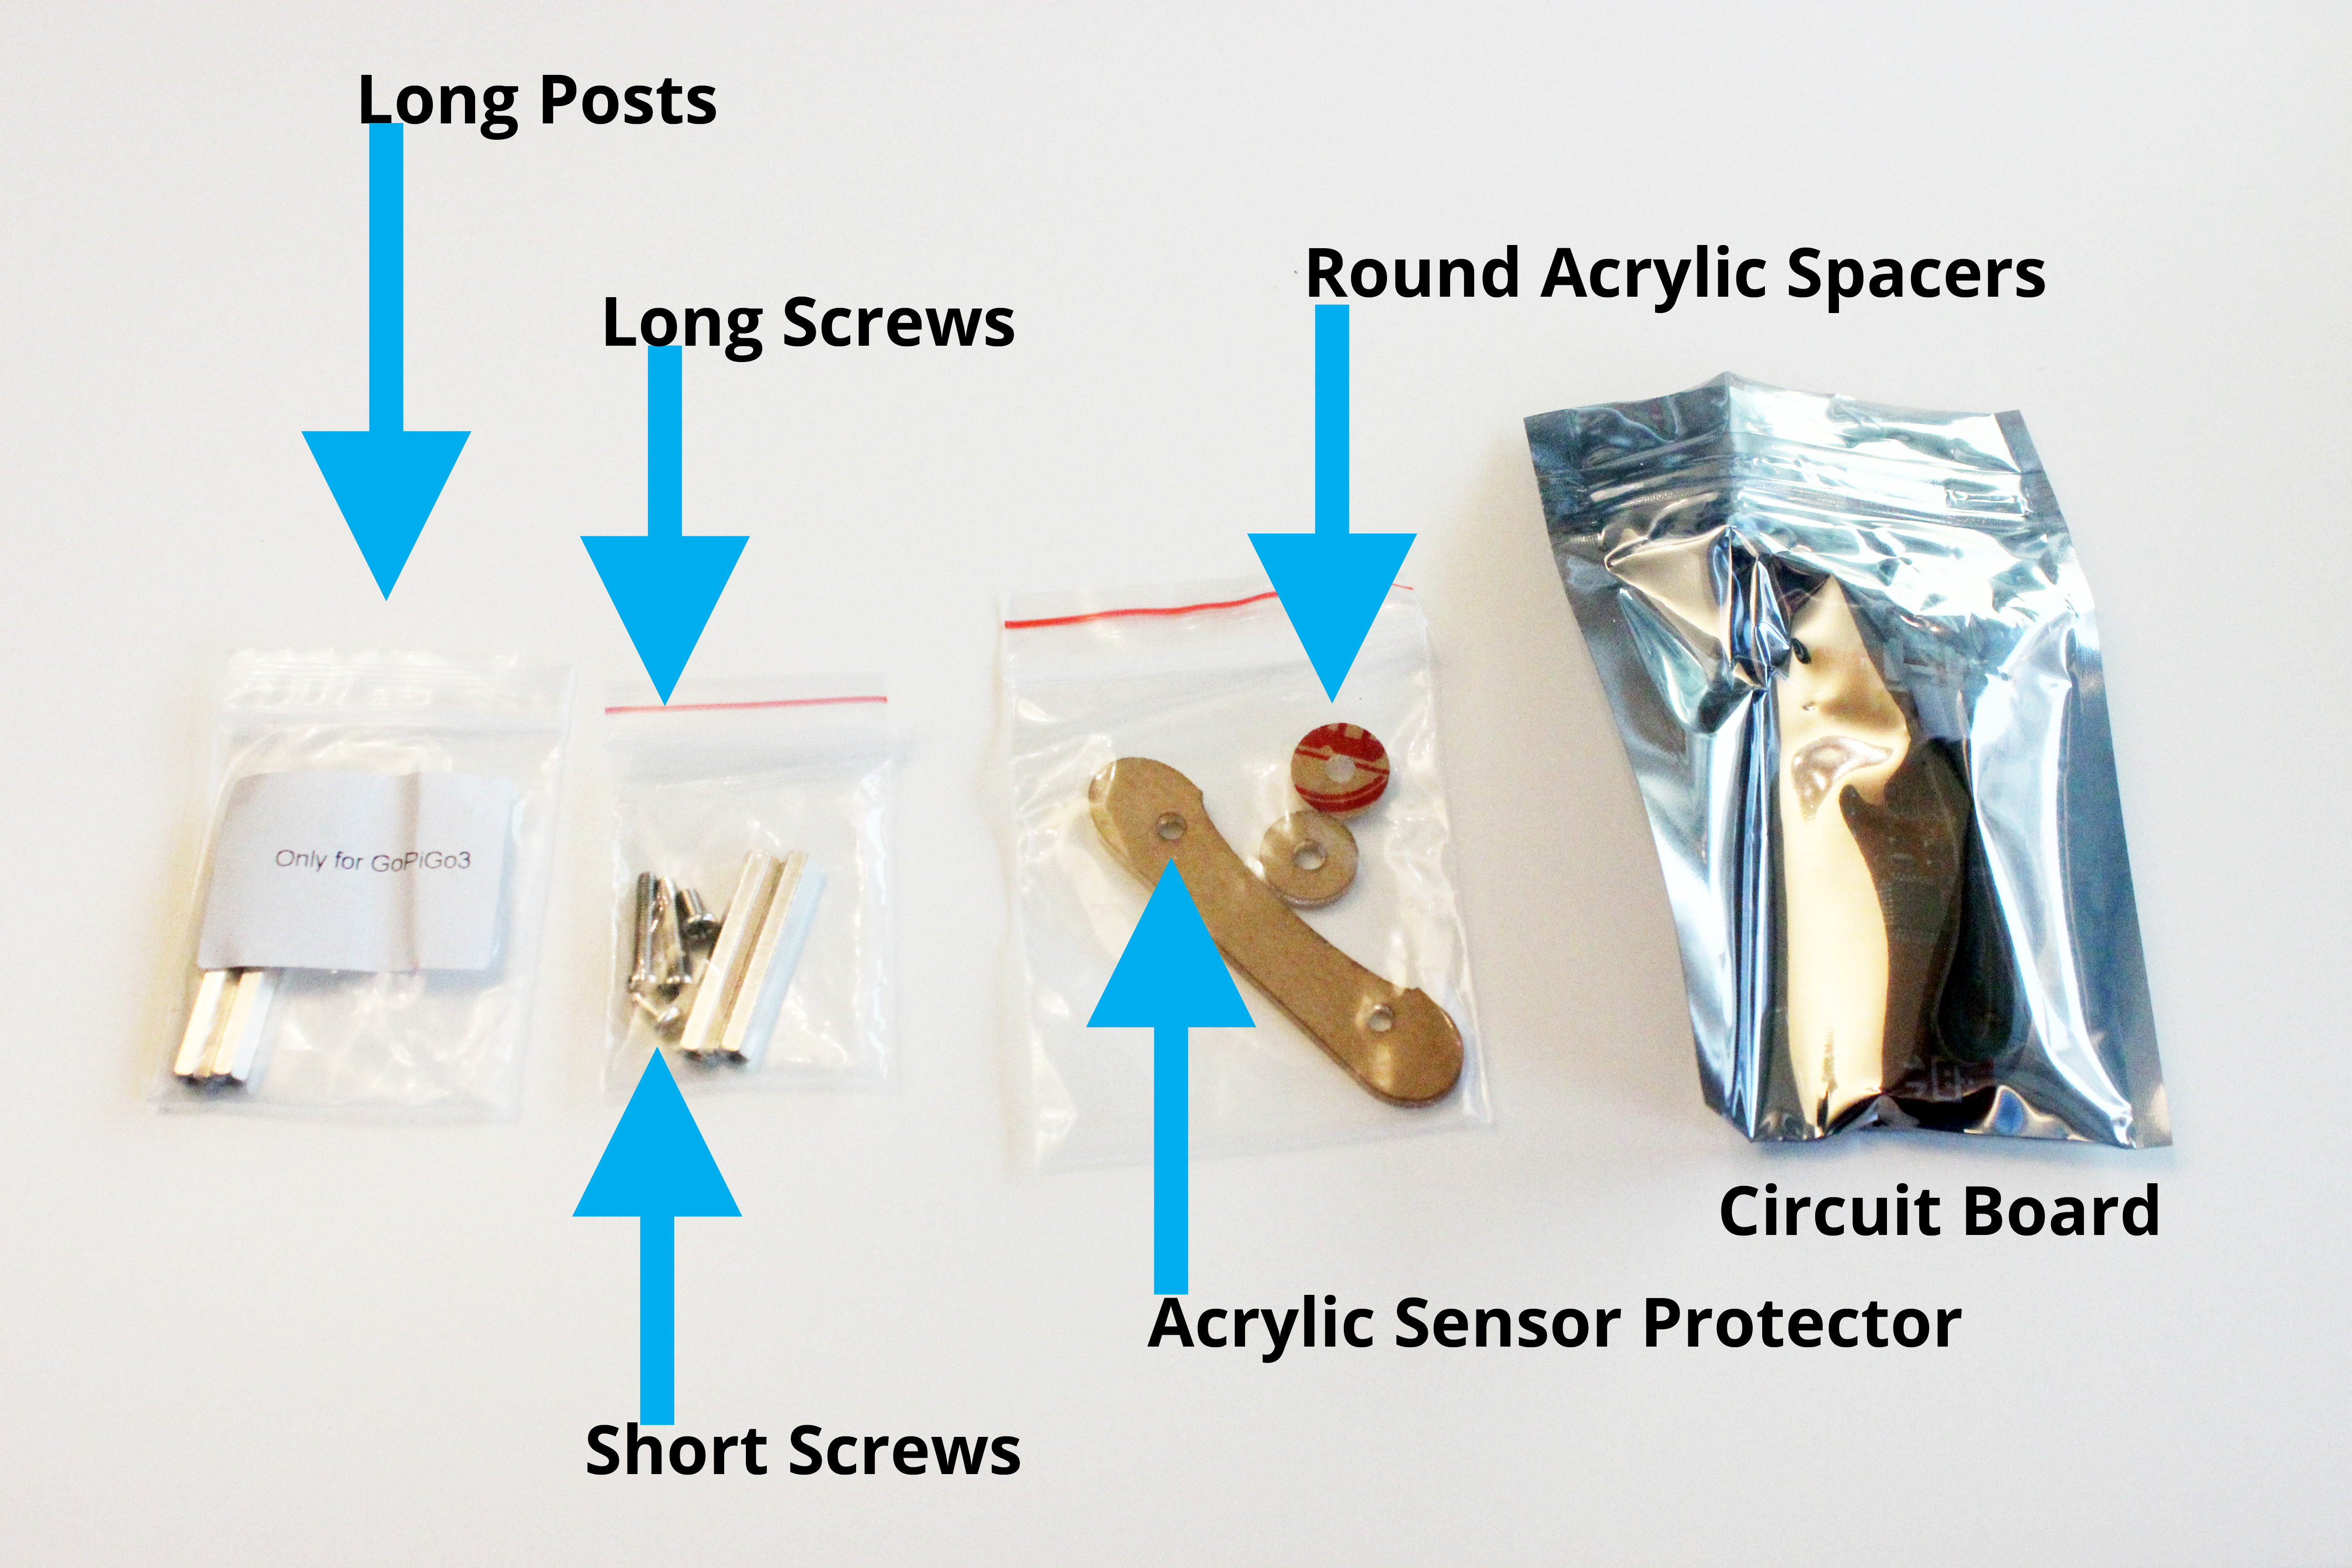
- 1 bag of screws and hardware (2)
- 1 bag of acrylic parts (3)
- 1 Line Follower Circuit Board (4)
- 1 Sensor cable (5)
Assemble the Line Follower
1. The acrylic parts come with scratch-protective paper or plastic film. Peel it off before continuing. In some of the following steps, we have left the protective coating on to help show the acrylic in the step better.
2. In this step we will line up the acrylic sensor protector. Find the bottom of the Line Follower Circuit Board. Note the parts lined up below, we will be moving from left to right.
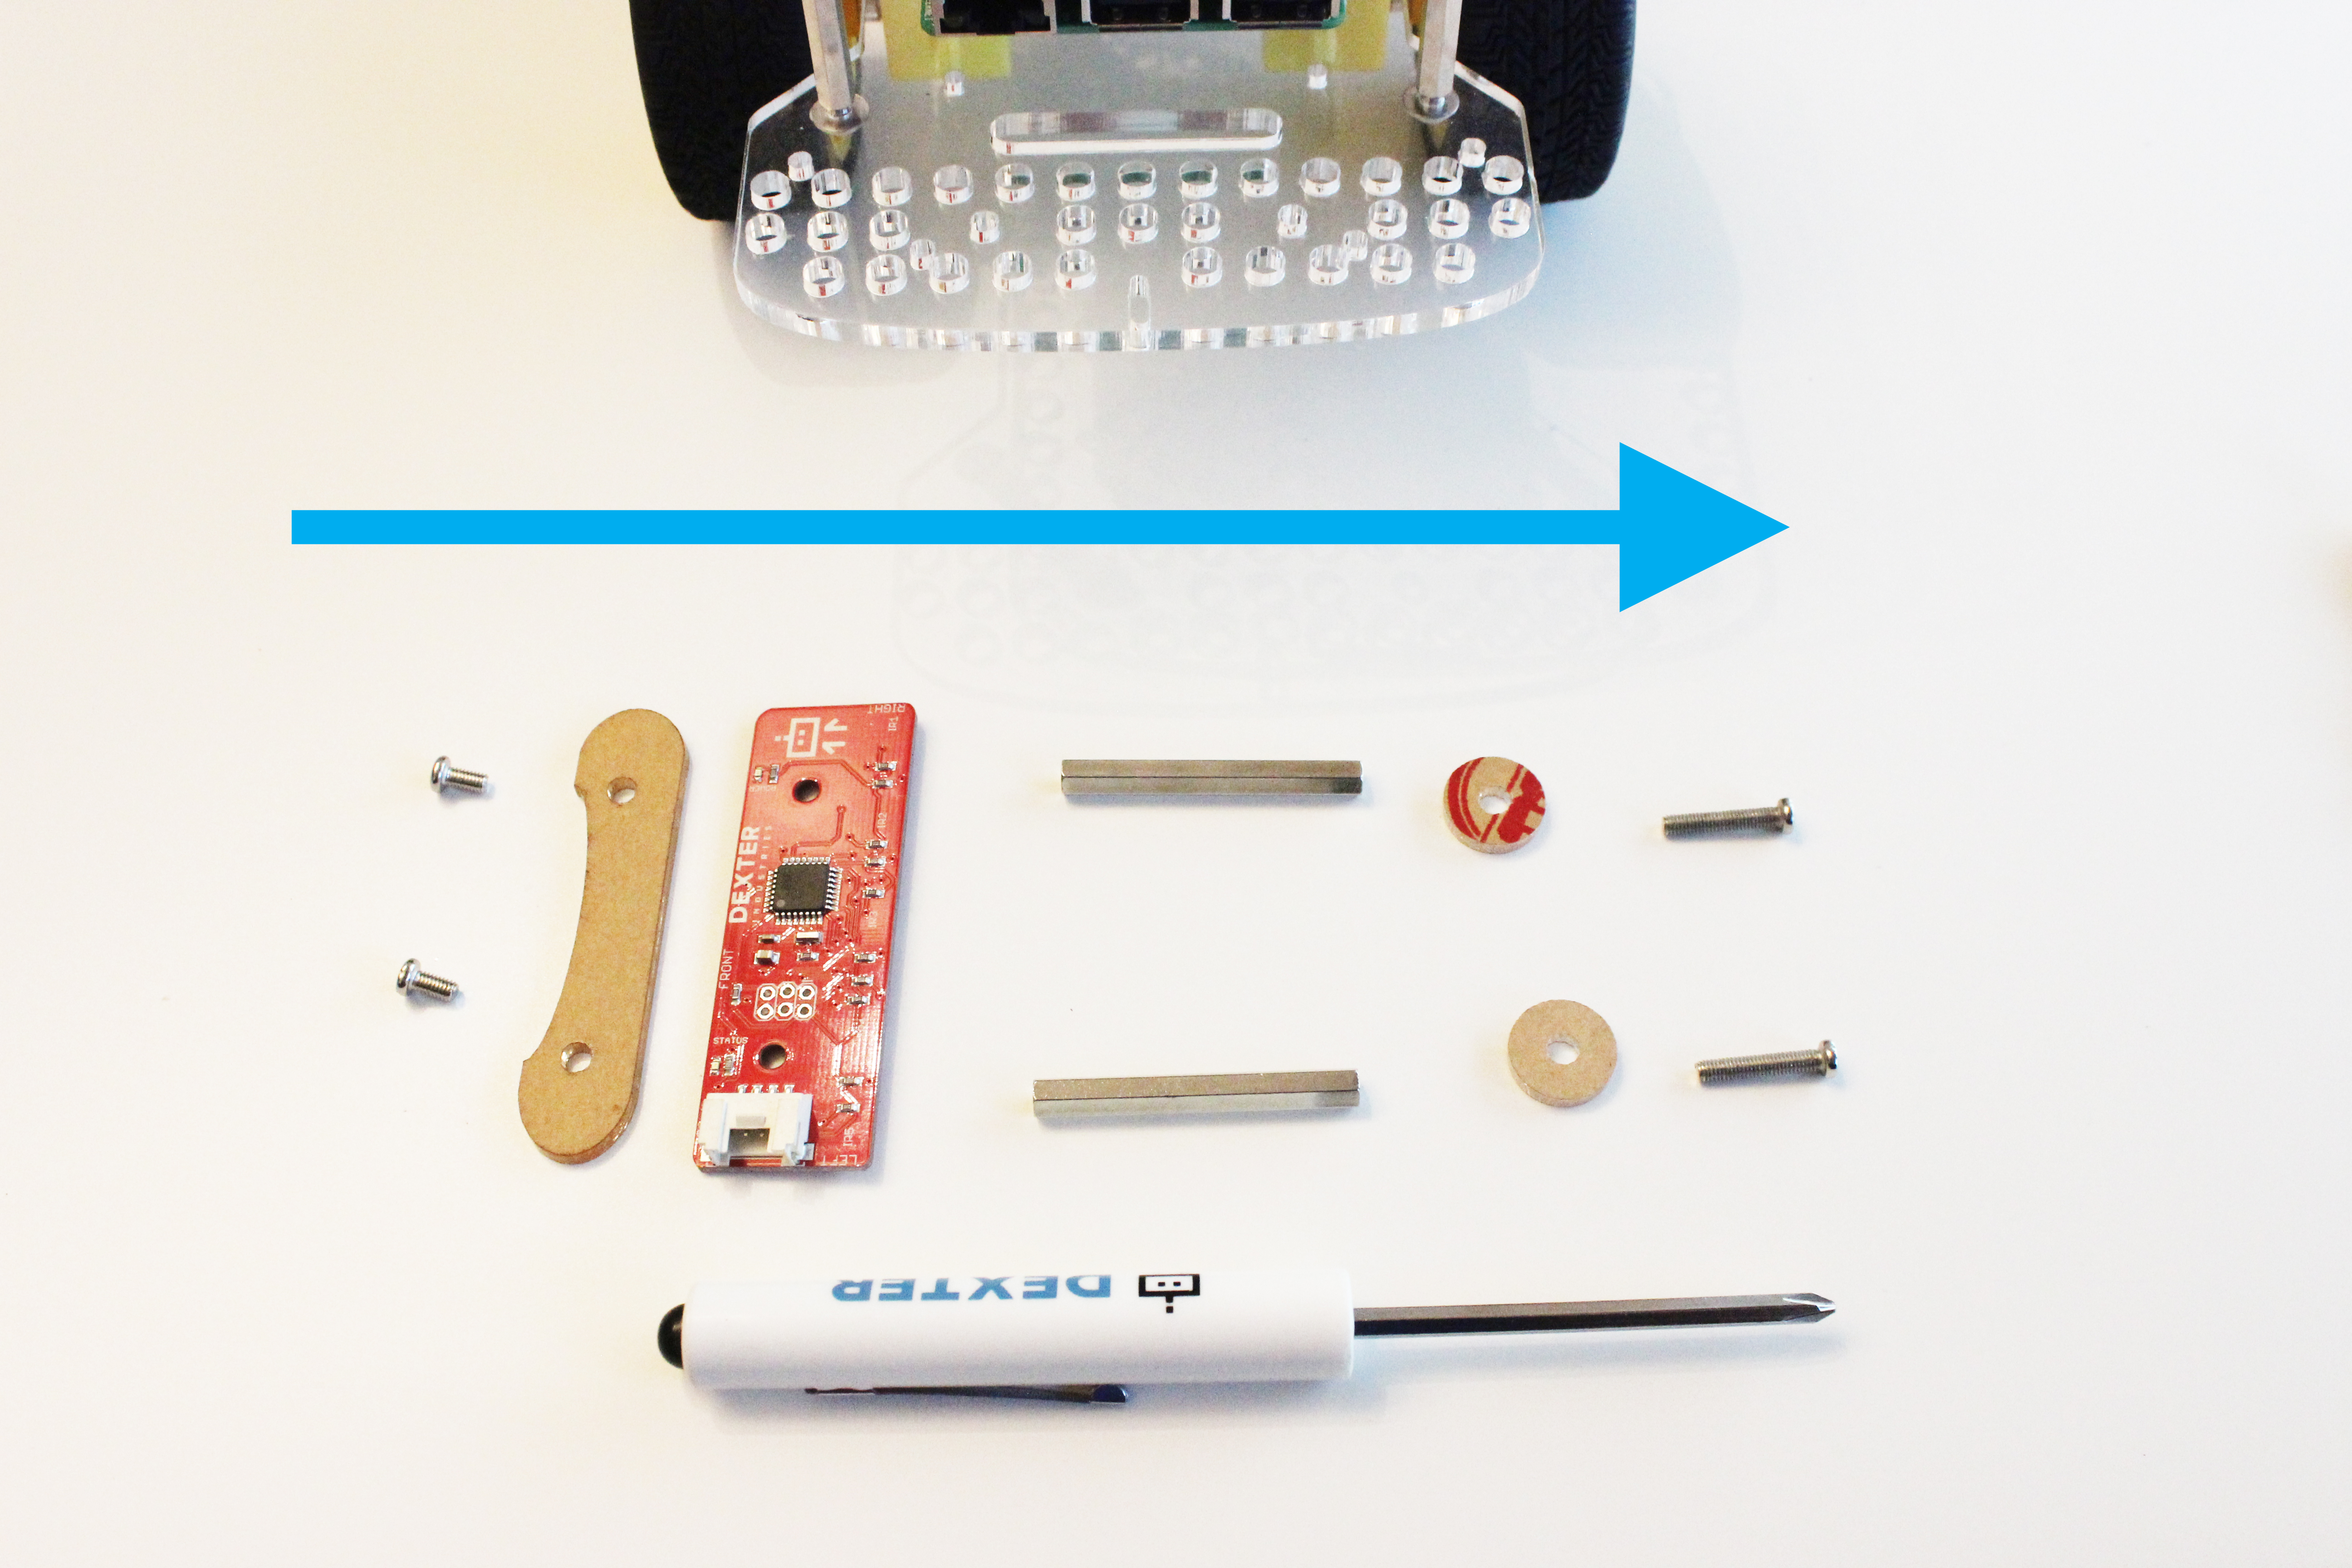
The bottom of the circuit board has five black colored plastic sensors on it. Place the acrylic sensor protector on this side of the board and line the holes in the circuit board with the holes in the acrylic protector.
Take the short screws and slide them through the acrylic and then the PCB.

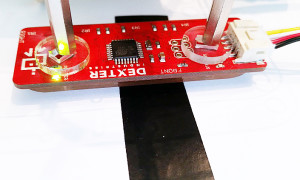
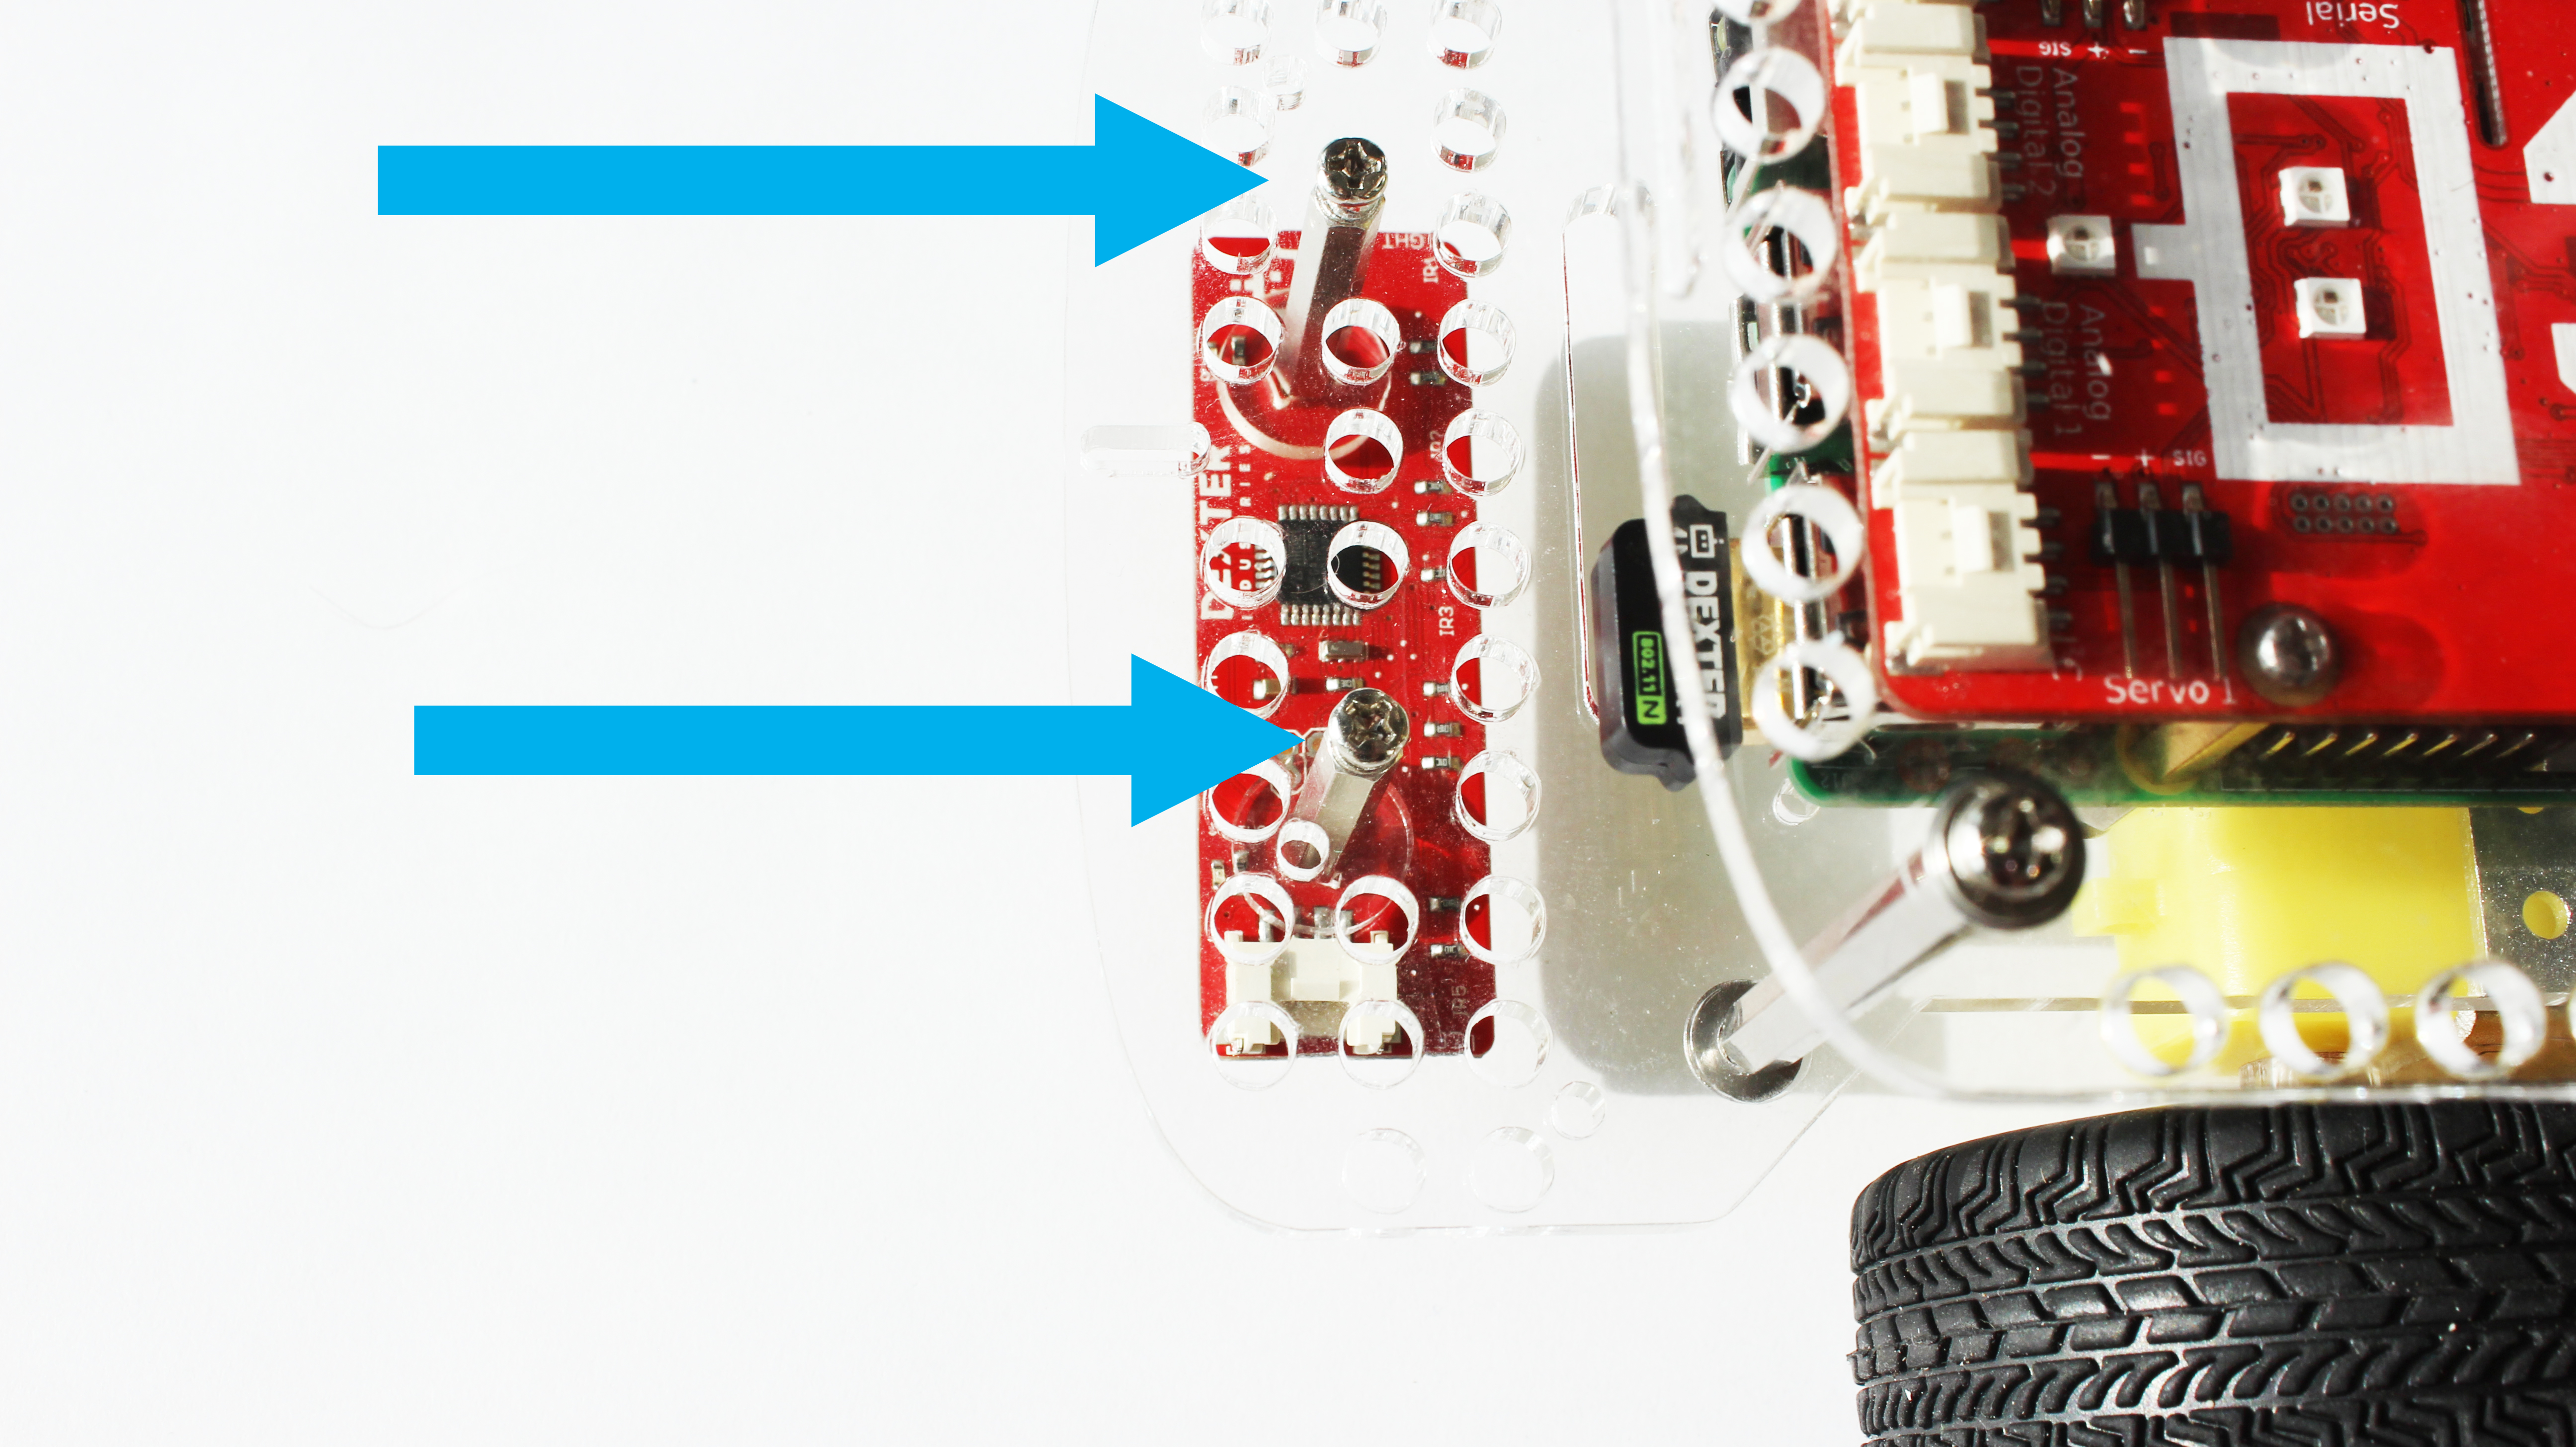
3. Turn the Linefollower circuit board over, with the screws pointing upwards. Find the two long hex posts.
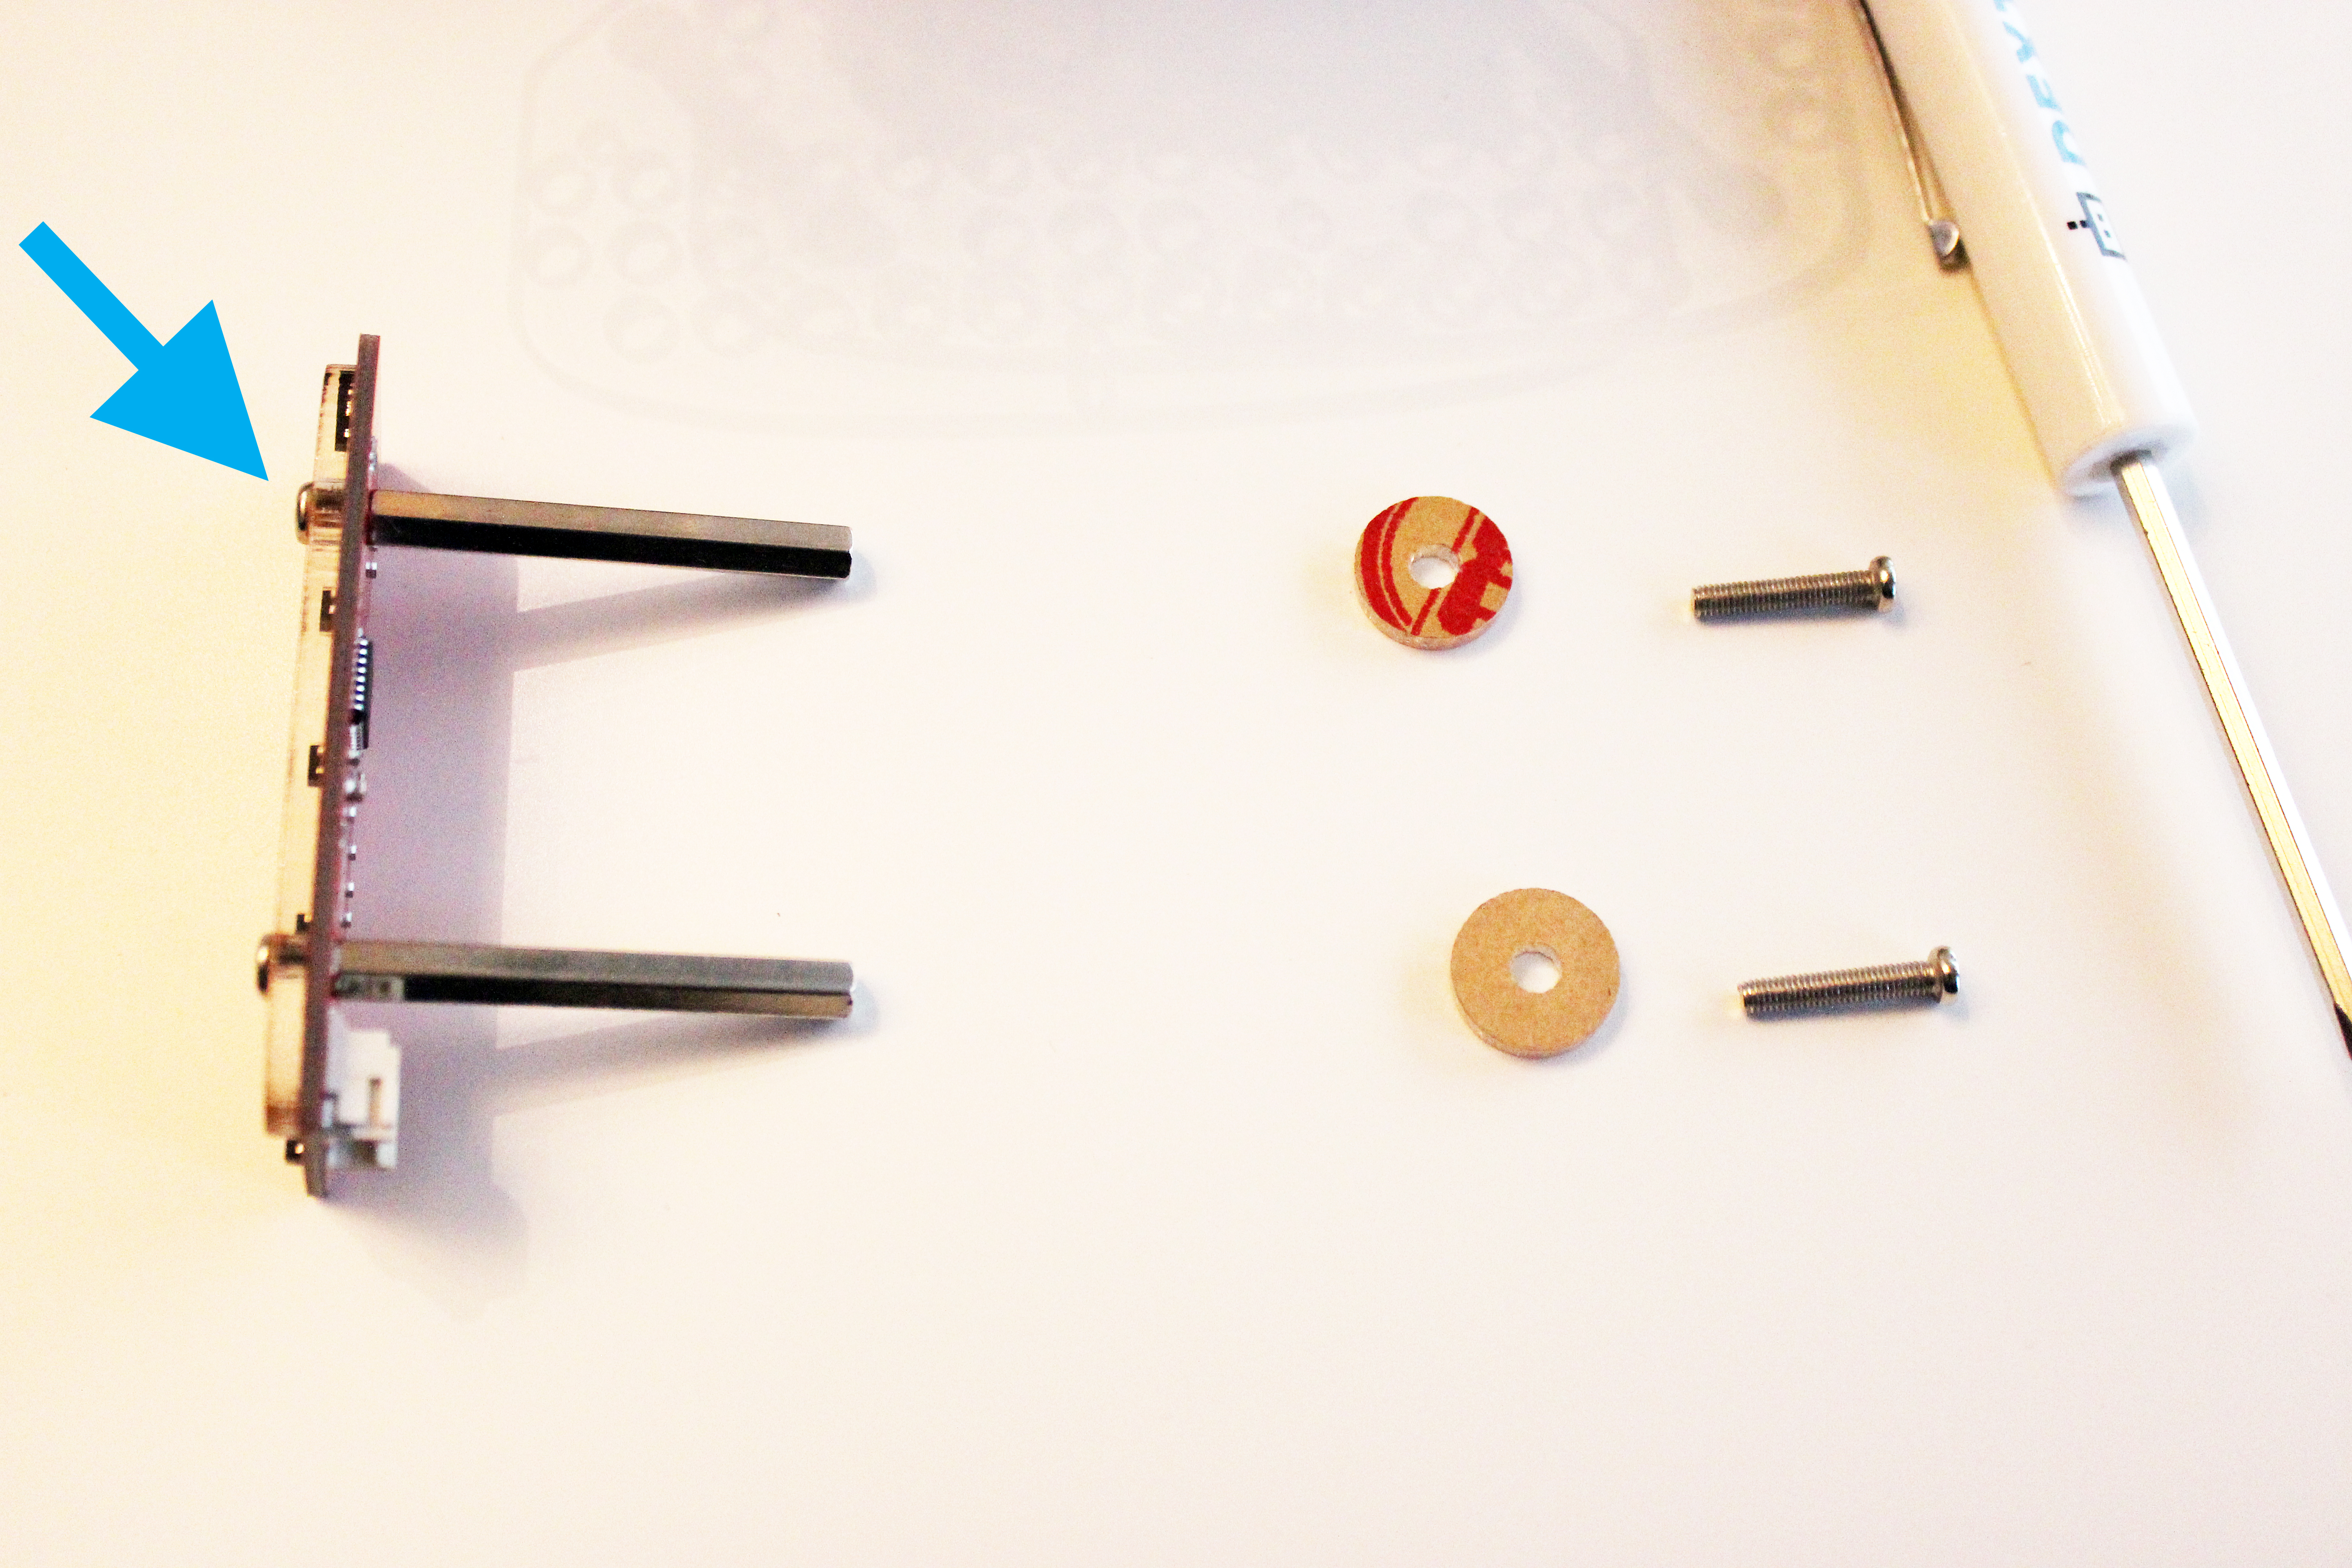
In the above picture, the top arrow points towards the short screws pointing through the circuit board. Take the hex posts and screw them onto the line follower.
Note that the line follower circuit board has orientation labels on it: left, right, and front of the sensor.
4. Attach the line follower to the GoPiGo3 Board. Find the two line follower holes on the front of the GoPiGo3 body. Remember that the front of the GoPiGo3 is the opposite end of the battery pack holder!
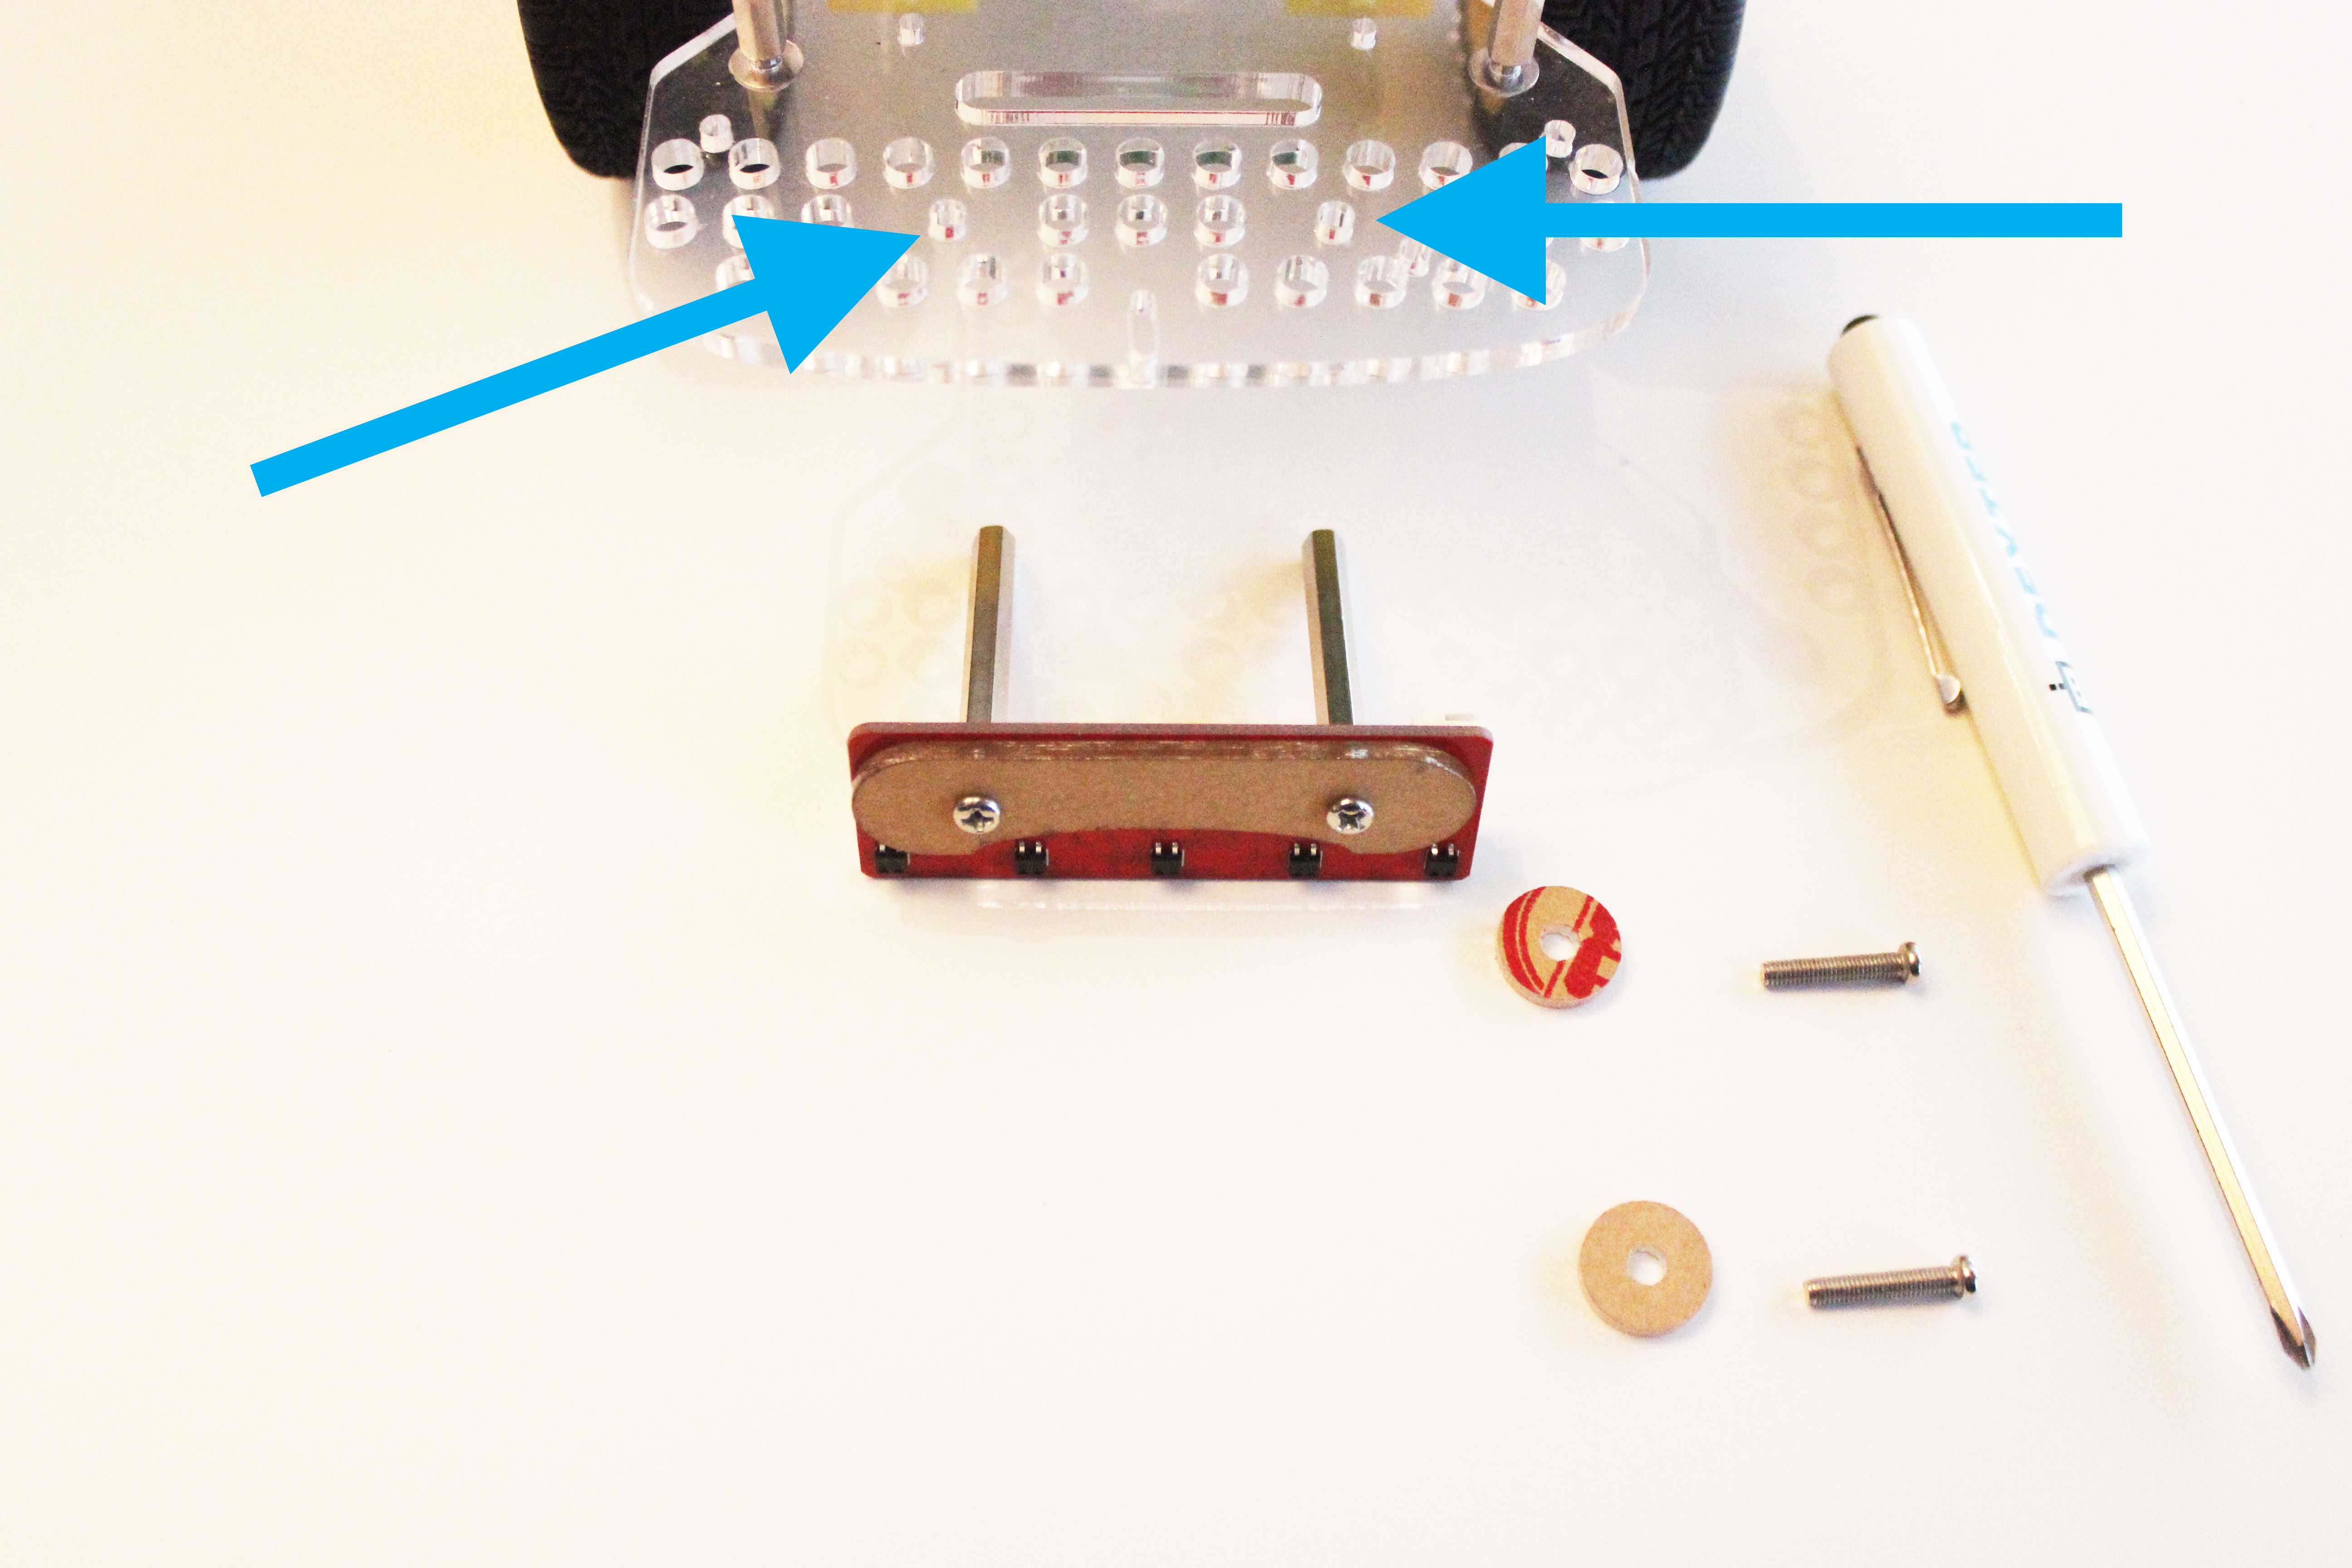
We will place the acrylic spacers over the holes on the GoPiGo3, and slide the screws through the spacers and the holes on the GoPiGo3.
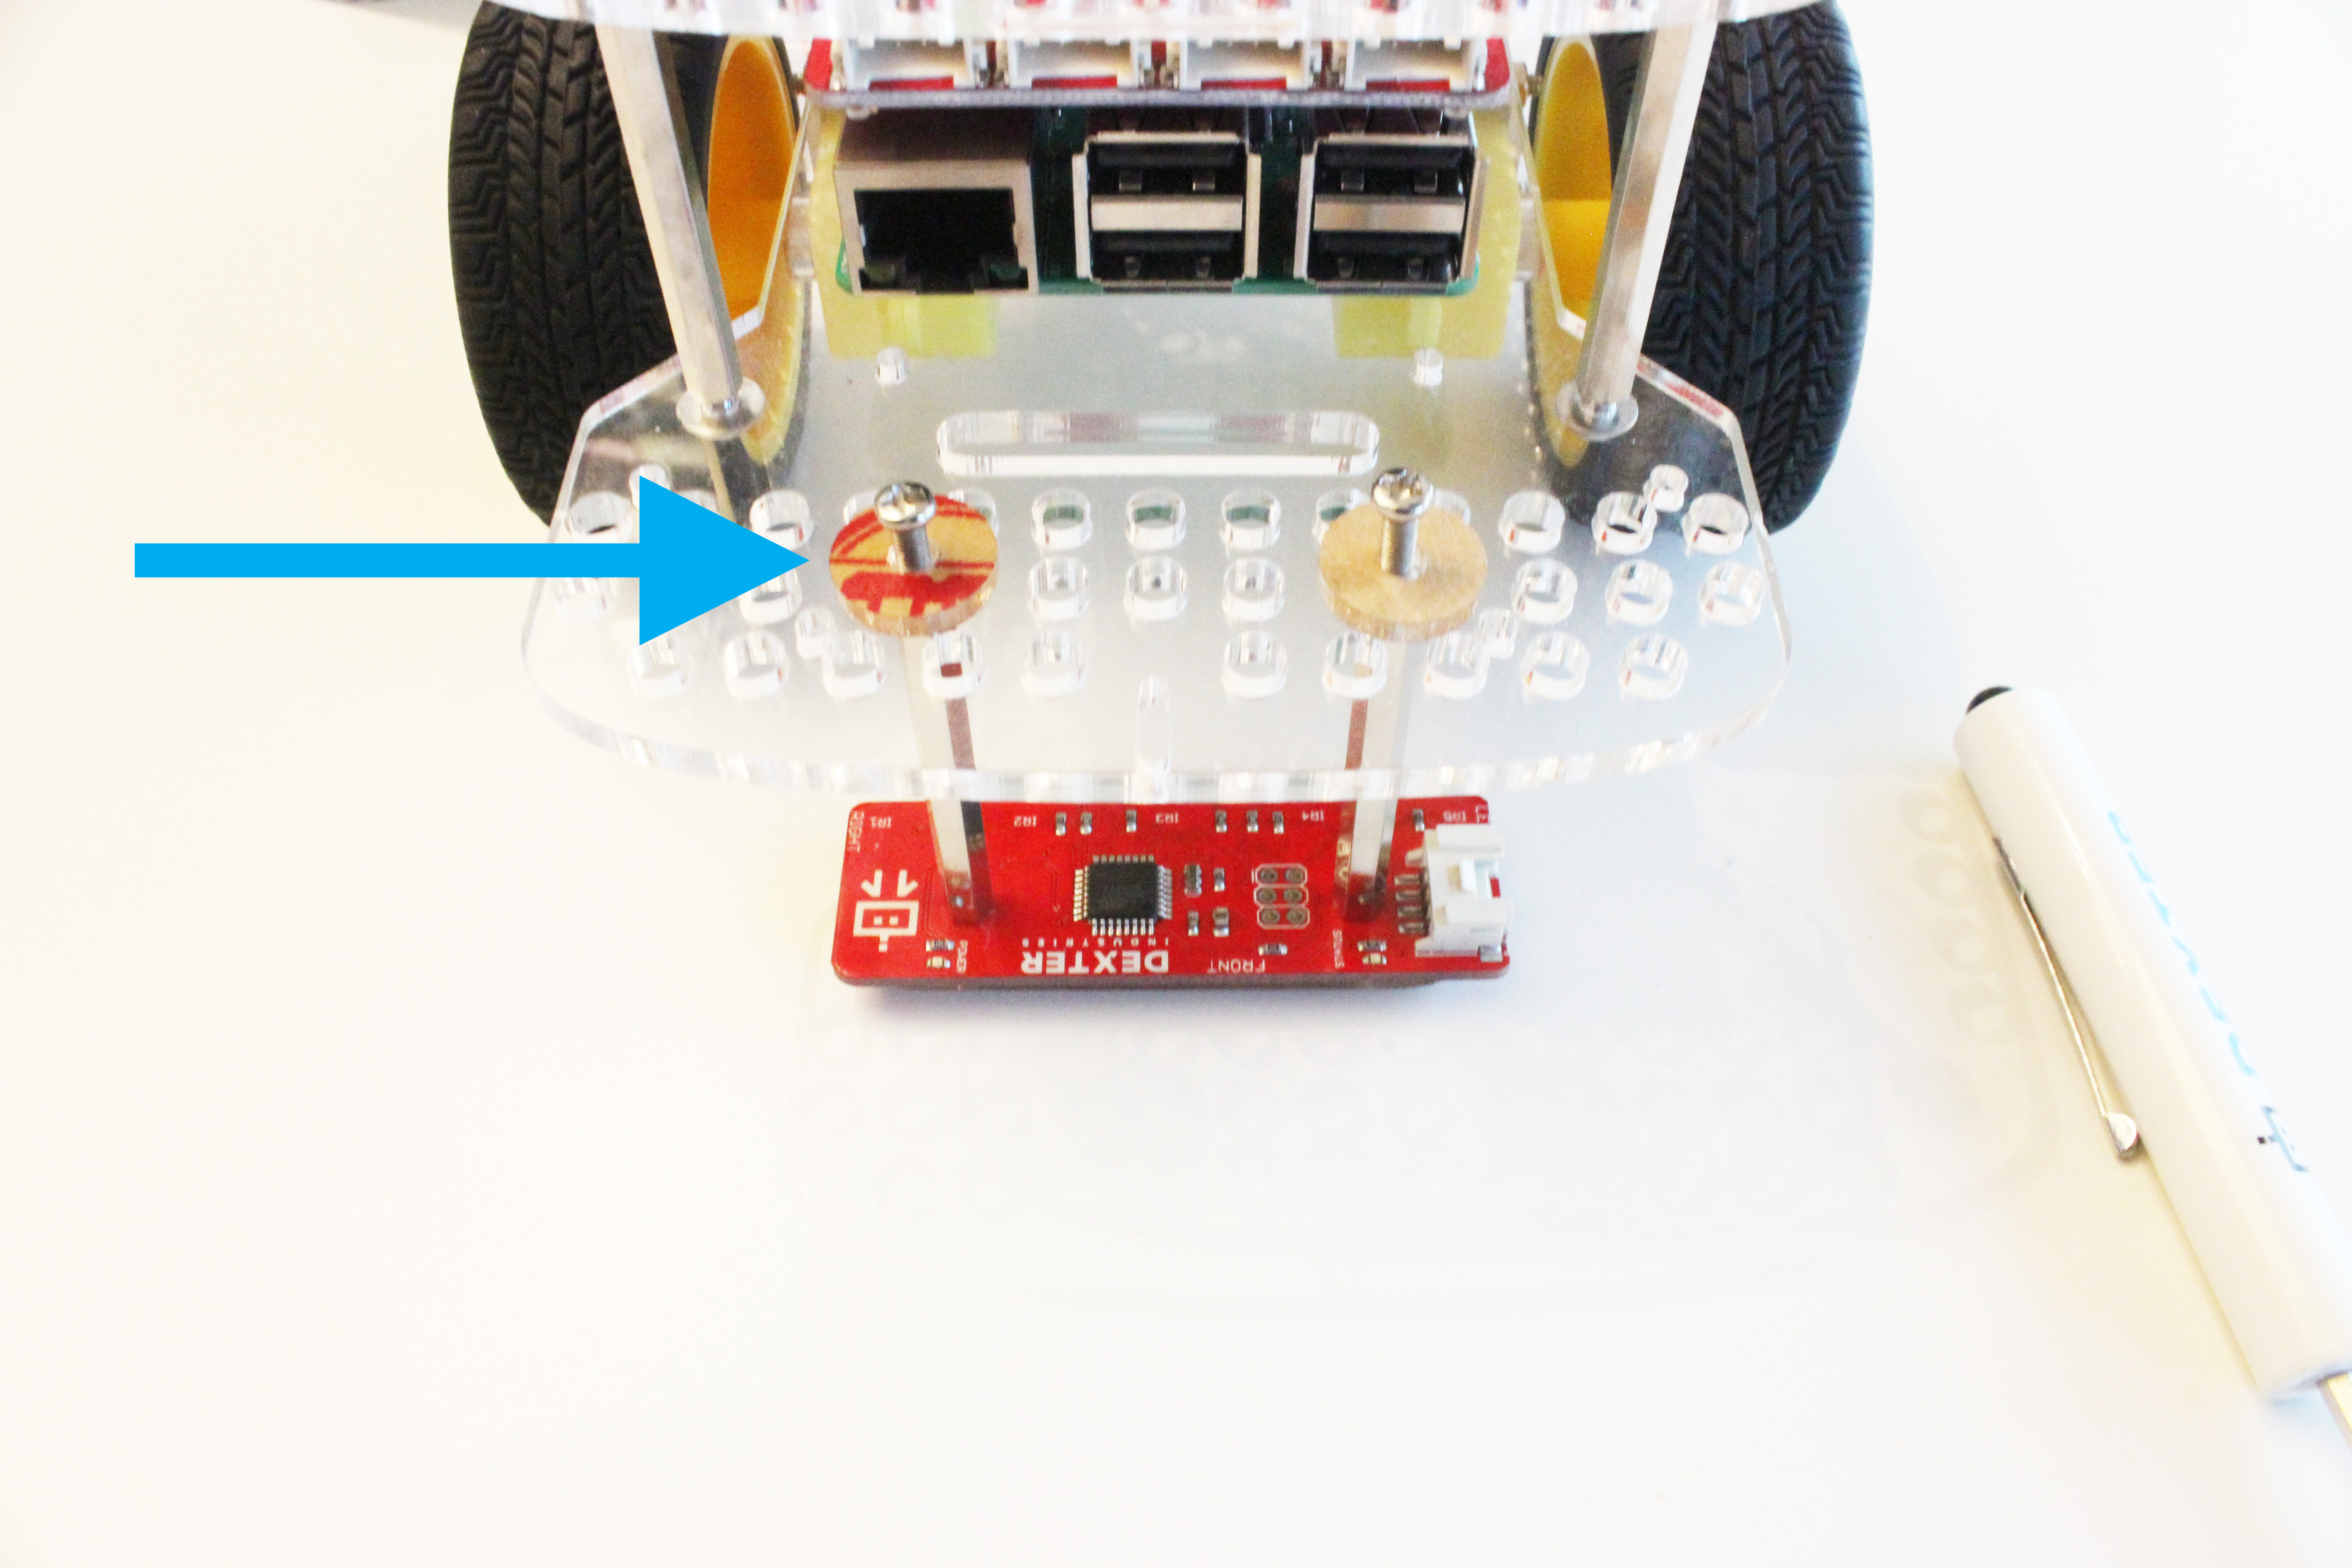
Line up the hex posts with these holes on the GoPiGo3. Screw them in with the shorter screws that came with the Linefollower sensor.
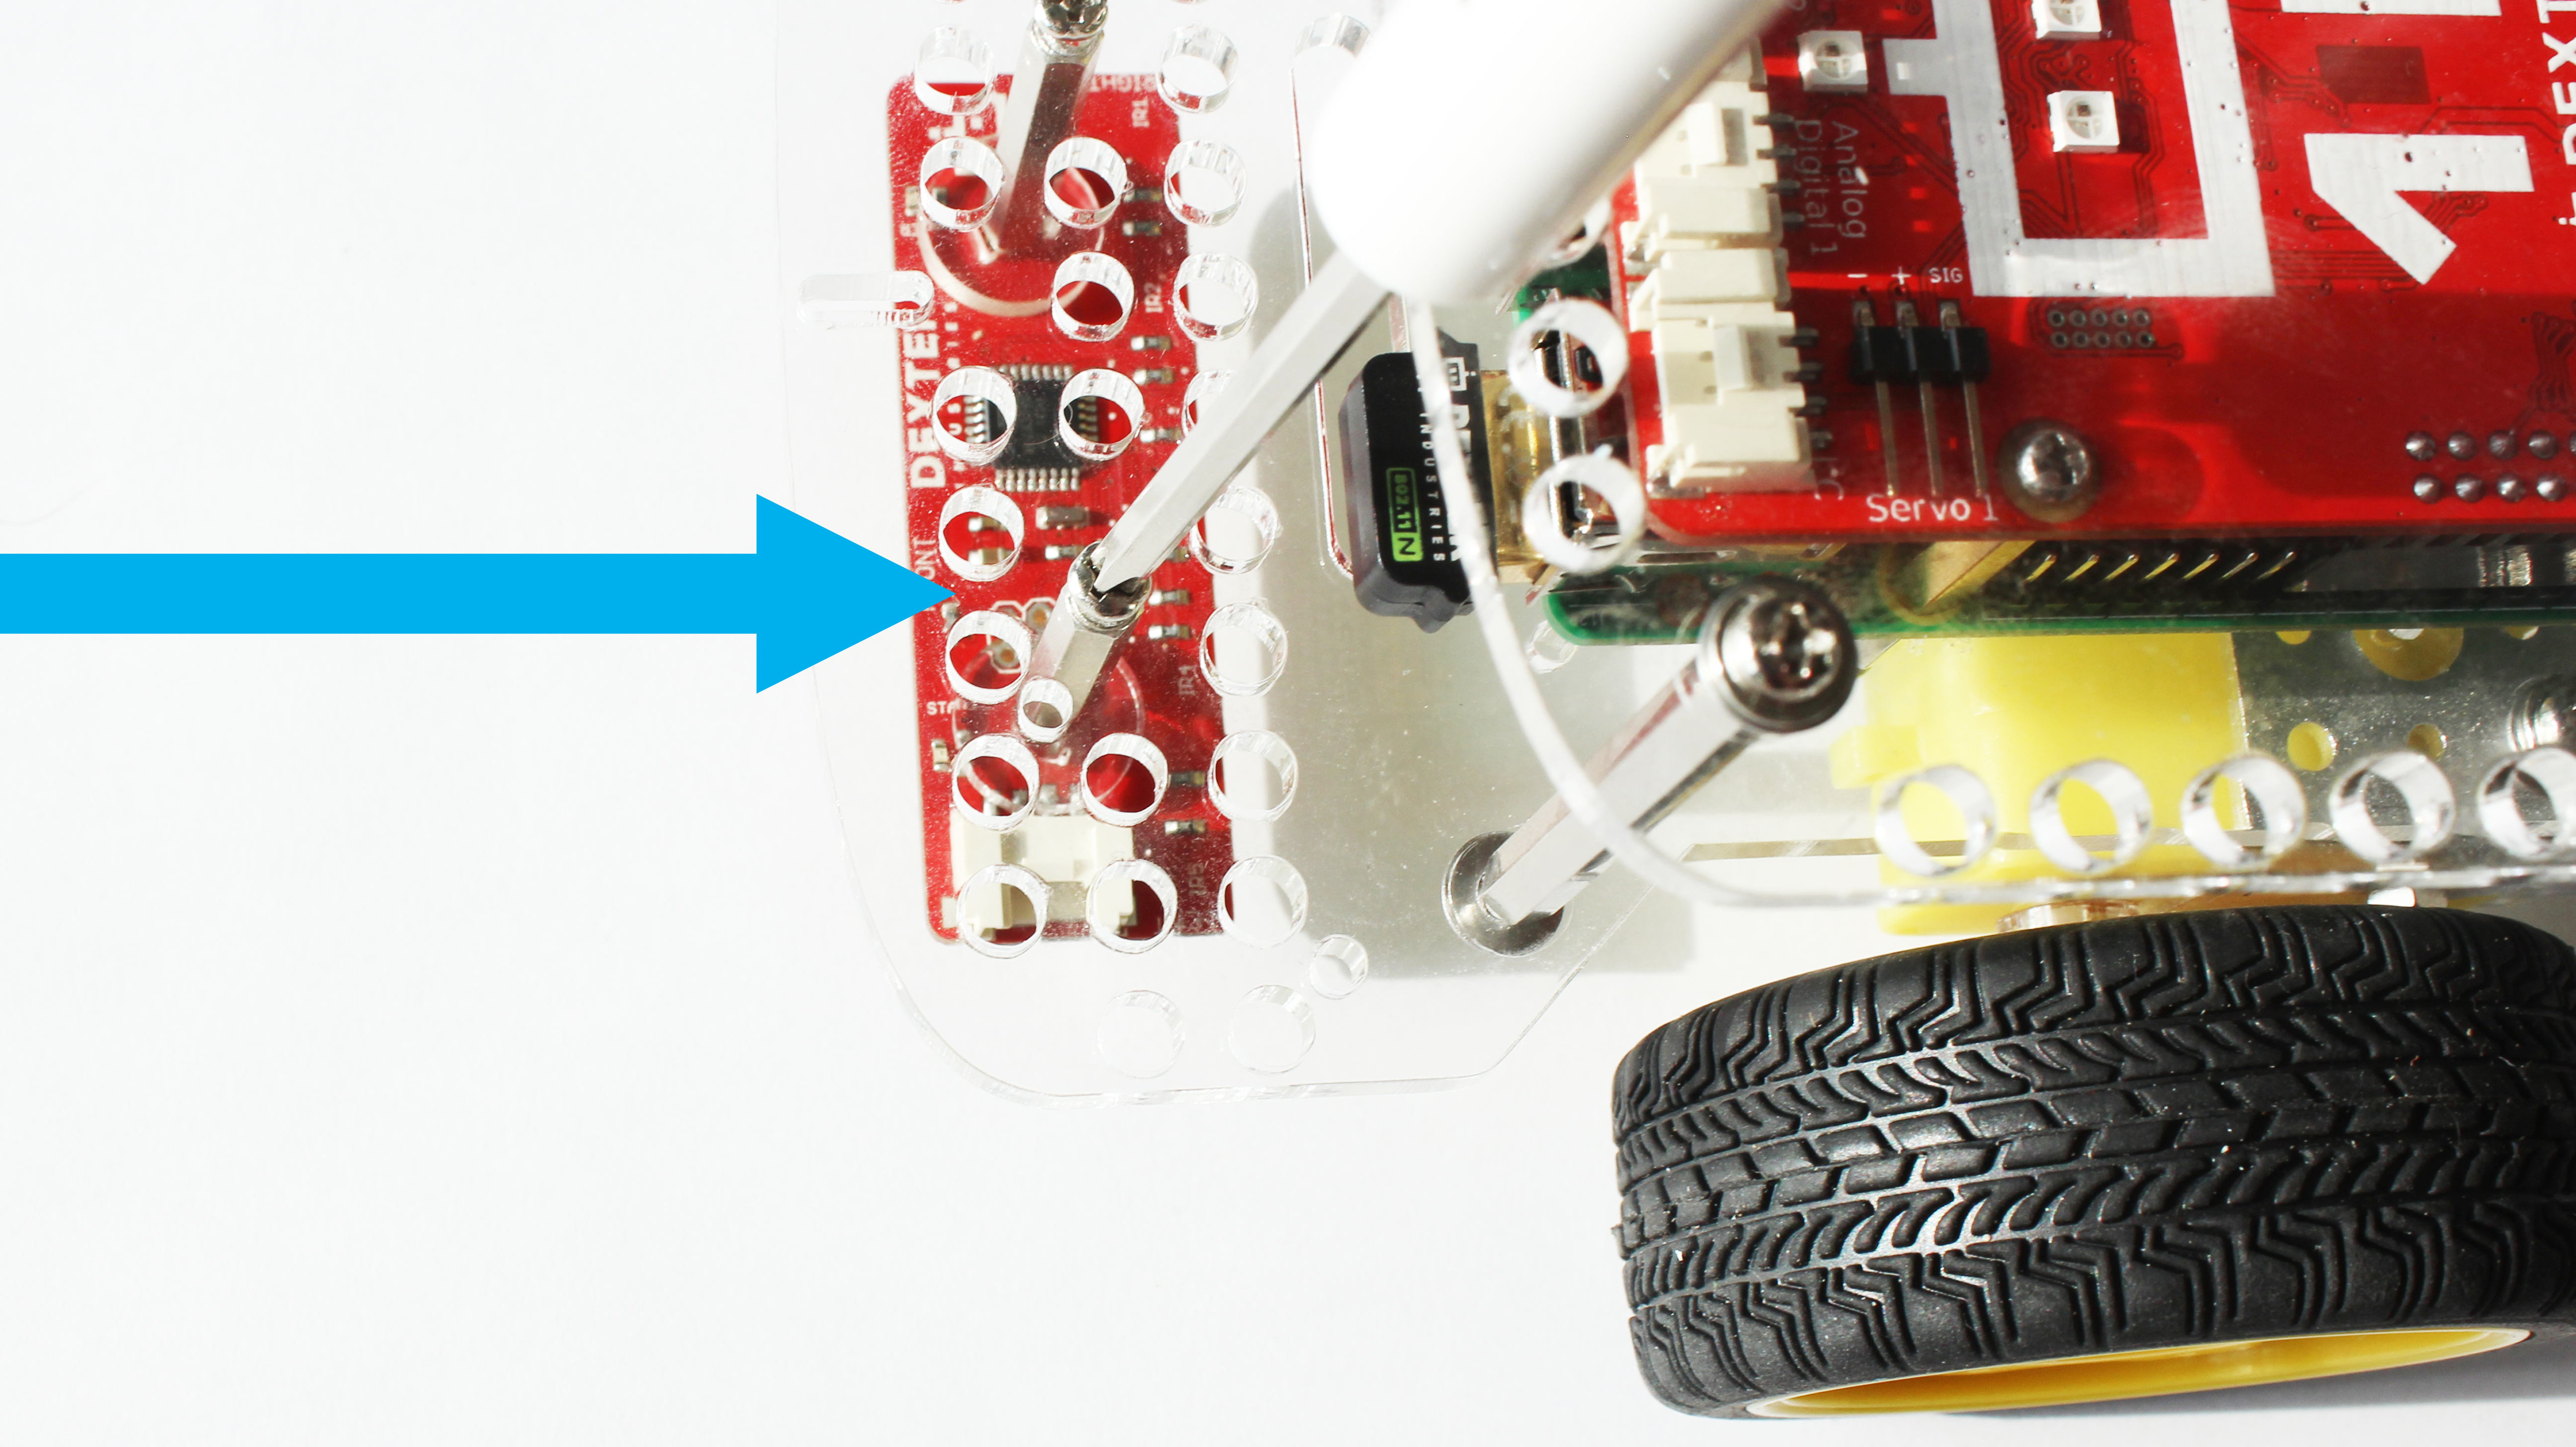
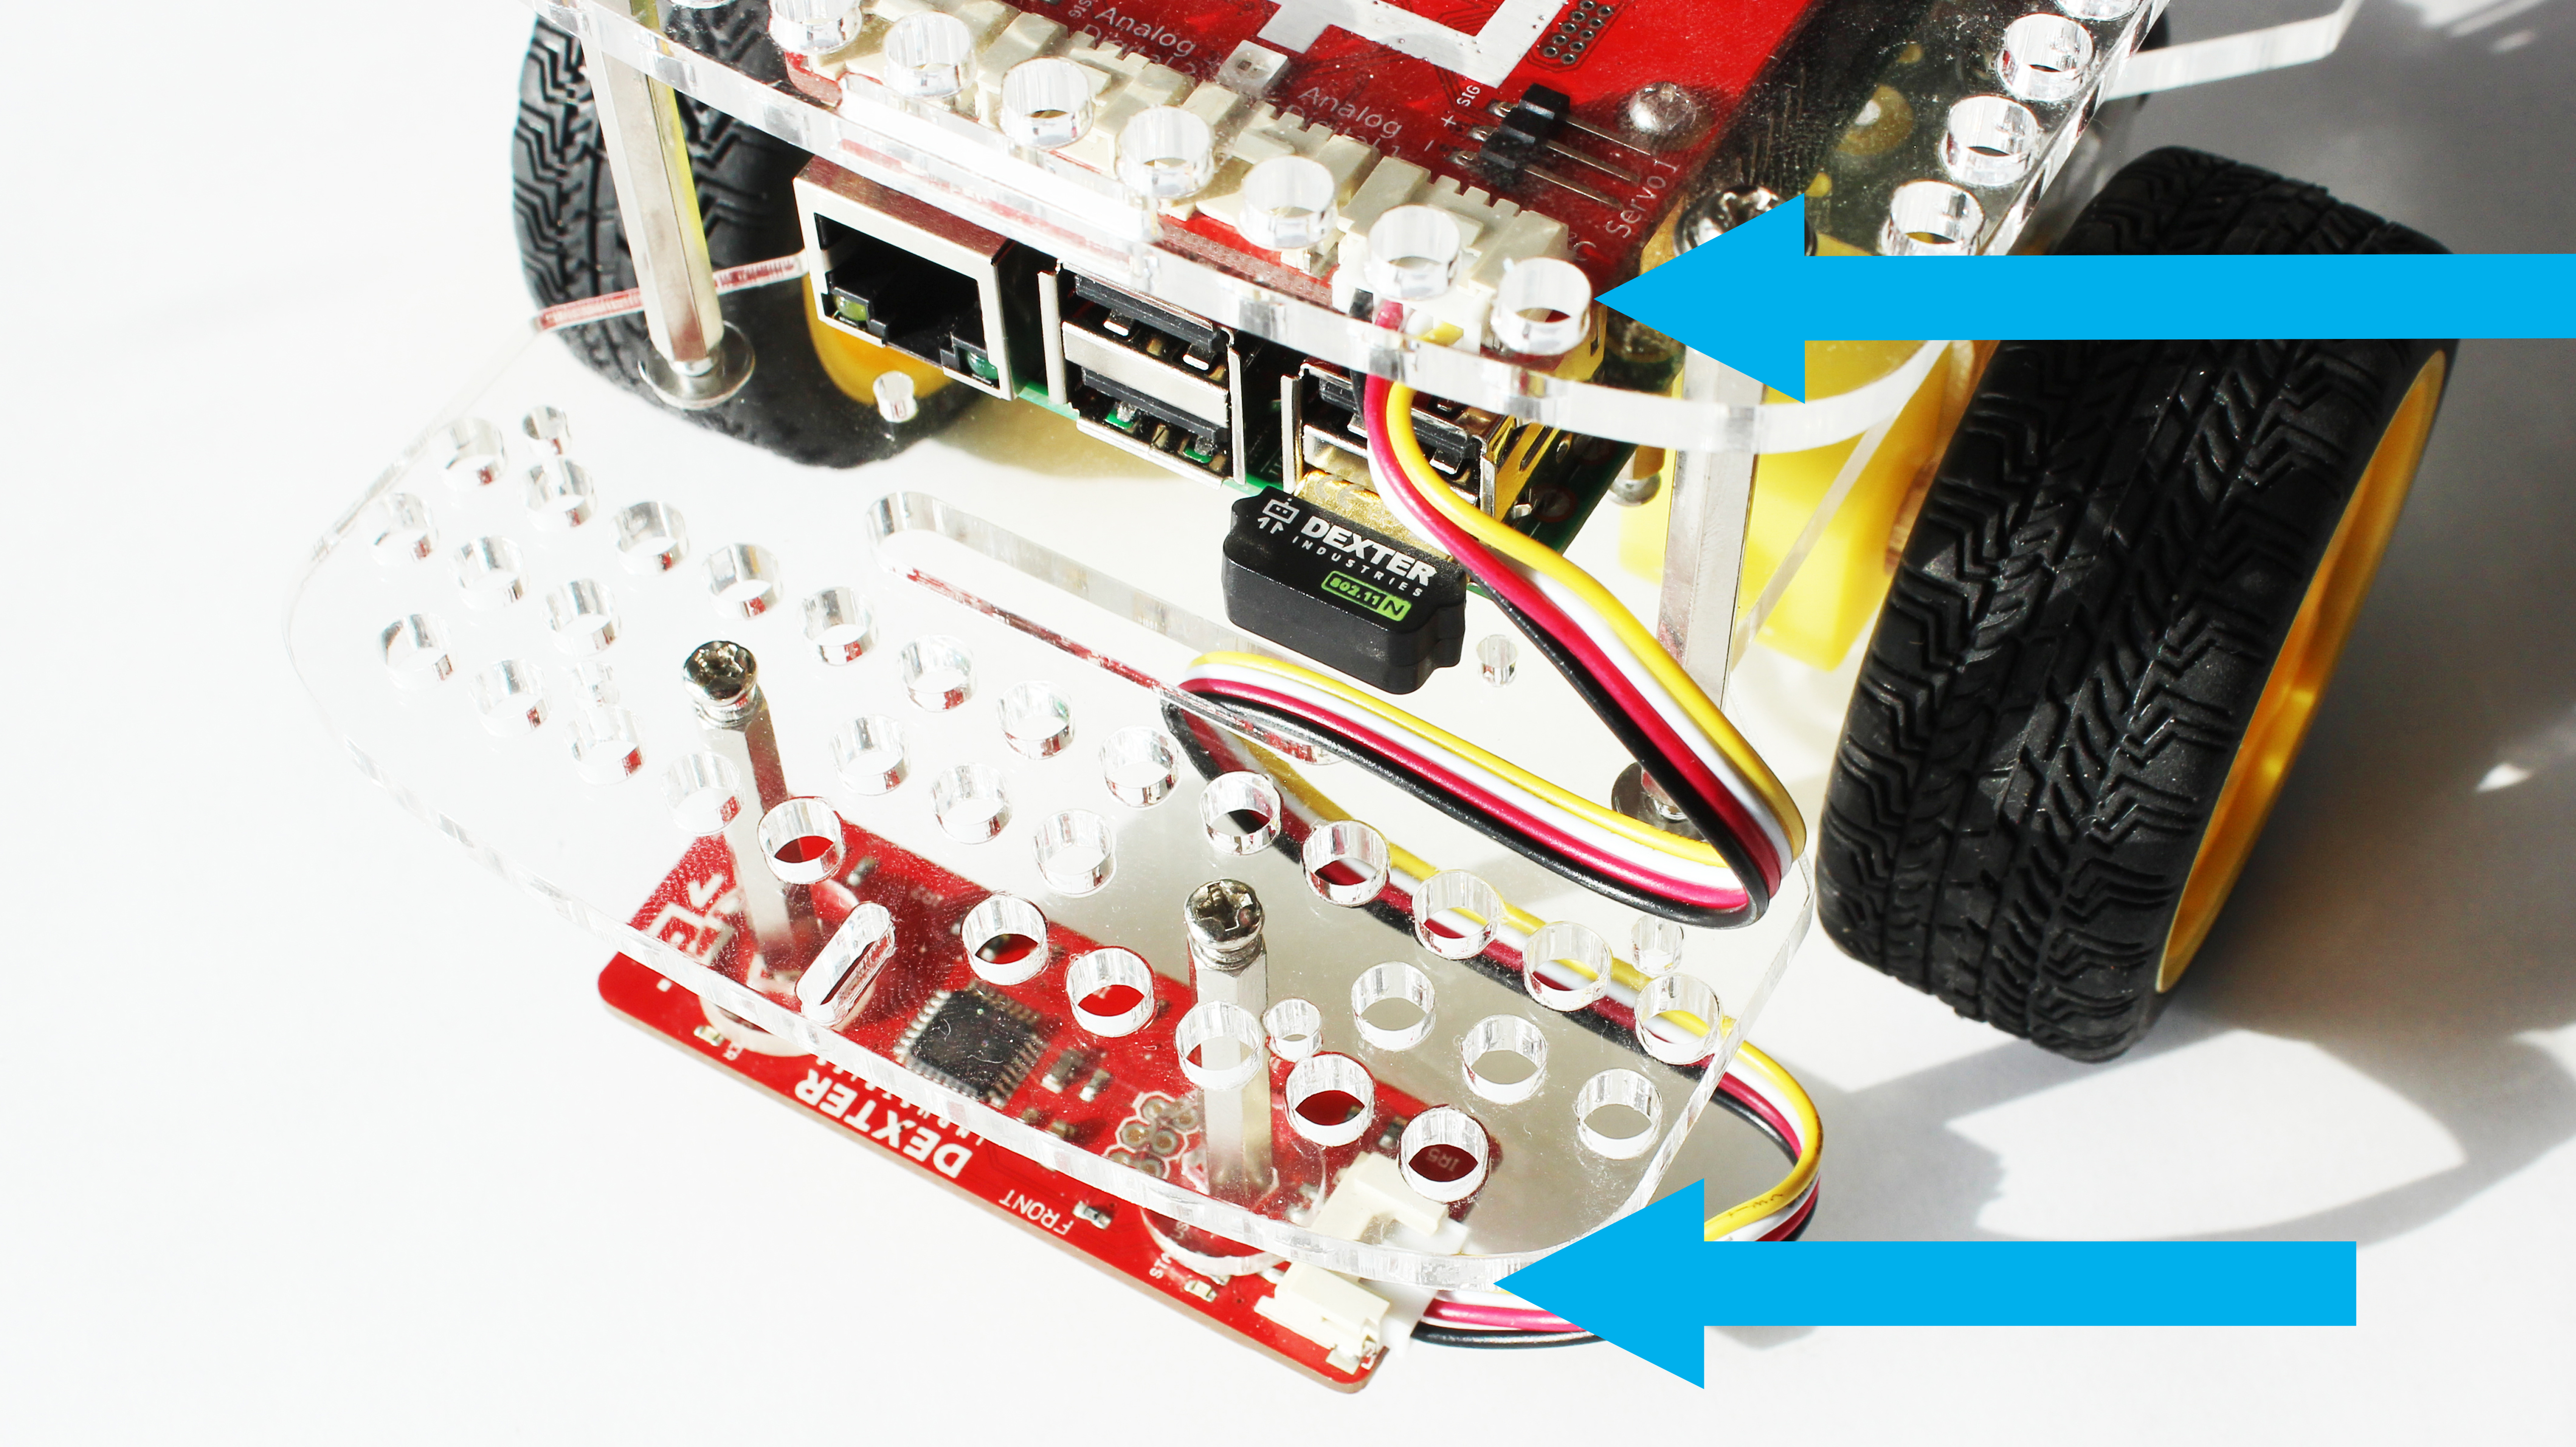
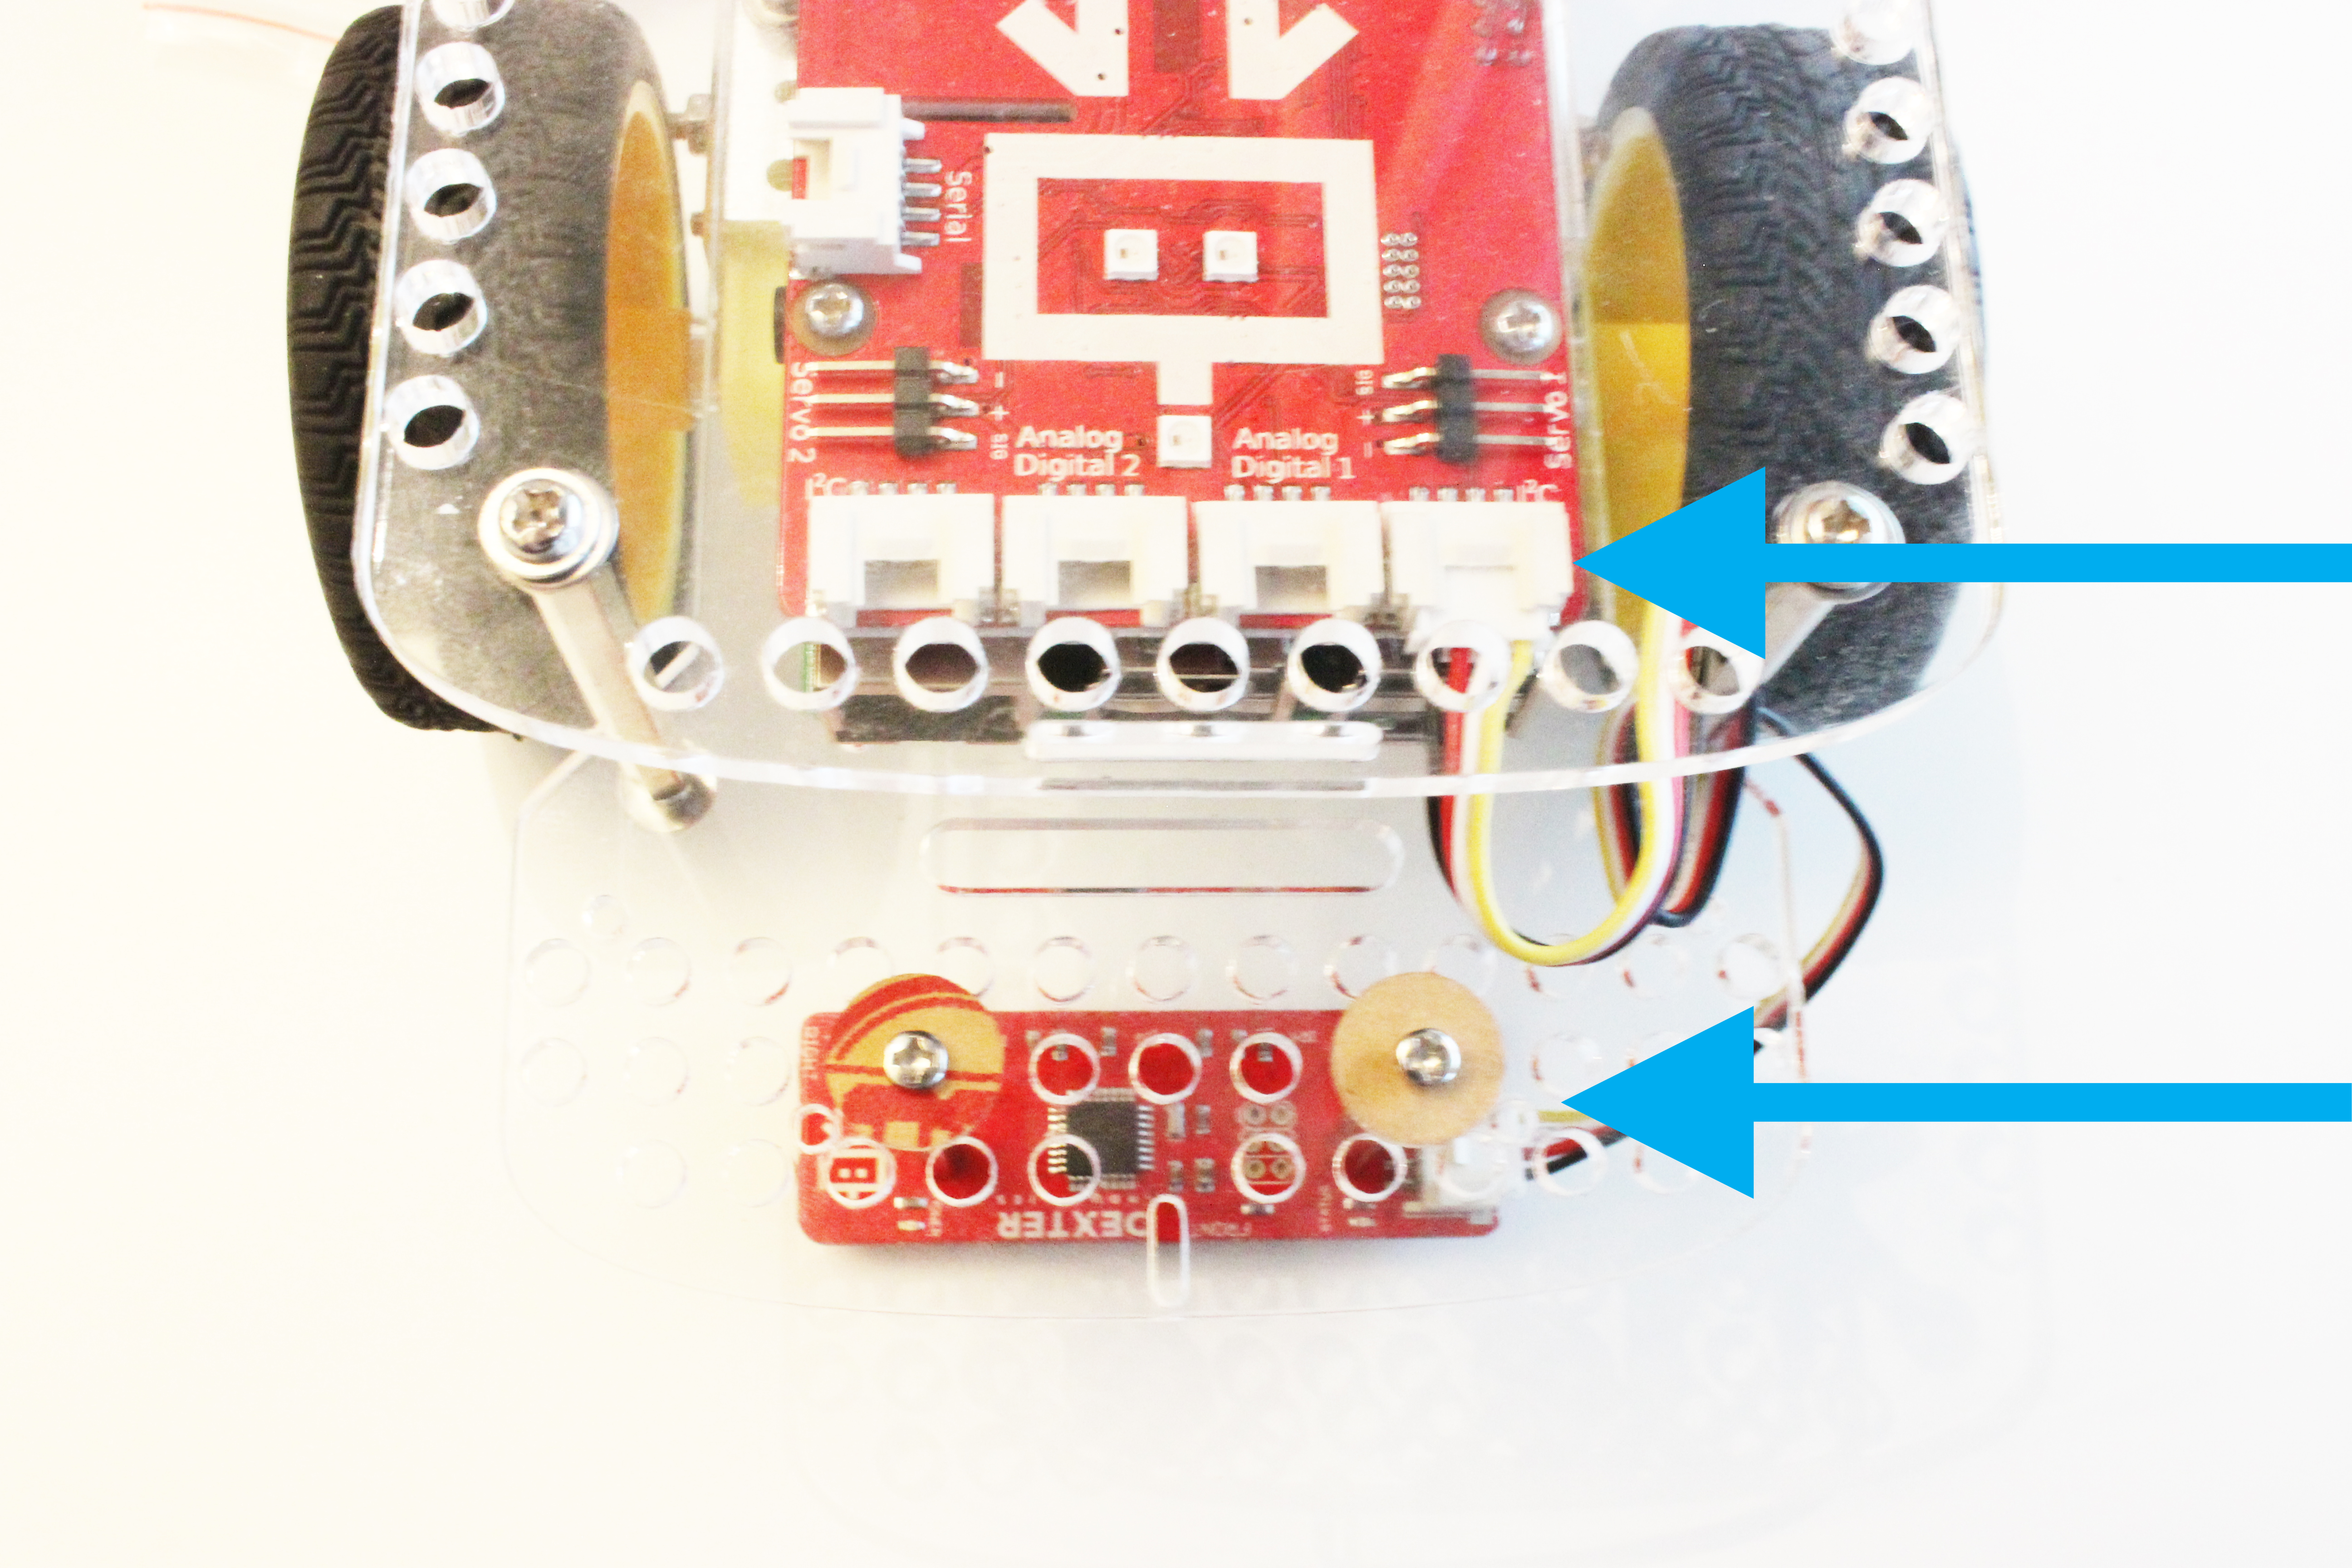
6. Connect the sensor to the GoPiGo3 Red Board. The line follower is connected to the I2C port. With the sensor cable included, connect the line follower to the GoPiGo3 board I2C port.
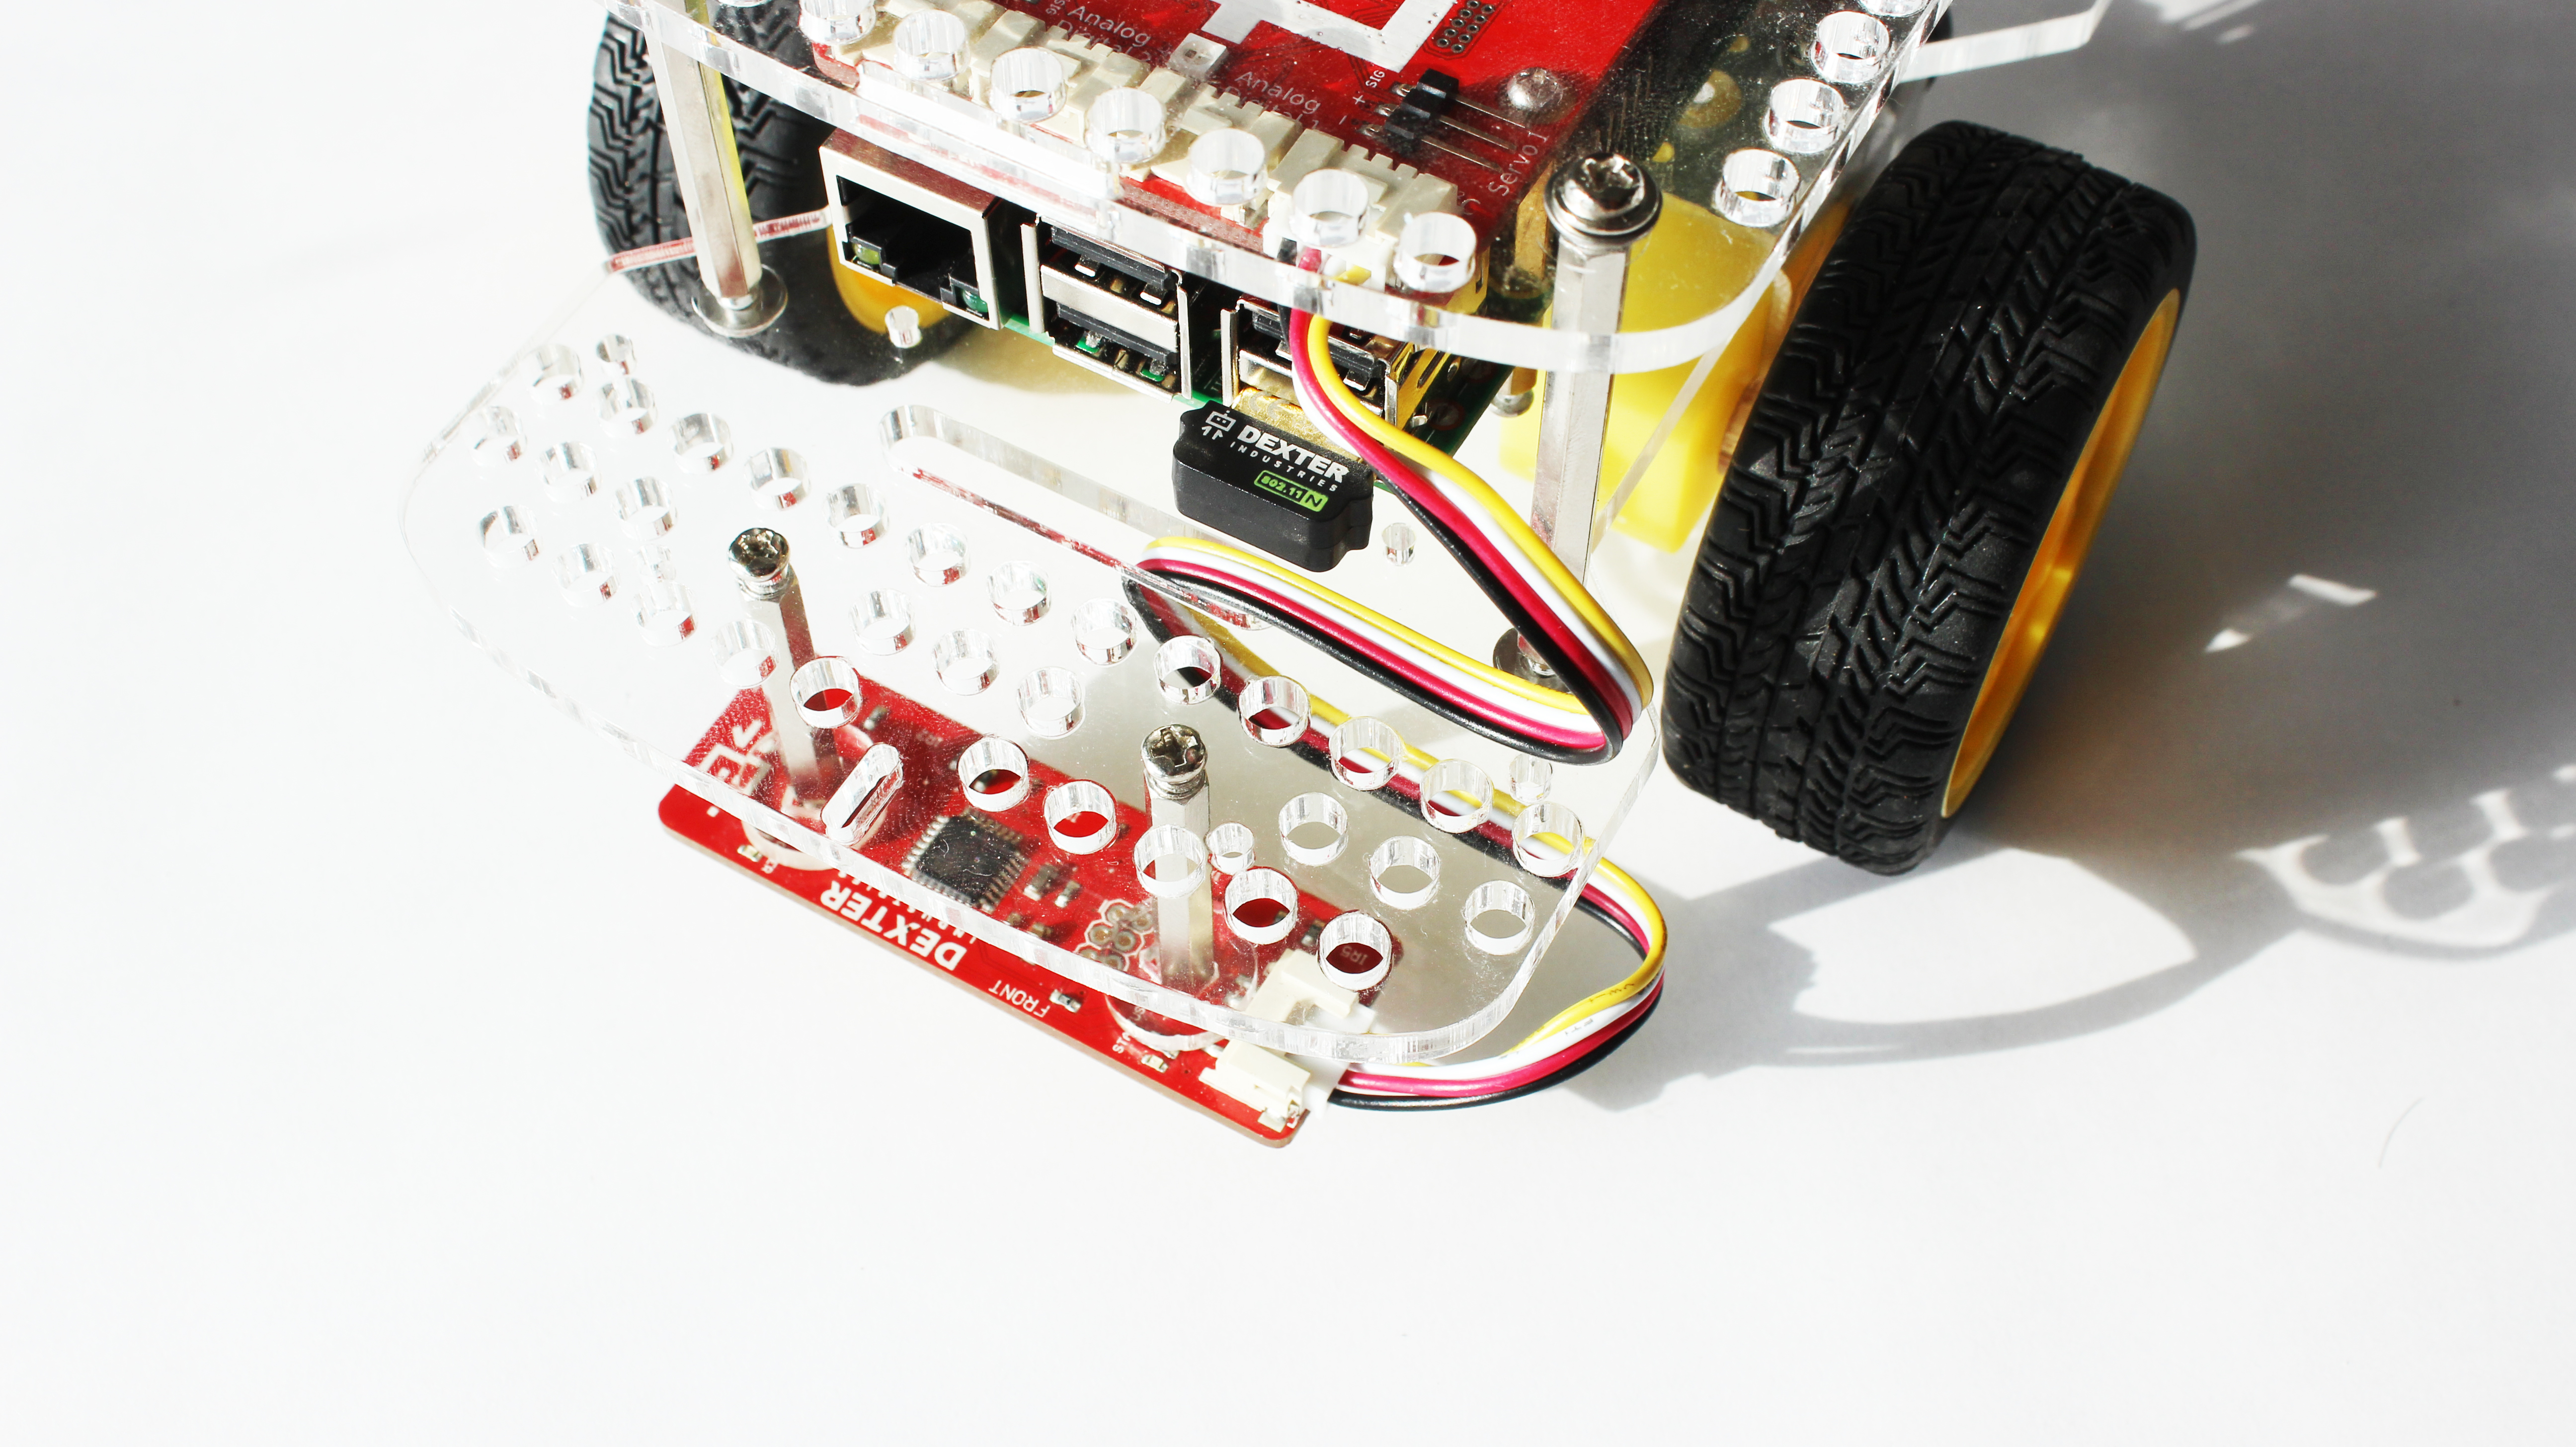
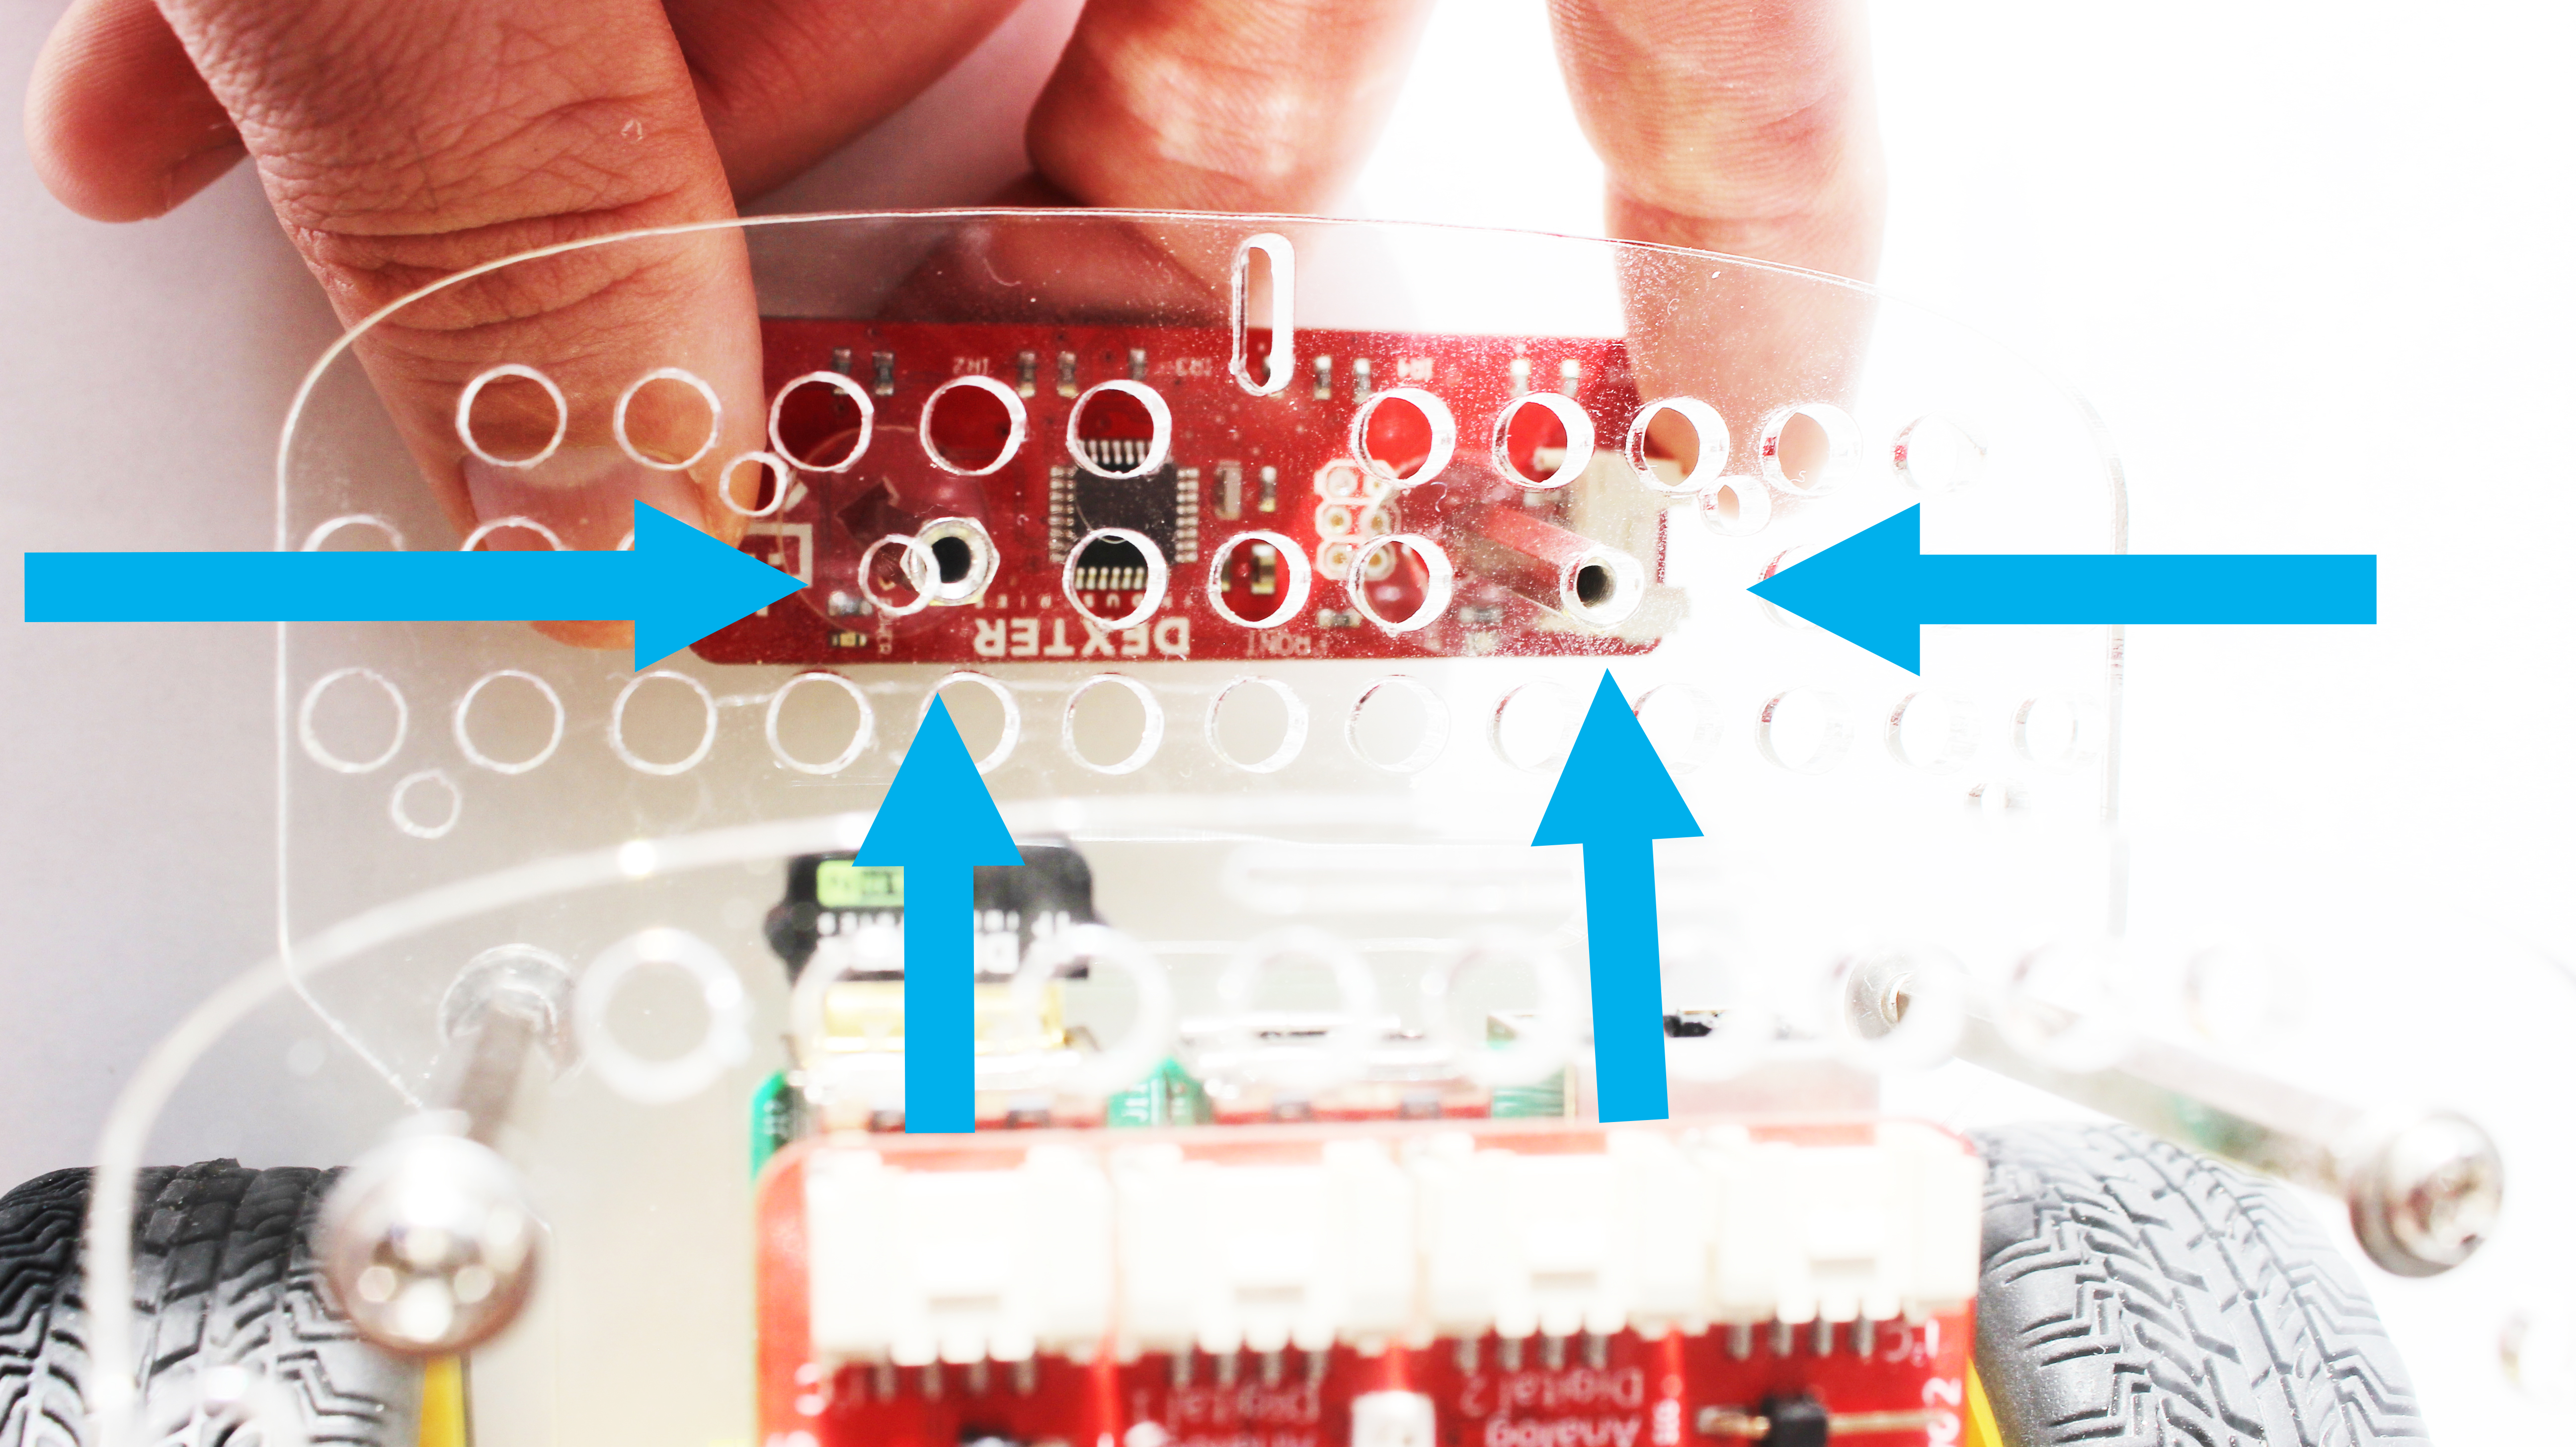
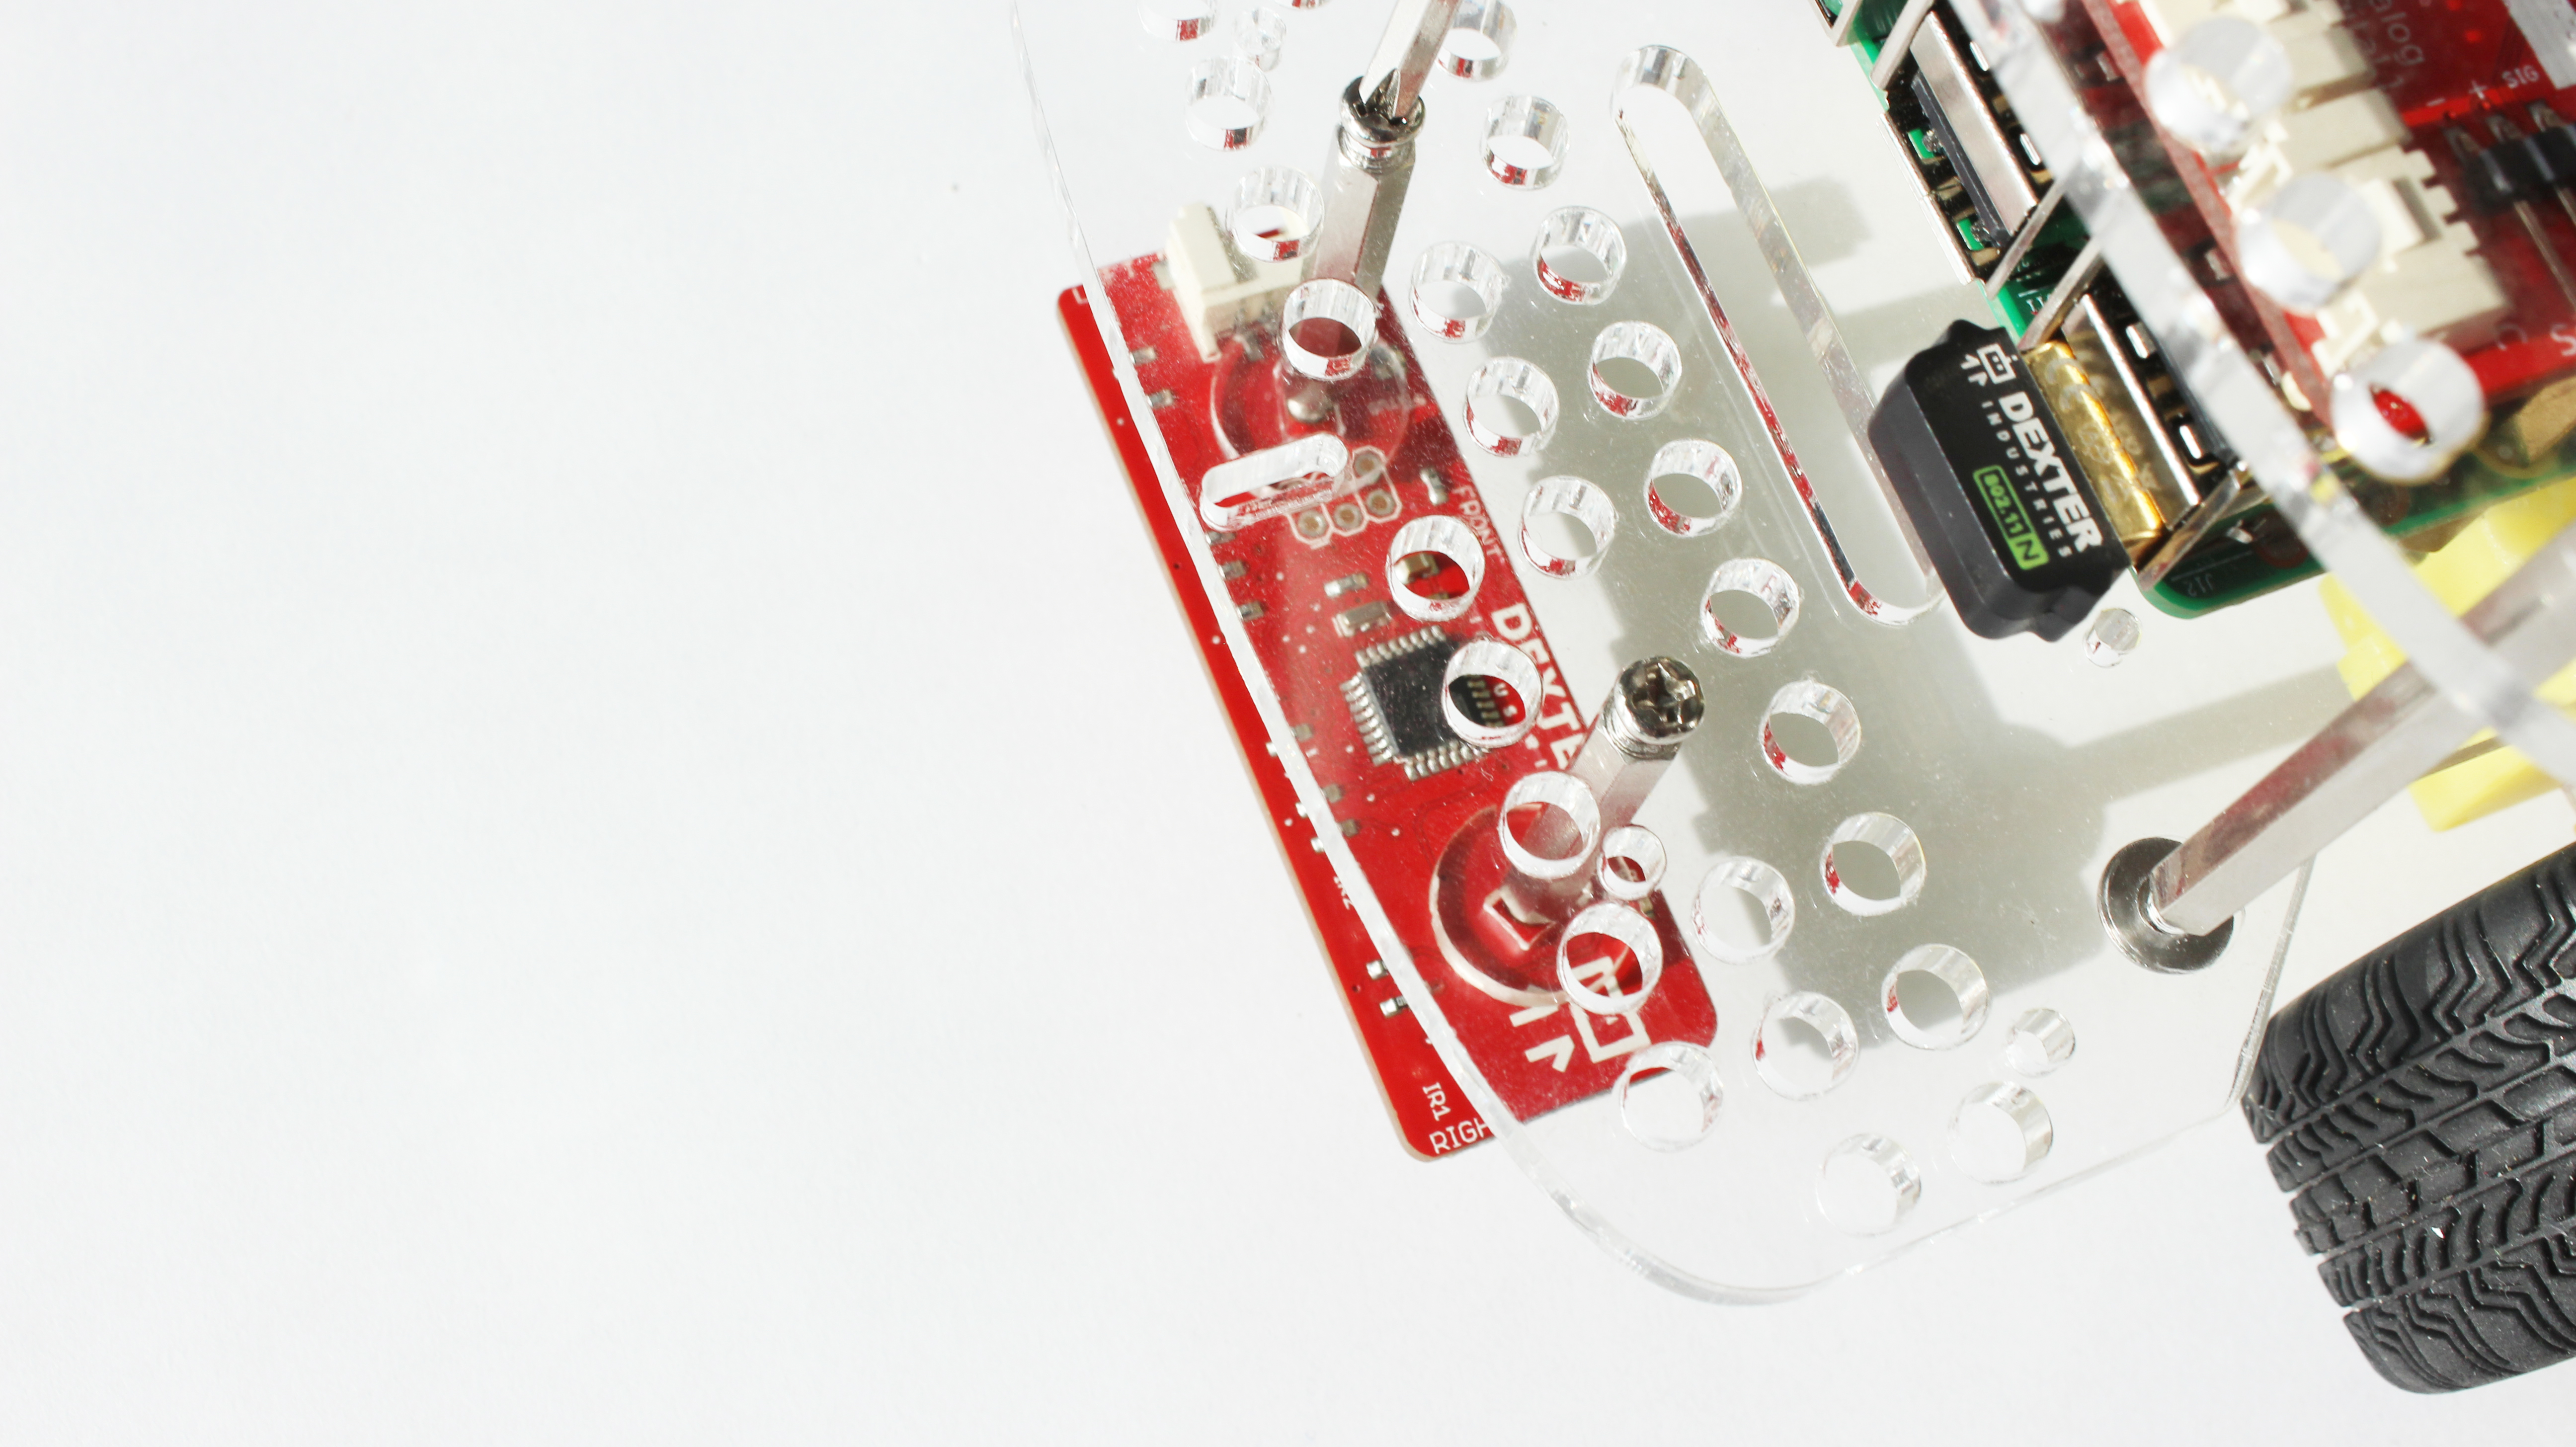
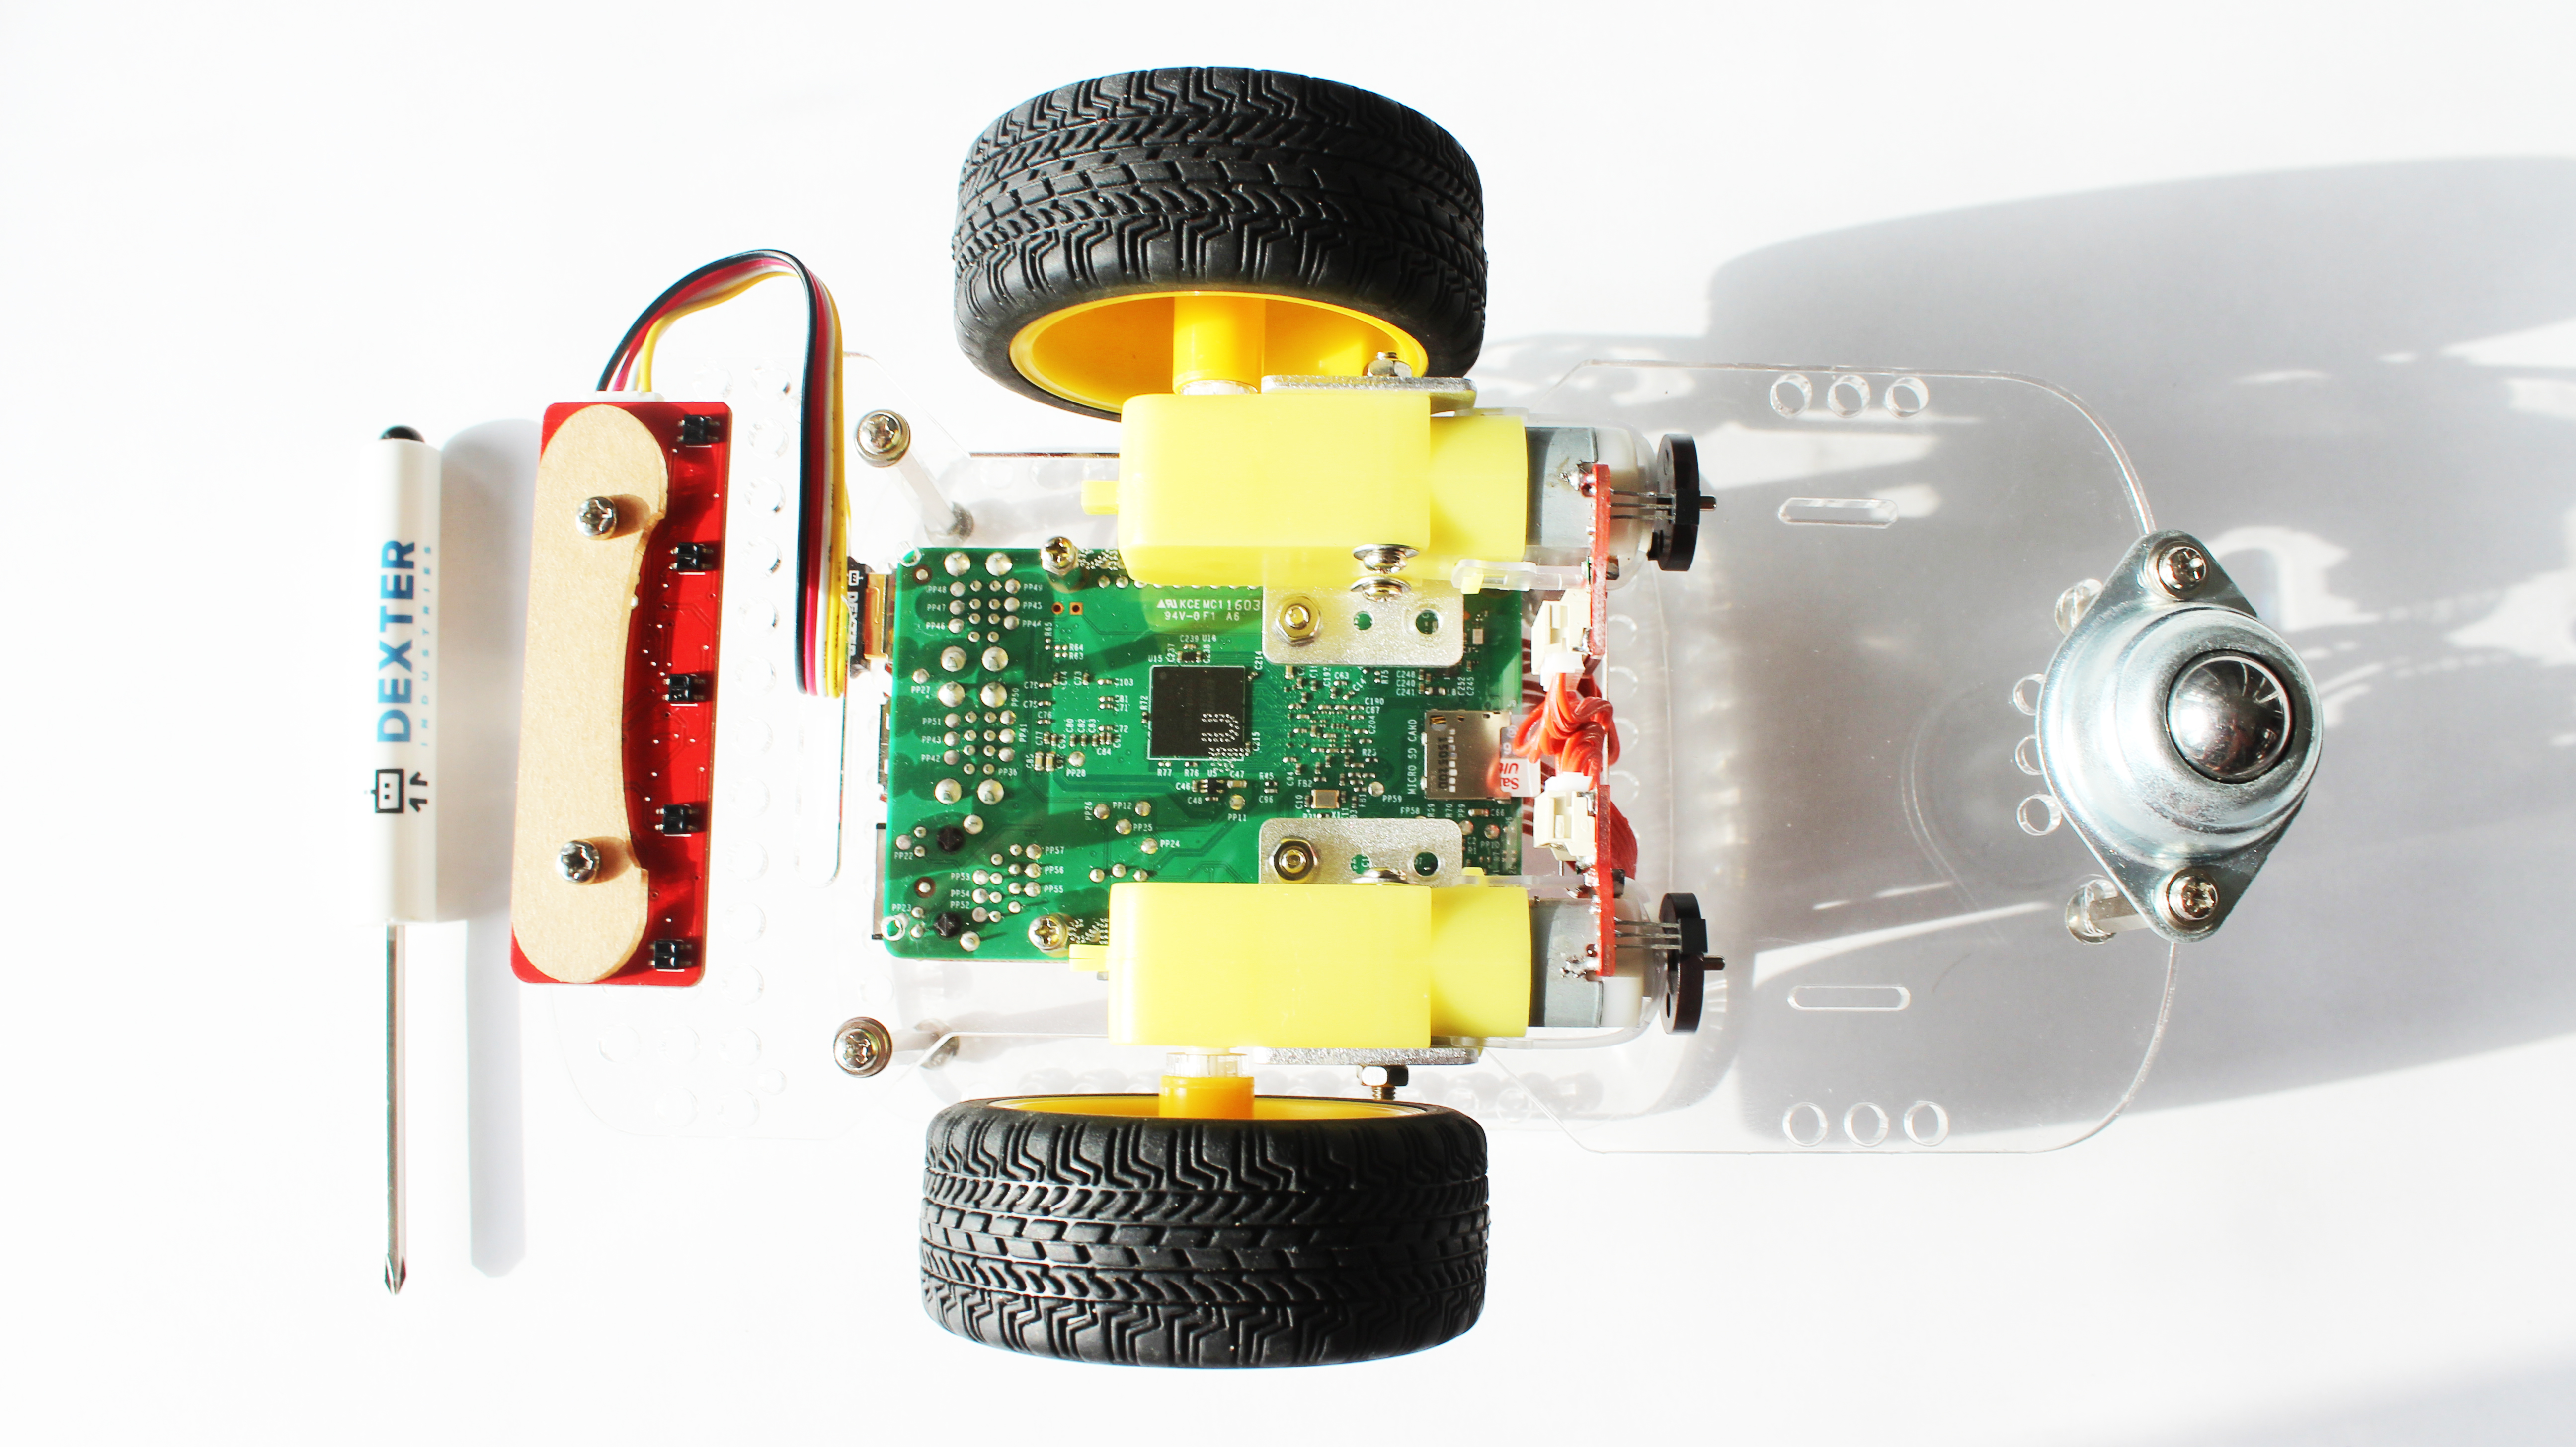
6. Done! Below are a few extra pictures from different angles to check that the Line follower is installed correctly.

Next Steps
Questions?
Go back to Get Started with the GoPiGo3.
Have a question or a suggestion? Ask on the forums here.