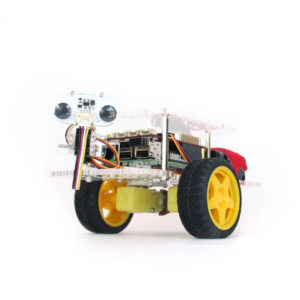
 Your GoPiGo3 mobile robot might need some sensors for seeing its way around. The two most popular sensors are the Raspberry Pi Camera, which takes video and pictures, and the Dexter Industries Distance Sensor, which measures distances to objects. Both of these sensors behave like eyes for the robot, detecting objects and helping the robot avoid obstacles as it navigates.
Attach a Raspberry Pi Camera Directly to the GoPiGo3 Body
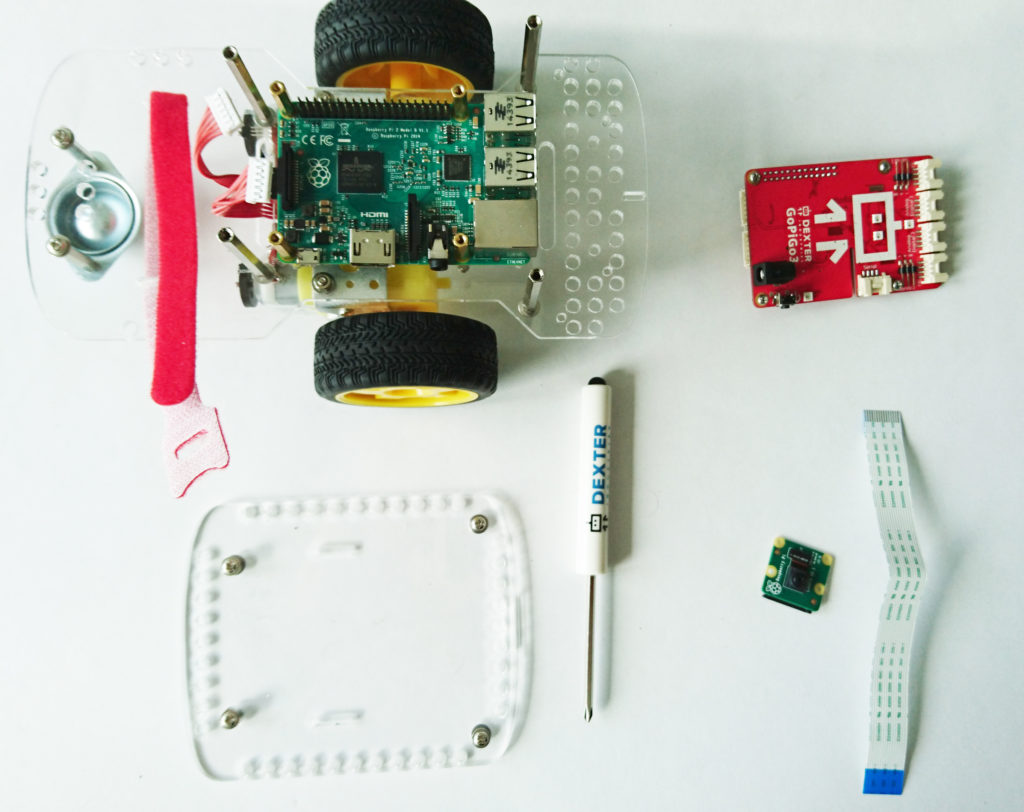
Building a Raspberry Pi Camera Robot: In this section we’ll show you how to attach the Raspberry Pi Camera to the GoPiGo3. You can use the GoPiGo Servo attachment, but you can also directly mount the camera to the GoPiGo3 body for forward-facing pictures and video from your Raspberry Pi Robot.
1. Remove the top acrylic canopy off the top of the robot.
2. Disconnect the motor wires, and unscrew the red GoPiGo3 board from the robot.
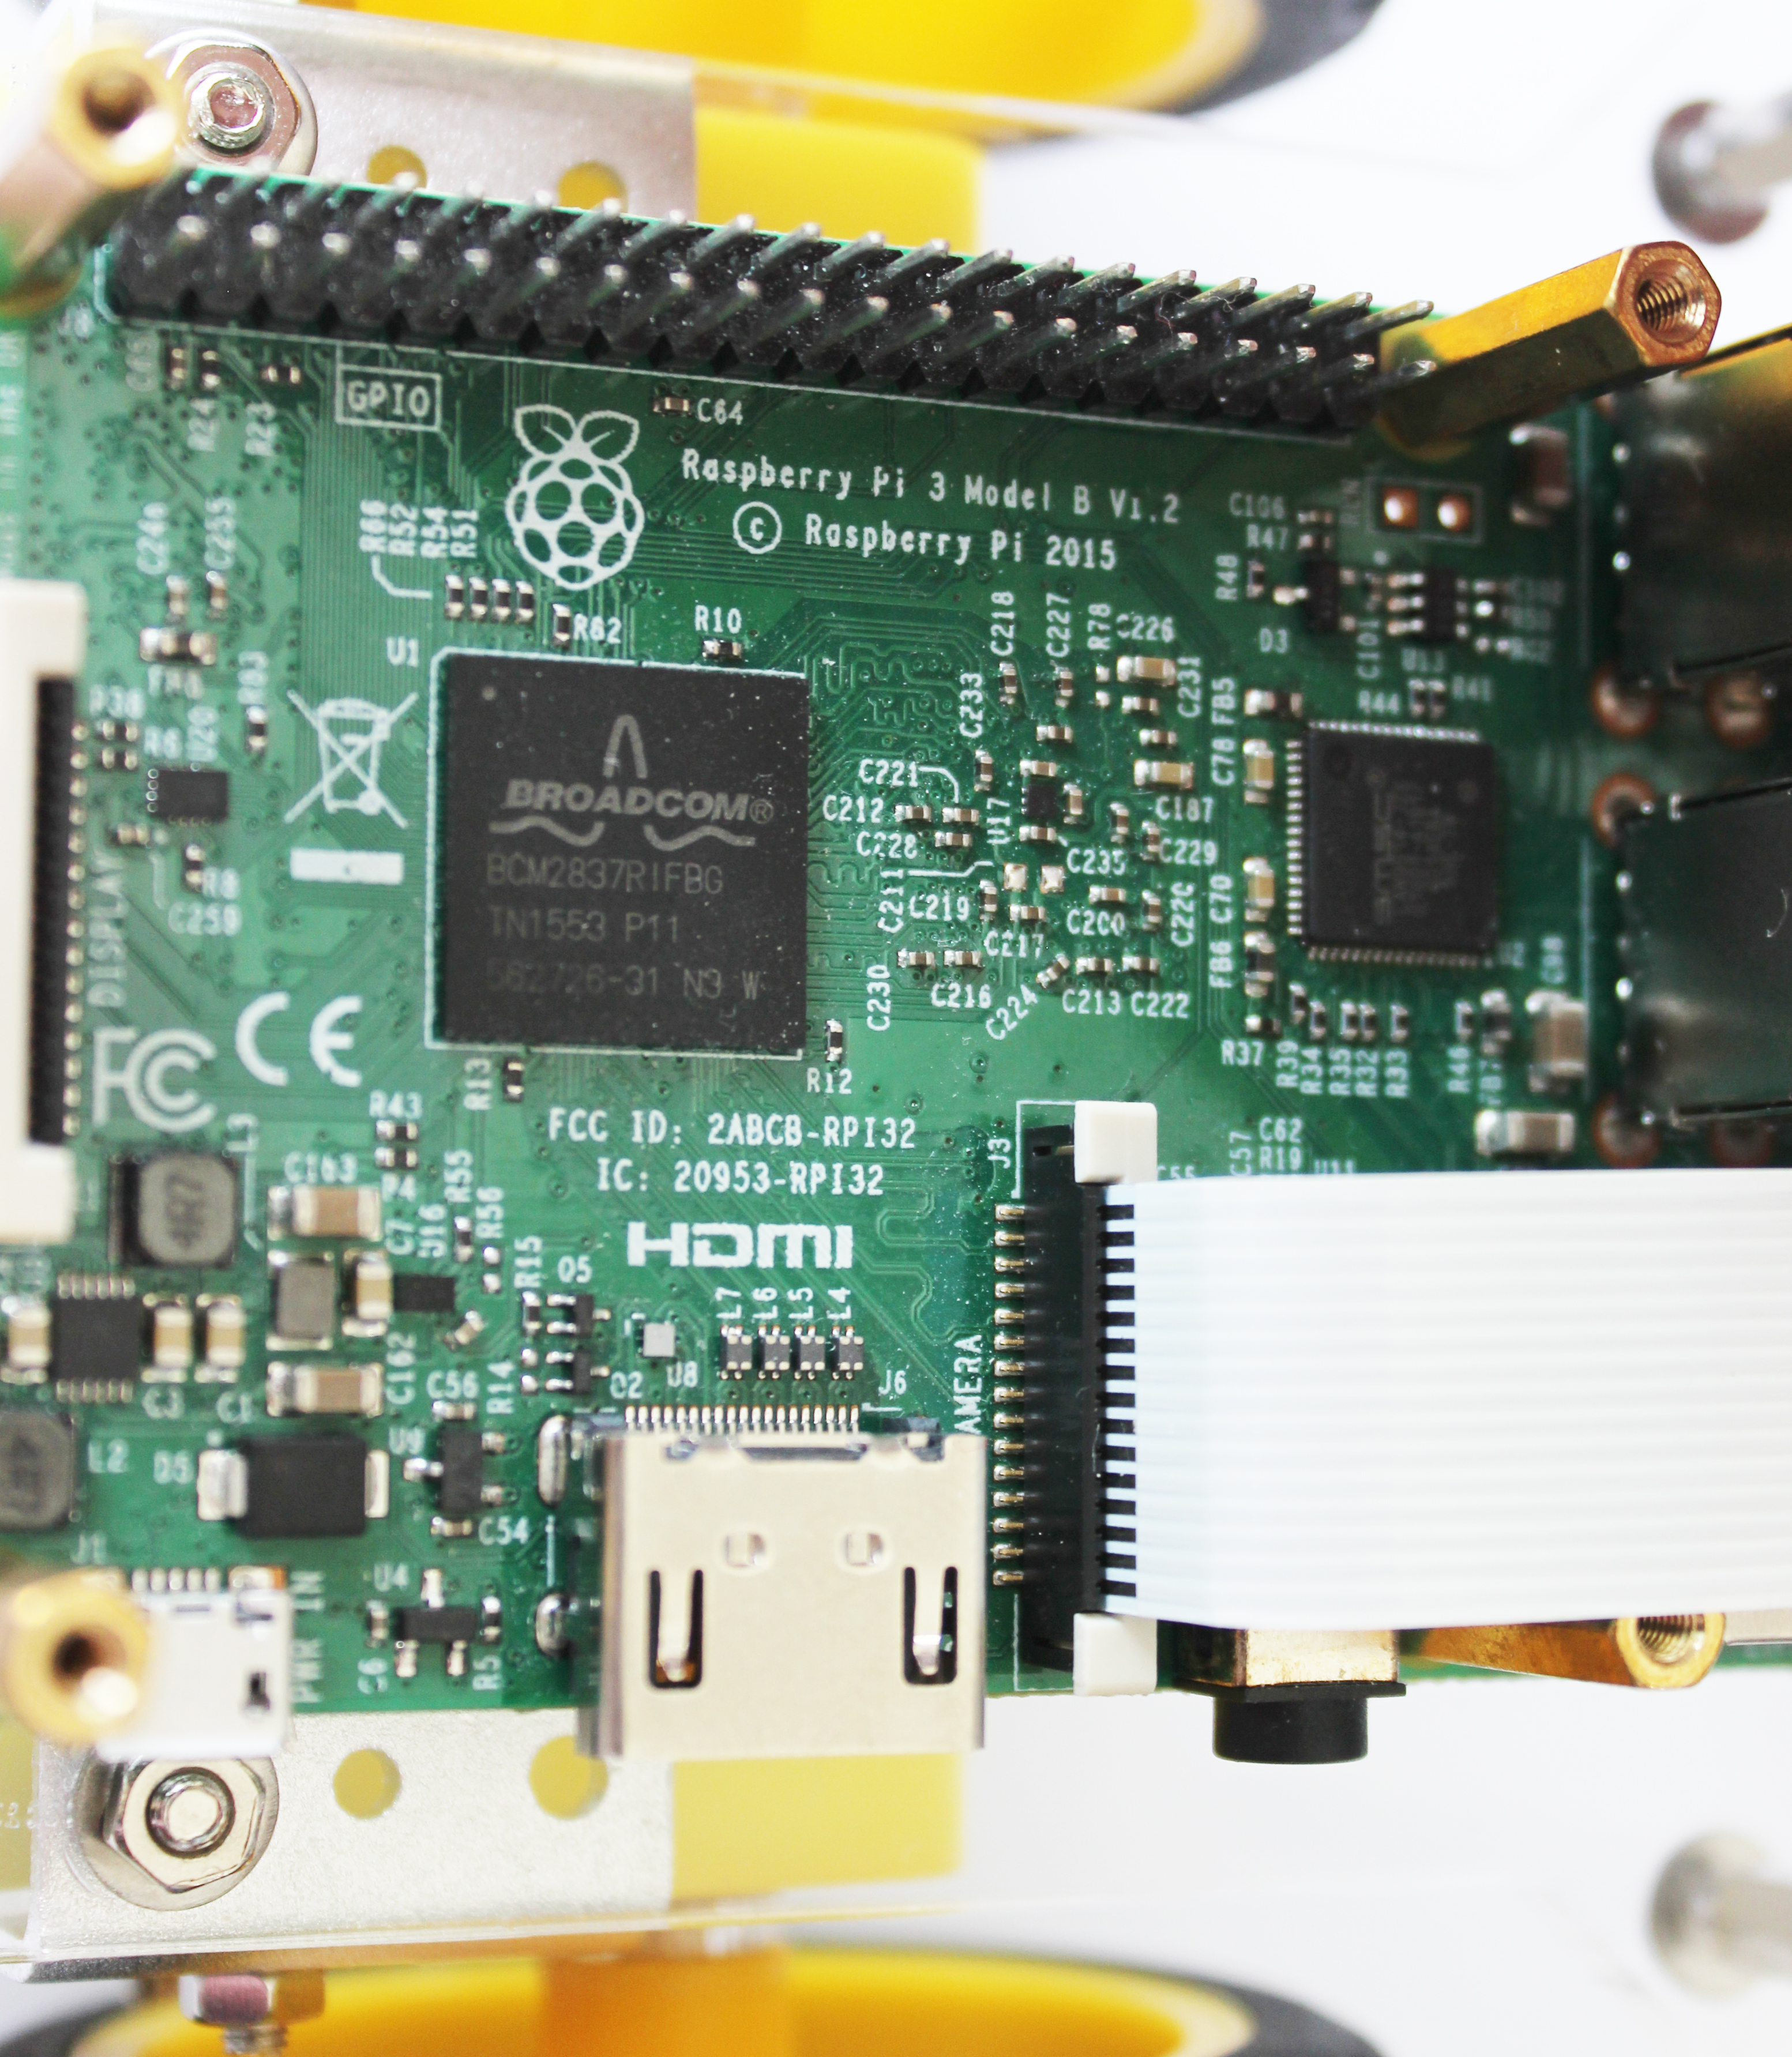
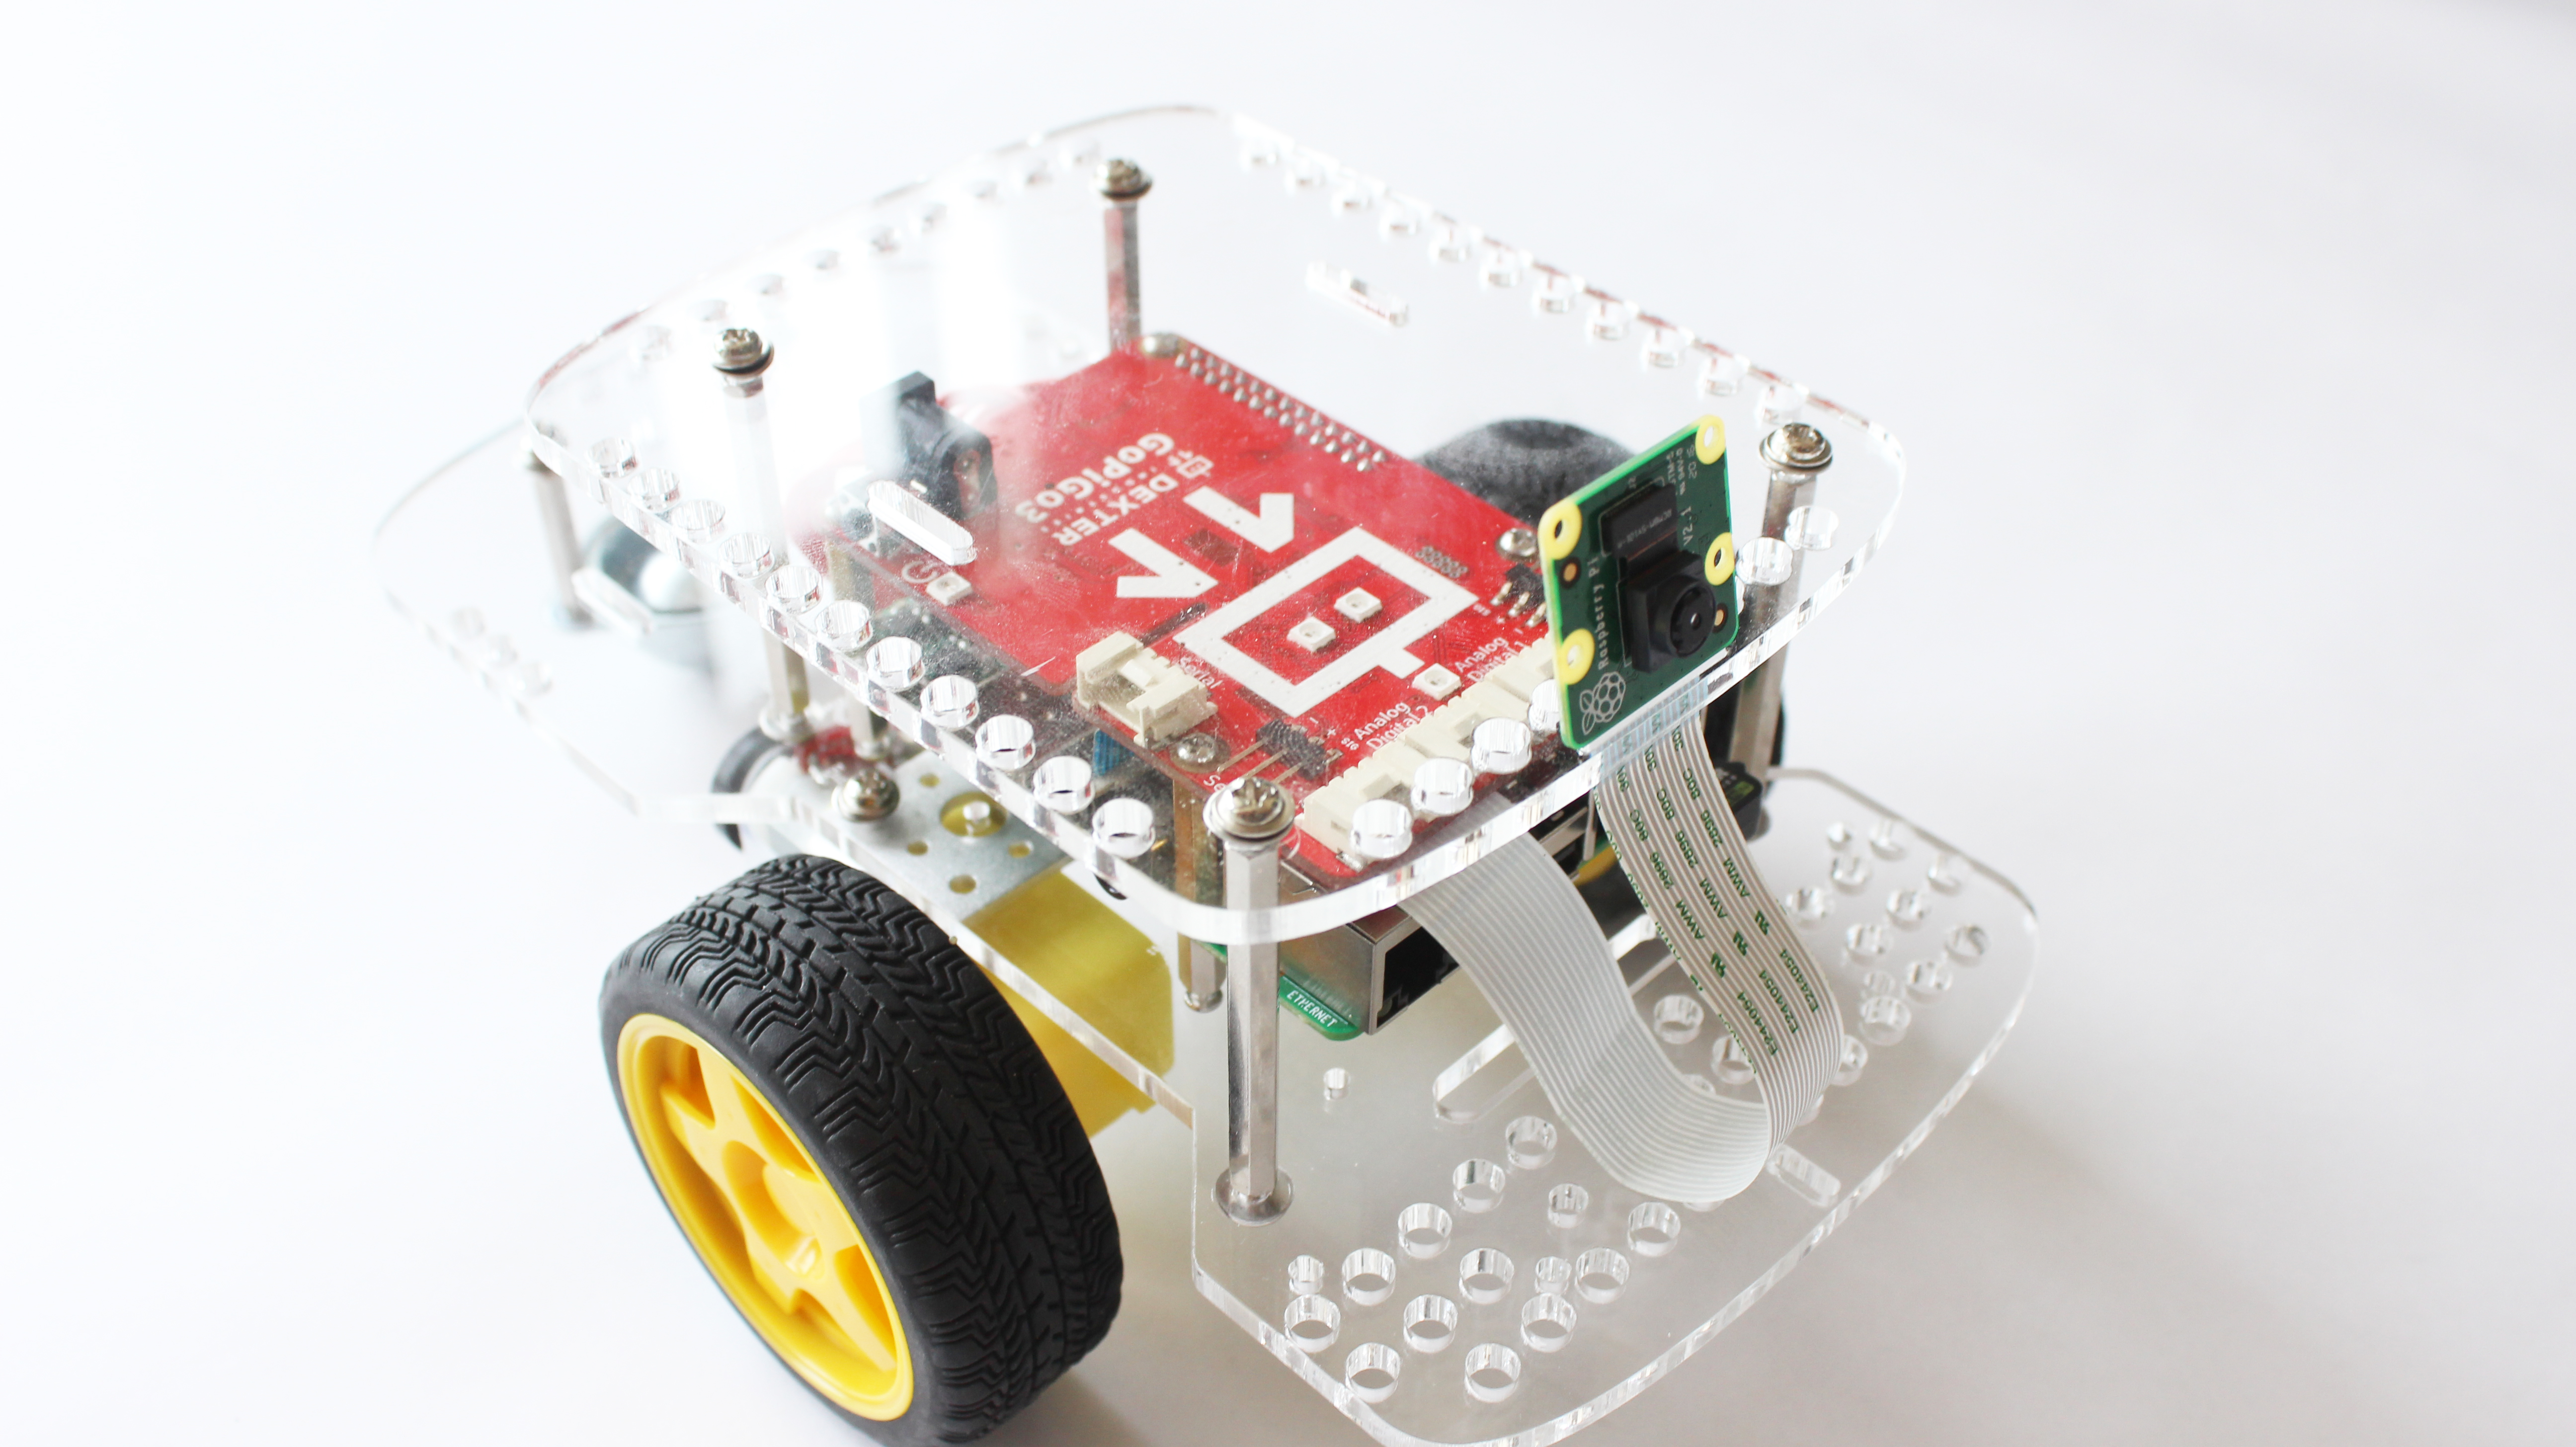
3. Connect the camera ribbon to the Raspberry Pi.
-
-
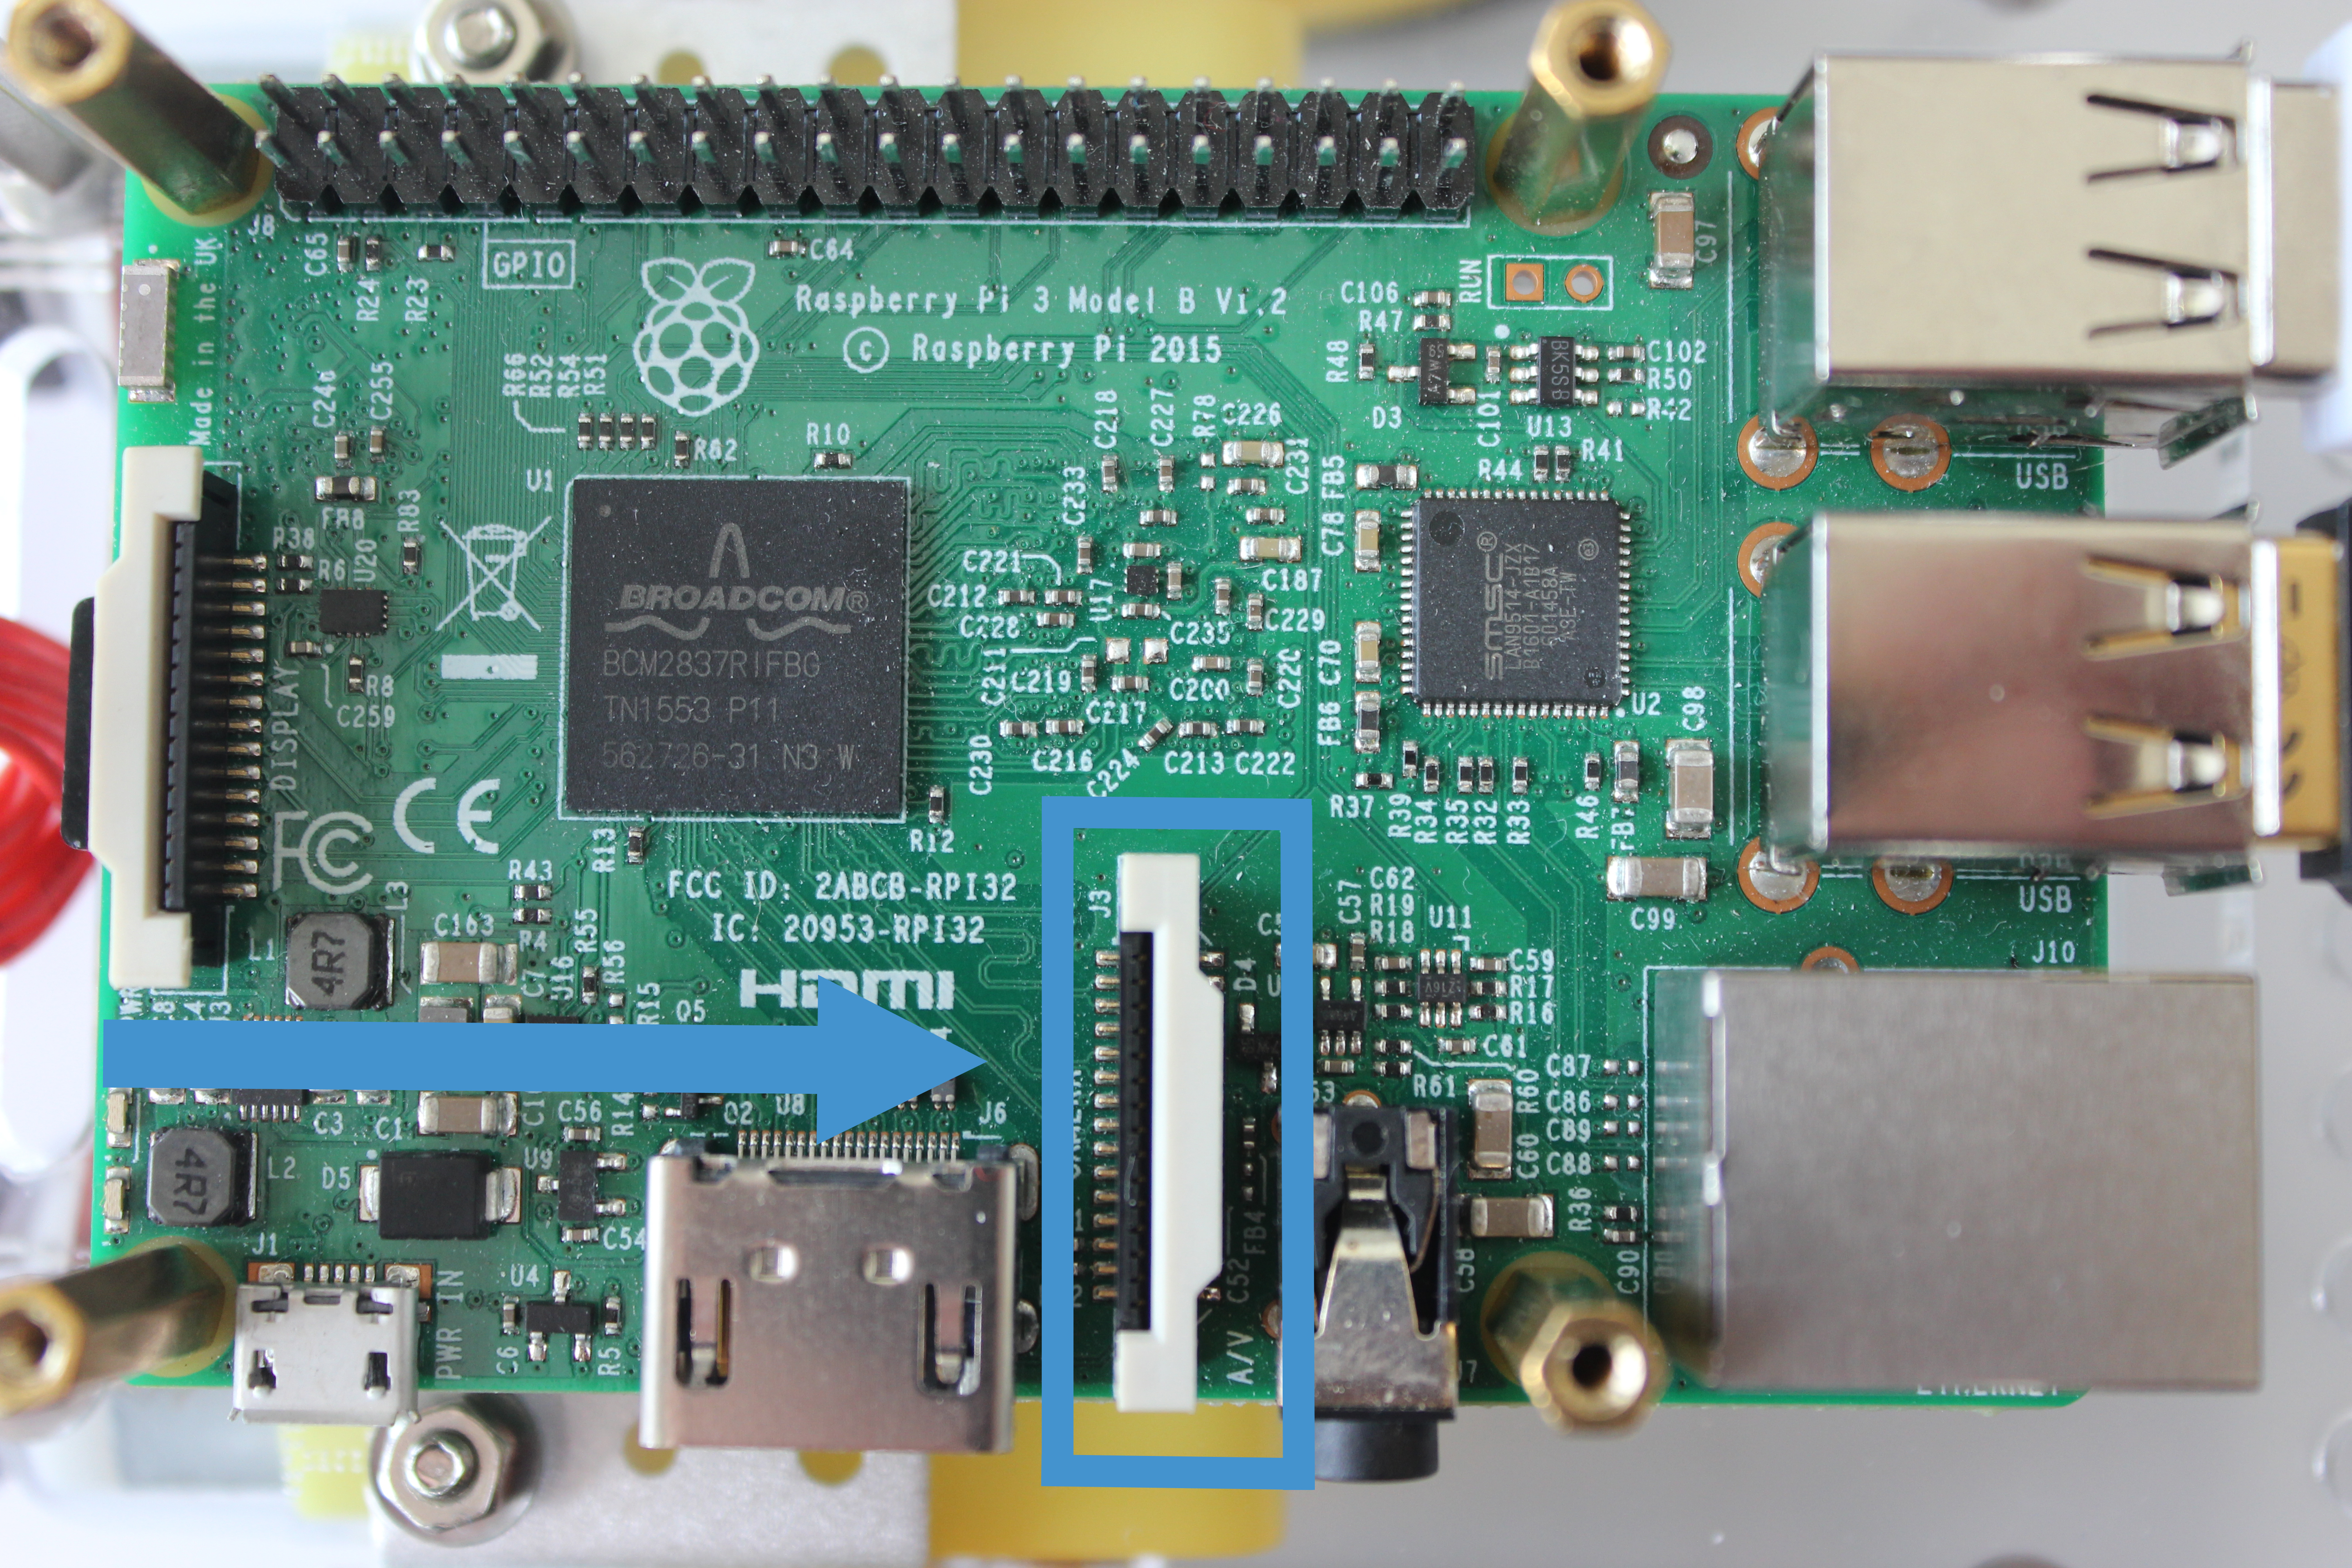
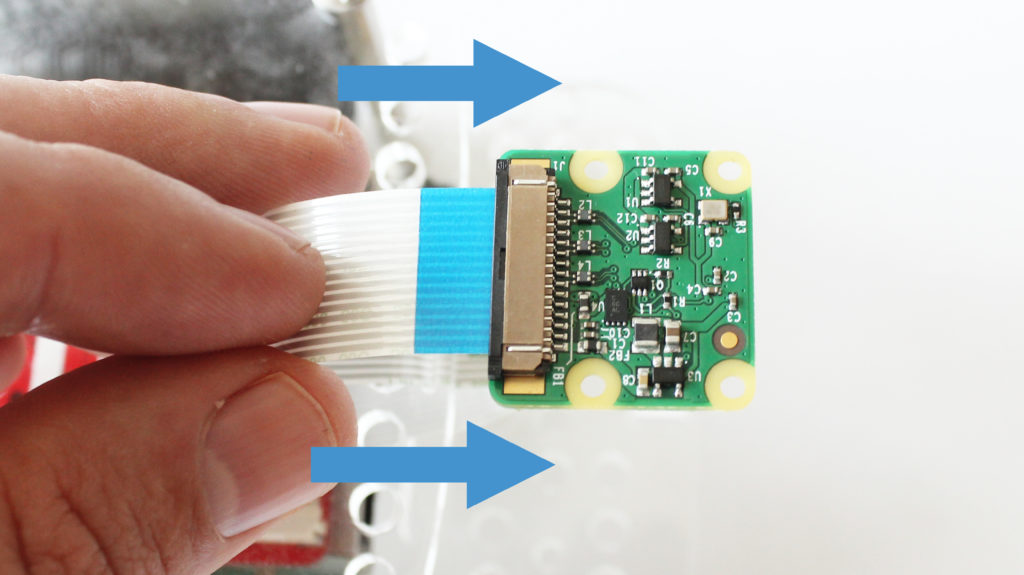
- Find the camera port on the Raspberry Pi (labeld “camera”), and slide the plastic clamp up by pulling on the edges of the plastic port. Below the camera port is circled in blue on the Raspberry Pi.
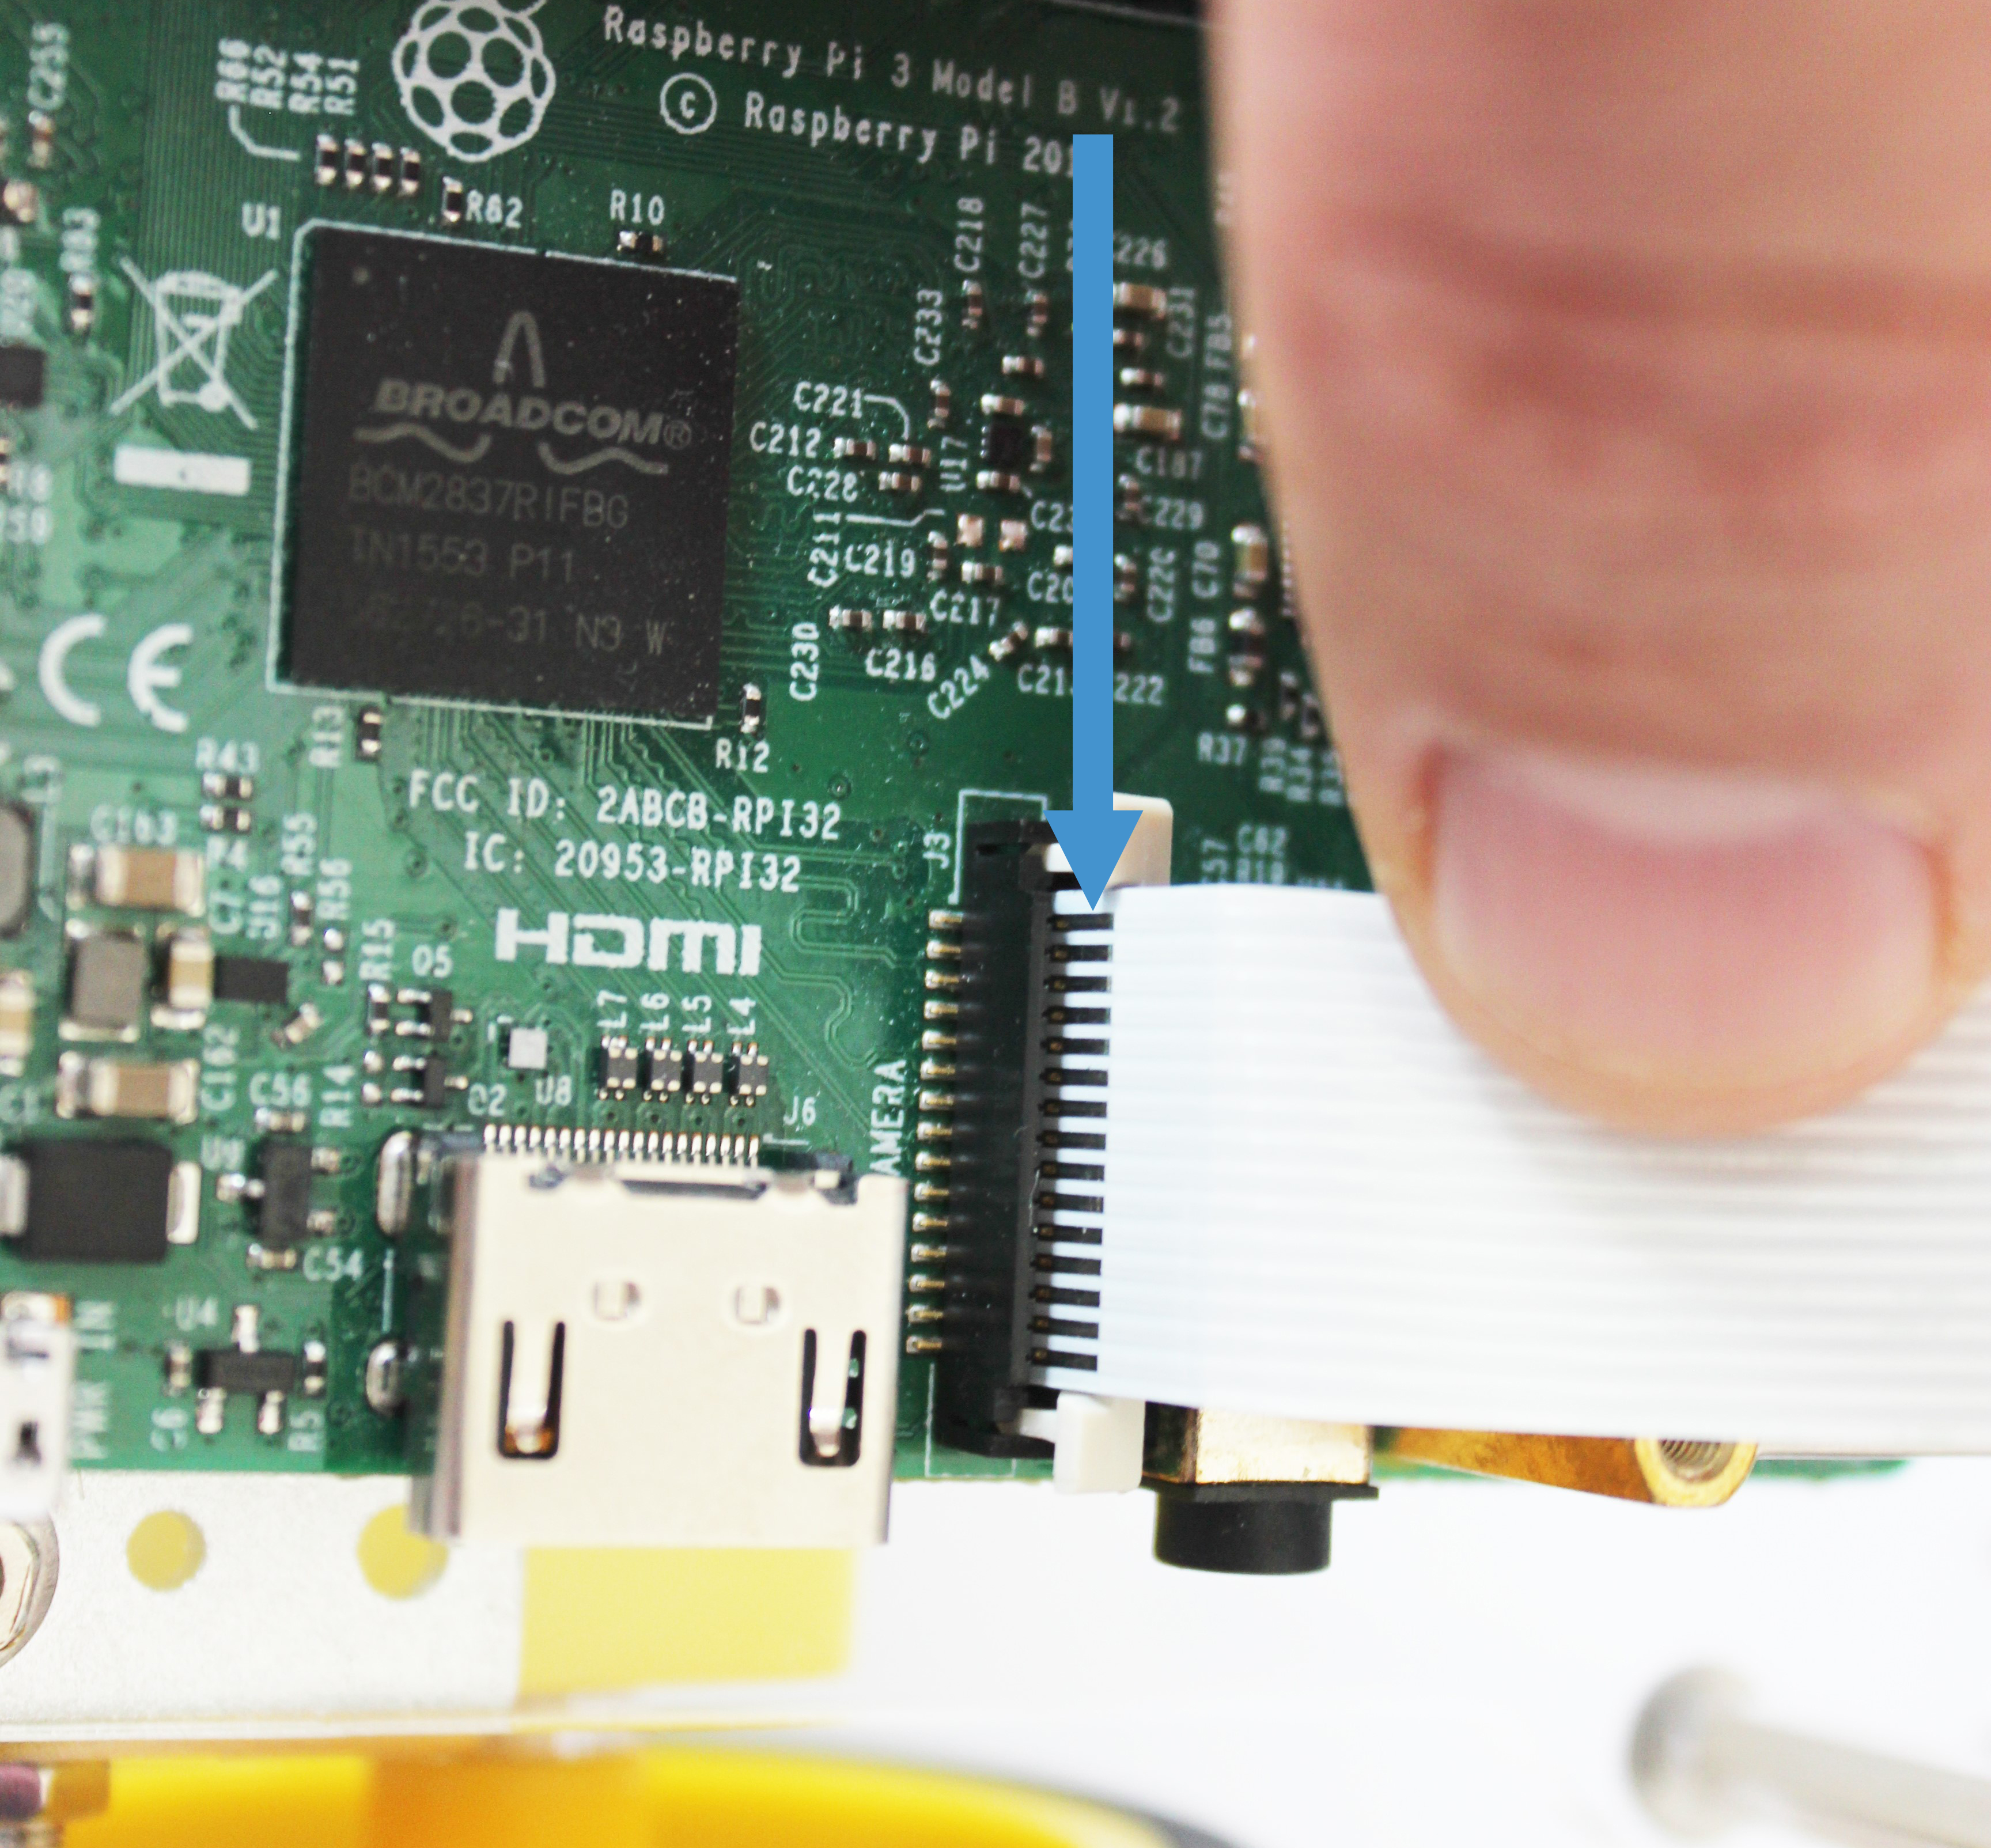
- Next, slide the ribbon into the camera port. The blue side of the ribbon should face towards the USB ports on the Pi, and the open metal strips should face towards the battery pack on the GoPiGo3.
- Secure the ribbon by pushing down on the edges of the port to clamp the ribbon in place.
- Find the camera port on the Raspberry Pi (labeld “camera”), and slide the plastic clamp up by pulling on the edges of the plastic port. Below the camera port is circled in blue on the Raspberry Pi.
-
4. Reattach the GoPiGo3 board to the Raspberry Pi.
-
-
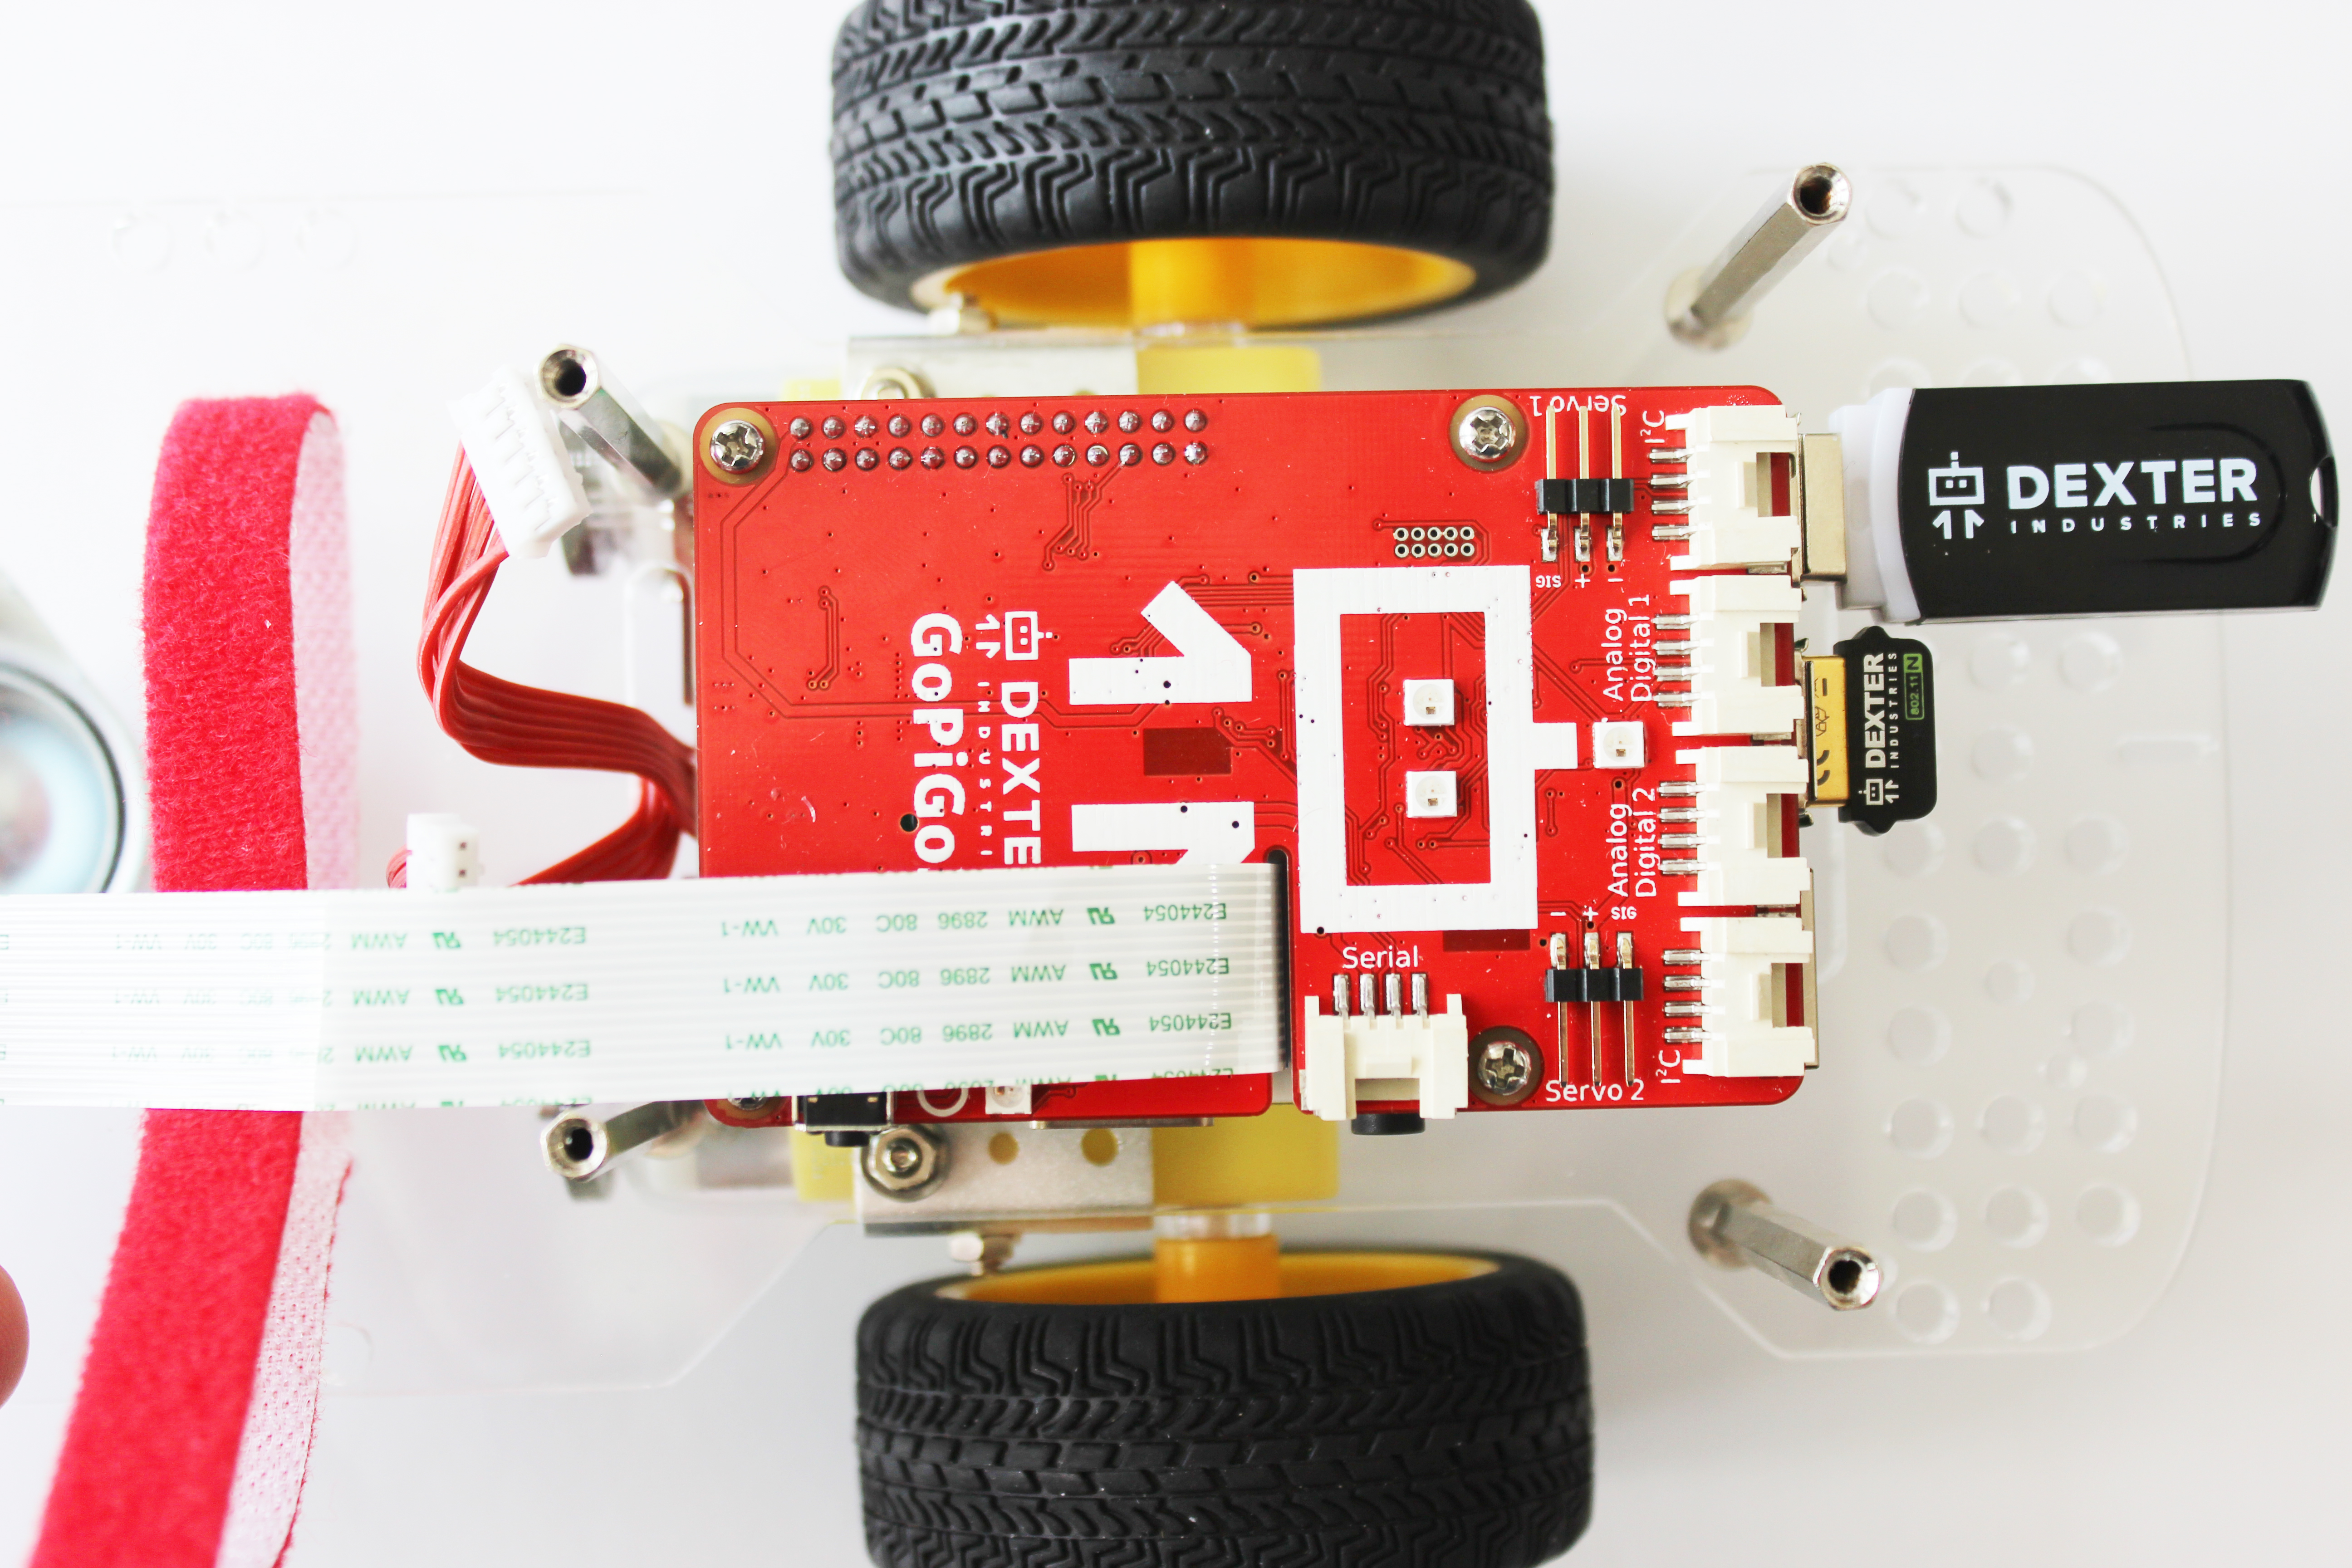
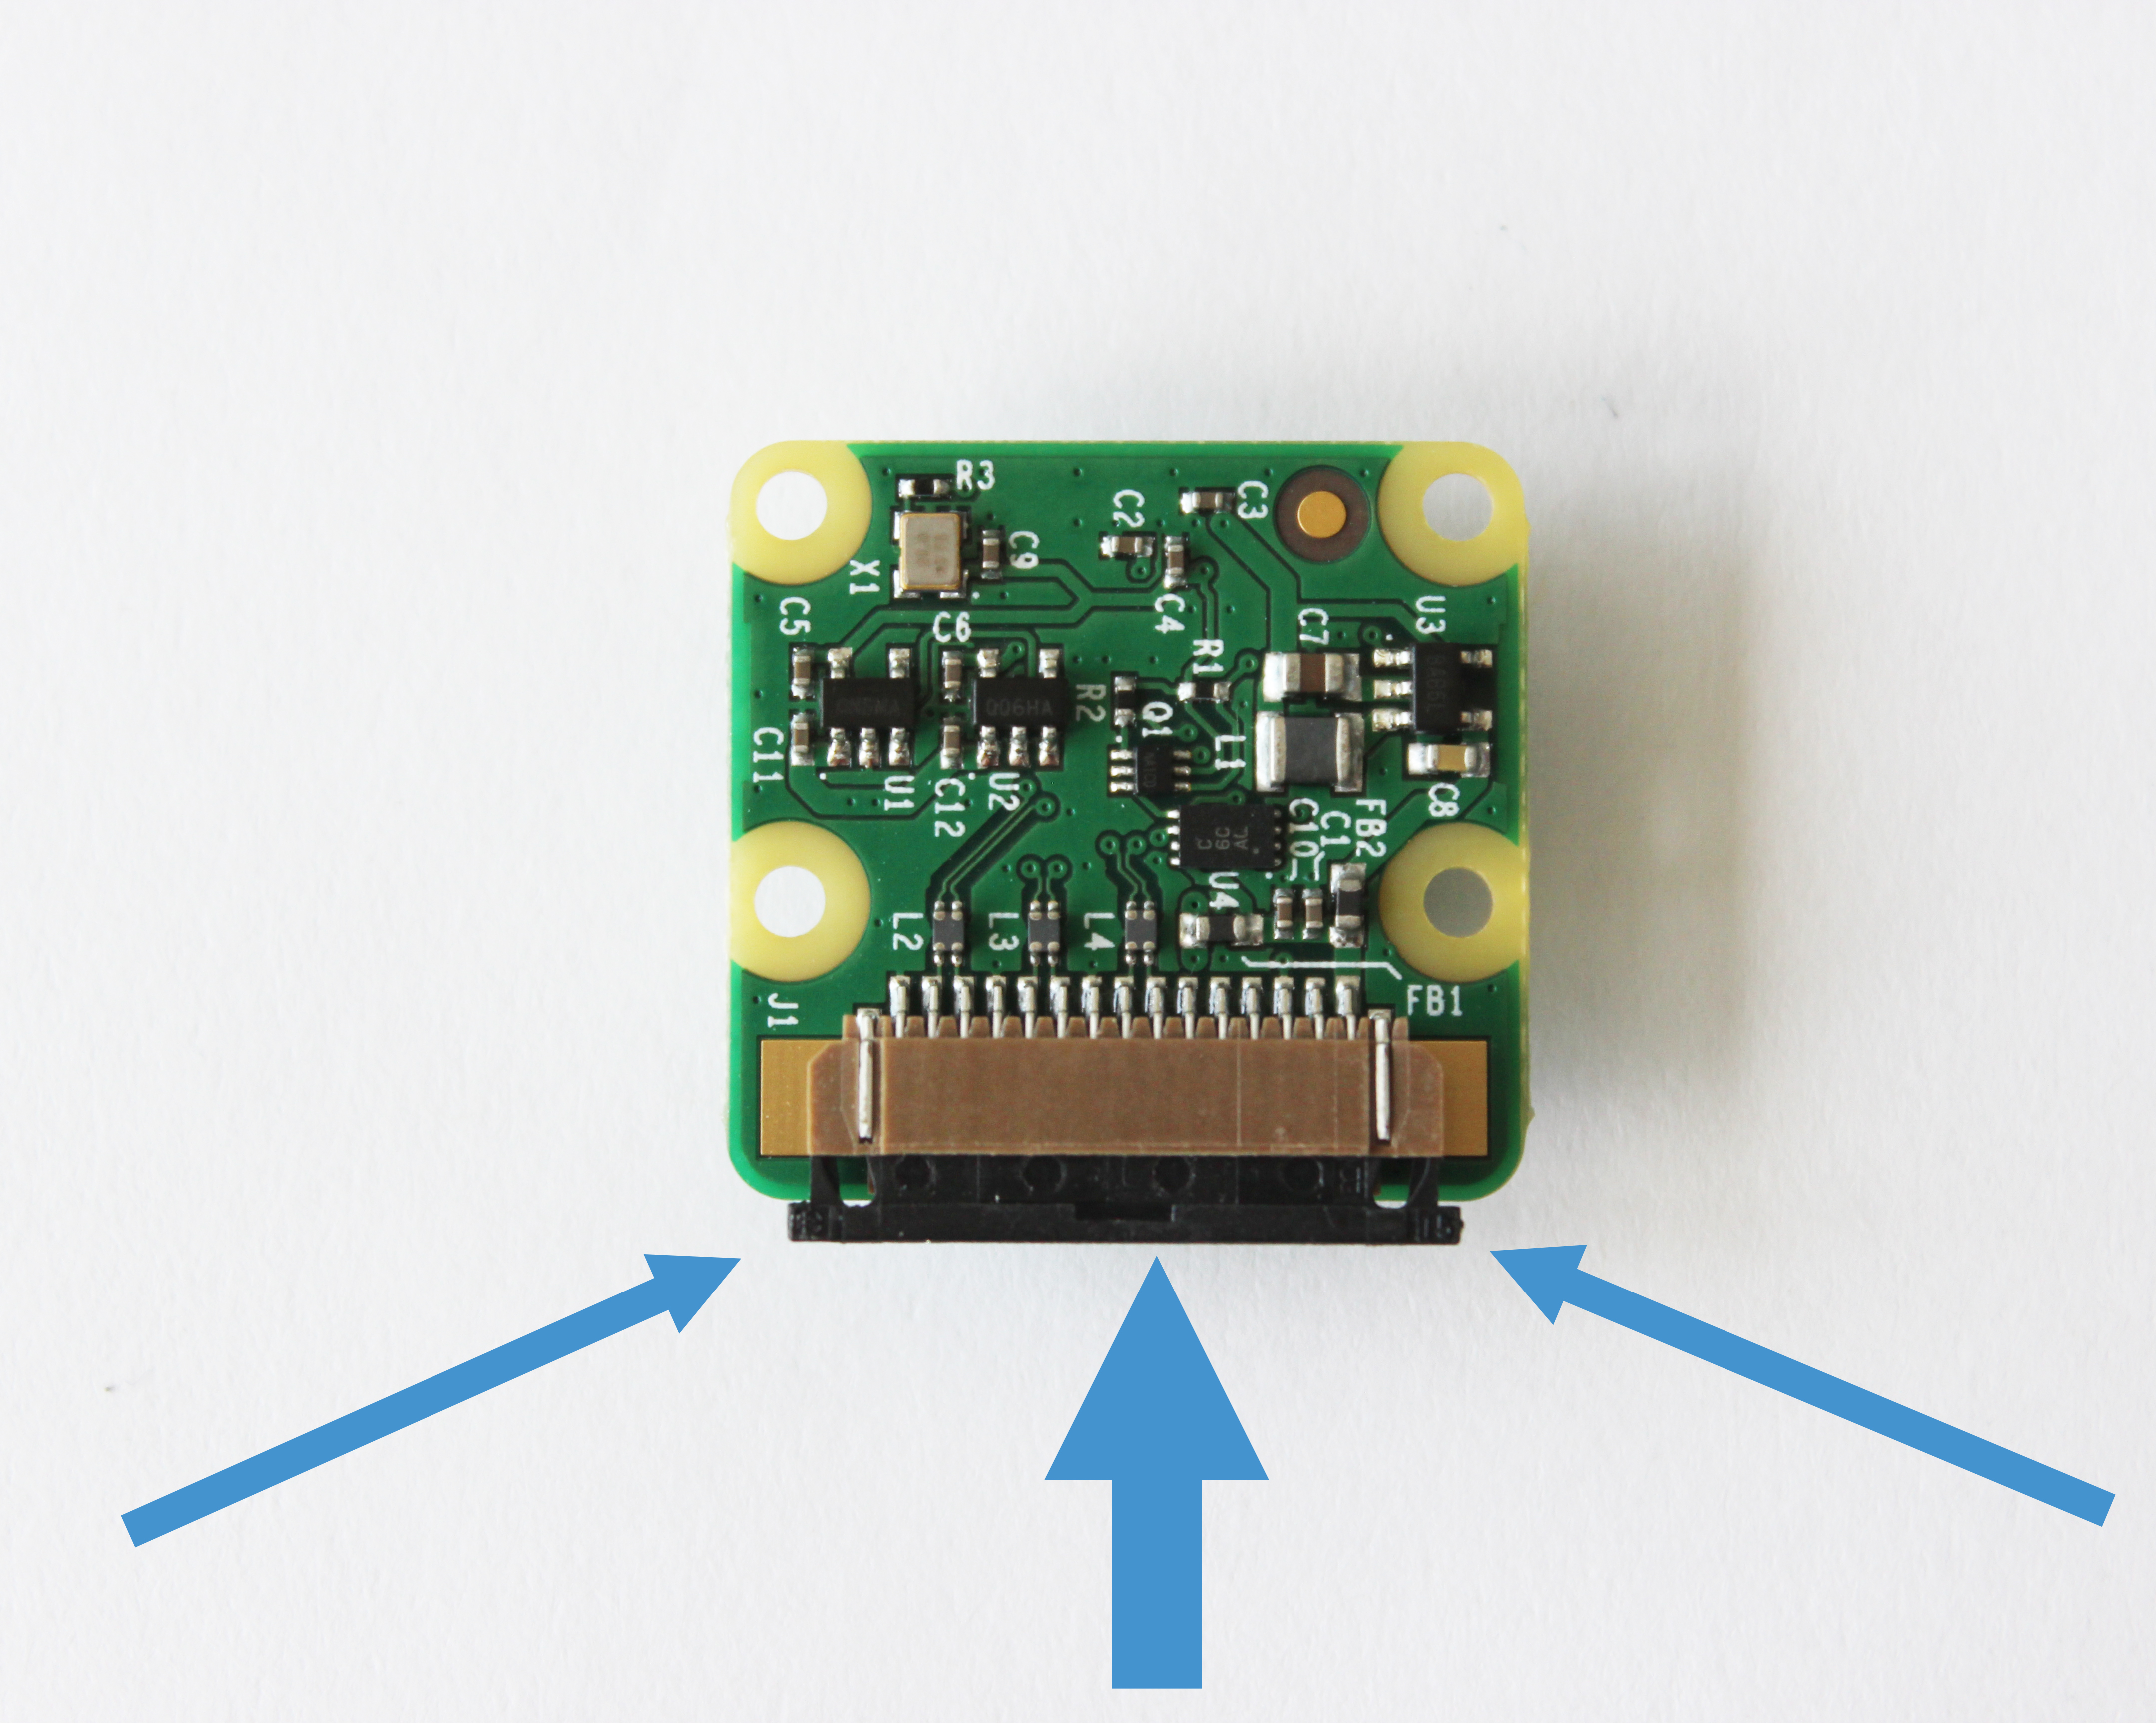
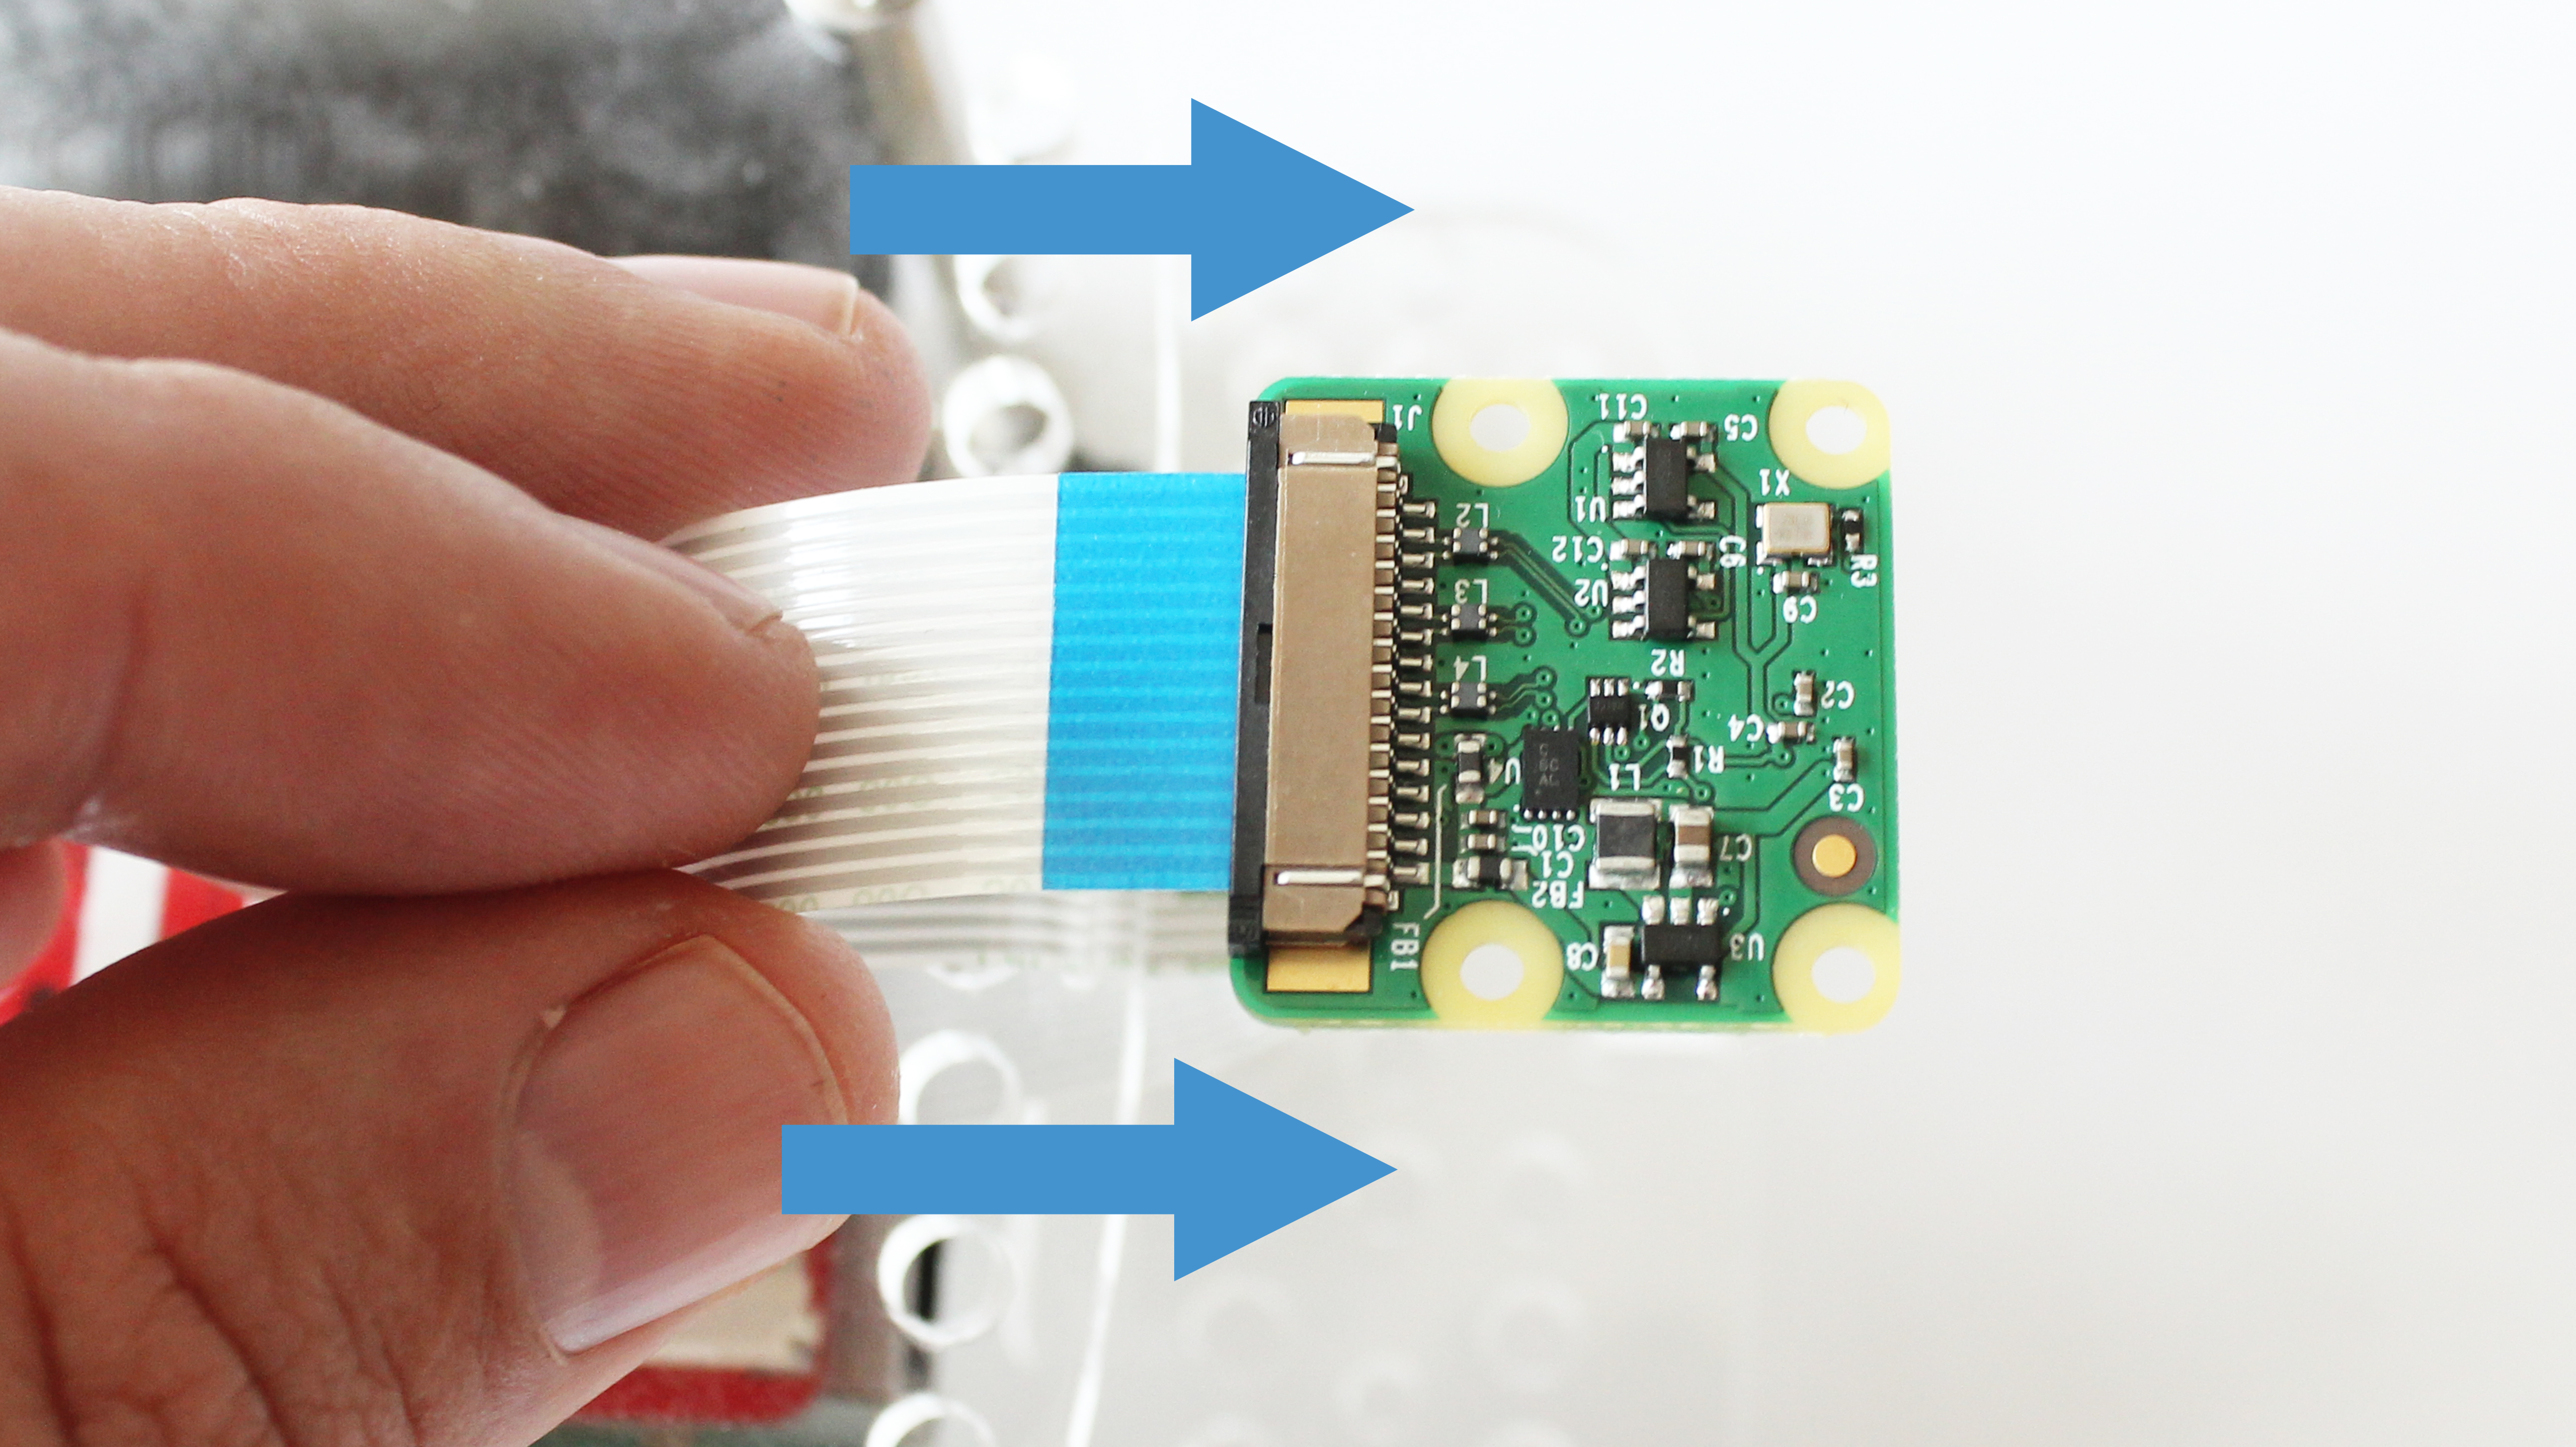
- Slide the ribbon through the camera slot on the GoPiGo3 board.
- Slide the GoPiGo3 board back onto the Raspberry Pi.
- Screw the GoPiGo3 board back onto the Raspberry Pi.
- Slide the ribbon through the camera slot on the GoPiGo3 board.
-
5. Reattach the acrylic to the GoPiGo3.
-
-
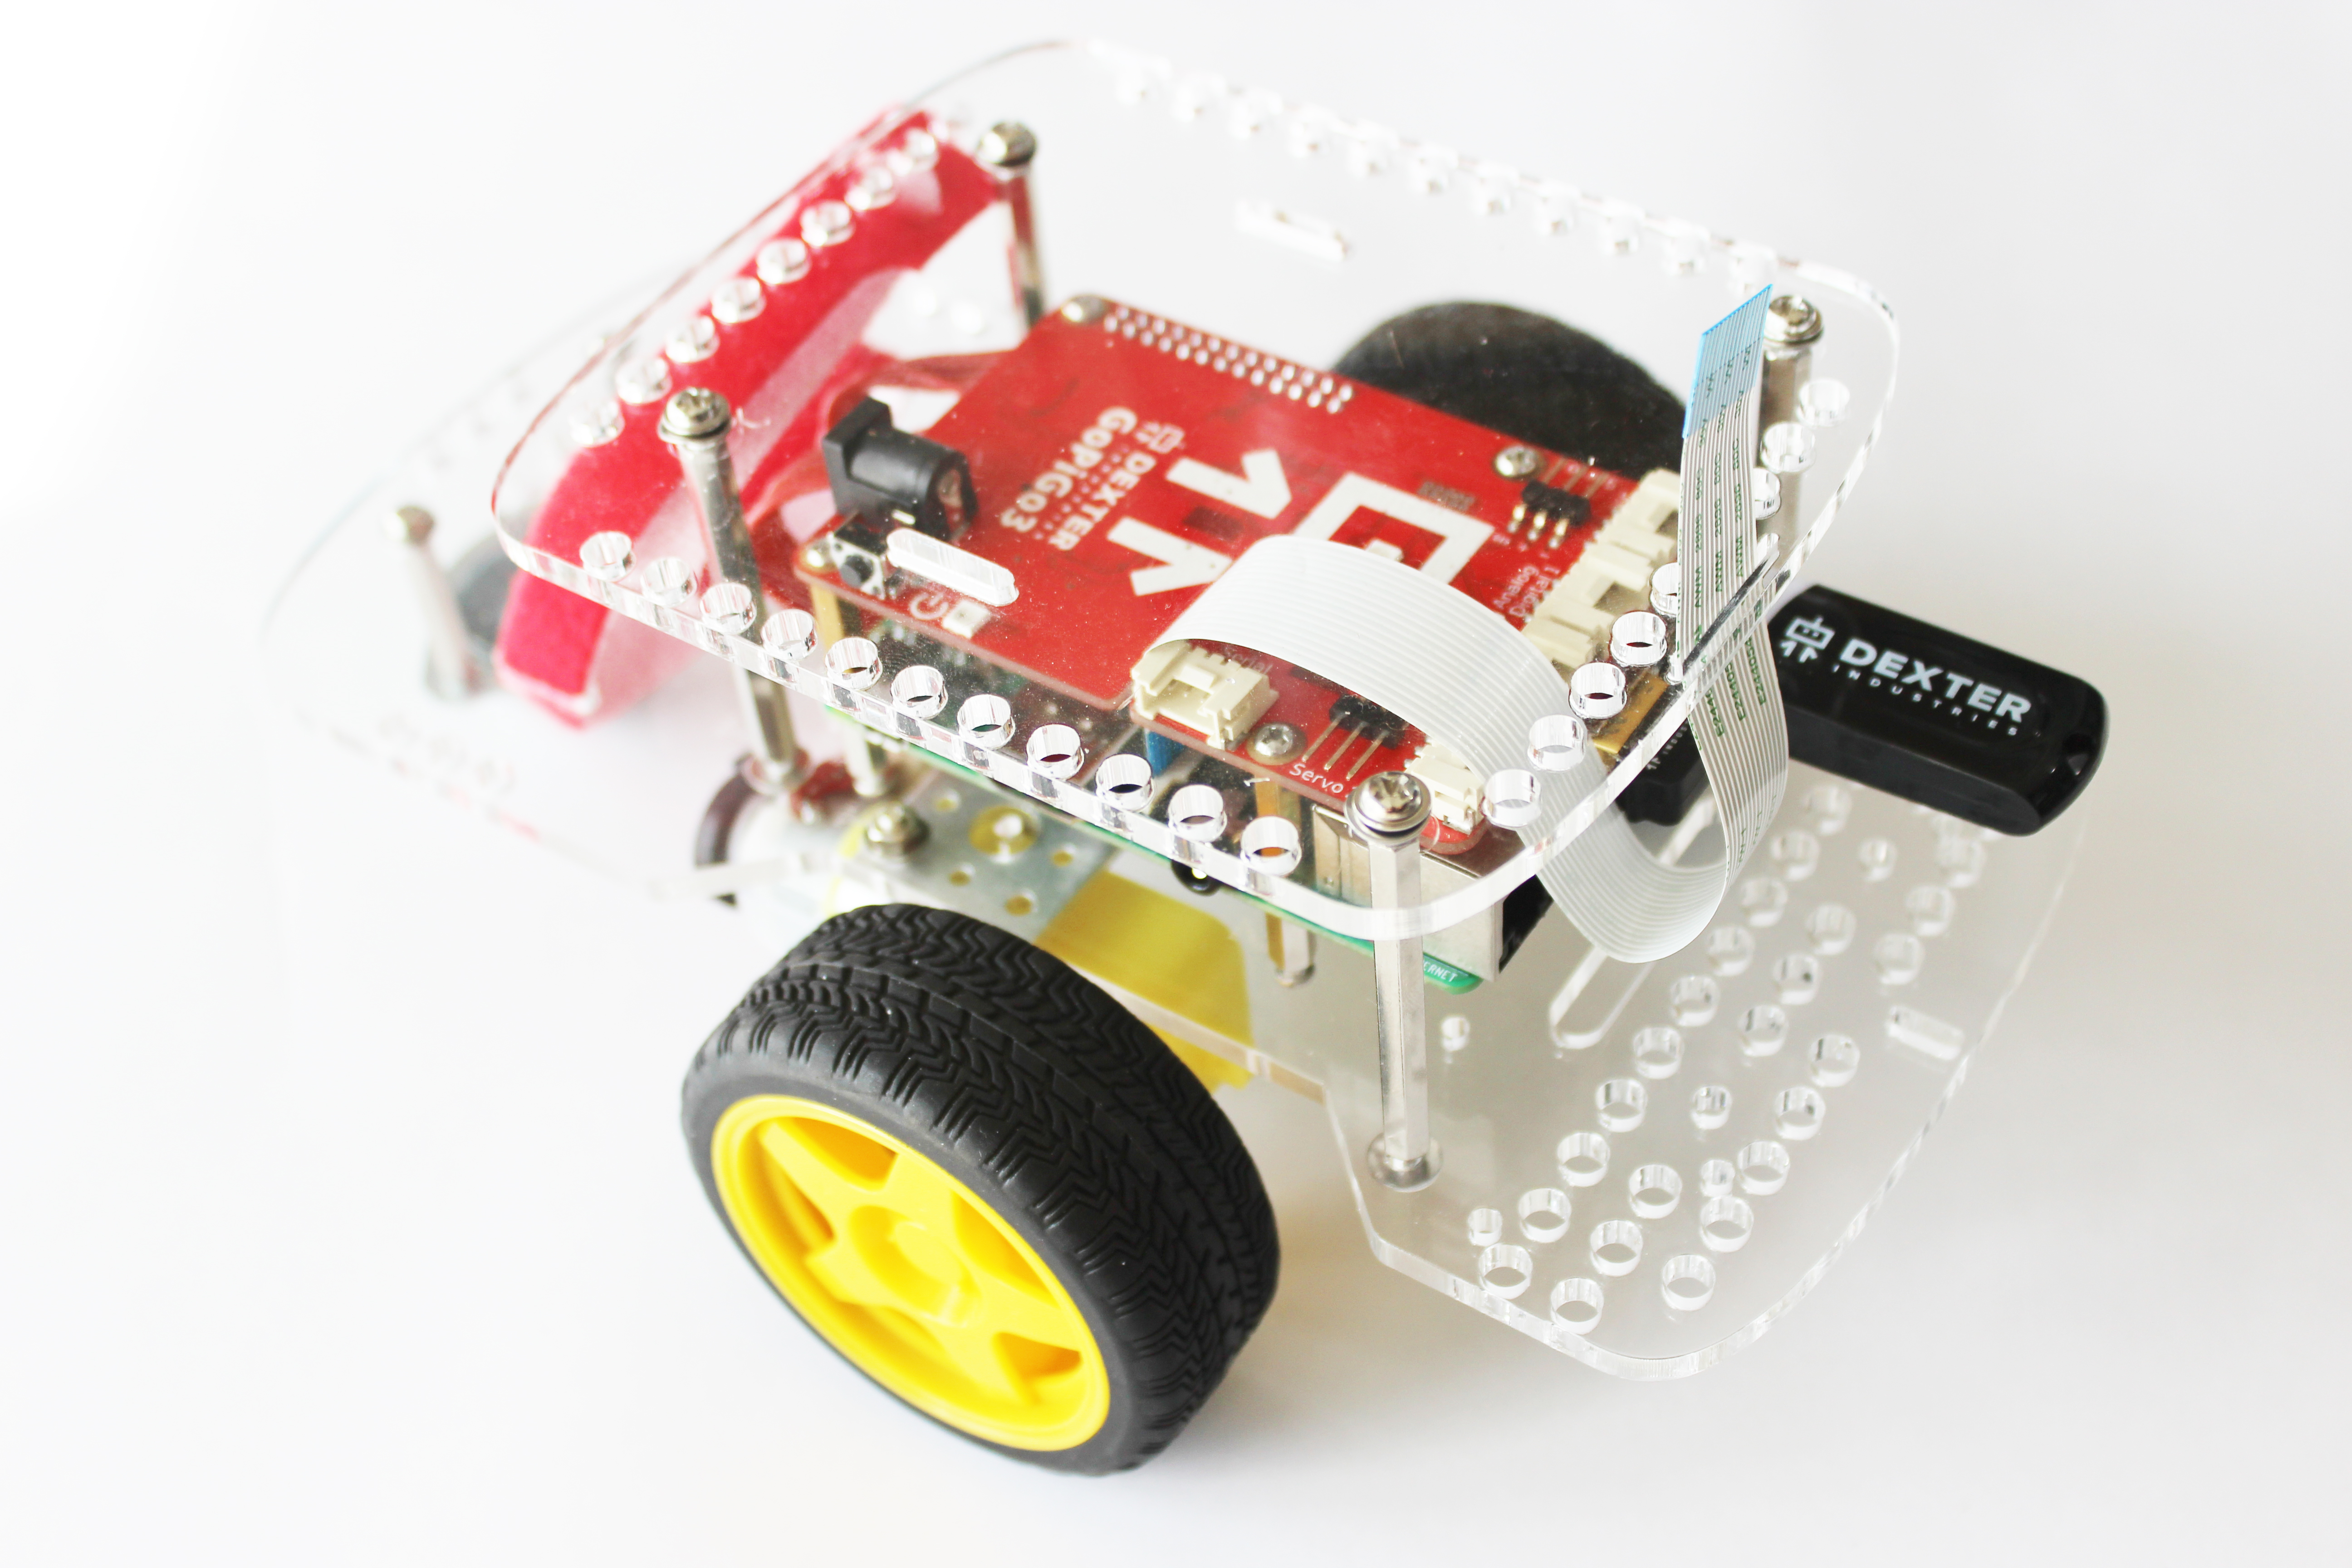
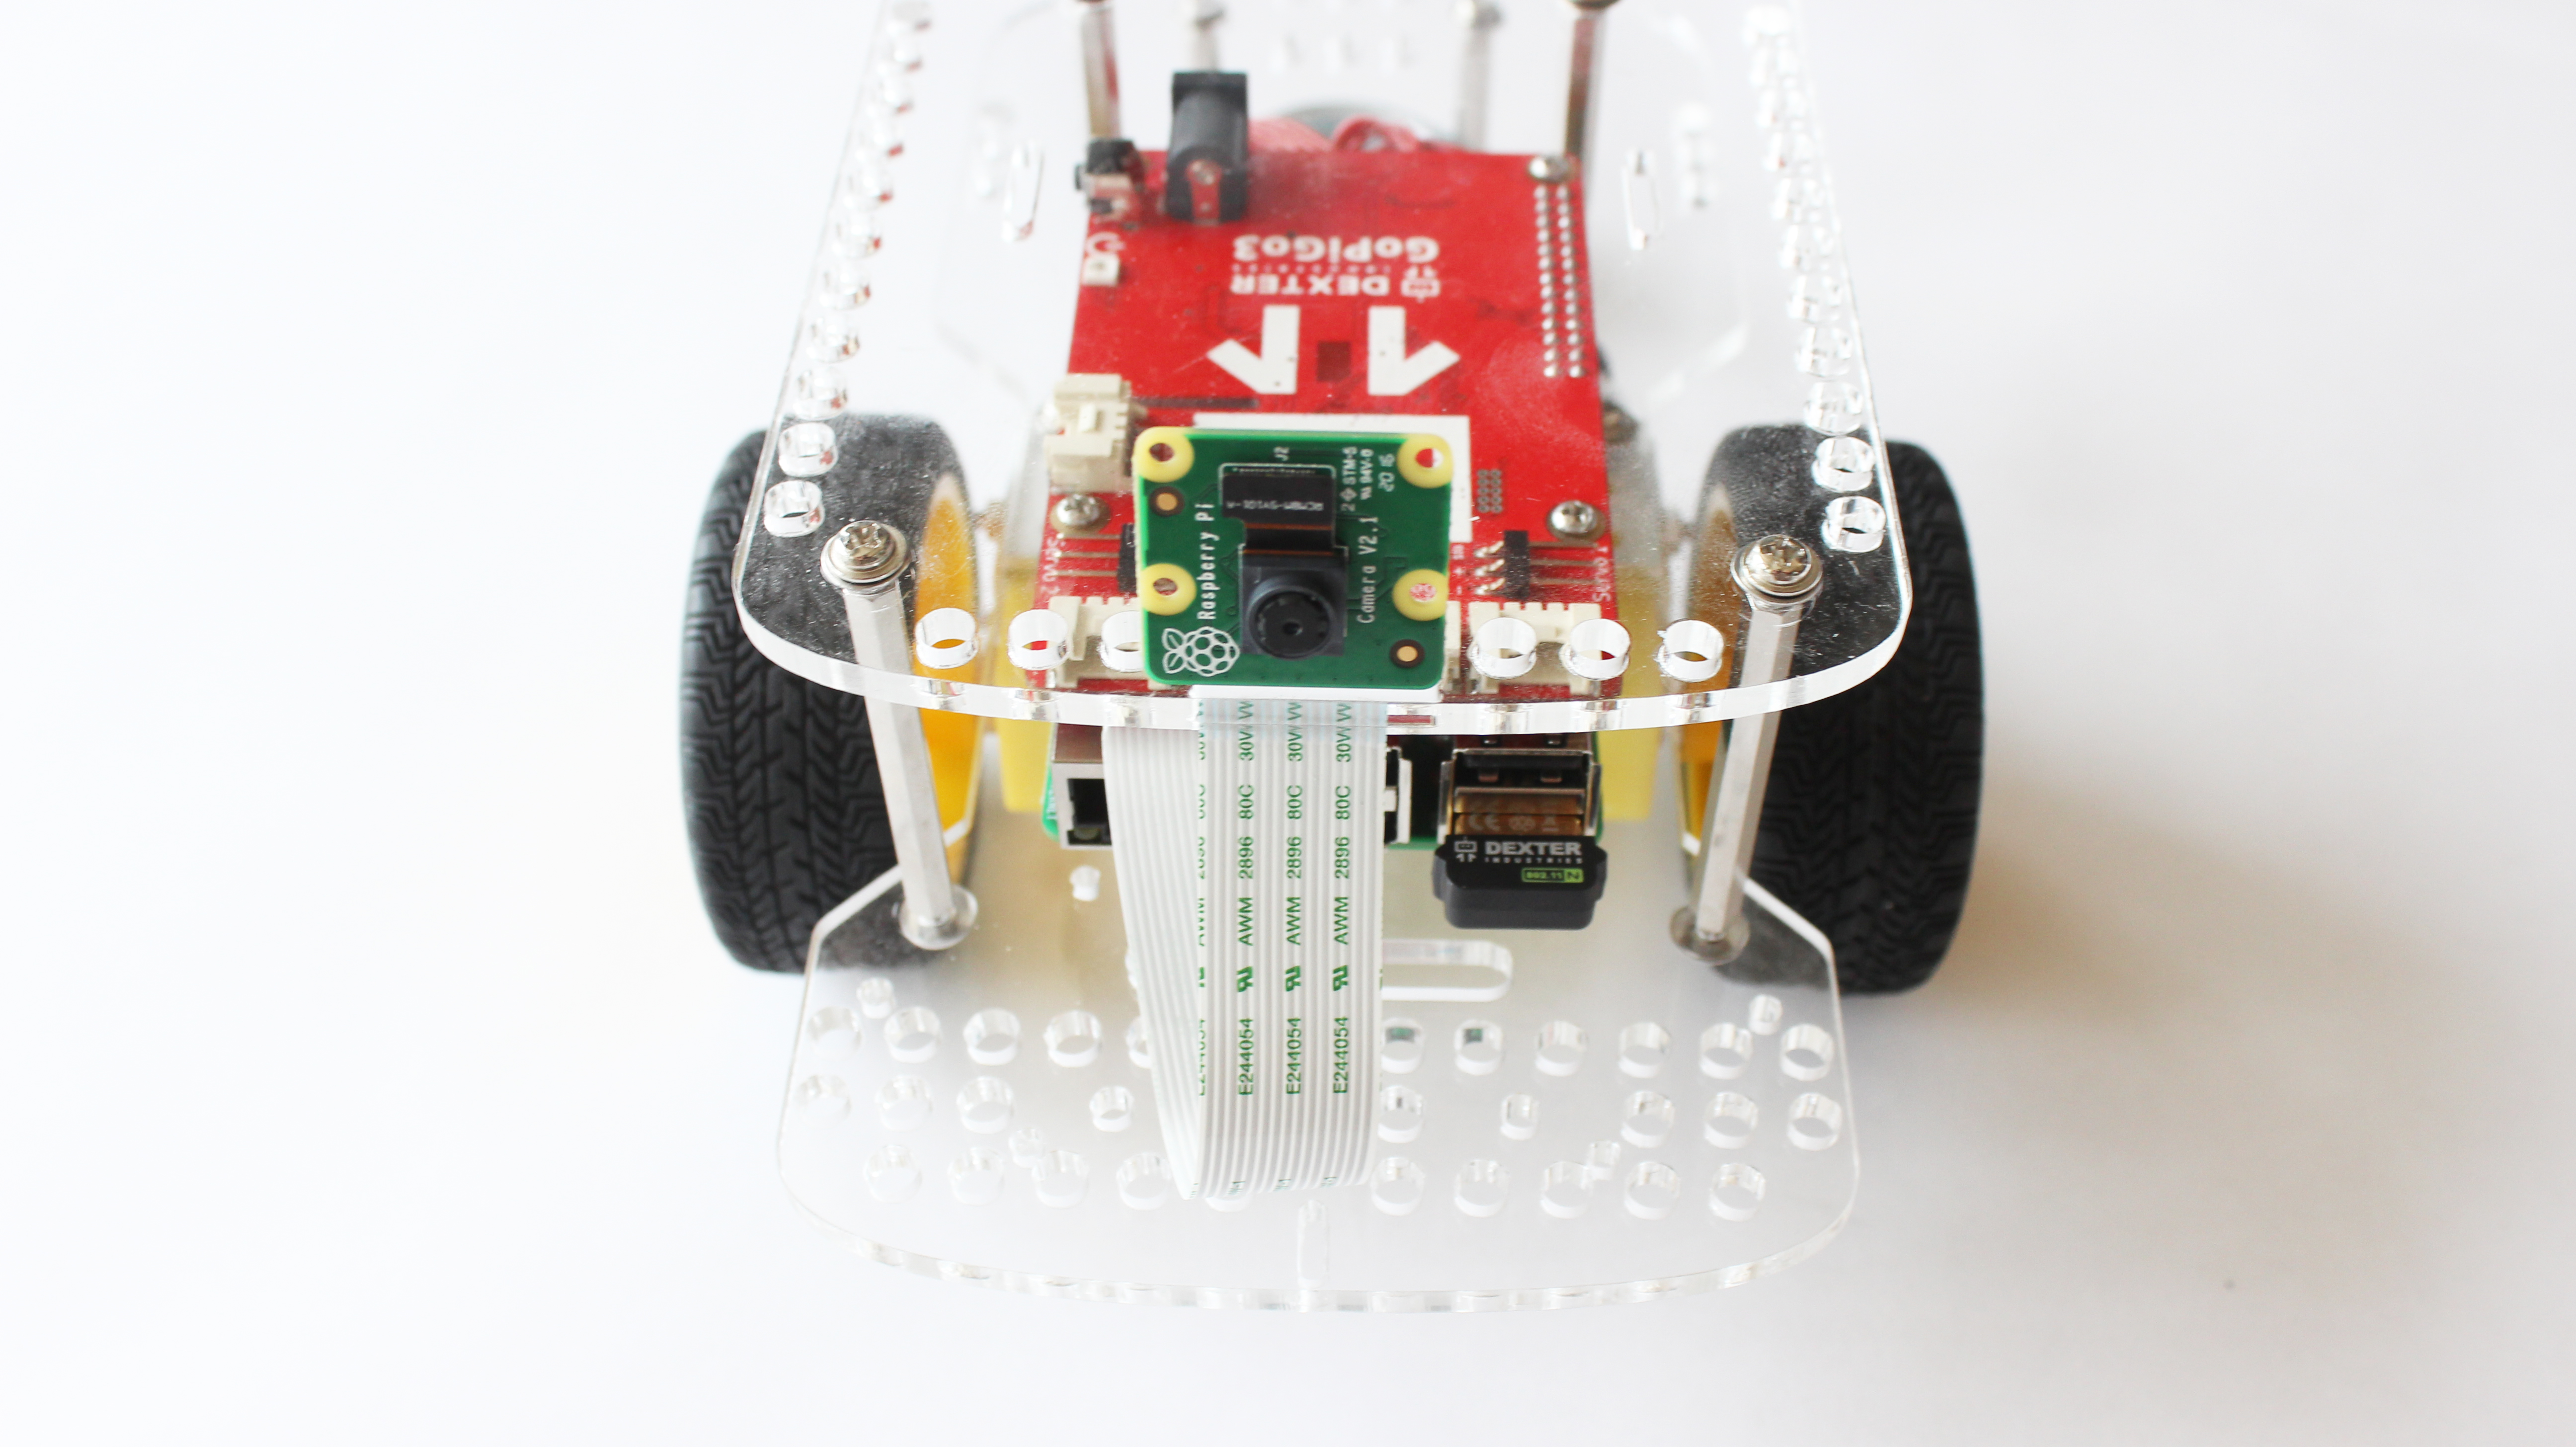
- Place the acrylic canopy back on the GoPiGo robot.
- Slide the ribbon through the camera slot on the GoPiGo3 arcylic canopy so it is sticking out through the top.
- Screw the acrylic canopy back in place.
-
6. Connect the camera to the camera ribbon.
-
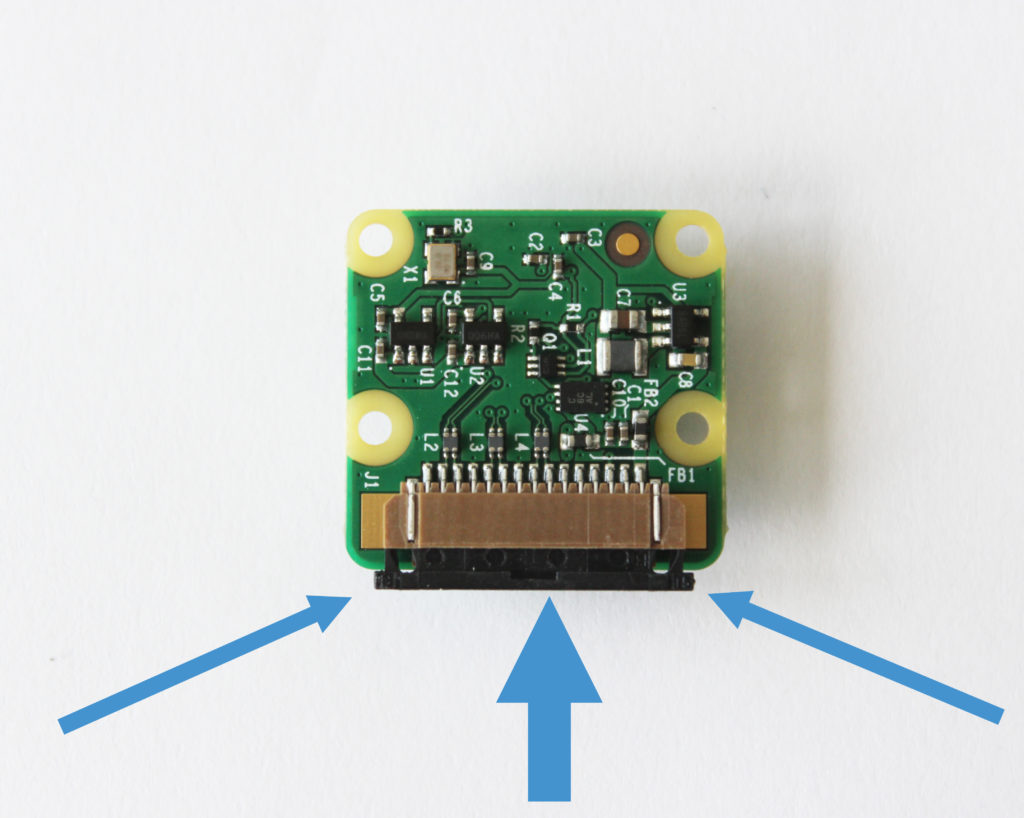
- On the Pi Camera, find the camera port. We will slide the camera ribbon up into this port.
-
Attach the Camera or the Distance Sensor to the GoPiGo3 Raspberry Pi Robot
- On the camera, slide the plastic clamp down to open it. Turn the camera so that it’s facing towards the front of the GoPiGo3, and turn the ribbon so that the metal strips are facing towards the camera.

- Slide the ribbon into the camera. The blue strip should be facing the back of the camera.
- Secure the ribbon by pushing in the edges of the port to clamp the ribbon in place.

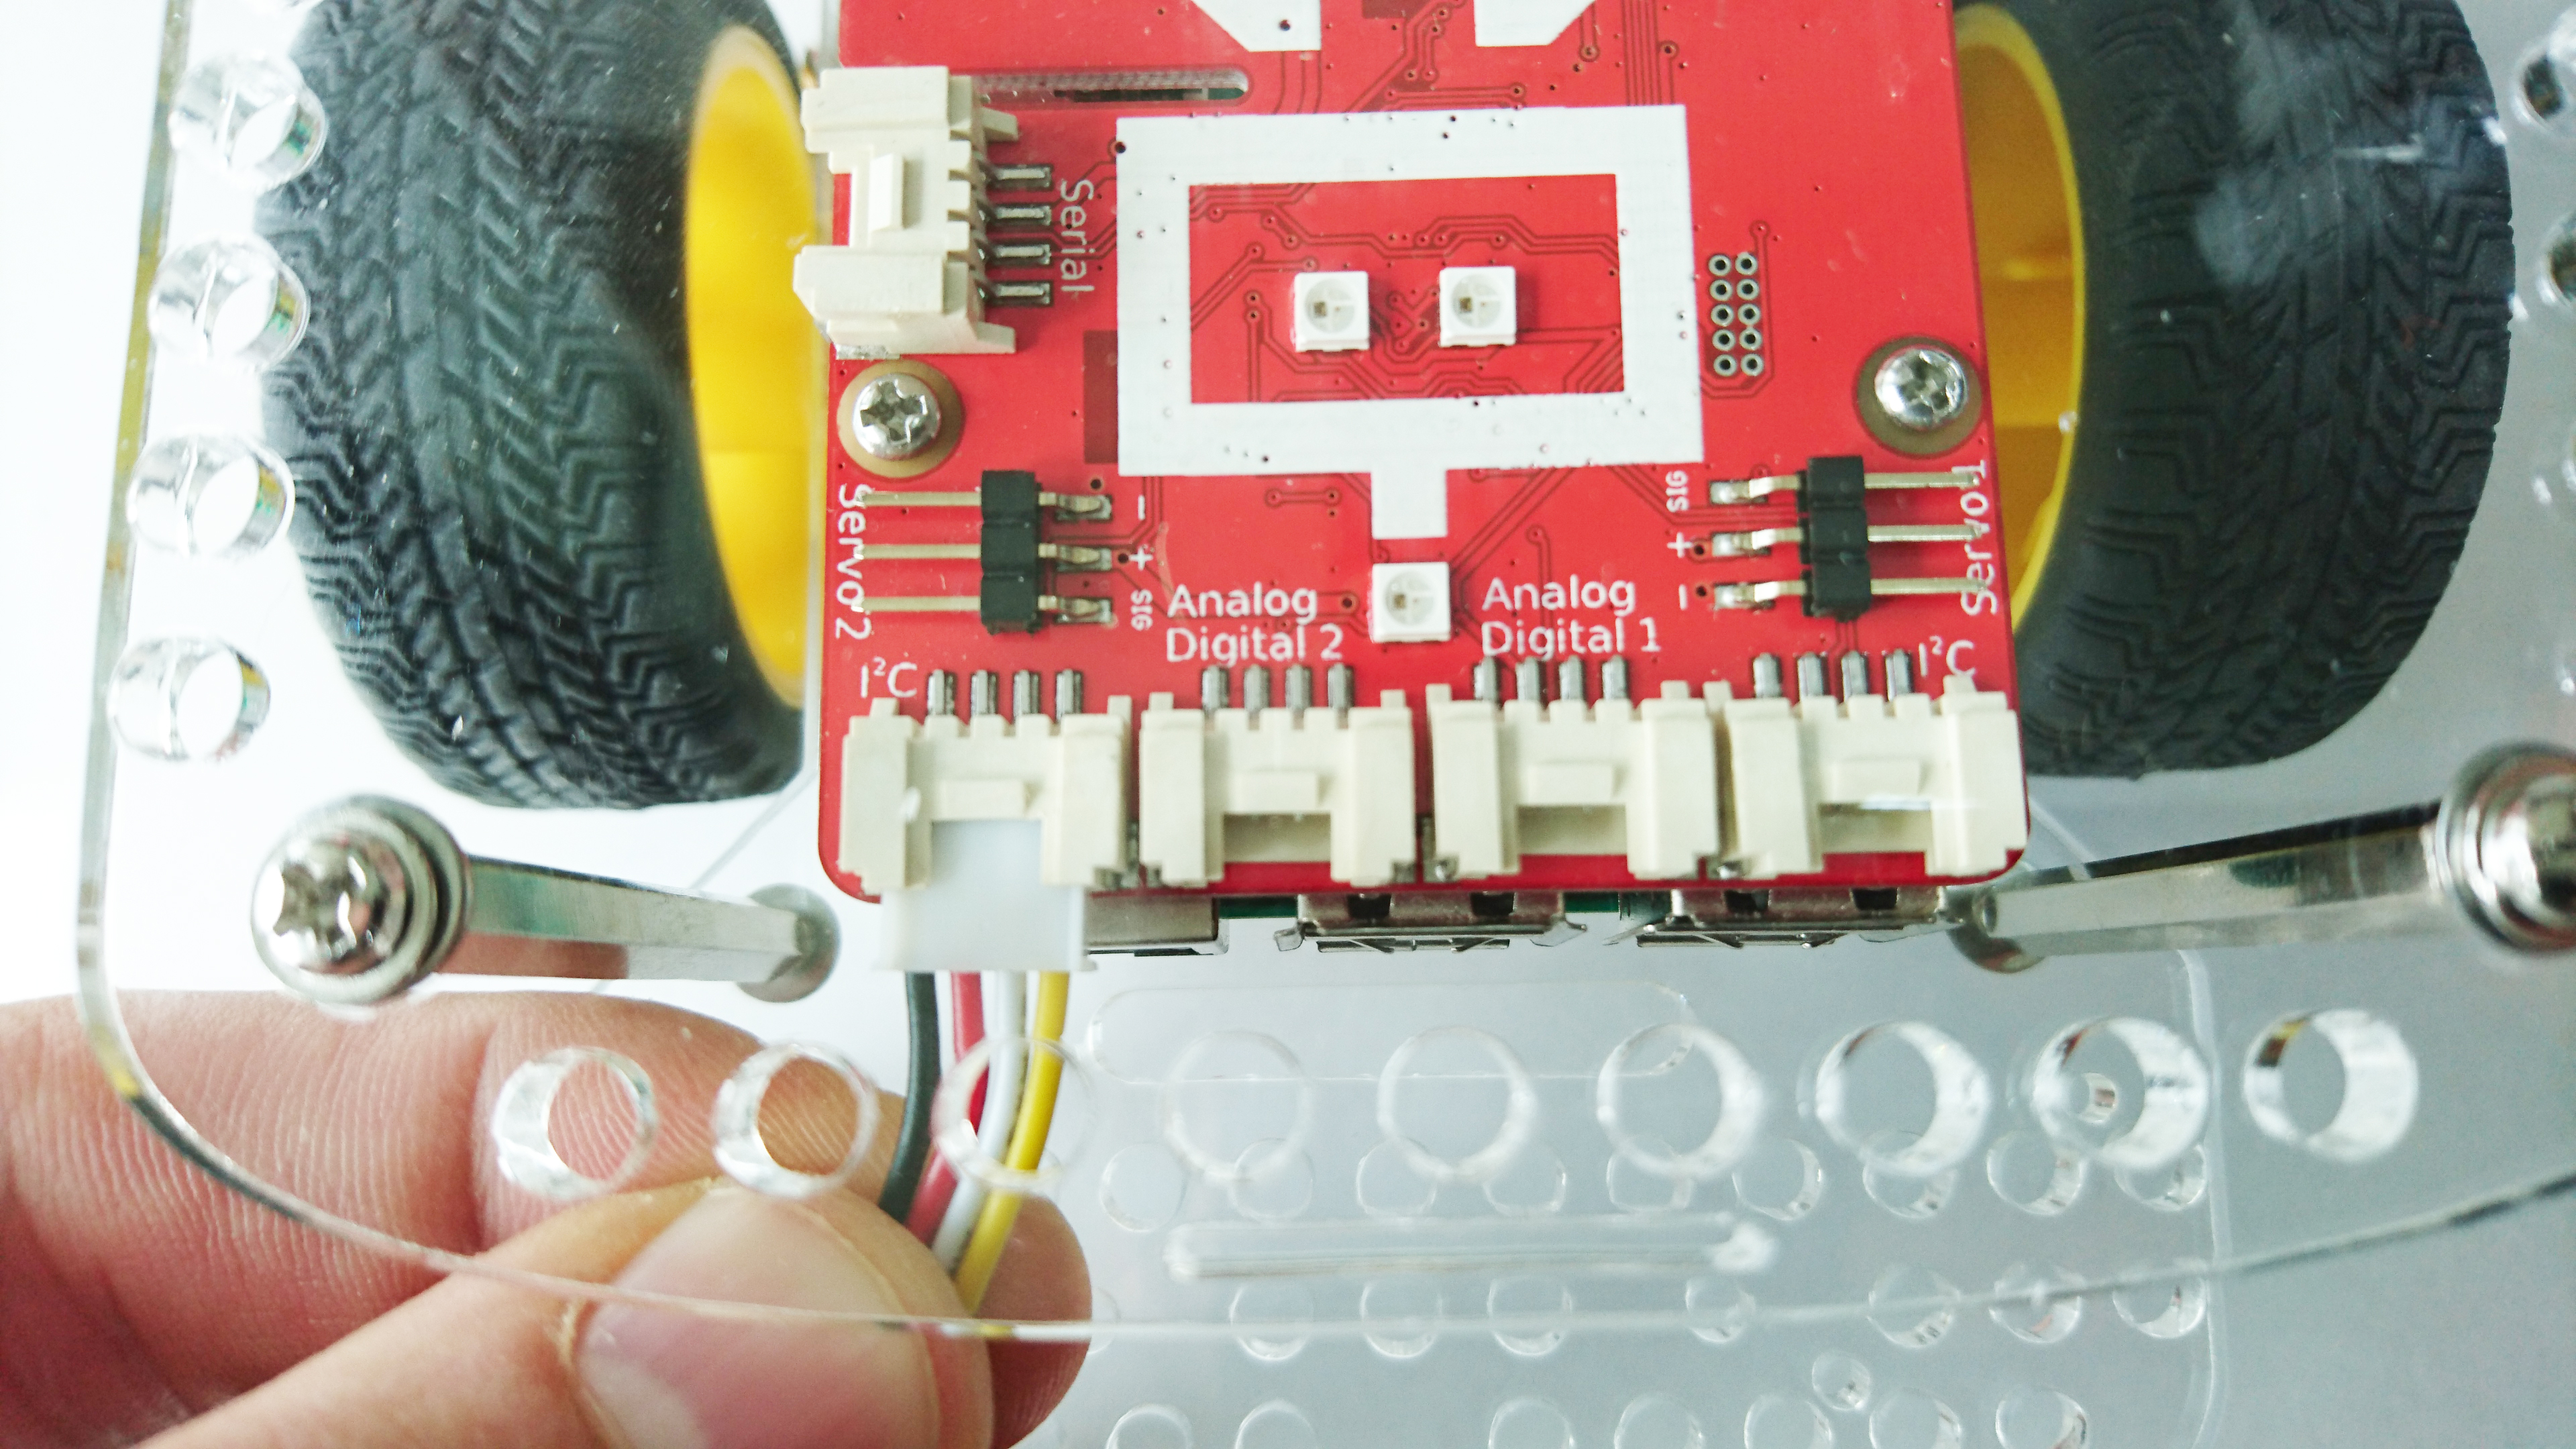
Note: If the camera ribbon interferes with the sensor ports on the GoPiGo3, you can also route the ribbon between the green Raspberry Pi Board and the Red GoPiGo3 Board, as in the picture below.
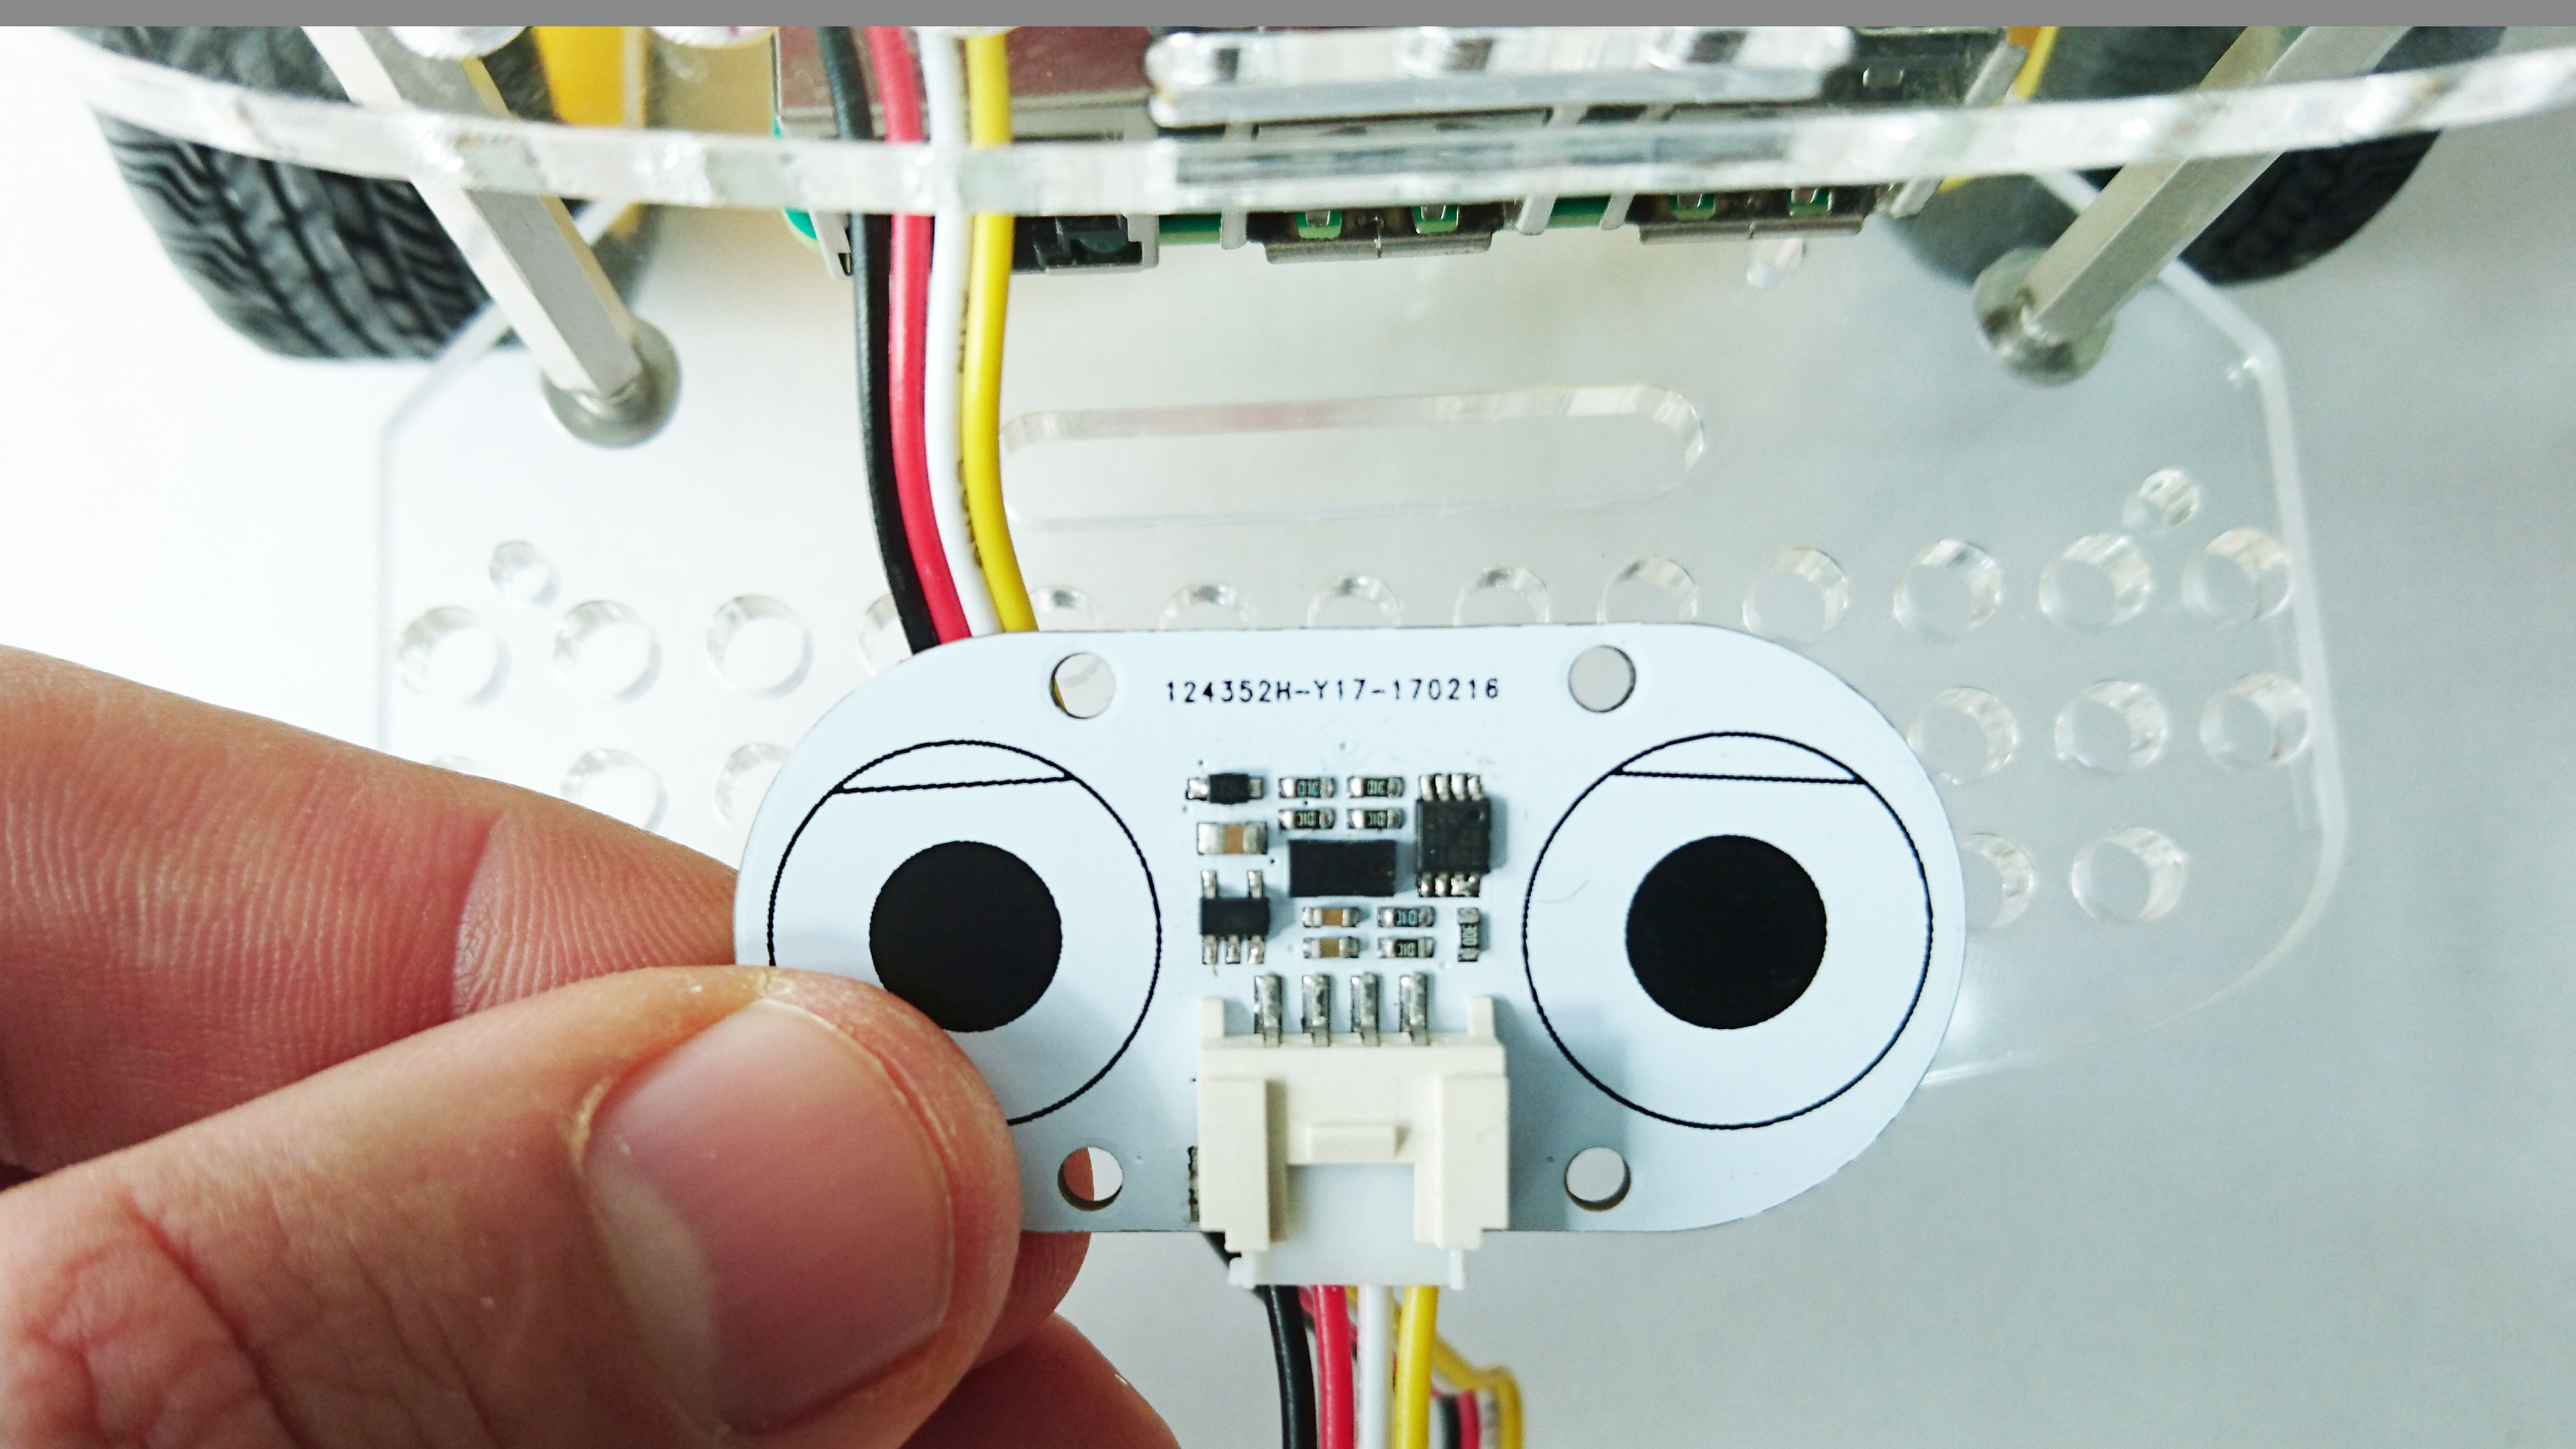
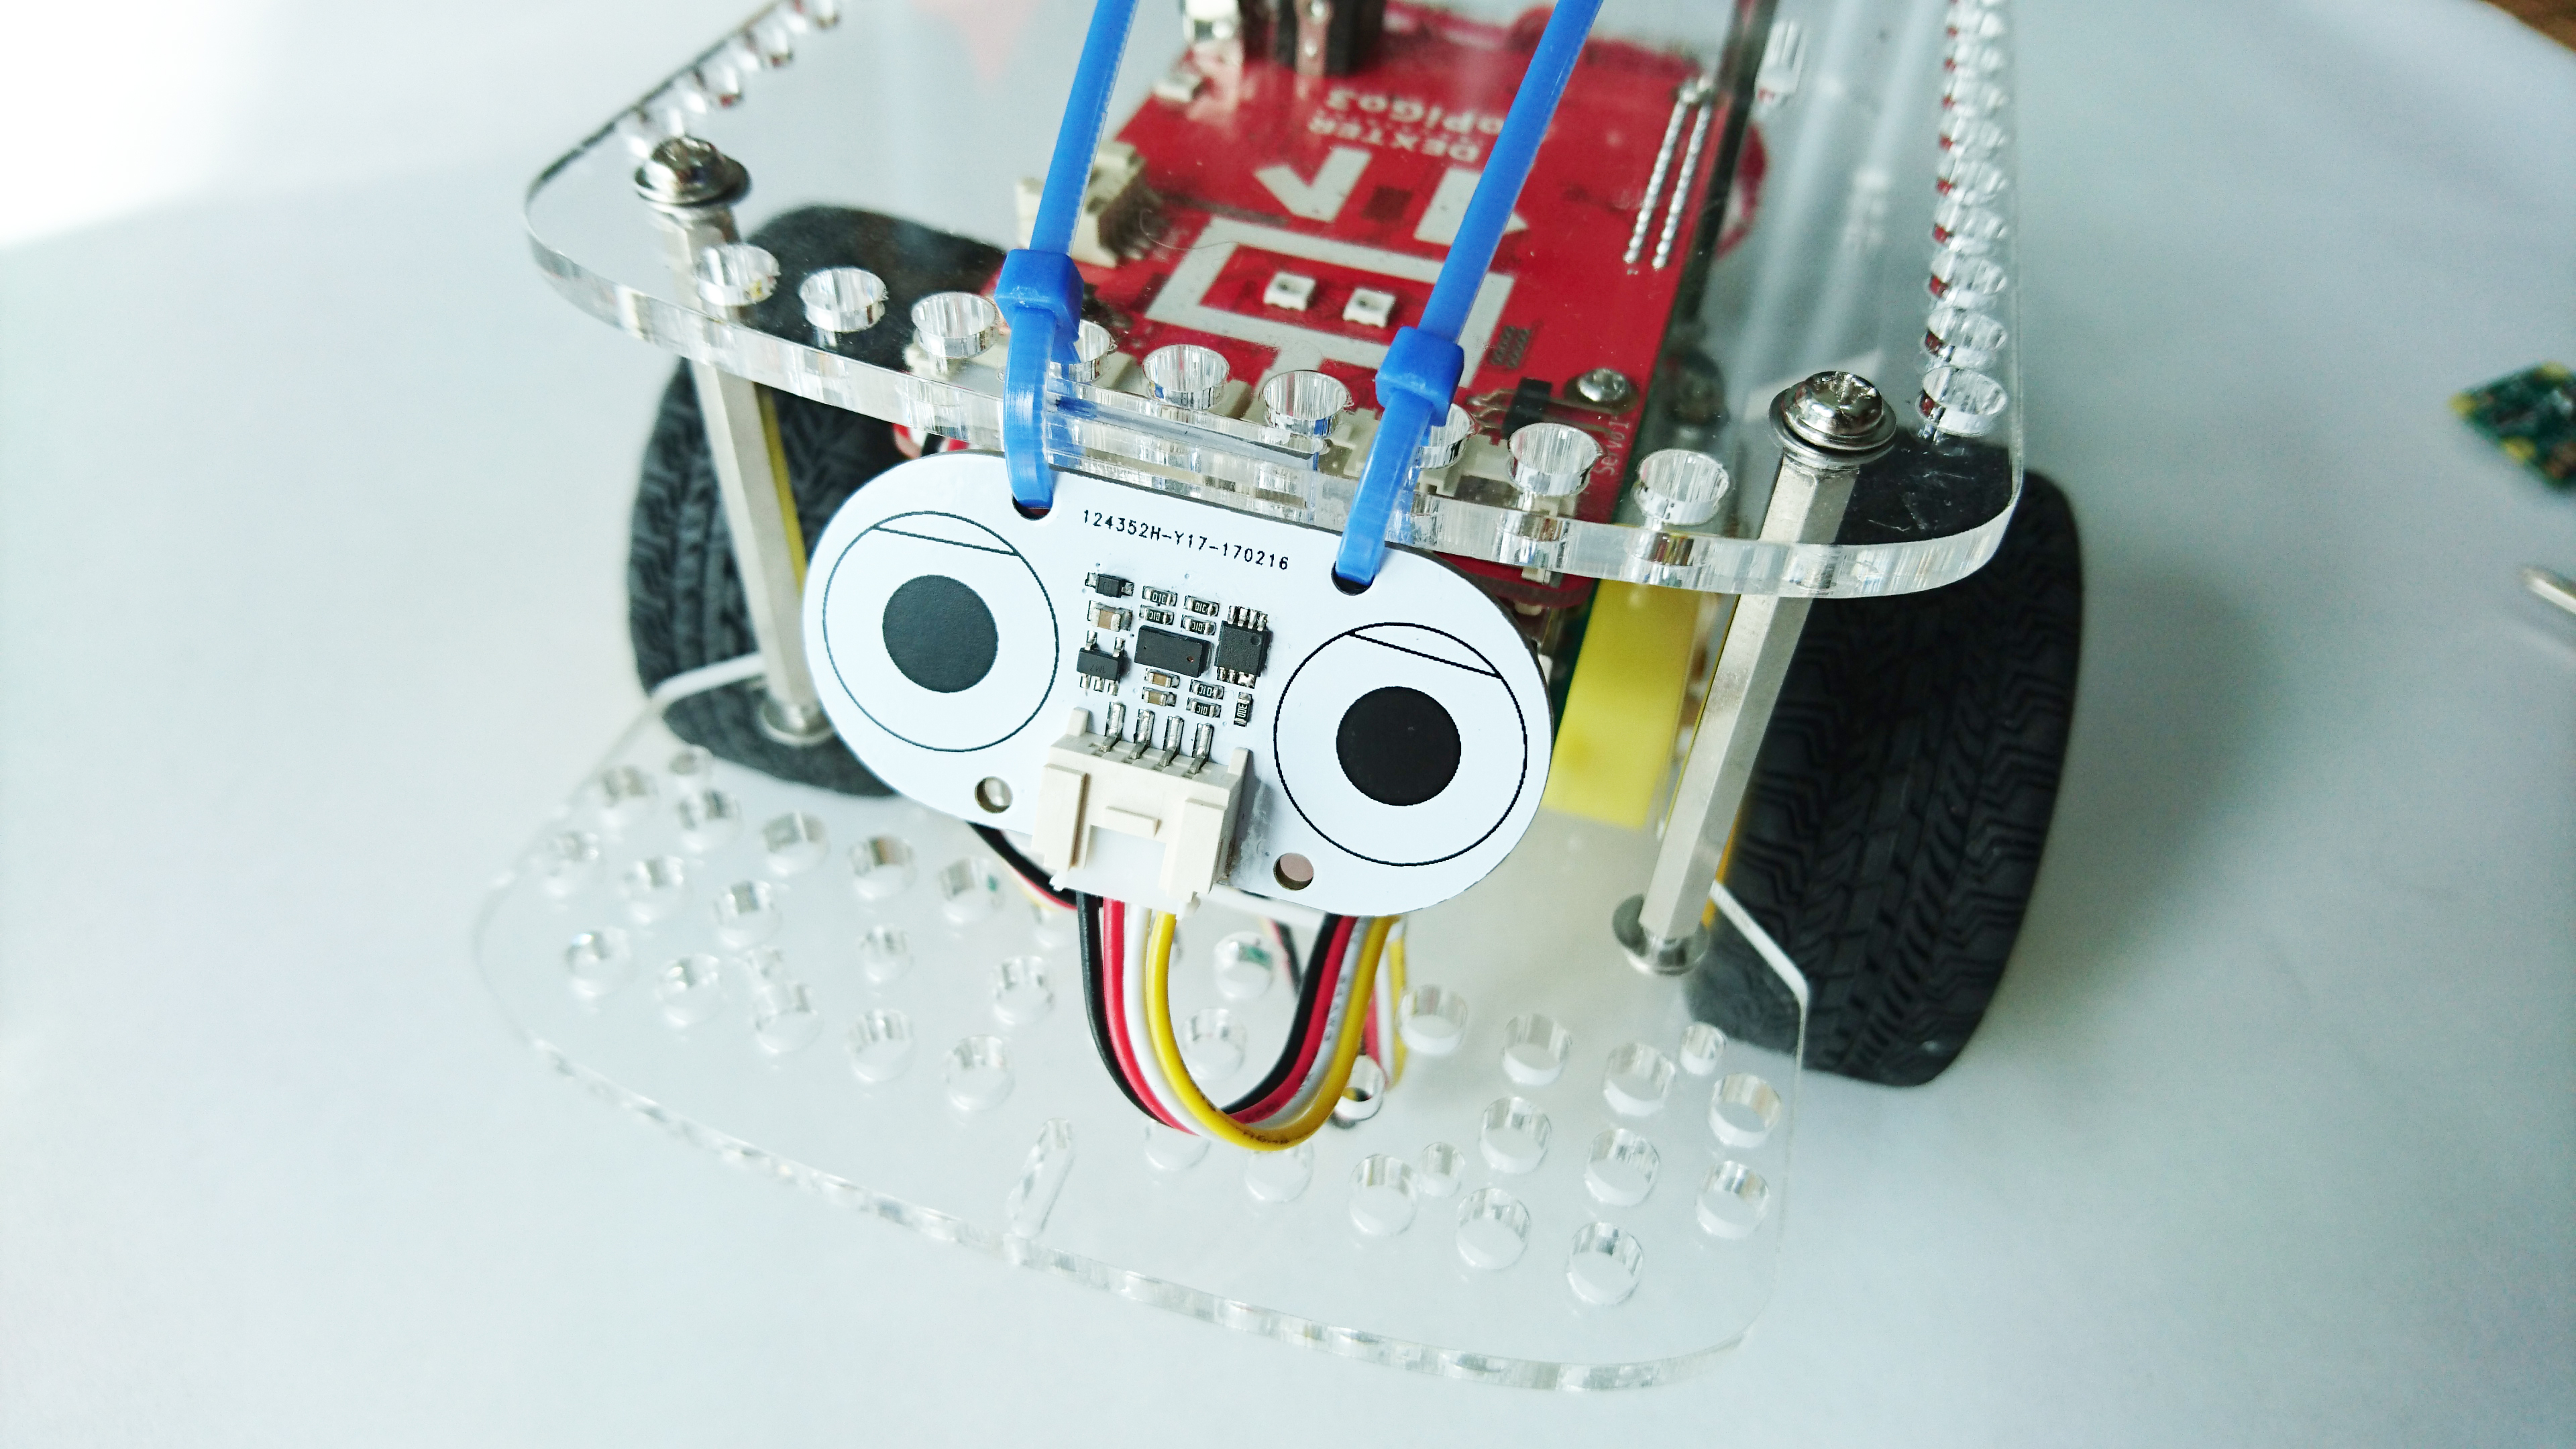
Attach the Distance Sensor Directly to the GoPiGo3 Body
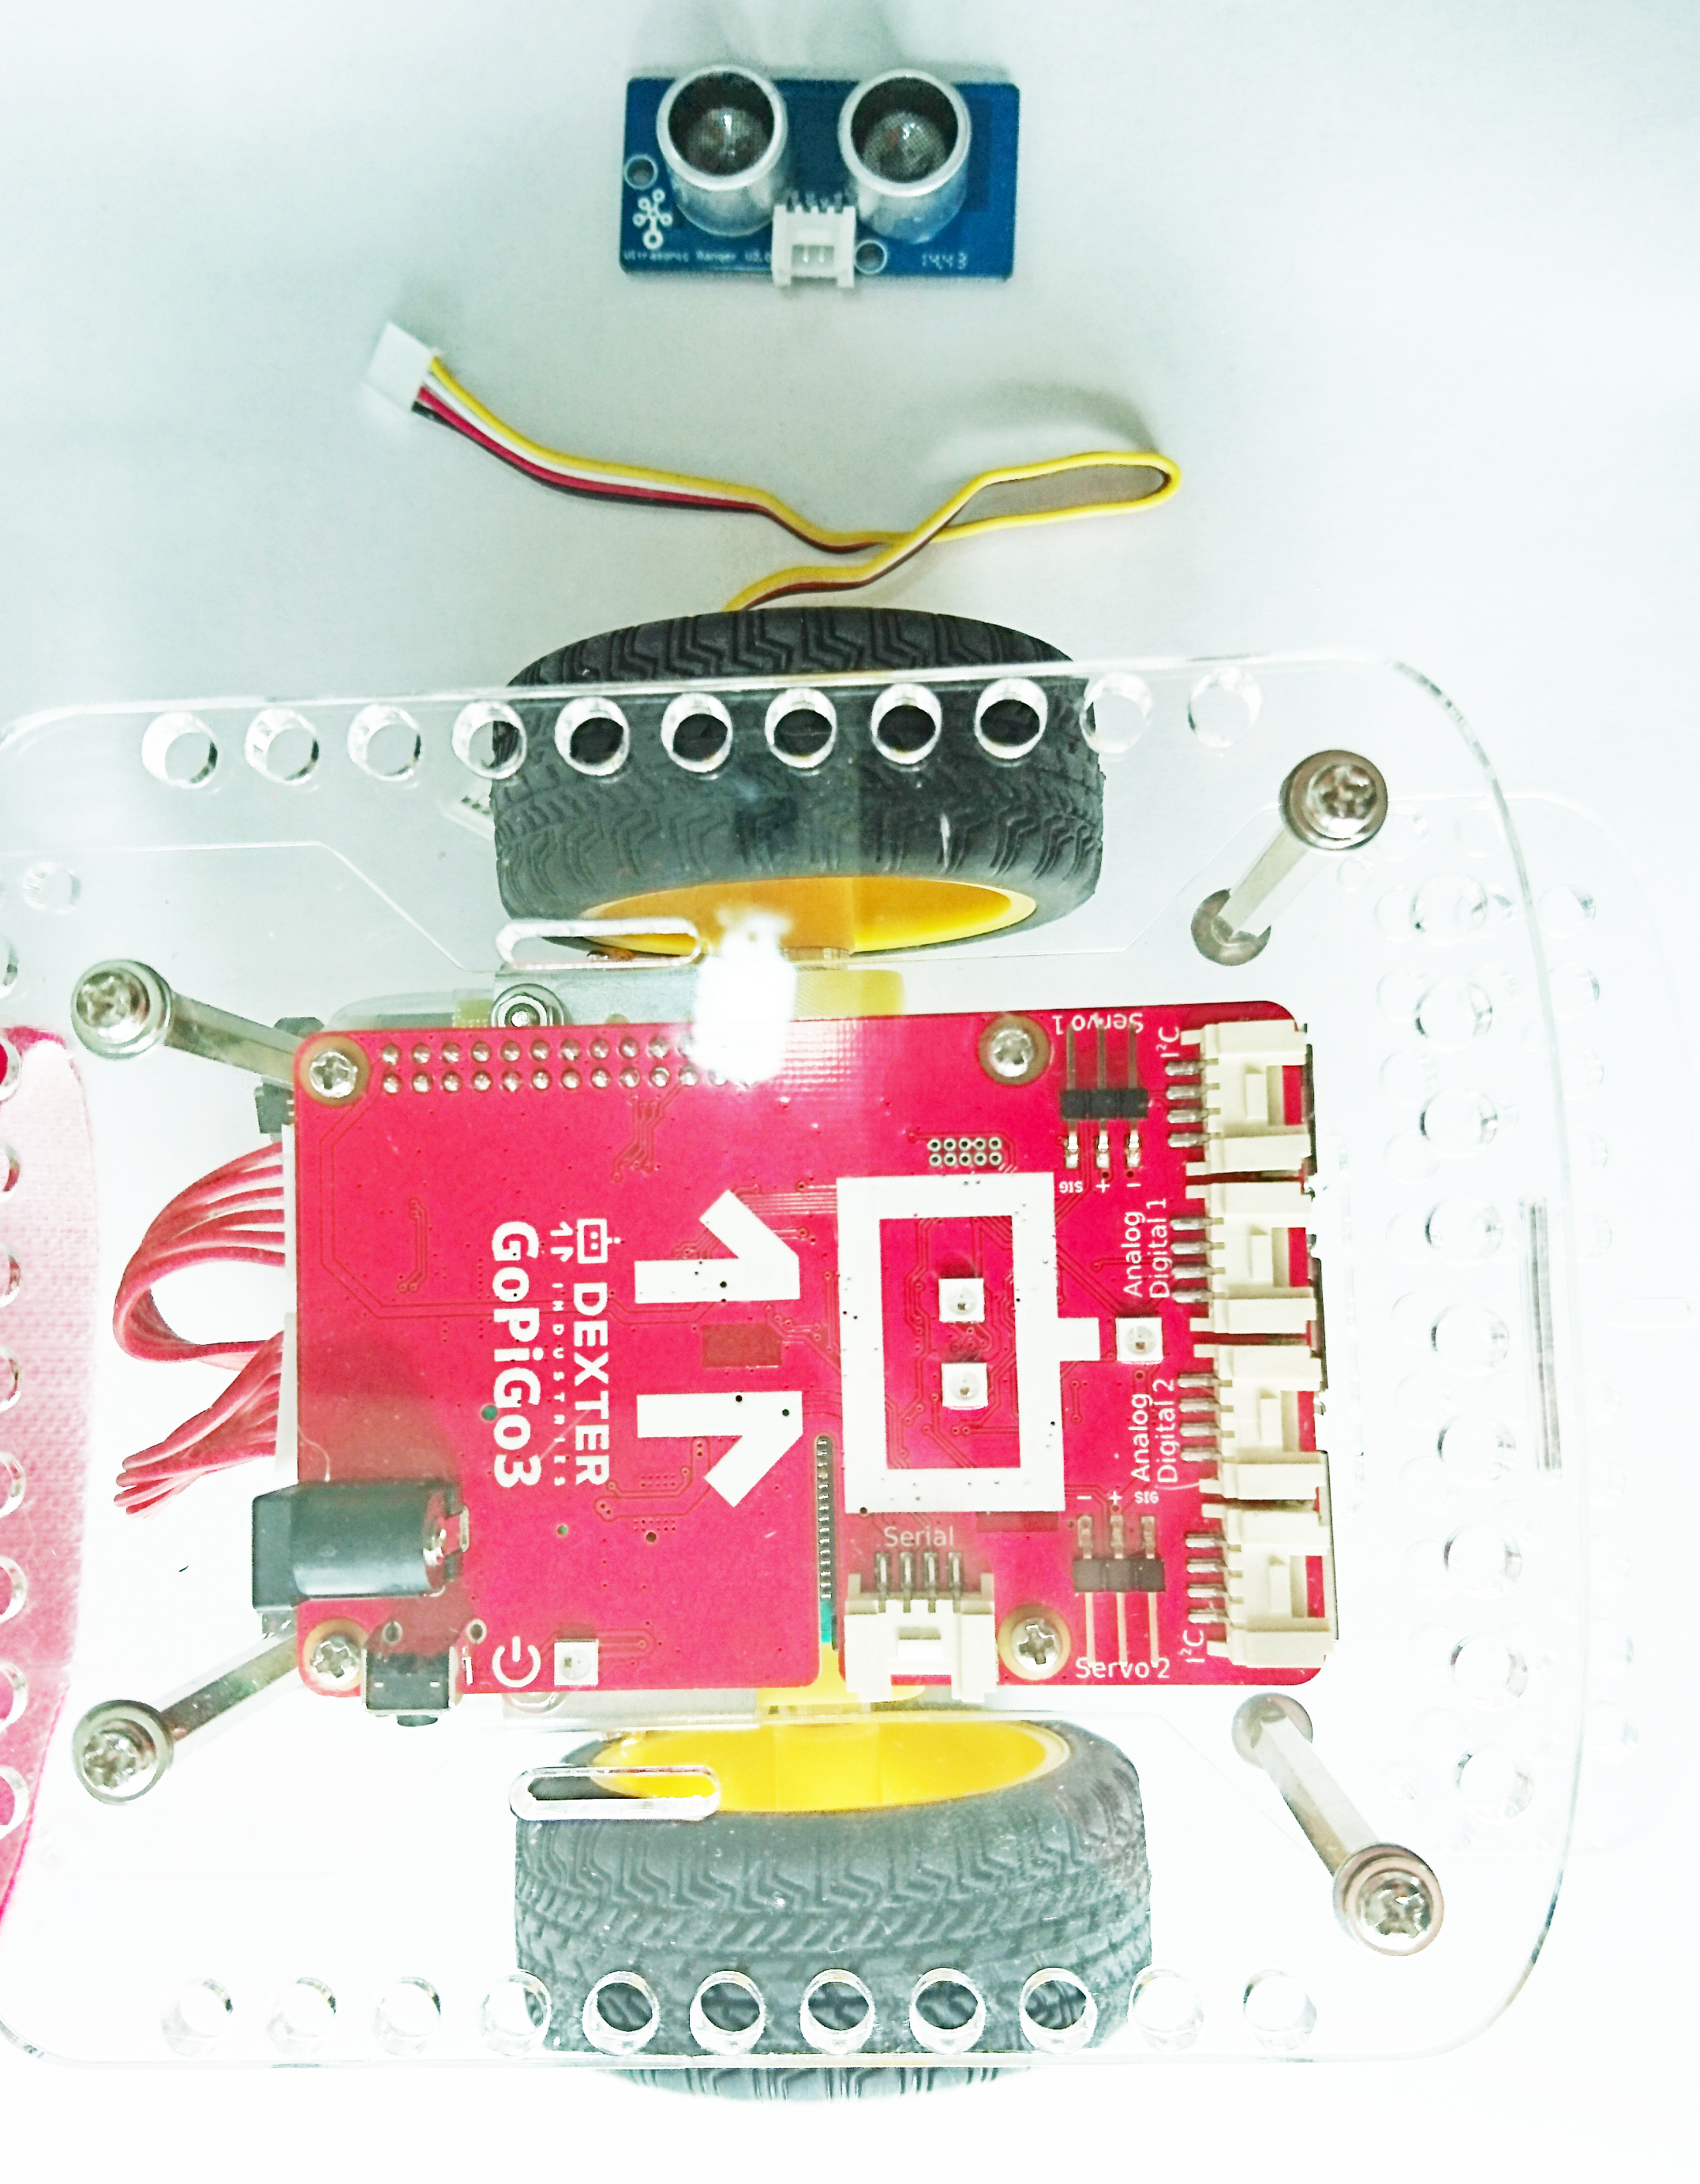
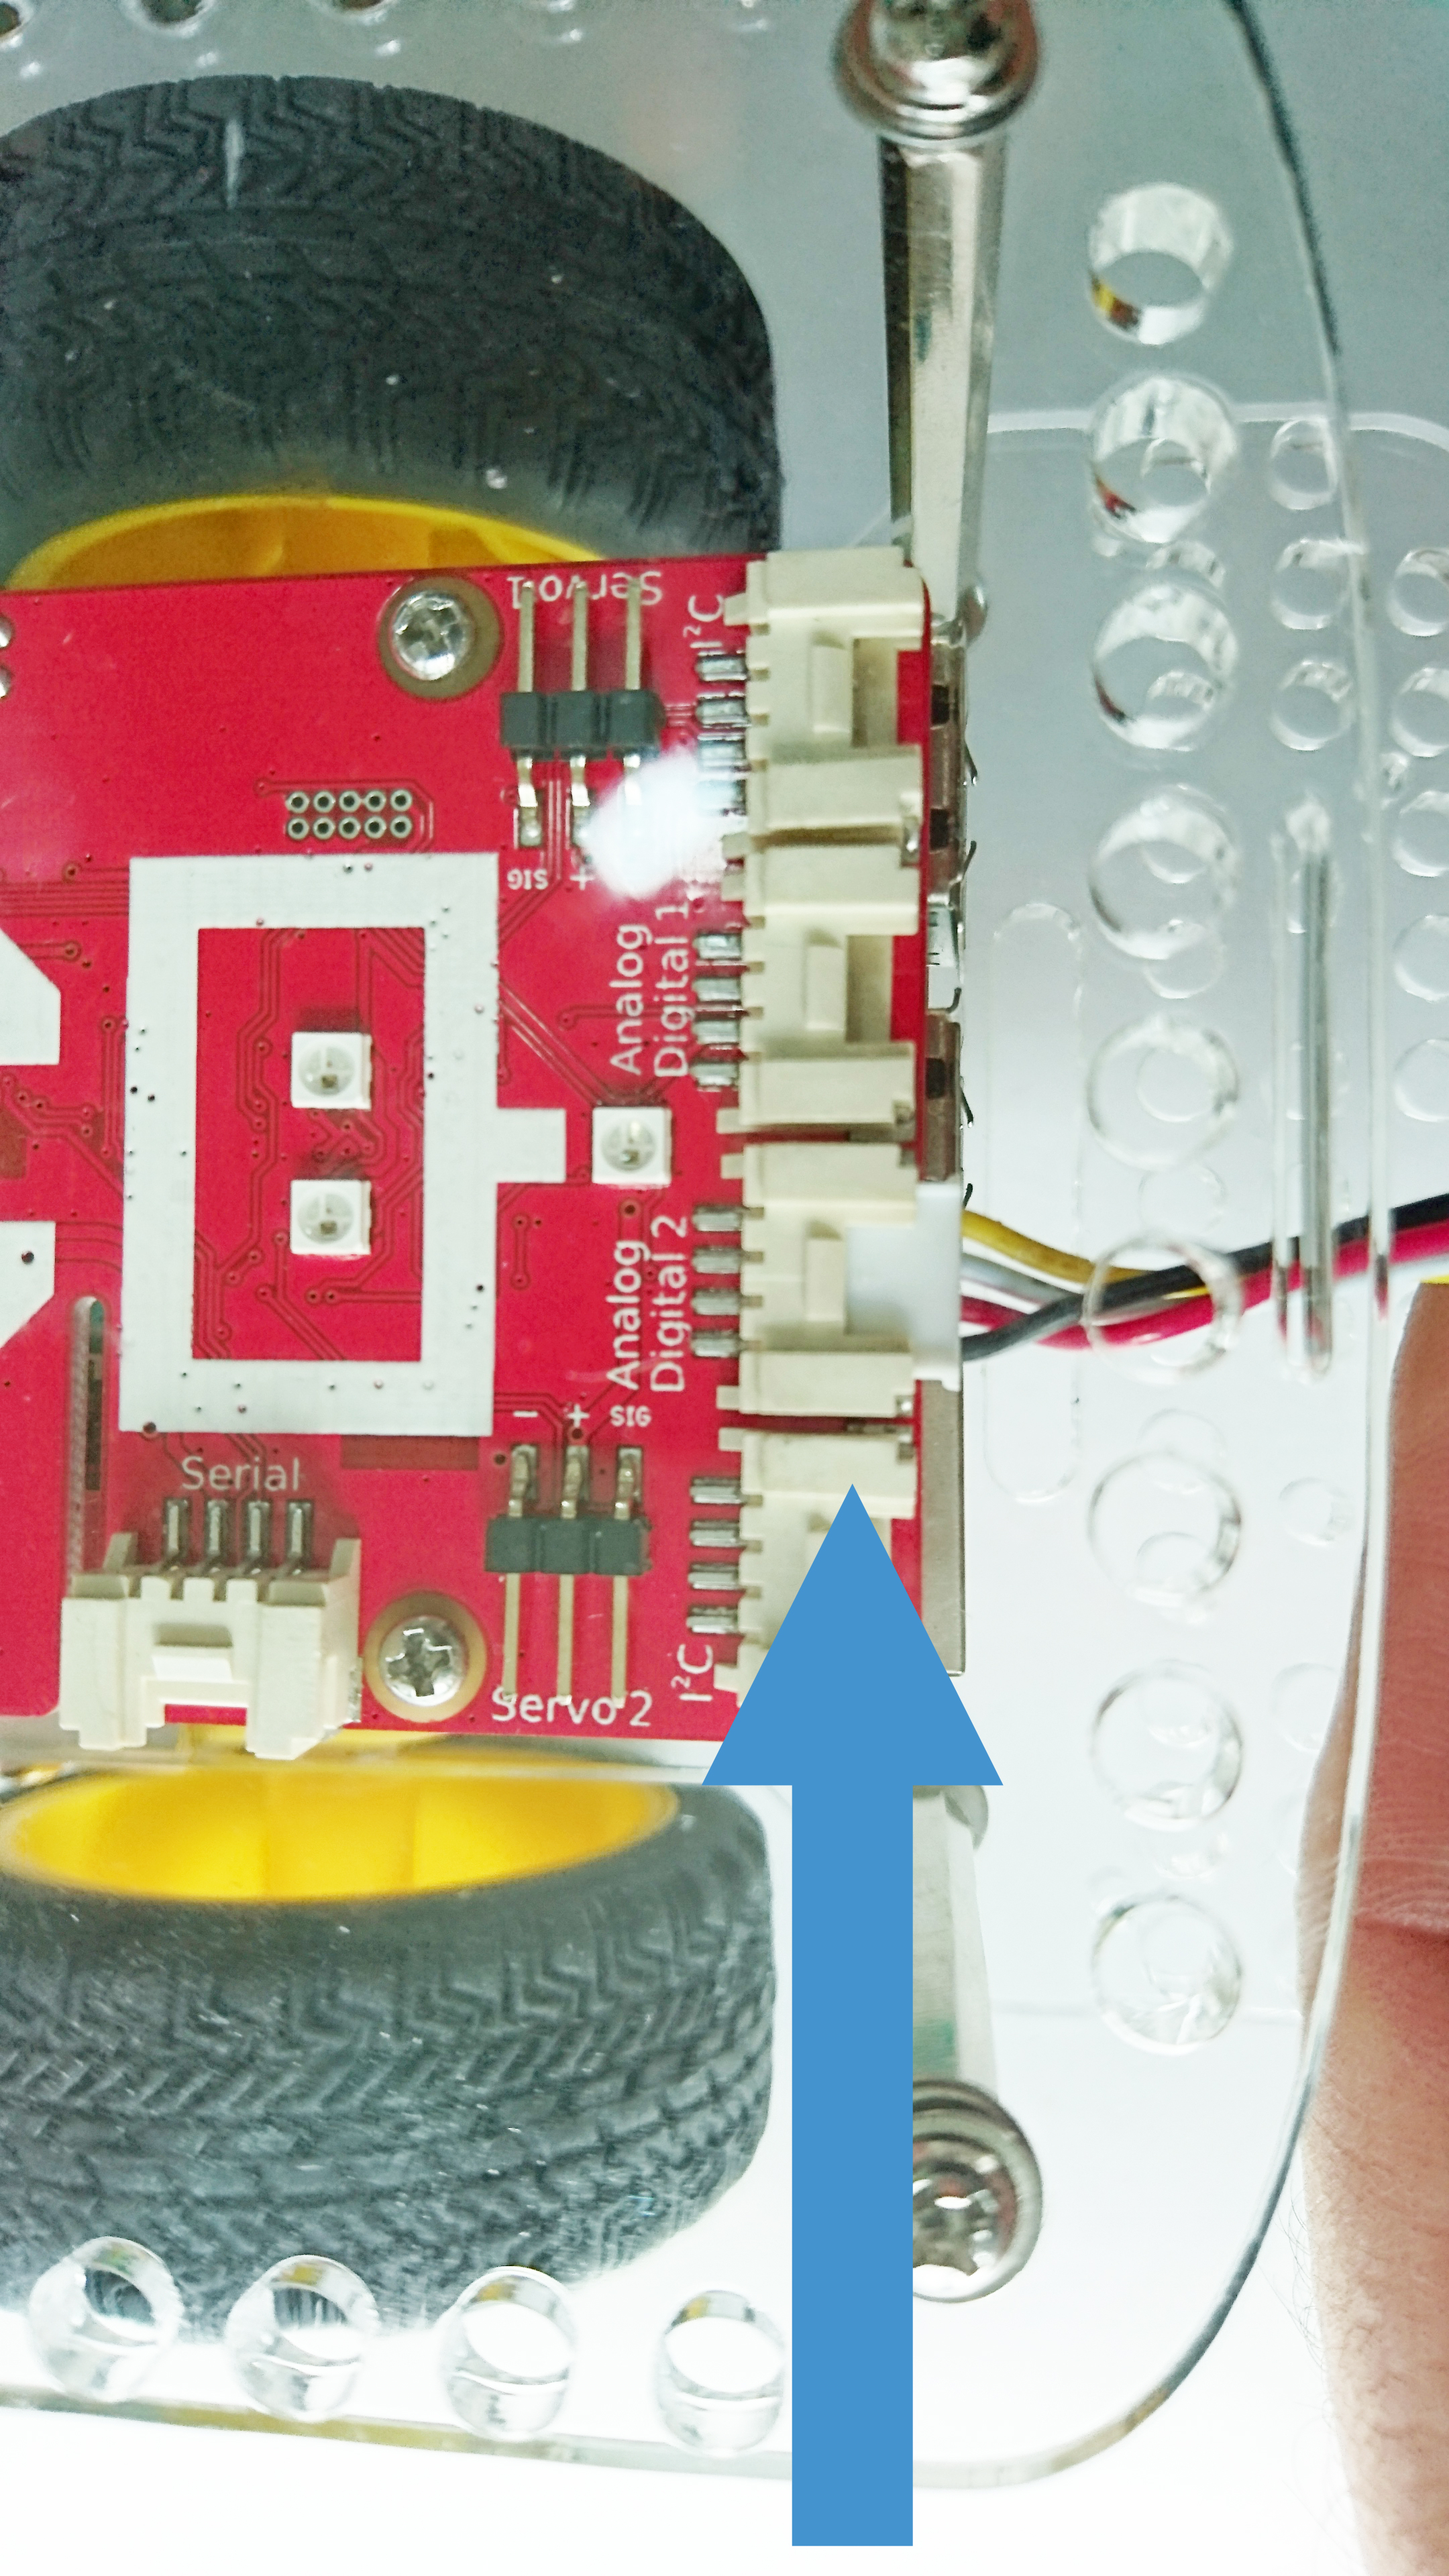
1. On the GoPiGo3 (red board), find the I2C port. There are two I2C ports on the GoPiGo3, and you can use either one.
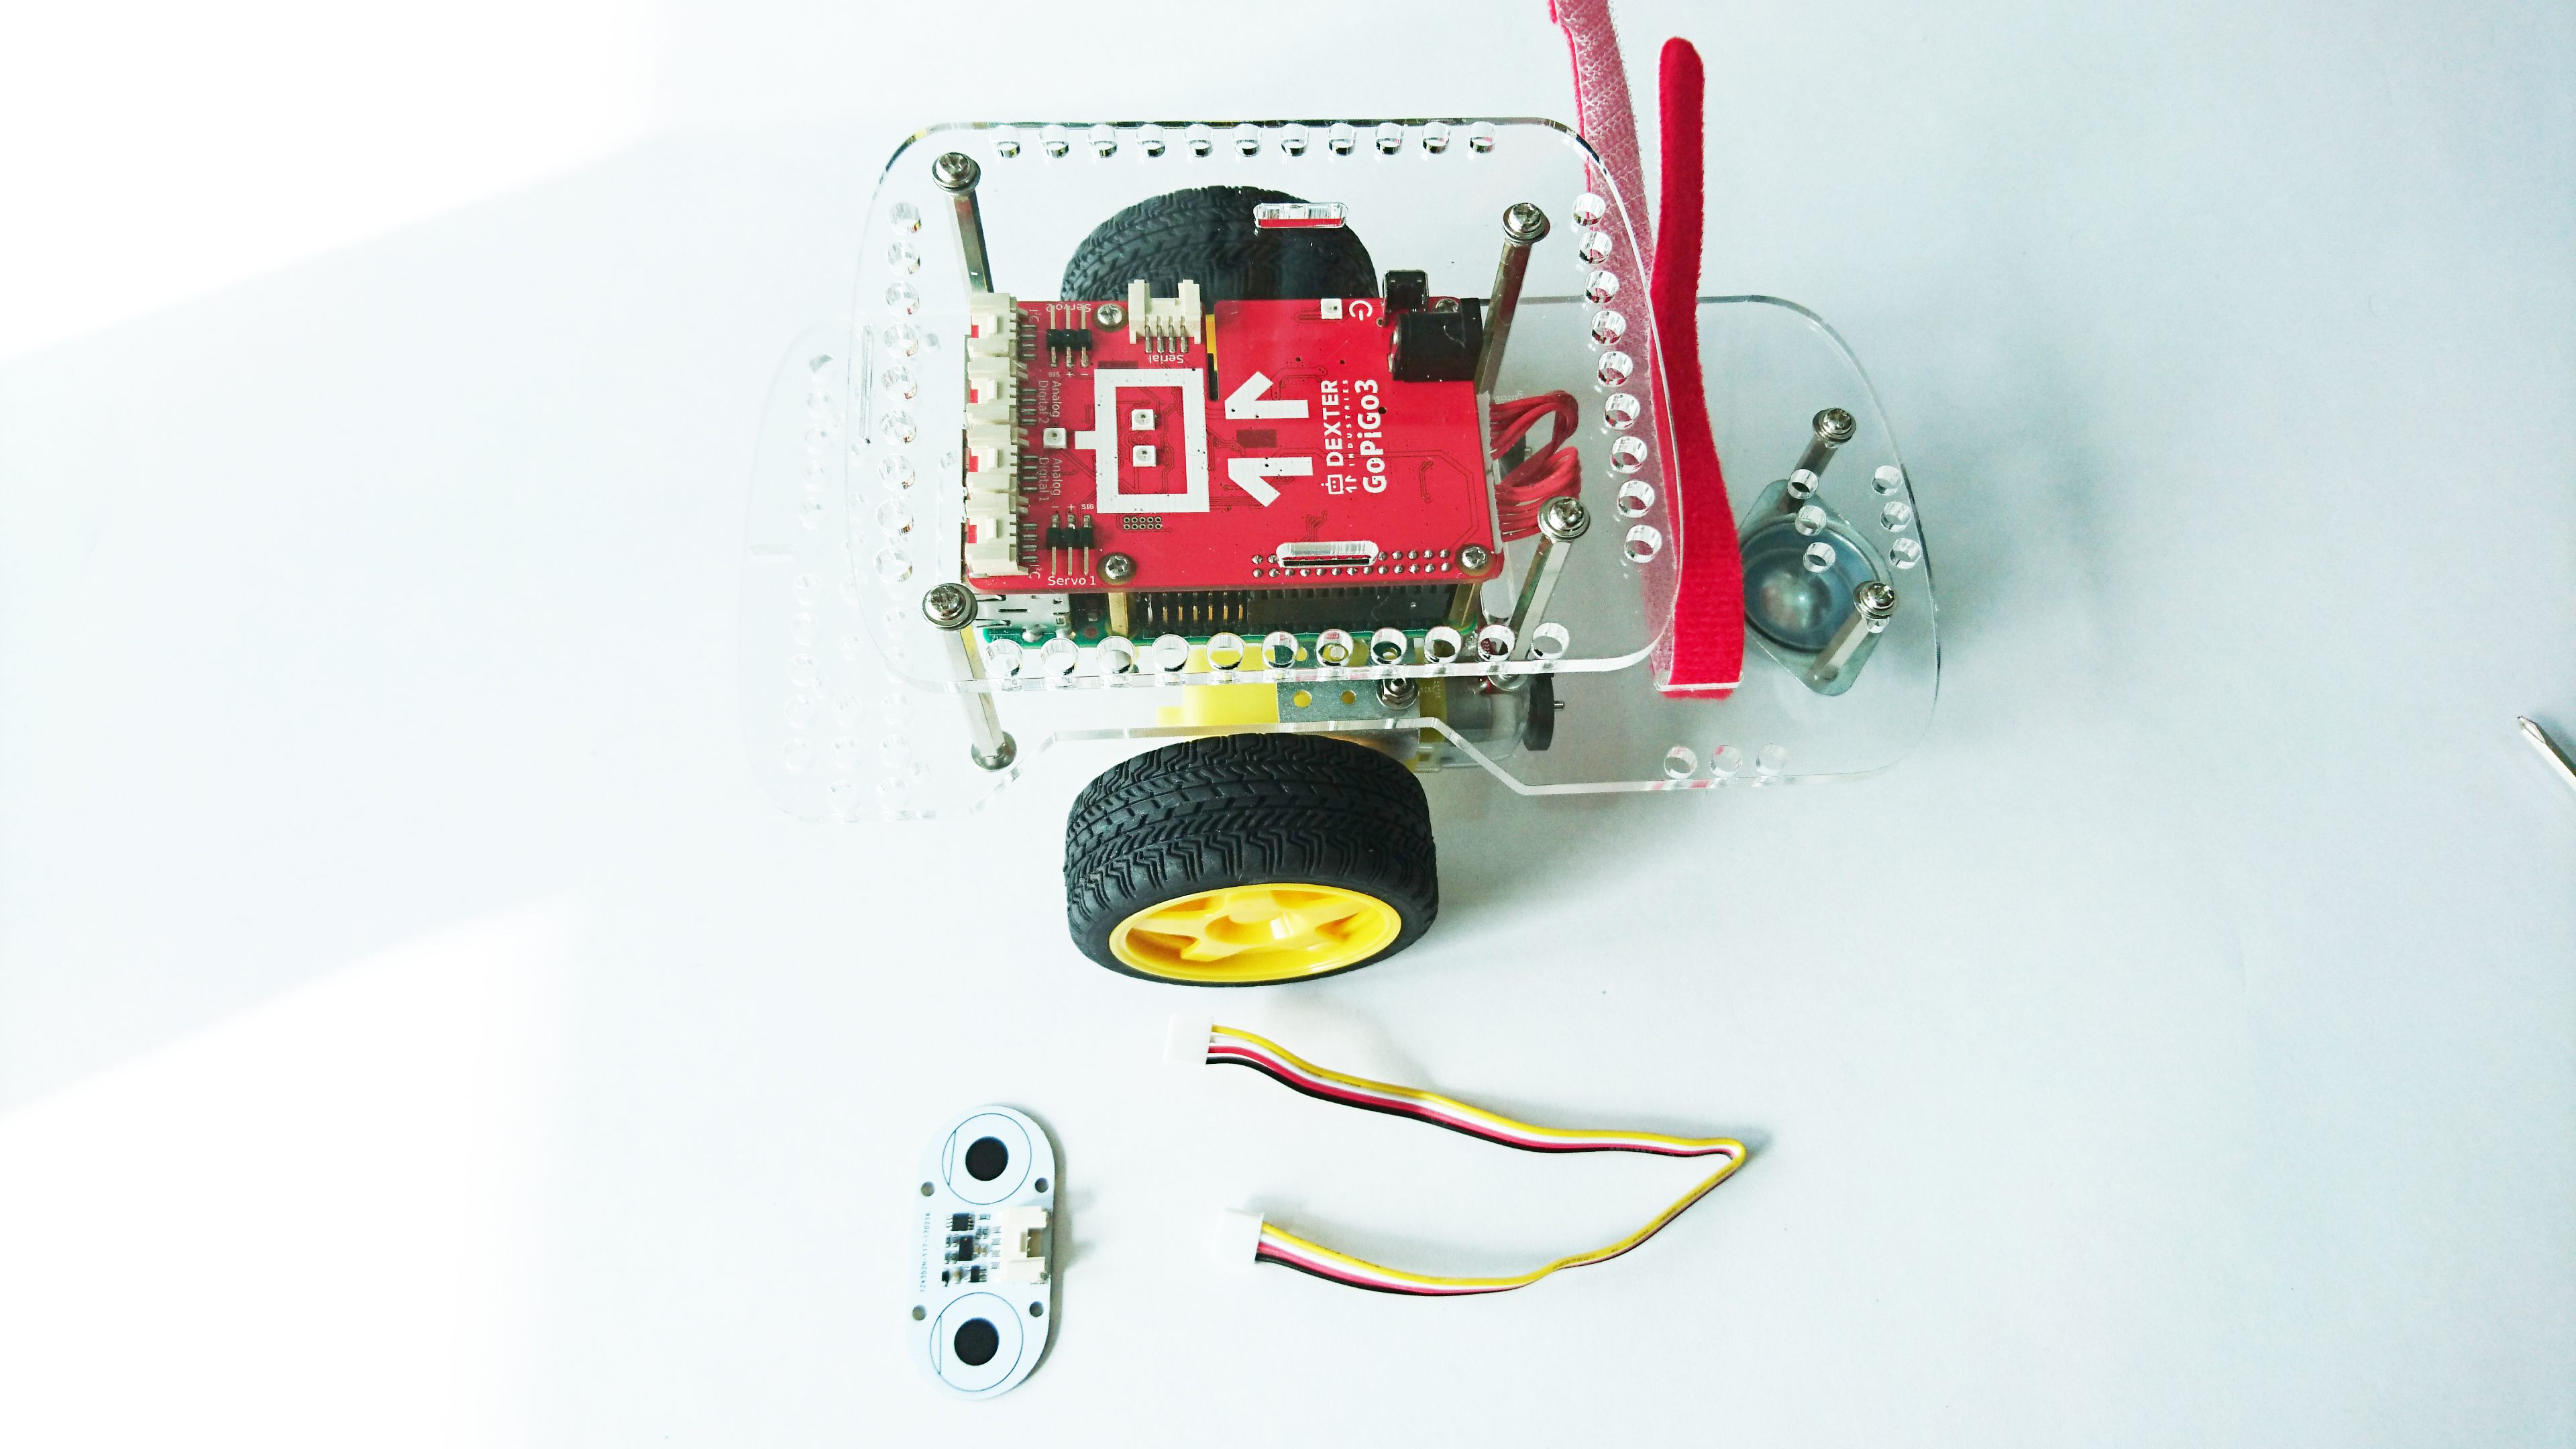
2. Insert the sensor cable into the GoPiGo3 I2C port.
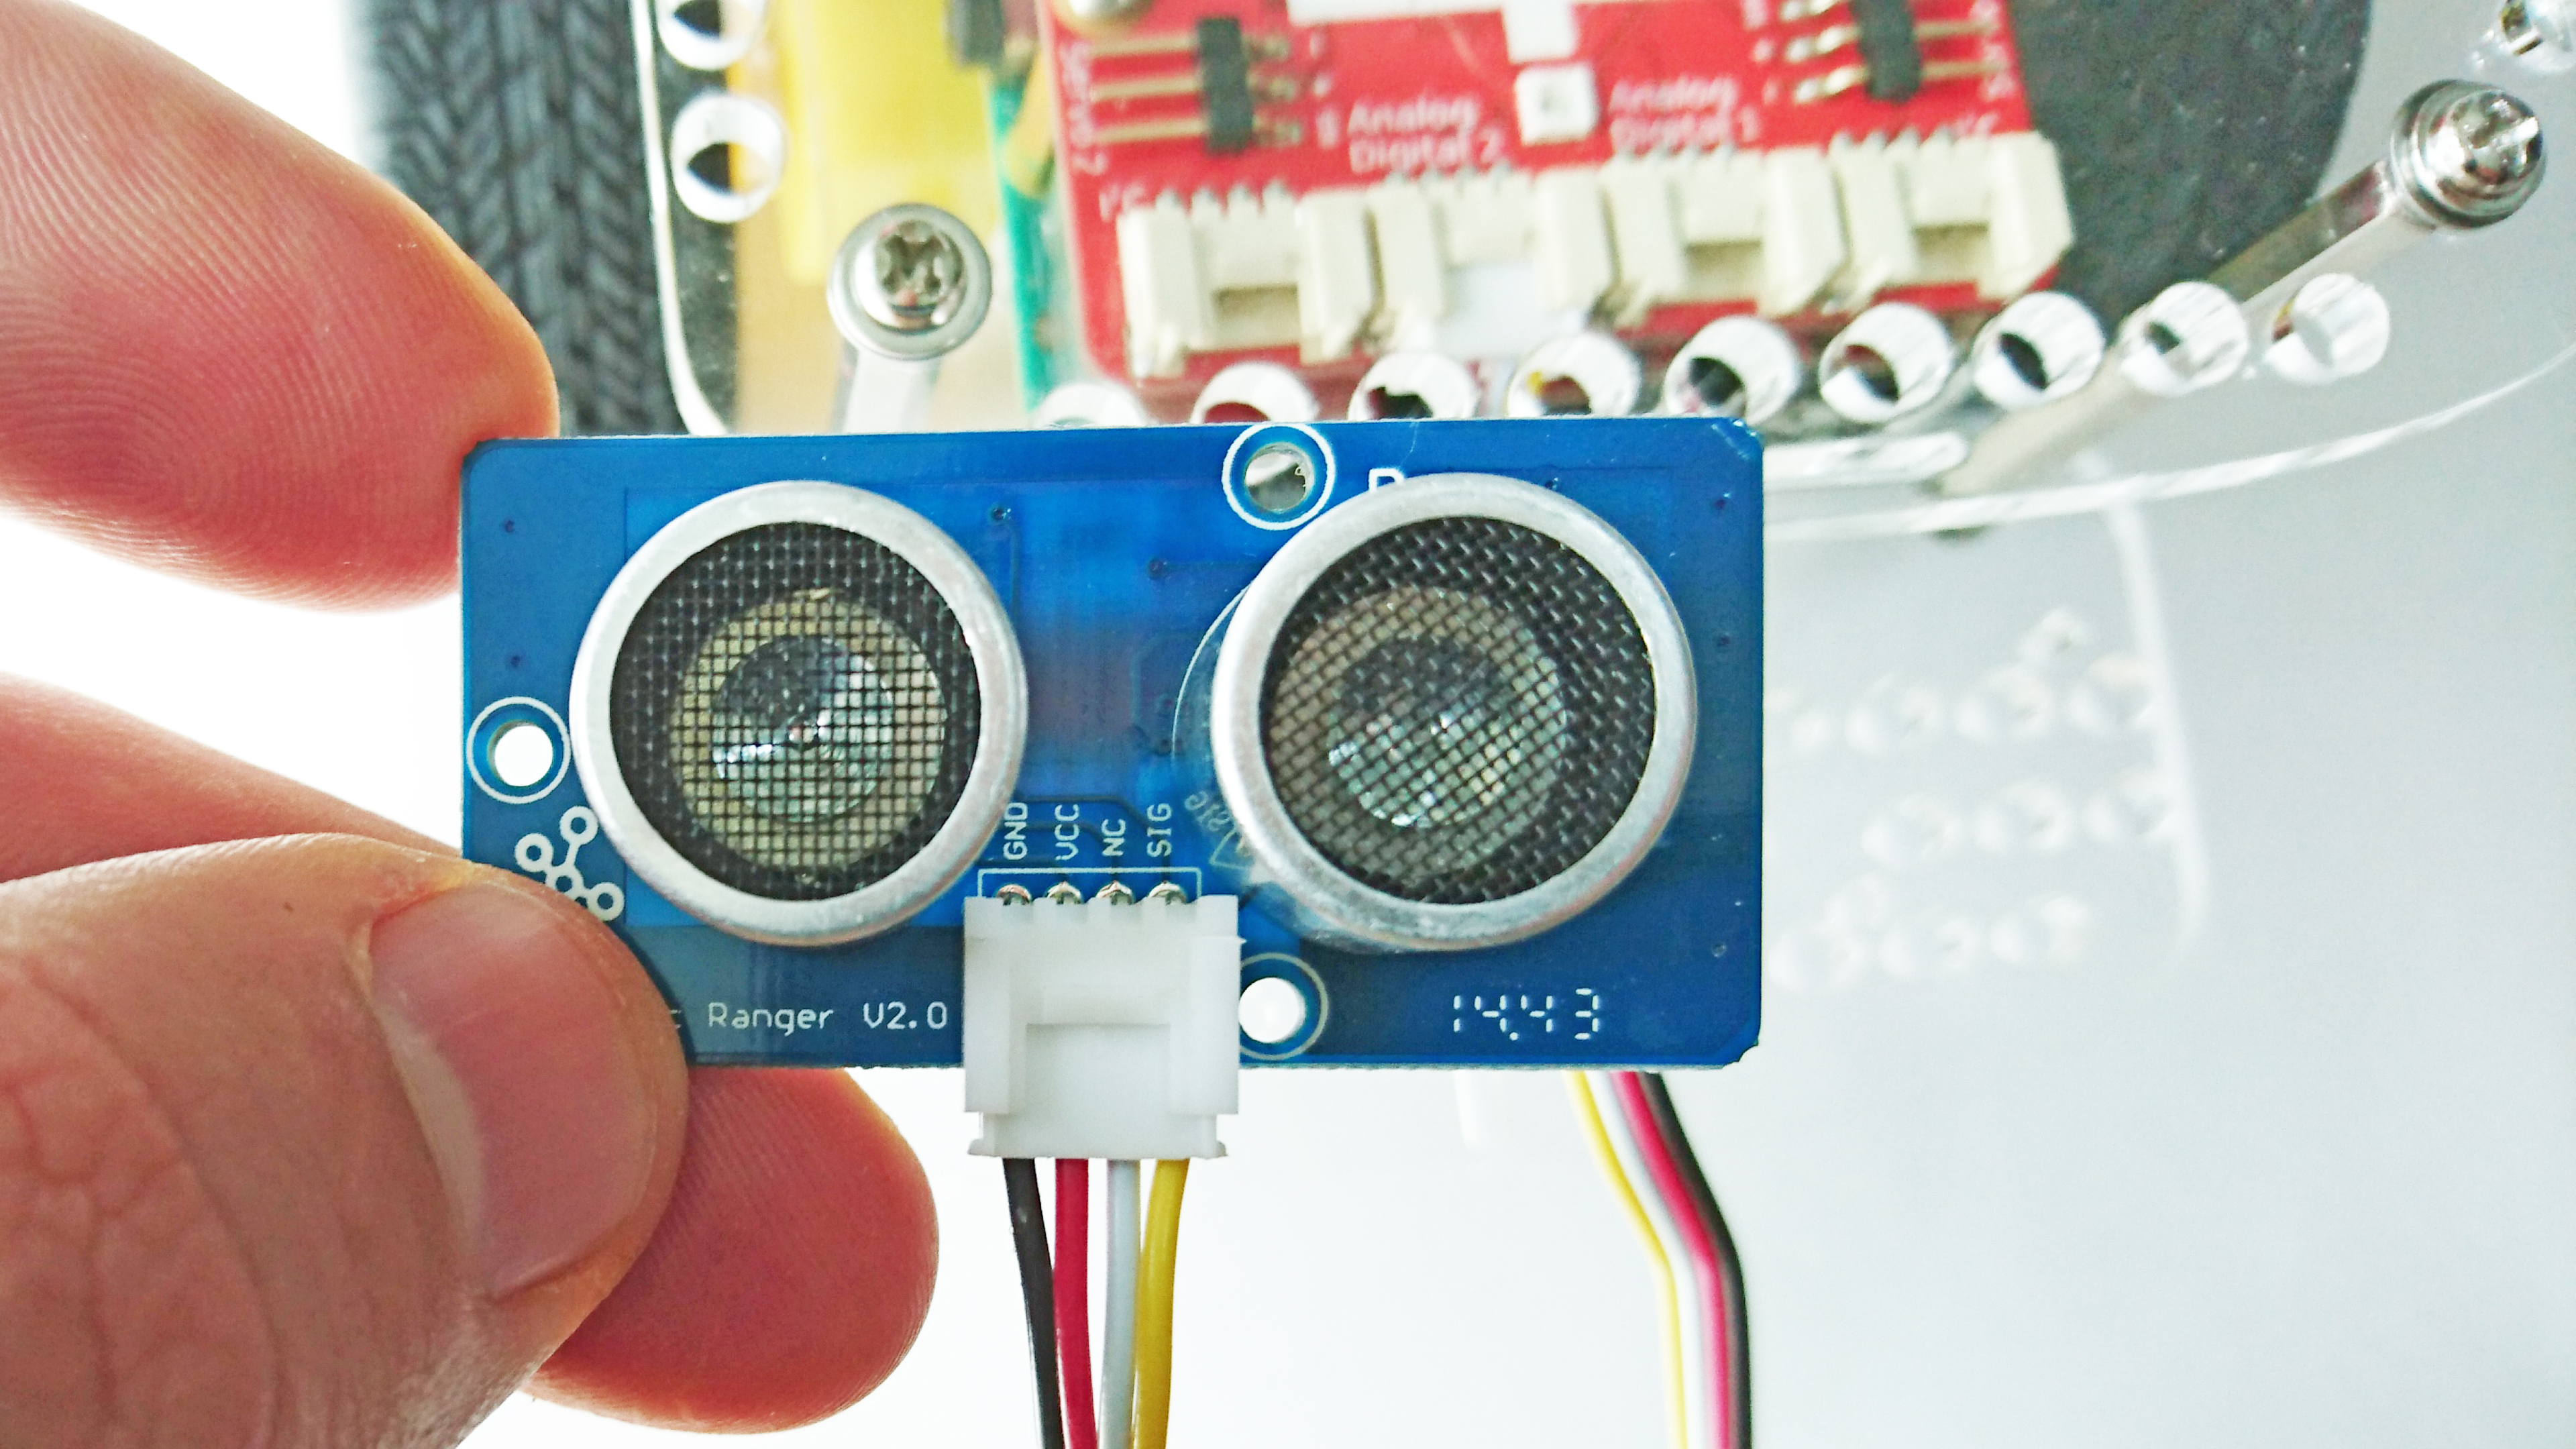
3. Insert the other end of the sensor cable into the port on the distance sensor.
4. Attach the distance sensor directly to the chassis using zip ties, twist ties, or short lengths of wire.
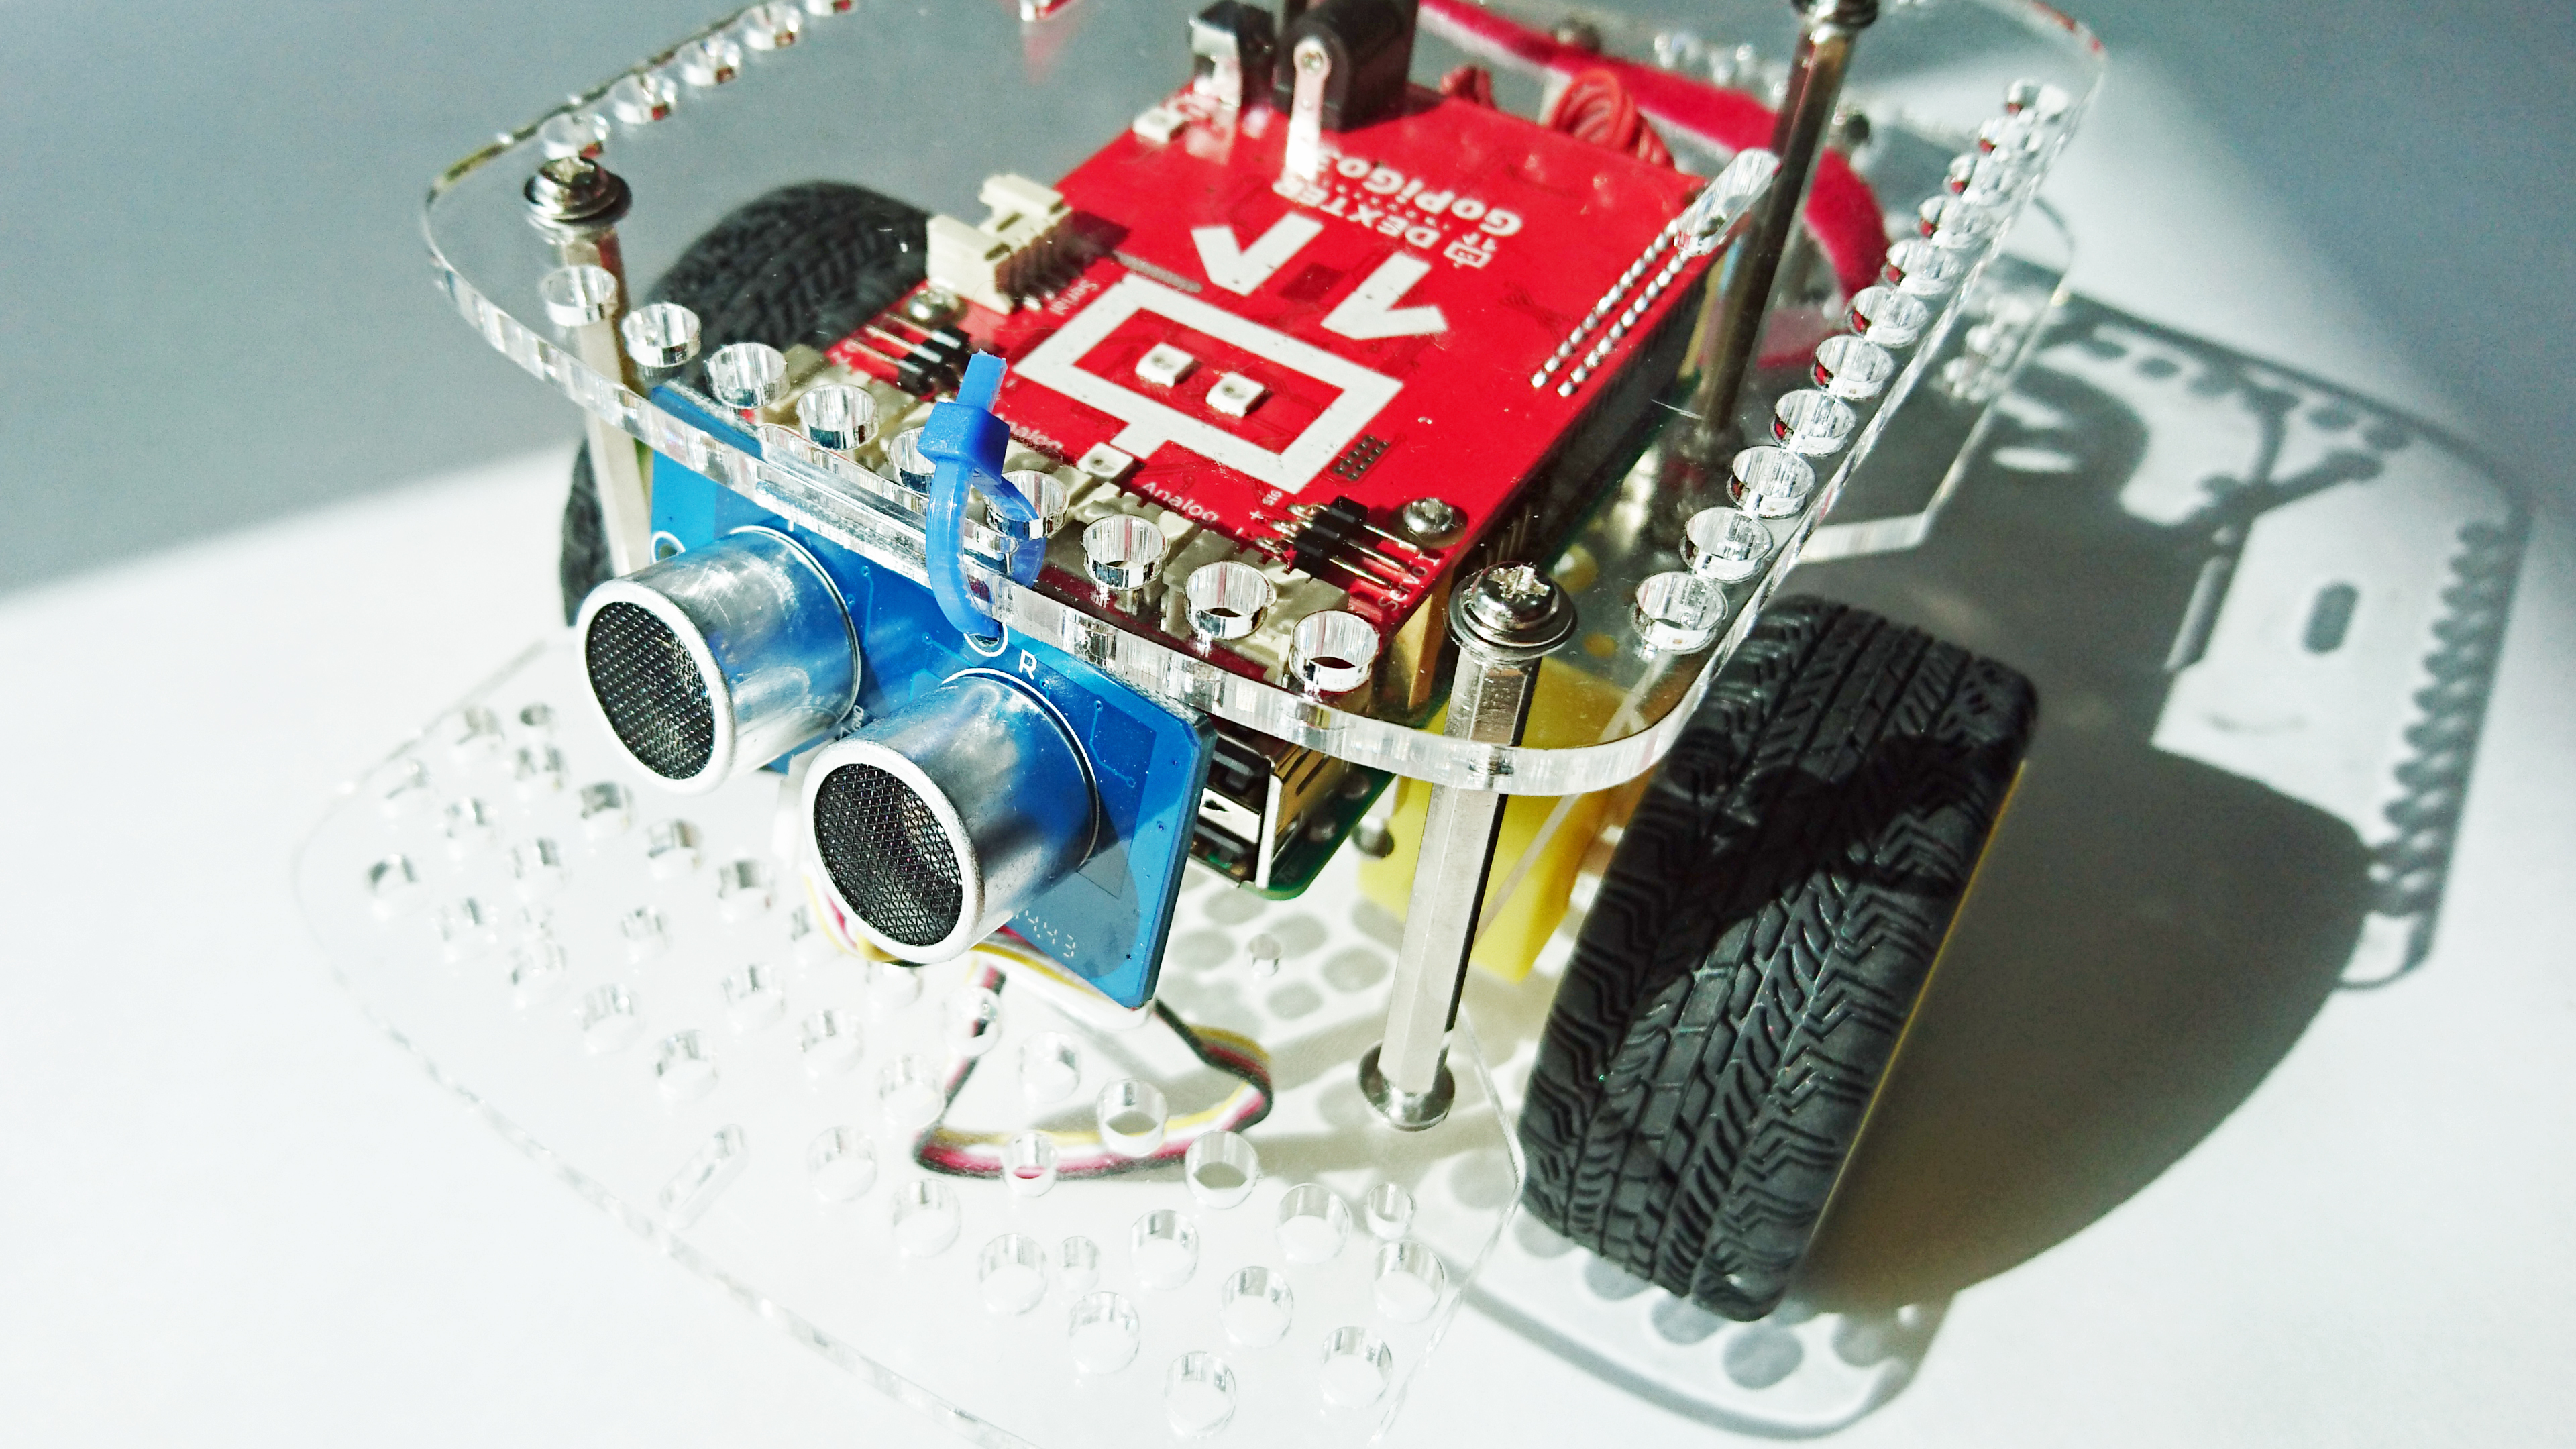
Attach the Ultrasonic Sensor Directly to the GoPiGo3 Body
Connect the sensor cable to the port on the GoPiGo3 labeled “Analog Digital 1”
Insert the other end of the sensor cable into the port on the Ultrasonic Sensor.
Connect the Ultrasonic Sensor to the acrylic body with a zipe-tie, twist tie, or short length of wire.

Questions?
Go back to Get Started with the GoPiGo3.
Have a question or a suggestion? Ask on the forums here.