You can setup WiFi on the BrickPi using the command line. Below are step-by-step instructions and some troubleshooting tips for setting up WiFi on the BrickPi.
1. A static IP. We DO NOT recommend that you use a static IP for wifi interface with the BrickPi.
The latest version of the BrickPi Raspbian comes with Bonjour. In short, this means that instead of using an IP address, you can connect using “raspberrypi.local”. The Pi can be accessed over the network (via VNC or SSH) by any computer that has Bonjour installed.
- Mac: If you have a Mac, Bonjour is installed.
- Windows: If you have a computer with iTunes installed, Bonjour is installed.
- Windows: If you need to install Bonjour, you can find it on Apple’s website here.
2. Insert Wifi Dongle. Boot the Raspberry Pi with the Wifi dongle plugged in, and open a terminal session in the Raspberry Pi.
3. With the GUI.
If you want to setup Wifi using the GUI, login to the Raspberry Pi. You can set up the Raspberry Pi as a Desktop, or you can connect via Ethernet and VNC.
 3.1 Click on WiFi Config. The icon on the desktop labeled “WiFi Config”. Click on it. Change tabs to “Manage Networks” and click “Scan”.
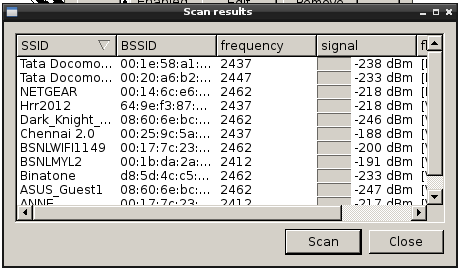
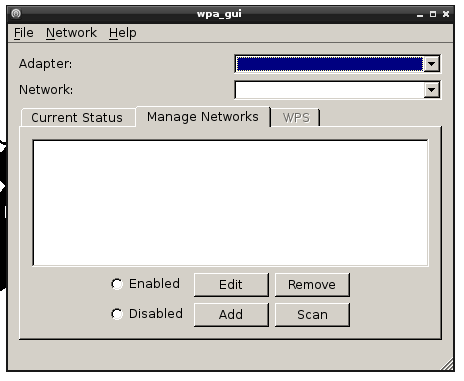 Clicking “Scan” reveals the wifi networks available. Click the network you want to connect to.
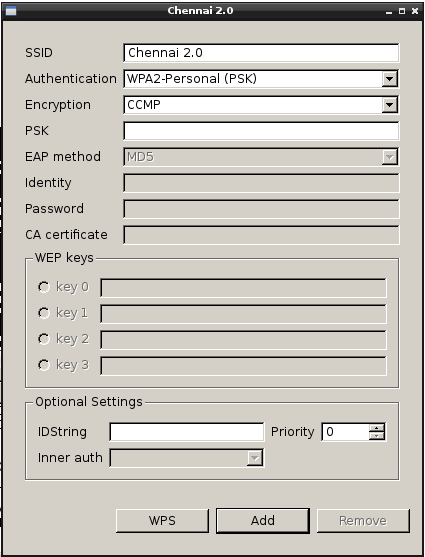
3.2 Enter your wifi informatin.
Enter in your wifi information and click “Add”. Your Raspberry Pi should connect automatically to the WiFi network.
4. With the Command Line.
If you want to setup wifi using the terminal or SSH, In the terminal, open your interfaces file for editing with the following command:
sudo nano /etc/network/interfaces
4.2 Interfaces File. Your interfaces file should look like this:
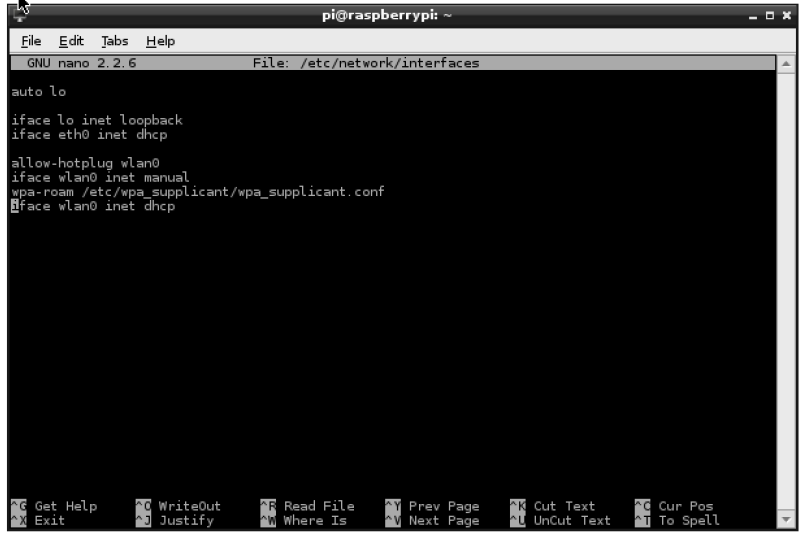
4.3 Edit the File. Edit the file by adding the network configuration information, and your networks SSID and passphrase below the last line. Indent one tab!.
     wpa-ssid "ssid"
     wpa-psk "password"
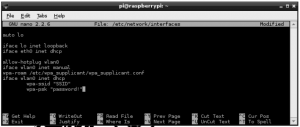

4.4 Save your File. After adding your information, save and exit by typing “Ctrl-x” and choosing to save the file.
4.5 Reboot your Raspberry Pi.
4.6 Test your Wifi Adapter. Test that your Pi recognizes the WiFi Adapter. You can test by typing “ifconfig” in the terminal of the BrickPi. If “wlan0” is showing, the wifi dongle is recognized.
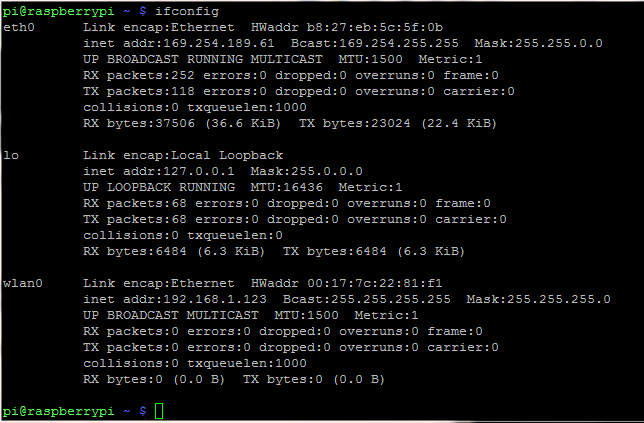
wlan0 is successfully recognized by the Raspberry Pi. The Raspberry Pi knows you have a wifi device installed.
ifconfig
When RX and TX are showing 0 bytes, no data has been exchanged. Below is a successfully connected Raspberry Pi to a wifi network.
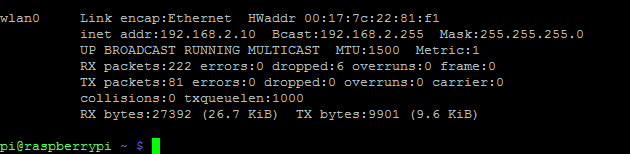
Successfully connected to a network. Note that RX bytes and TX bytes at the bottom have values greater than 0, indicating we’re connected and sending and receiving information.