First things first: we need some hardware for this to work.
Getting the Parts
The first challenge is to get the parts. The system consists of components (easy to get), a circuit board (a little harder to get), and laser cutting (meh).
- Circuit Board: In our github repository, we have placed the Eagle board and schematic. Use the board house of your choice. You will need to generate your own gerber files as these are dependent on which manufacturer you use.
- Acrylic Case: Also in our github repository, we’ve placed the CAD files for the top and bottom parts of the BrickPi Case. Depending on the laser-cutting service you use, you may need to convert the file to another format. Let us know if you do, we’ll put it up on our Github page! We used 4mm thick acrylic plastic. You can feel free to try out any thickness you like that works for you (please tell us if you improve on it!).
- Components: We’ve placed a handy Bill of Materials (BOM) in the Github repository as well. To keep it simple, we’ve placed links for Mouser in the spreadsheet. This is not an endorsement, we just wanted to keep all the parts in one place to make it easy to order. Full disclosure: you will probably need to buy at least one part from us: the Female Sockets for LEGO MINDSTORMS.
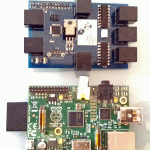 Assembling the Board
Assembly is relatively easy. There are a few SMD parts, but most of the parts are through-hole. Parts are labeled on the Eagle Board, and there are no special tricks. But here are some tips:
- Soldering SMD: we had no trouble using a modified SMD method. Basically, we put solder down on the pads for the device with a soldering iron. Then we reheated the solder parts and, using tweezers, placed the part on the board. This is not the most elegant method, if you have the patience use SparkFun’s legendary SMD soldering method. Our method destroyed one of the clocks at first shot.
- Through Hole: Lots of through-hole parts on this board!