In this project, we use a Grove DHT (Digital Humidity and Temperature) sensor as a Raspberry Pi temperature sensor. This project uses a Grove RGB LCD display, connected to the Raspberry Pi, to show the temperature and humidity. You can use this project as designed: a simple weather station for your home.
You can also use this example project as a basis for your own project. The project shows how to use a thermometer sensor with the Raspberry Pi, and how to display the data without a monitor. You could adapt it or add more sensors for your own data-logging project with the Raspberry Pi.
This is a simple example to demonstrate how to use multiple Grove Sensors with GrovePi in your Projects. All the parts used in this project are available in the GrovePi Starter Kit.
Raspberry Pi Temperature and Humidity Sensor with a Display
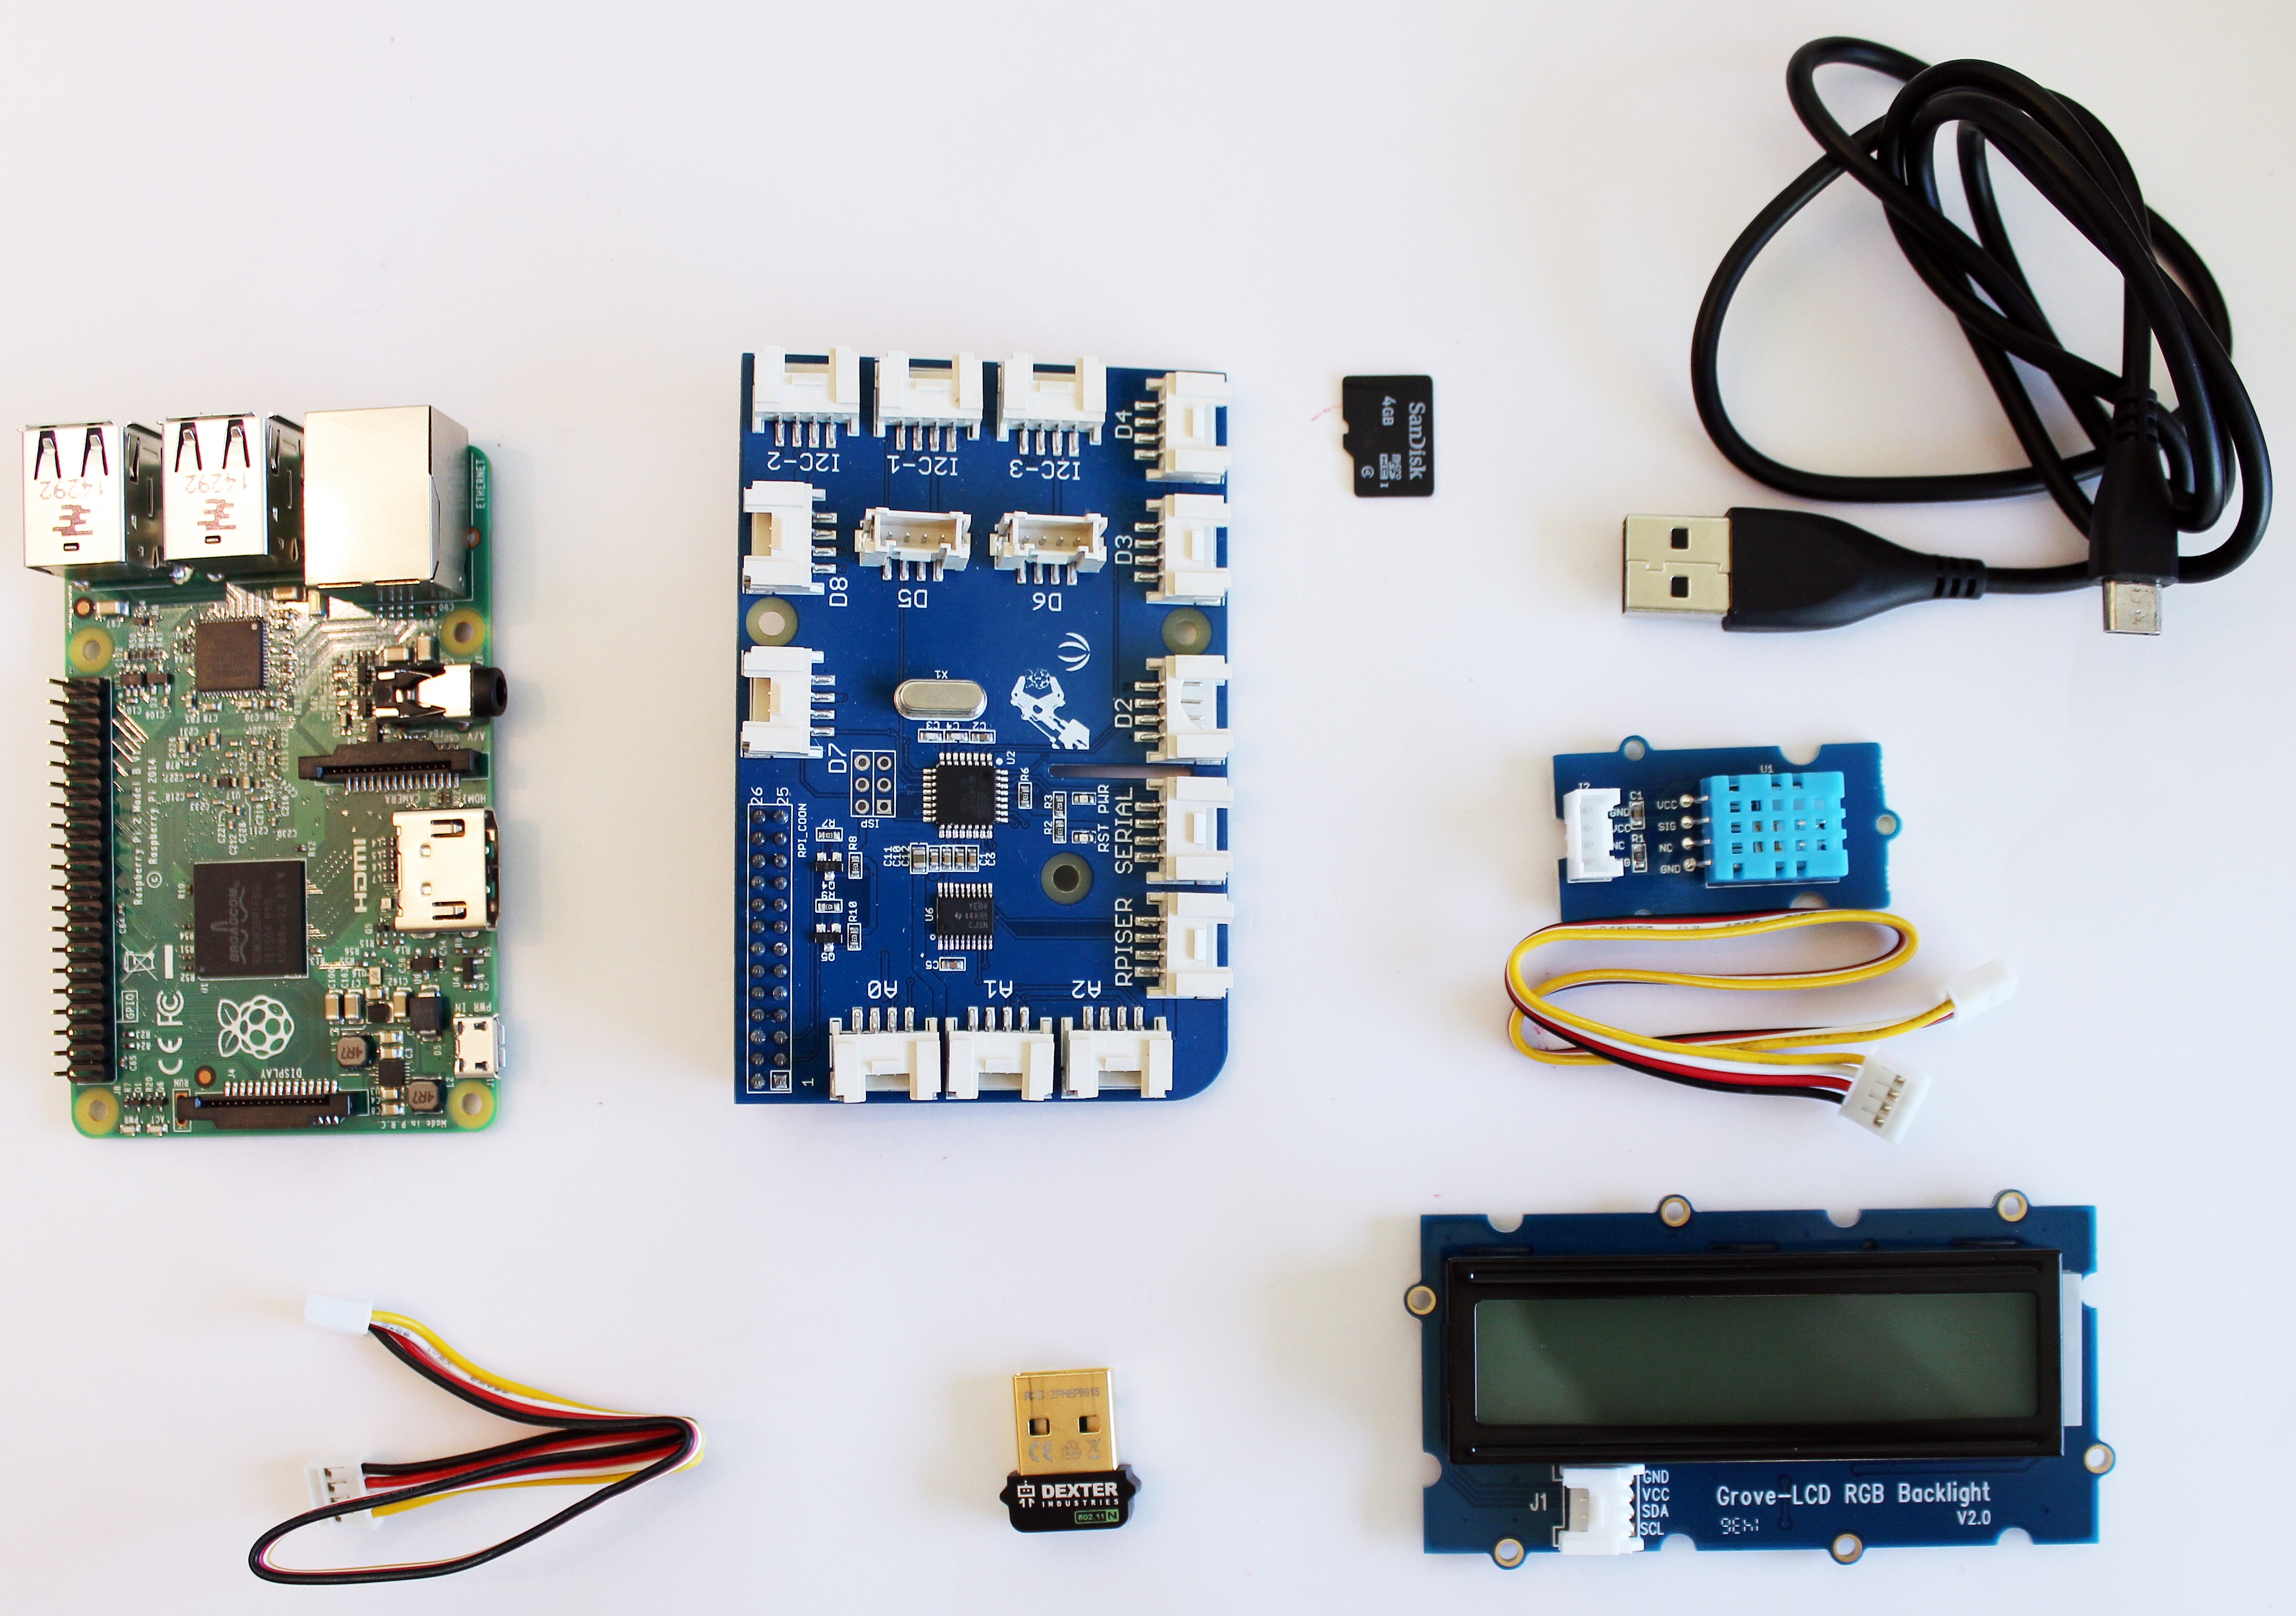
Hardware Required
- Raspberry Pi
- GrovePi
- Grove DHT sensor
- Grove RGB LCD display
- Grove Connection wires
- SD card and WiFi module
Connecting the Raspberry Pi temperature sensor
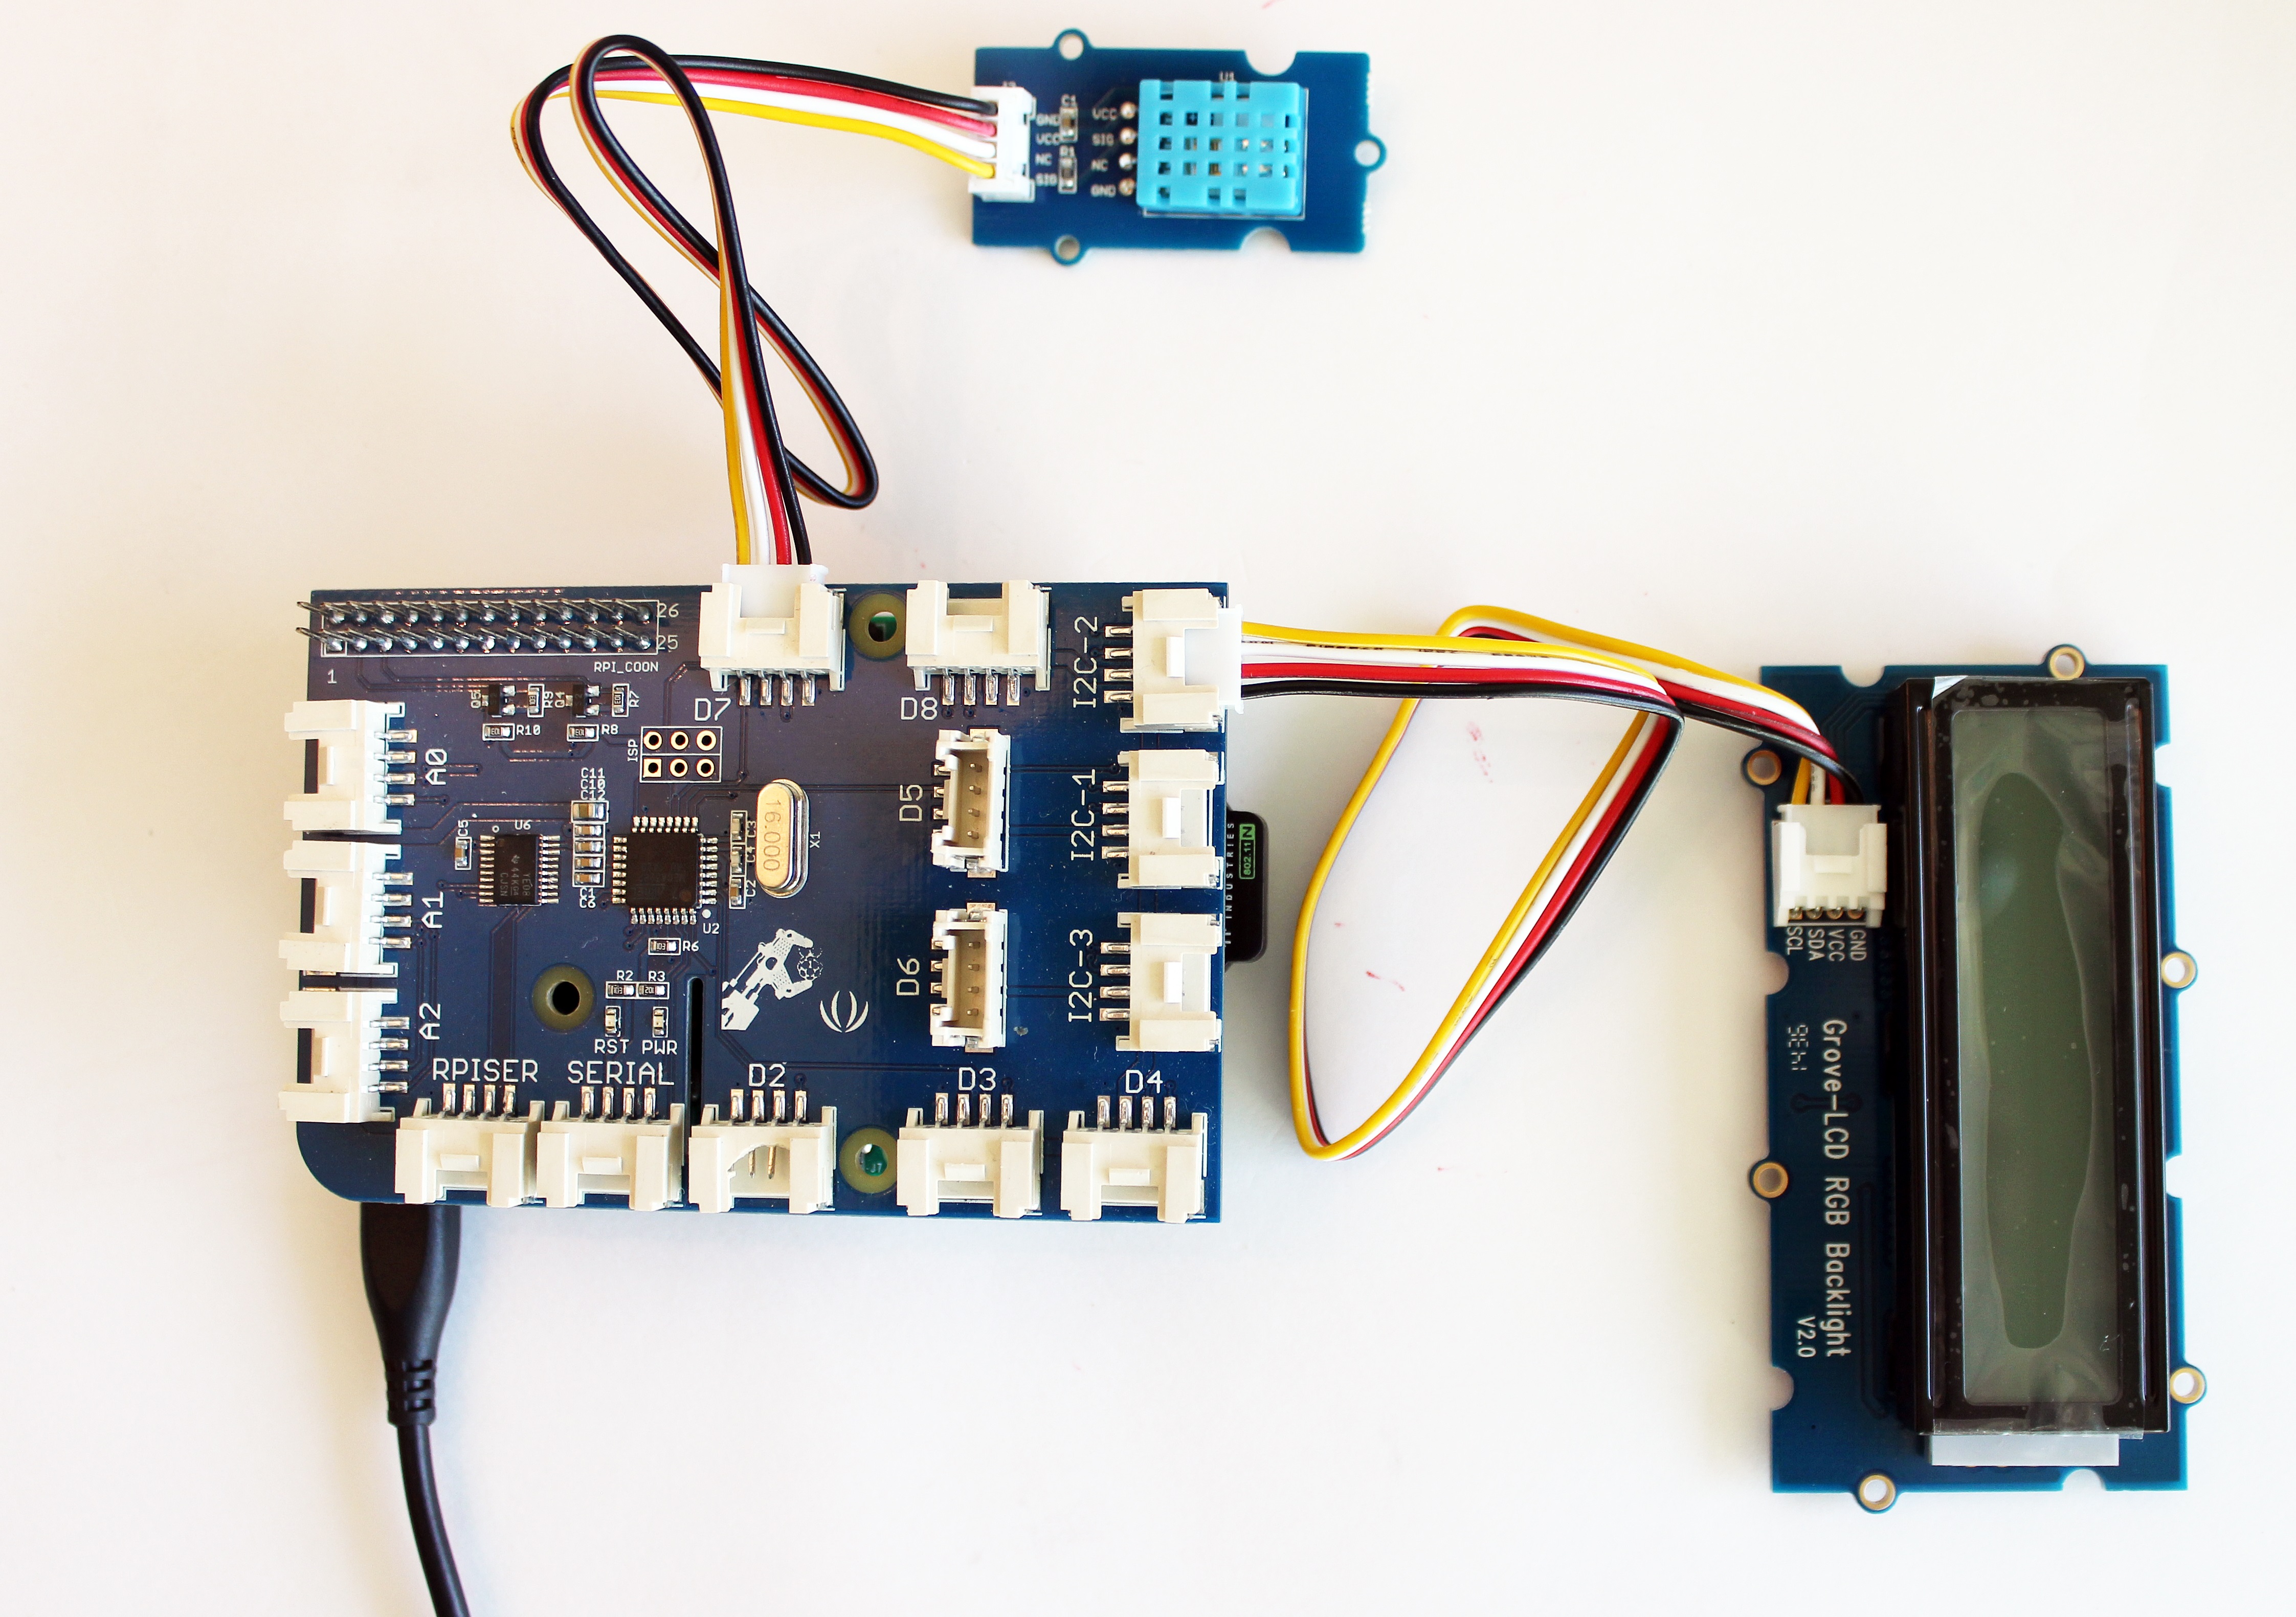
Connect the DHT sensor to Port 7 and the RGB LCD display to any of the I2C ports. Now power on the Raspberry Pi.
Running the Program
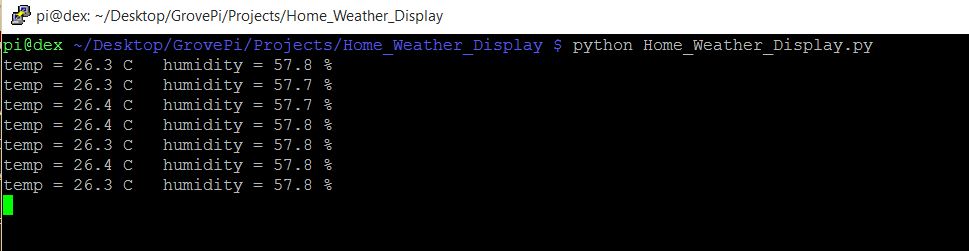
In the Raspberry Pi terminal, change directory to GrovePi/Projects/Home_Weather_Display:
cd /home/pi/Desktop/GrovePi/Projects/Home_Weather_Display
In the directory, Run the Home_Weather_Display.py in example python program in root (sudo):
sudo python Home_Weather_Display.py
The RGB LCD display will start showing the live temperature data and humidity data from the DHT sensor.
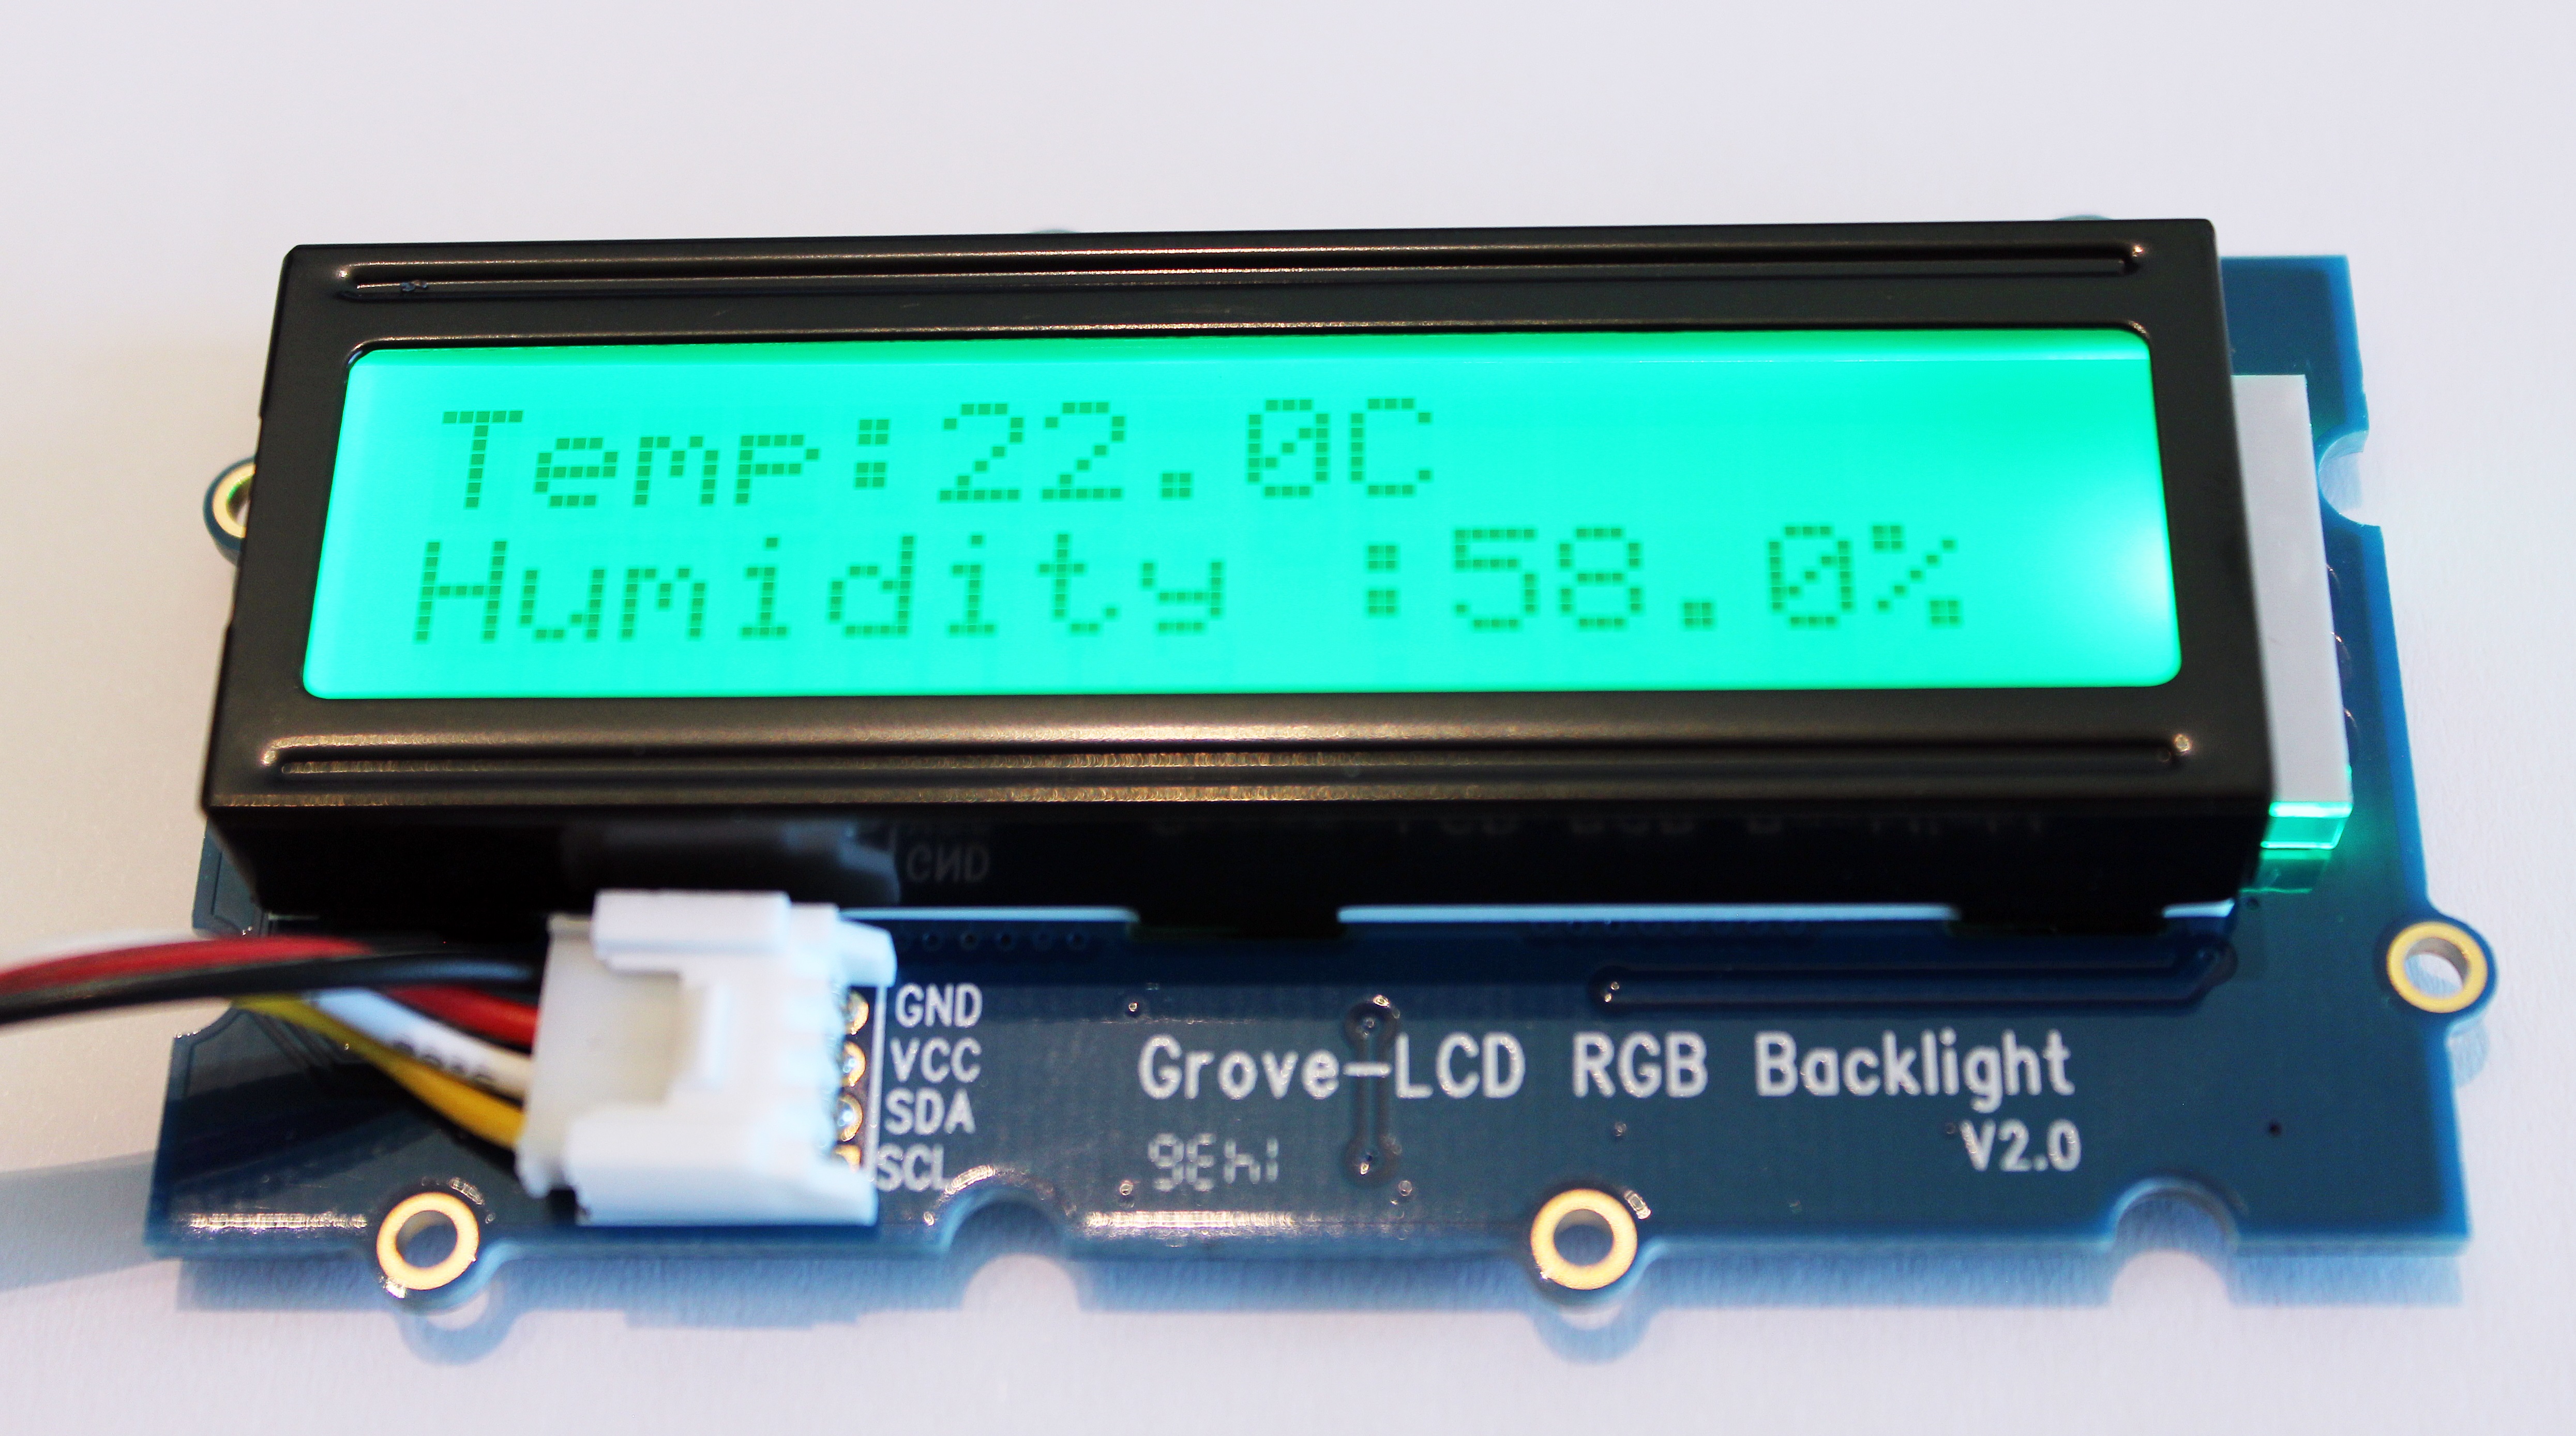
Digital Temperature and Humidity information from the Raspberry Pi.
Source Code
The source code for the example can be found here