We recently launched the Arduberry on Kickstarter which brings a seamless experience to Raspberry Pi by providing a very simple yet powerful way to interface the Arduino sensors and shields with the Raspberry Pi.
One of the things with a Kickstarter project, especially if it’s yours, is that it keeps you hooked. There’s always a tab in the browser open with the Kickstarter page that you’ll keep on obsessively checking every 10 minutes.
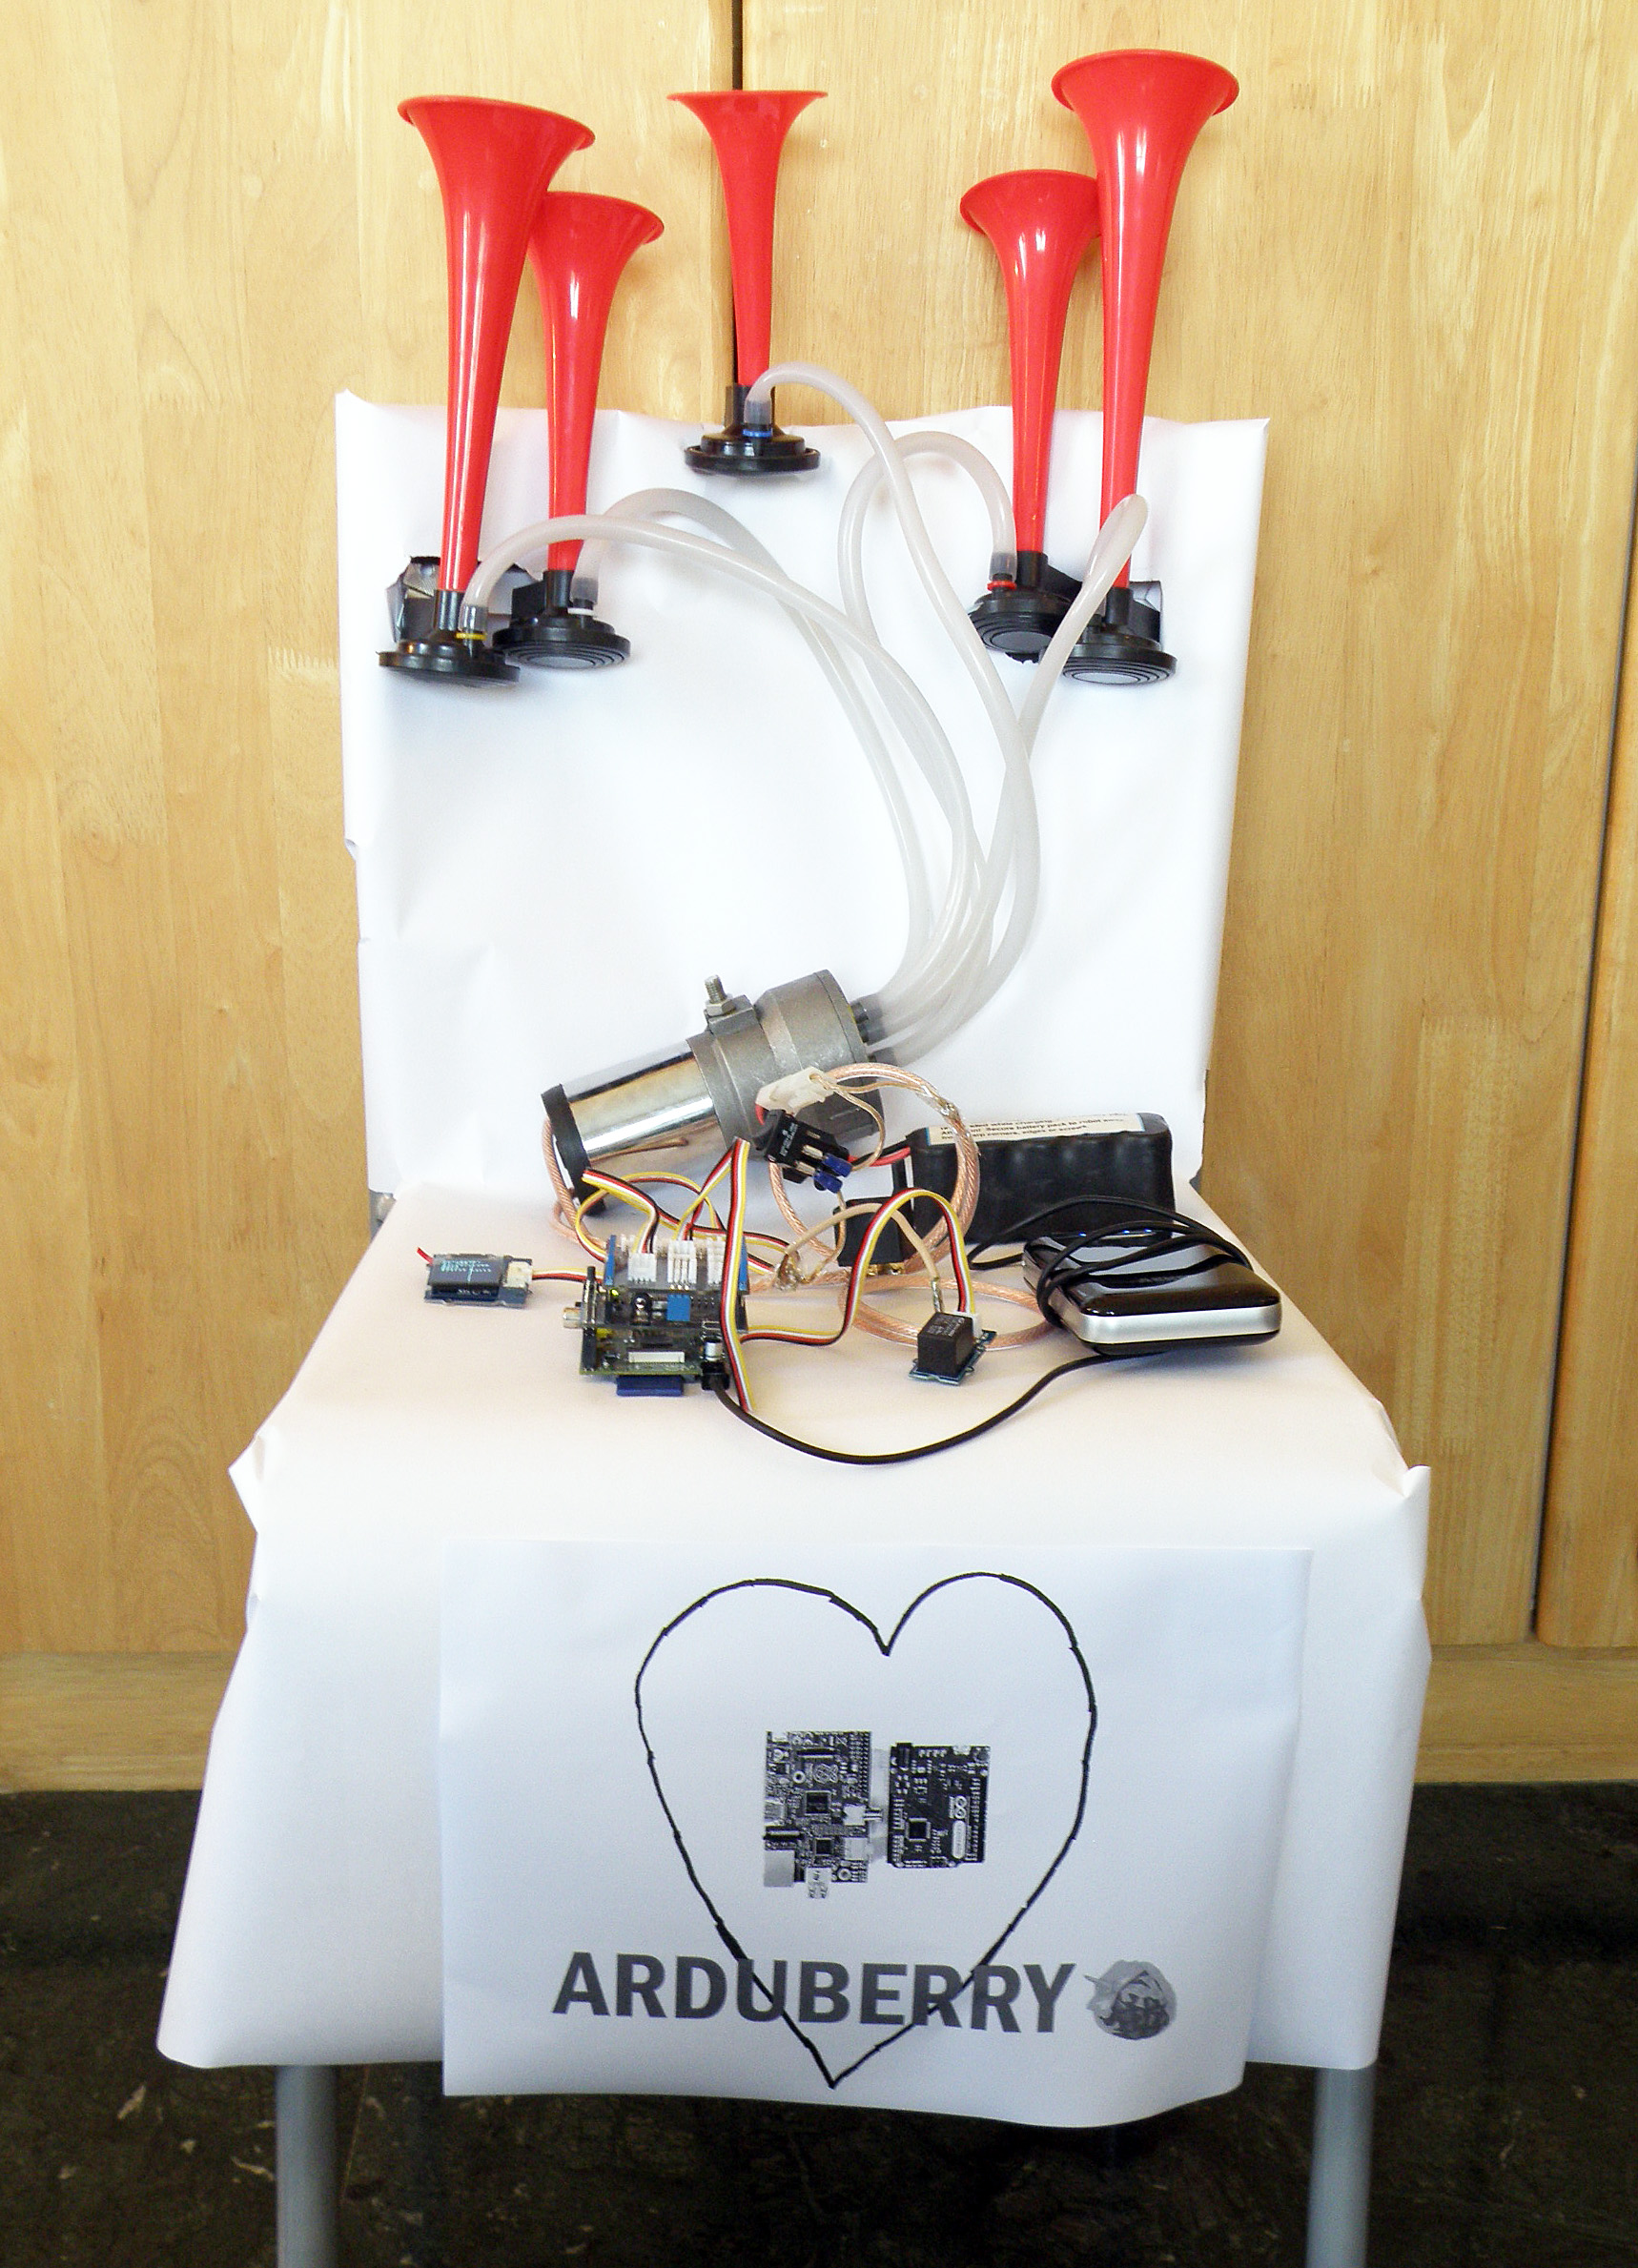
We found a solution this addiction that involves air horns, the Arduberry, and web-scraping. What better way to demonstrates the power, flexibility and the ease of use the Arduberry than to make a glorified Kickstarter Backer Alert?
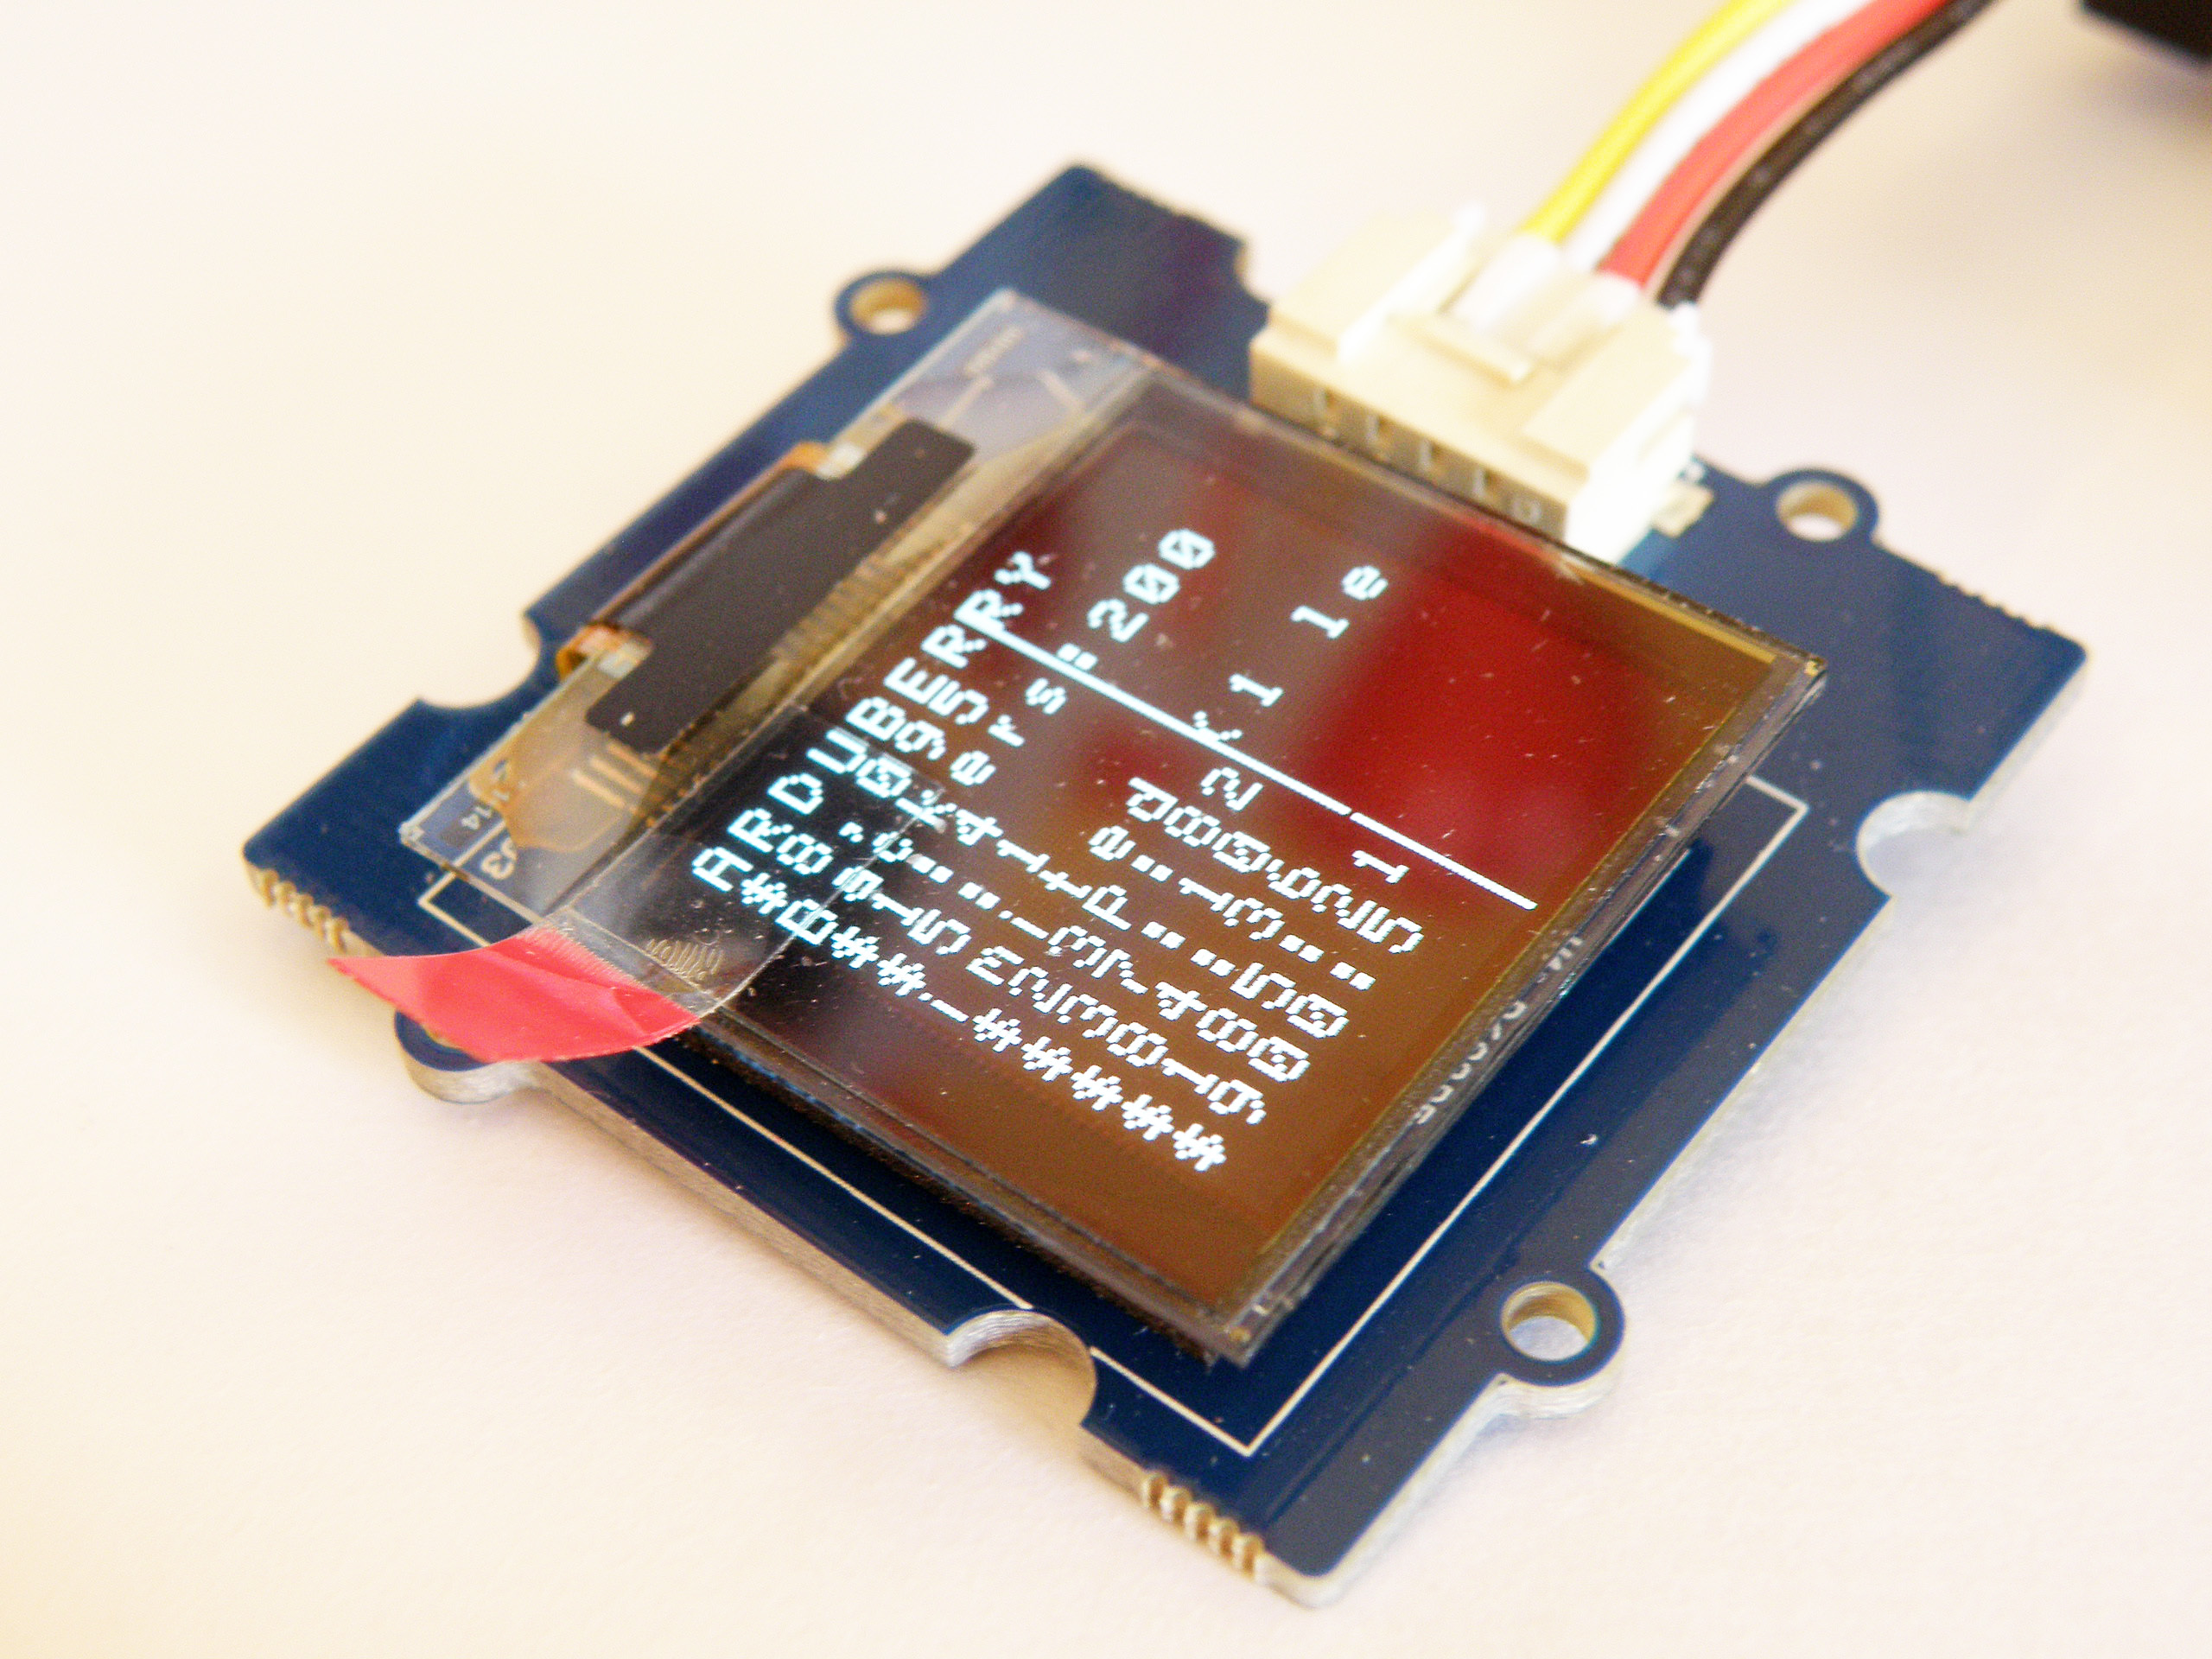
We have sitting in our lab right now an Air horn. Actually 5 air horns controlled by an Arduberry, which plays the theme song from the Dukes of Hazard whenever we have a new backer . We also have a small OLED which displays the live stats too.
Hardware Required
- Air horns (get the biggest and the baddest one’s you can find, should easily make someone jump out of their chairs)
- Arduberry
- Raspberry Pi
- WiFi adapter for the Raspberry Pi
- Grove Base Shield
- Grove OLED – to display live stats
- Grove Relay – to control the air horns
- 12V battery or power supply for the Air horns
- 5V battery or power supply for the Raspberry Pi and Arduberry
Step 1- Connecting the Airhorns
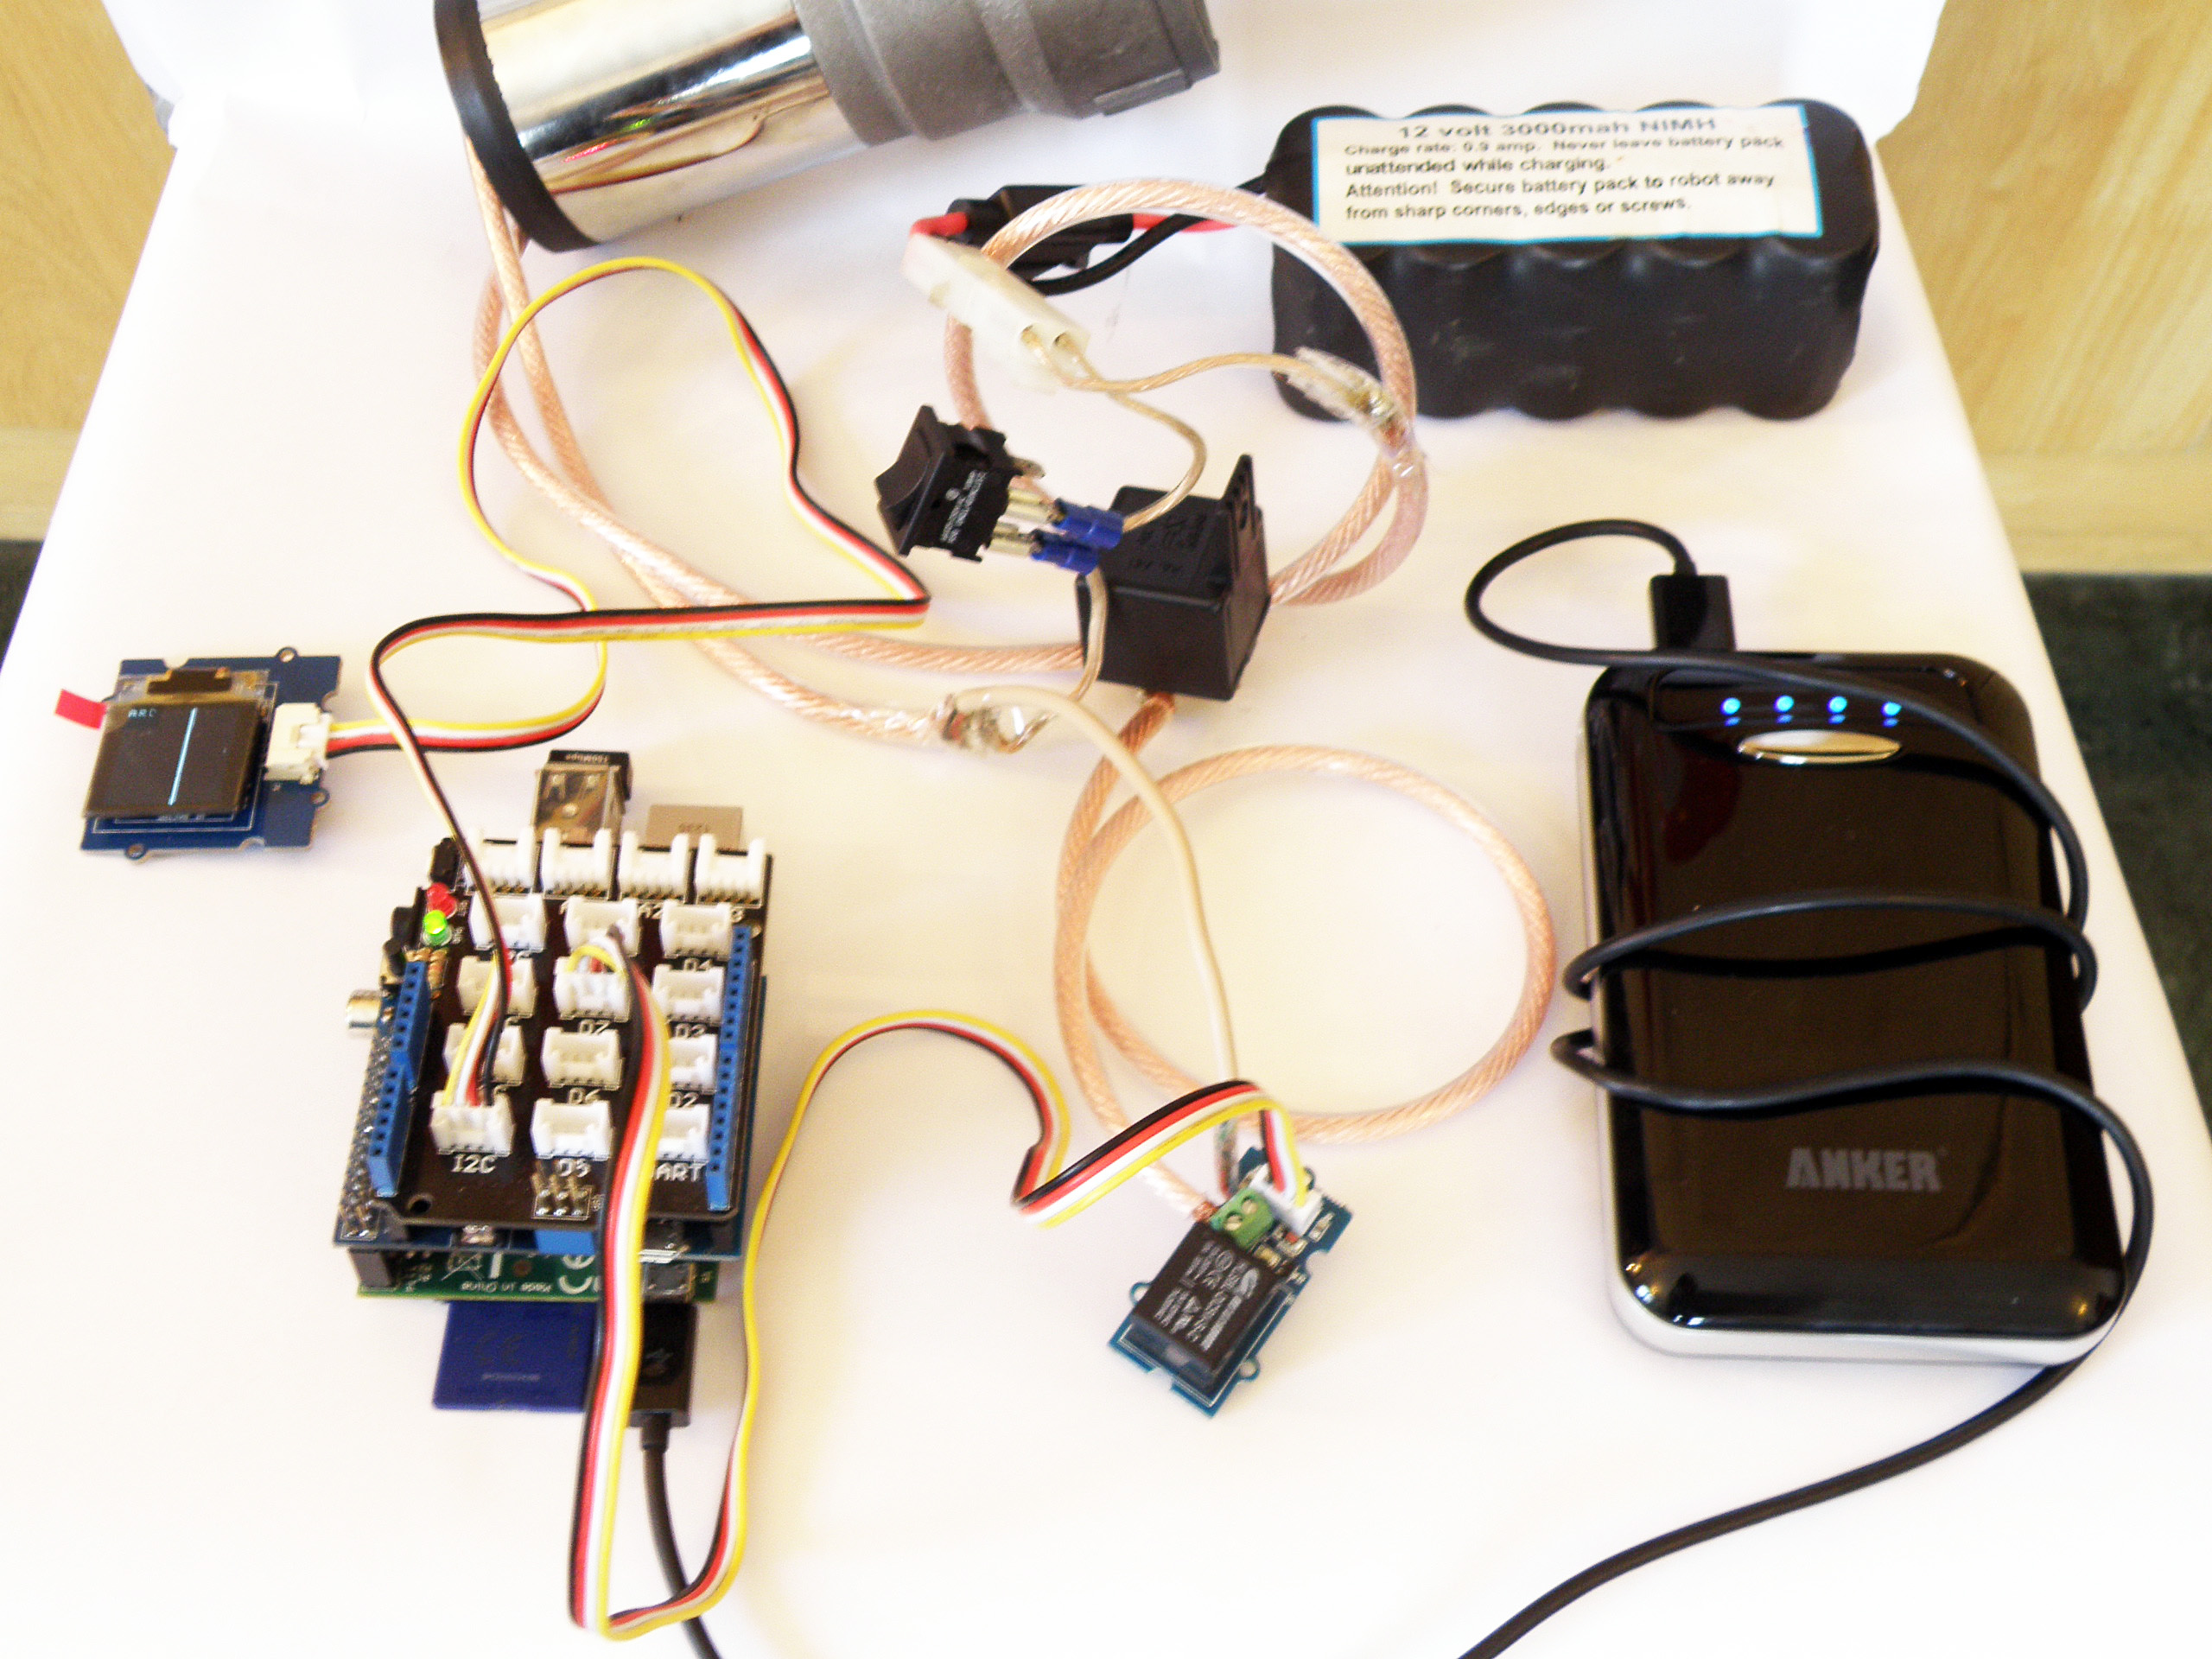
Connect the air horns to the 12V power supply and leave the switch unconnected for the Grove relay. We used a Tetrix 12V battery. These horns are generally meant for cars, so a large car battery will work too.
Be careful when powering the air horns: they often need a power source capable of supplying 20 Amps at 12V. Luckily we had some rechargeable NiMH batteries lying around which were rated at 20 Amps. Cutting and soldering the connections on the air horn with a 14AWG wire was a challenge in itself.
Step 2- Connecting the Arduberry and the Grove modules
The beauty of the Grove system is that all the sensors use the same 4 wire connector, so there’s no headache when connecting different modules and no unreliable wiring. Just connect the sensors to the base shield and you are up and running. We had a couple of Grove sensors lying around which were ideal for our project.
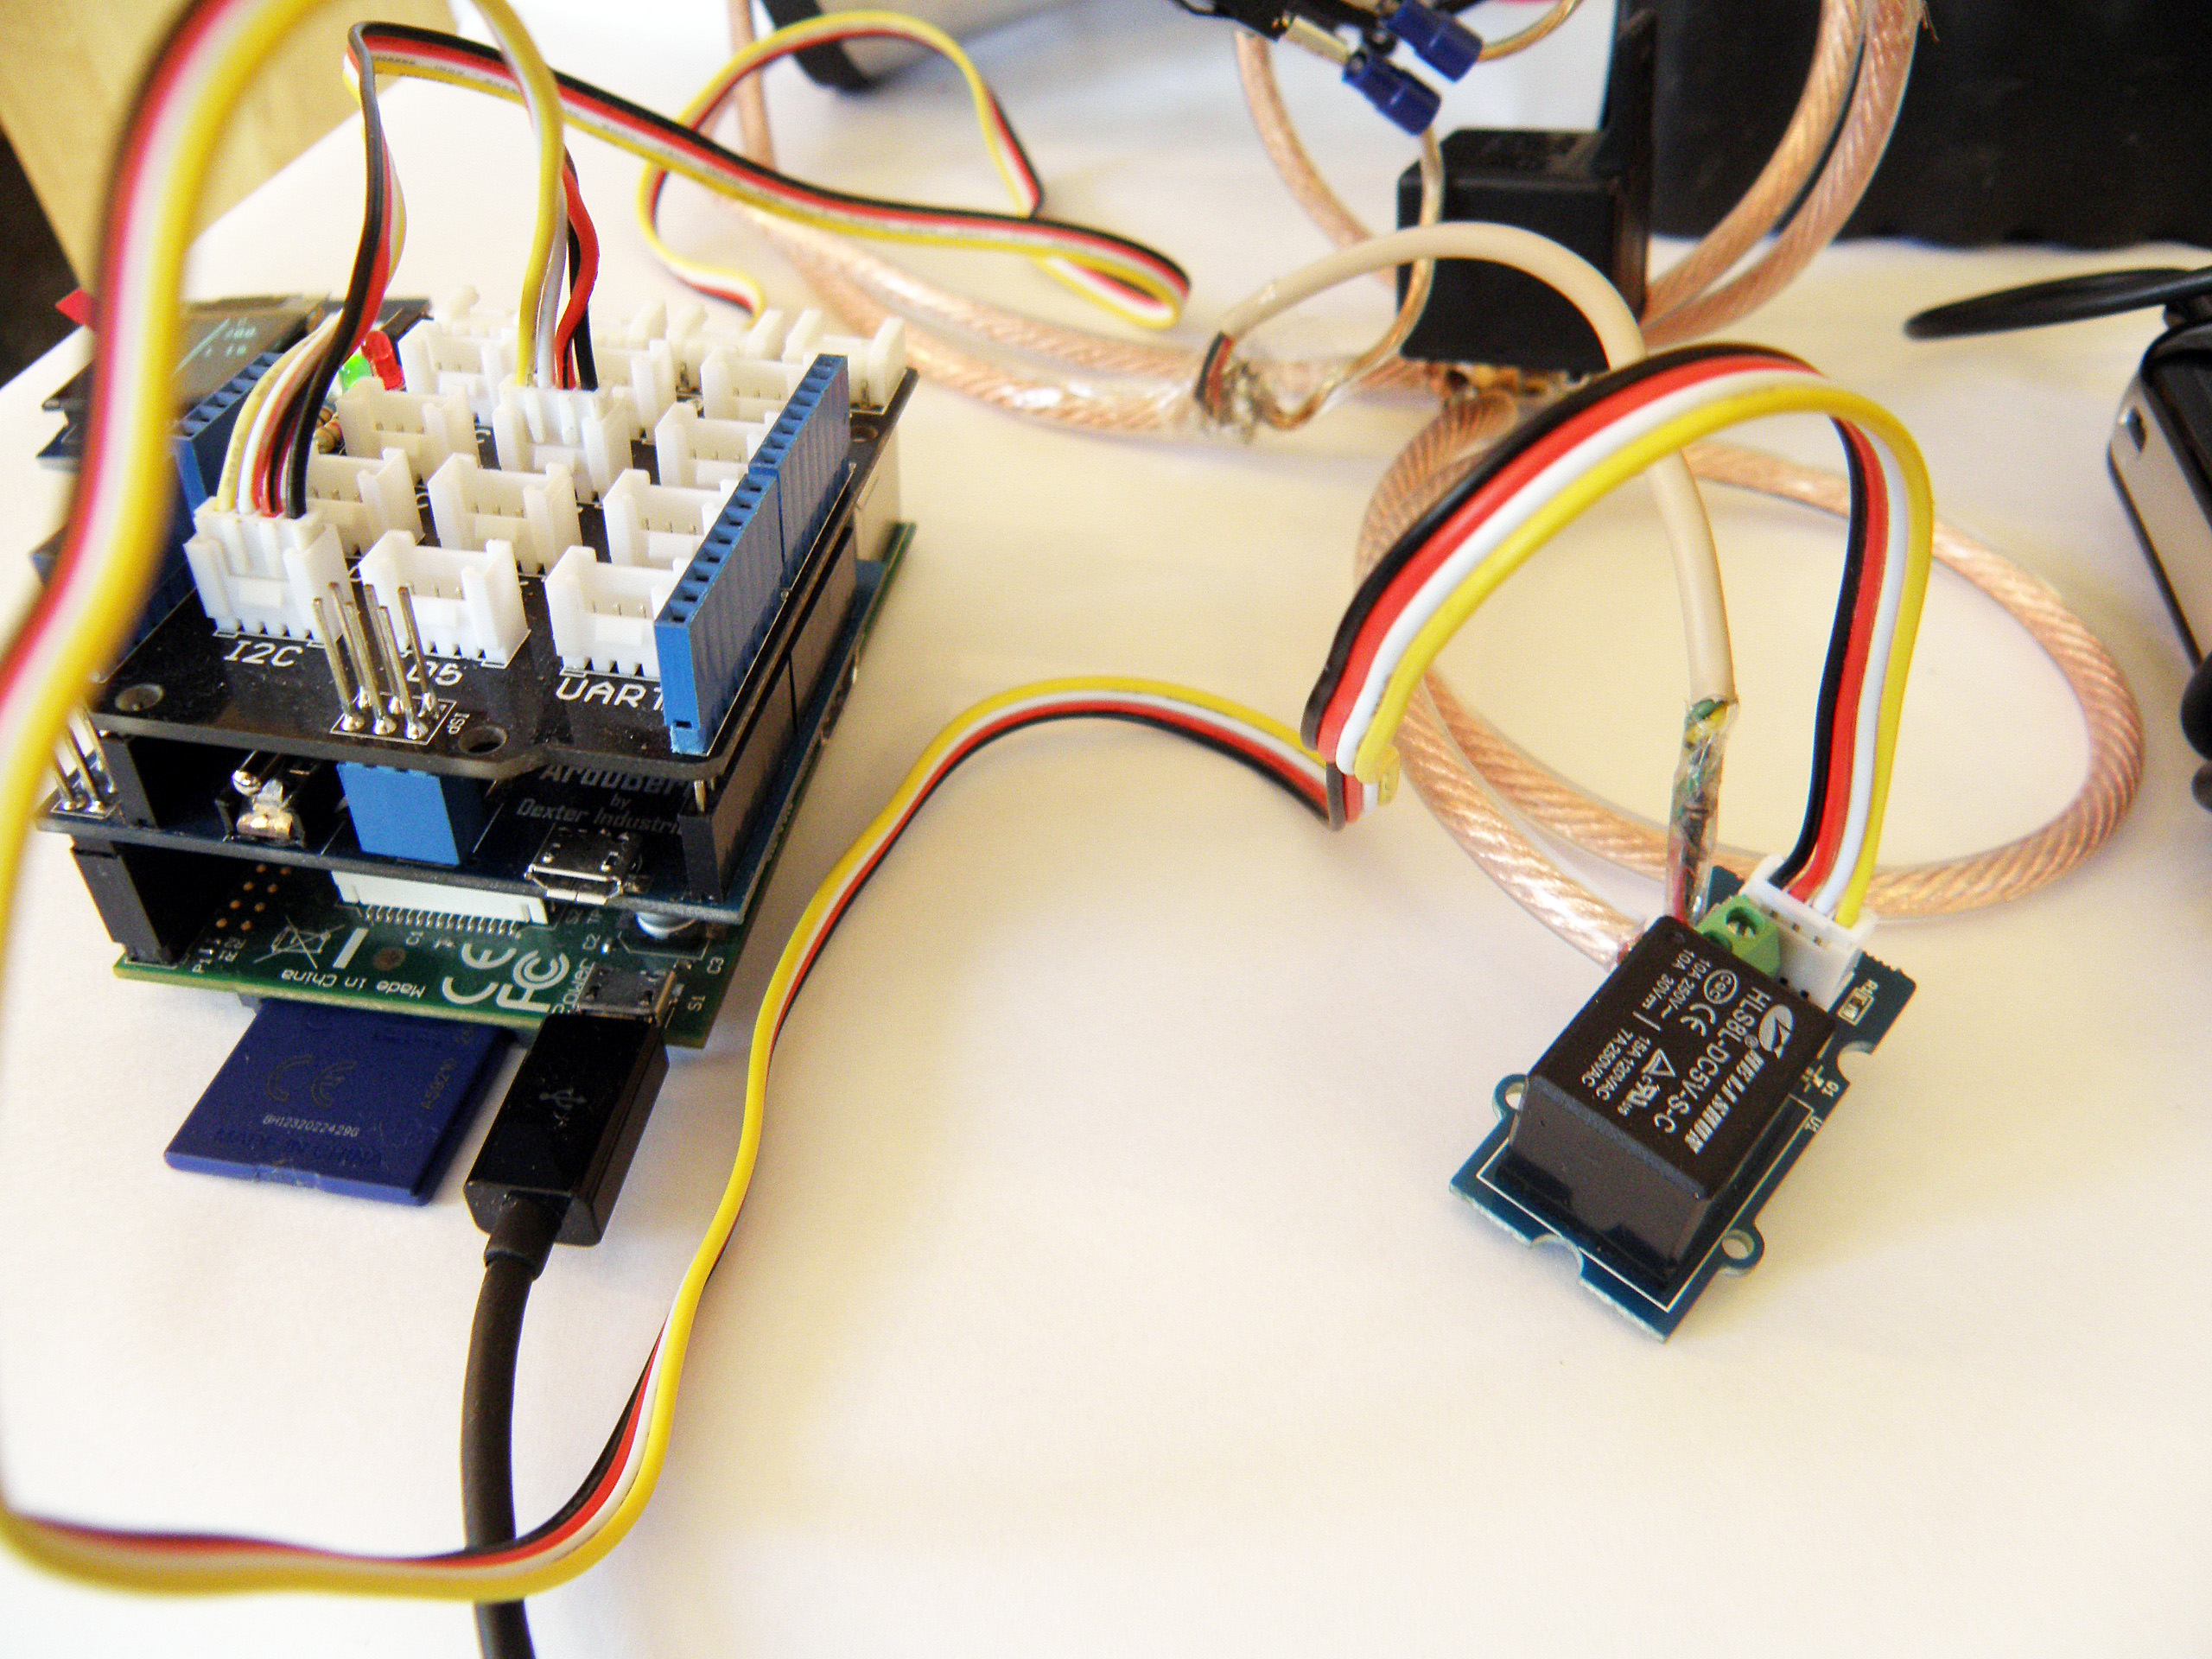
Connect the Grove Relay to Port D7 and the OLED shield to any I2C port and slide it on the Arduberry. Now slide the Arduberry on the Raspberry Pi and power it on.
Step 3- Connecting the Air horn to the Arduberry
Connect the wires in the air horn circuit which were meant for the switch, to the two terminals on the Grove Relay.
Step 4- Getting data from Kickstarter
Kickstarter does not have a public API and we wanted to get live stats of our project. The solution is to set up a web crawler to get data from Kickstarter periodically and extract the data. We have some experience with crawlers but we usually try to avoid the pain of setting up a web crawler and it would have been an overkill for a small project like this.
Enter Kimono. This is an awesome product (still in beta) from Kimonolabs that converts any website into API’s directly from the browser without writing a single line of code. The only bottleneck is the 1000 free API calls provided for real time data. It might not suit a large project, but was just the thing we needed for our project. Within minutes the API was streaming data to our python client on the Raspberry Pi.
A huge shout out for the guys at Kimonolabs for making our lives easier!
The python client code is in our Arduberry Github Repository. Here’s a quick preview of the code.
Step 5- Setting up the Arduberry
We need the Grove OLED library for the OLED shield. Take a look at Installing a library tutorial if you don’t know how to use the library with Arduberry.
The sketch which goes on the Arduberry is in the Arduberry Github Repository.
The messages sent to the Arduberry from the python program uses Serial interface. The serial buffer on the Arduberry is by default set at 64 bytes. It needs to be increased to 128 bytes to accommodate the bigger messages. Here’s a quick tutorial on how to increase the serial buffer.
Step 6 – Putting it all together
Upload the code on the Arduberry (here’s how). Power on the Air horns and run the python code and wait for the Air horns to come to life. This is sure to raise the liveliness of the office!
Our inspiration: Dwight Schrute: