Windows IOT and the GrovePi
Step 3. More WinIoT GrovePi Samples and Examples
This is Step 3 in a 3 part series on Getting Started with WinIoT and the GrovePi+. See the other parts here.
In this final step, we will walk through all the various examples for the GrovePi Internet of Things device running on the GrovePi and the Raspberry Pi.
Now, with Visual Studios properly set up and the GrovePi example running, you are ready to explore the other sensors in the GrovePi Base Kit. You have downloaded the GrovePi Github Repository from Github here.
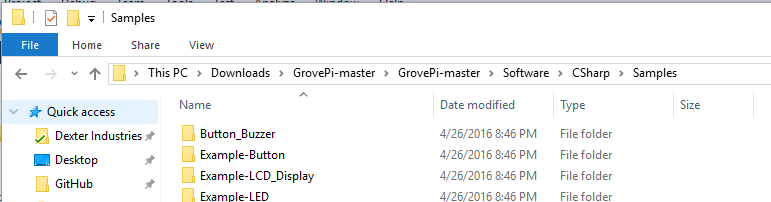
The Examples for the GrovePi in C# are found in the GrovePi Directory under /Software/CSharp/Samples, or here on Github.
In the Github directory you will find examples for:
- Grove Button Sensor
- Grove Buzzer
- Grove LCD Display
- Grove LED
- Grove Light Sensor
- Grove Relay
- Grove Sound Sensor
- Grove Temperature and Humidity Sensor
- Grove Ultrasonic Sensor
You will also find some bonus examples that combine two or more sensors.
In this final tutorial, we’ll open up and run “Button_Buzzer”. The Directions are the same for each of the samples.
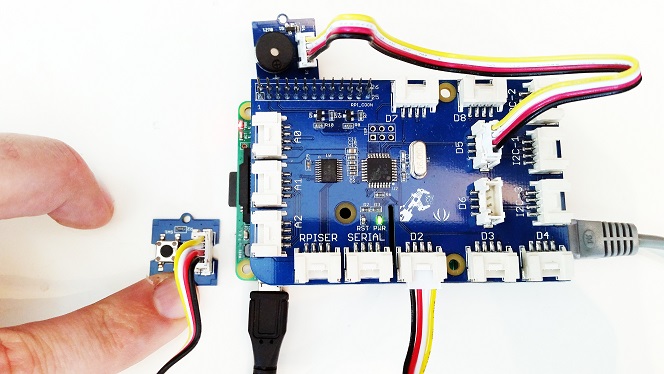
1). Set up the Hardware
We assume the GrovePi and Raspberry Pi are already set up. (Not yet? See Step 2!) Then
- Connect the Buzzer to D5 (Digital Pin 5) on the GrovePi.
- Connect the Button to D2 (Digital Pin 2) on the GrovePi.
2). Open the Solution
Click the ButtonBuzzer.sln file.

You may get a security warning. We’re a trustworthy source!

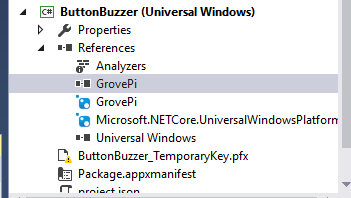
2). Add a Reference to the GrovePi Libraries
Remove the GrovePi Reference. In the Solution Explorer, click “References”. Right click on “GrovePi” and select
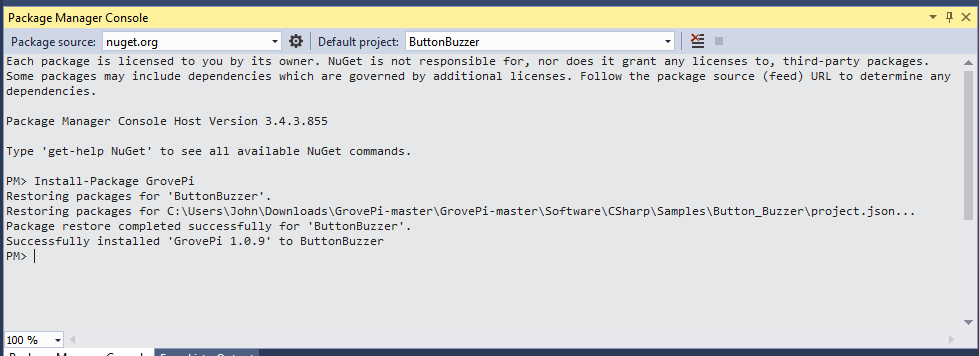
Open the NuGet Packet Manager. Open “Tools” –> “NuGet Package Manager” –> “Package Manager Console”.
In the command line, type “Install-Package GrovePi”.
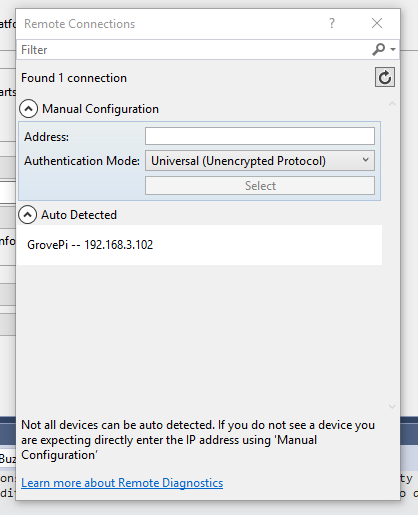
3). Find your Raspberry Pi and GrovePi
Next, we’ll make sure we’re connected to the Raspberry Pi and GrovePi. In the Solution Explorer, right click on “Properties” and click “Open”.
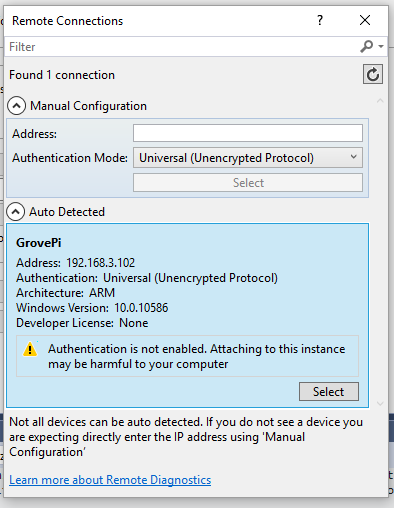
Click the “Debug” tab and change the “Target device: ” to “Remote Machine”. Next click “Find” and select the Pi we are going to deploy to.

Find your device.
Type “Ctrl+S” to save the ButtonBuzzer Configuration Properties File.
4). Run the Solution
Run the solution by either clicking F5, or the “Remote Machine” Button at the top.

You should see a successful build.
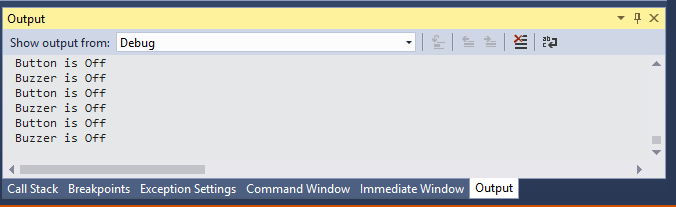
And the Button Buzzer should go into Debug/Running Mode. If you click on the “Output” window, you should see output from the device.