 Introduction
In this tutorial we will look at how to send data to an online service like Thingspeak, and how to display data from your BrickPi on the web. We use a the Dexter Industries Thermometer to measure the temperature in the room and then post the data up on the ThingSpeak website. The temperature values are read by BrickPi mounted on a RaspberryPi which sends data online to plot the graph.
What You’ll Need:
- A RaspberryPi
- BrickPi
- 9 V battery – for powering the BrickPi board and sensor
- Dexter Industries Thermometer
Procedure:
Step 1: Signup for Thingspeak
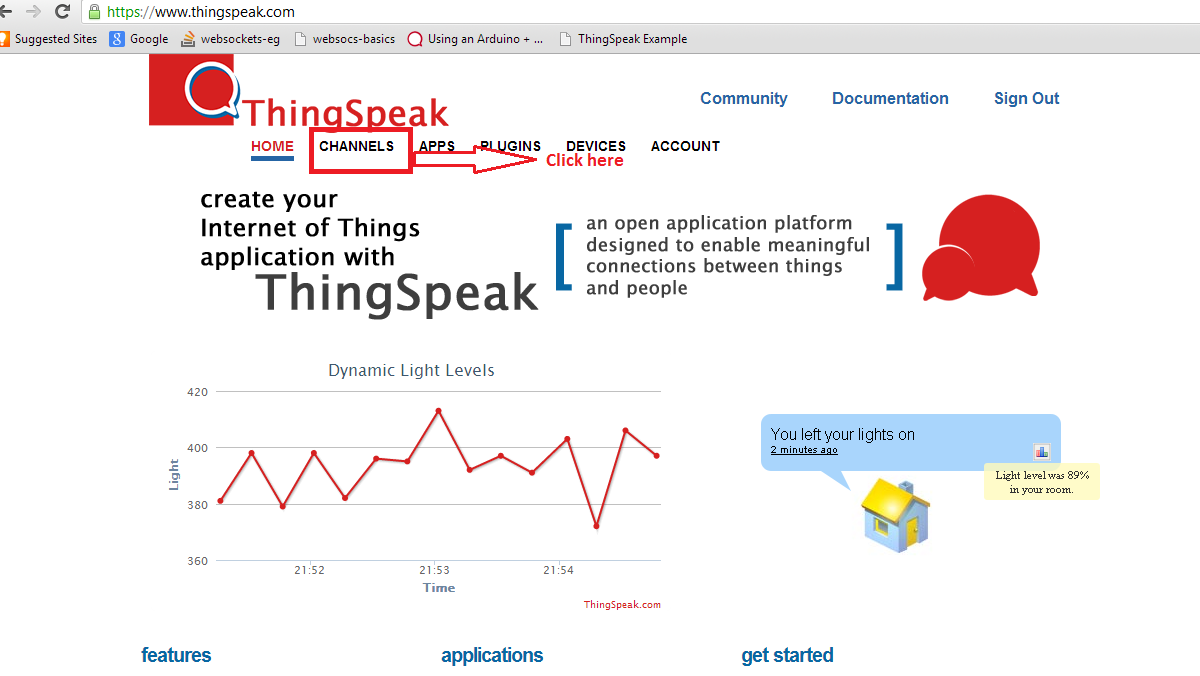
First signup for the new account in thingspeak at https://www.thingspeak.com

Step 2: Login to Thingspeak
Login to your account and click on the channels icon.
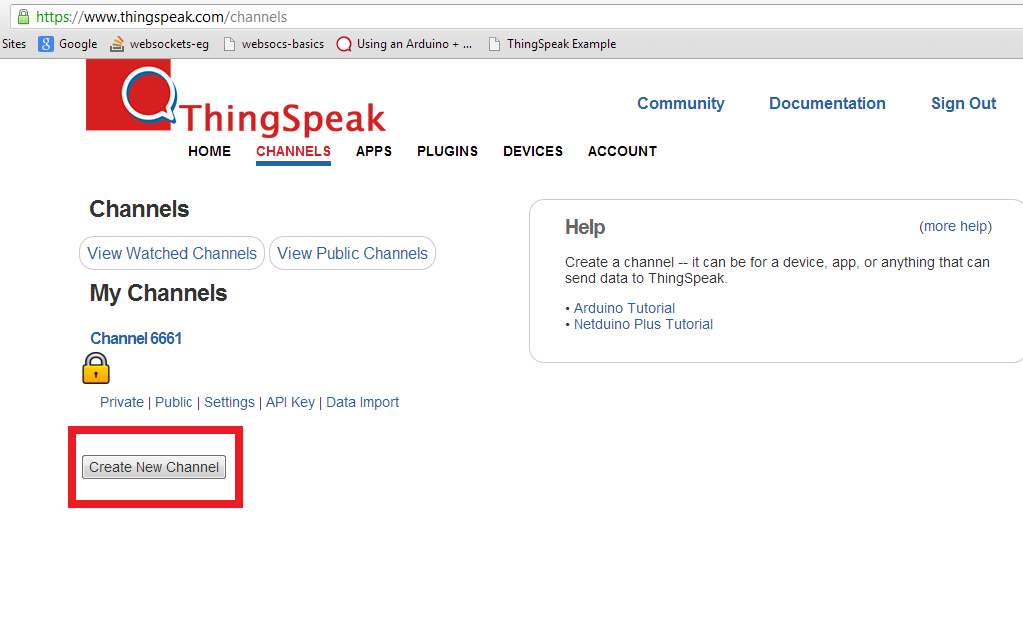
Step 3: Create a Channel for Your Data
Create a new channel by clicking on the “Create New Channel” button.
Step 4: Name Your Project
- Give a name for your project and fill the field column with the information you are plotting. Eg : Temperature.
- Fill only one field column since we are plotting the data on a single thermometer.
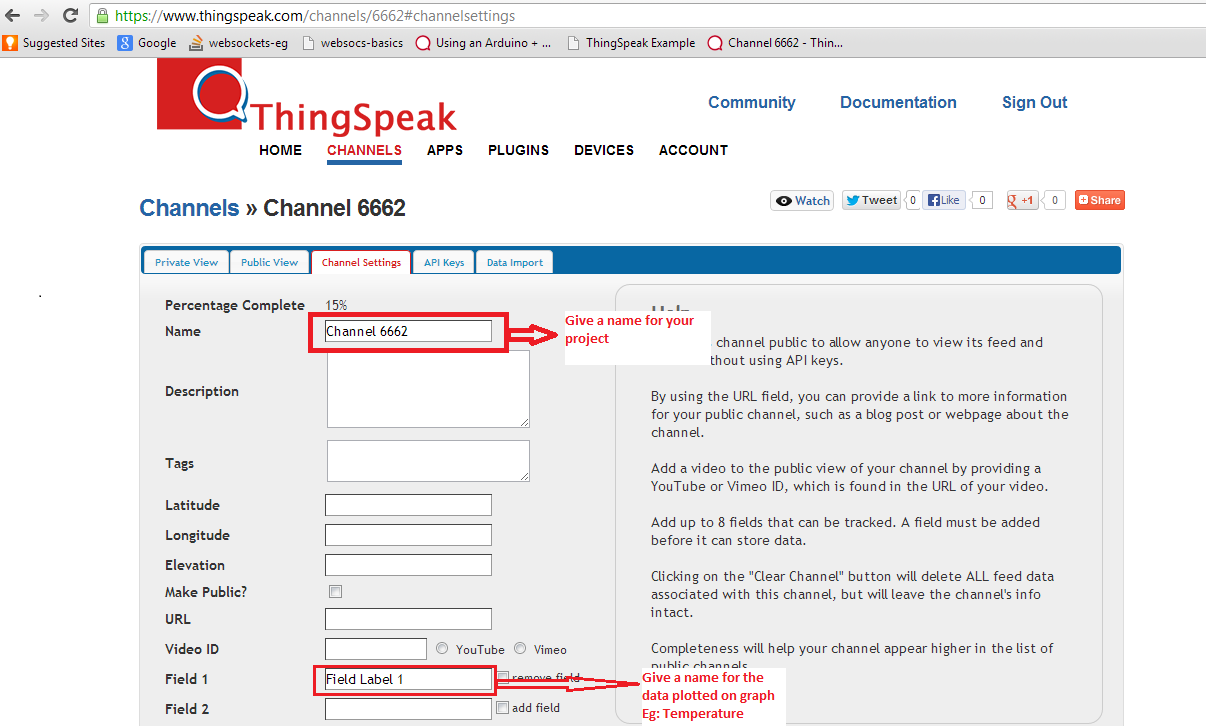
Step 5: Update the Channel
Click the Update “Channel button” after completing the Channel Settings.

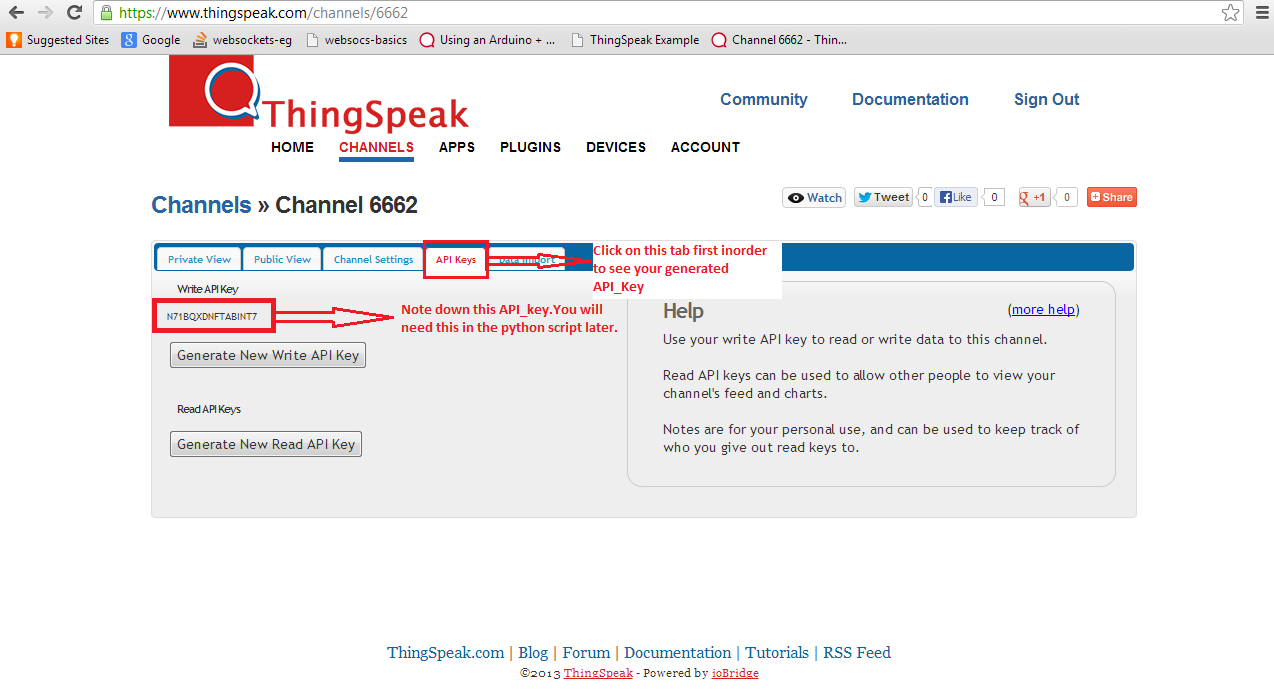
Step 6: Get an API Key
Click on the API Keys tab and copy down the API_KEY value. We will use this in the python script later.
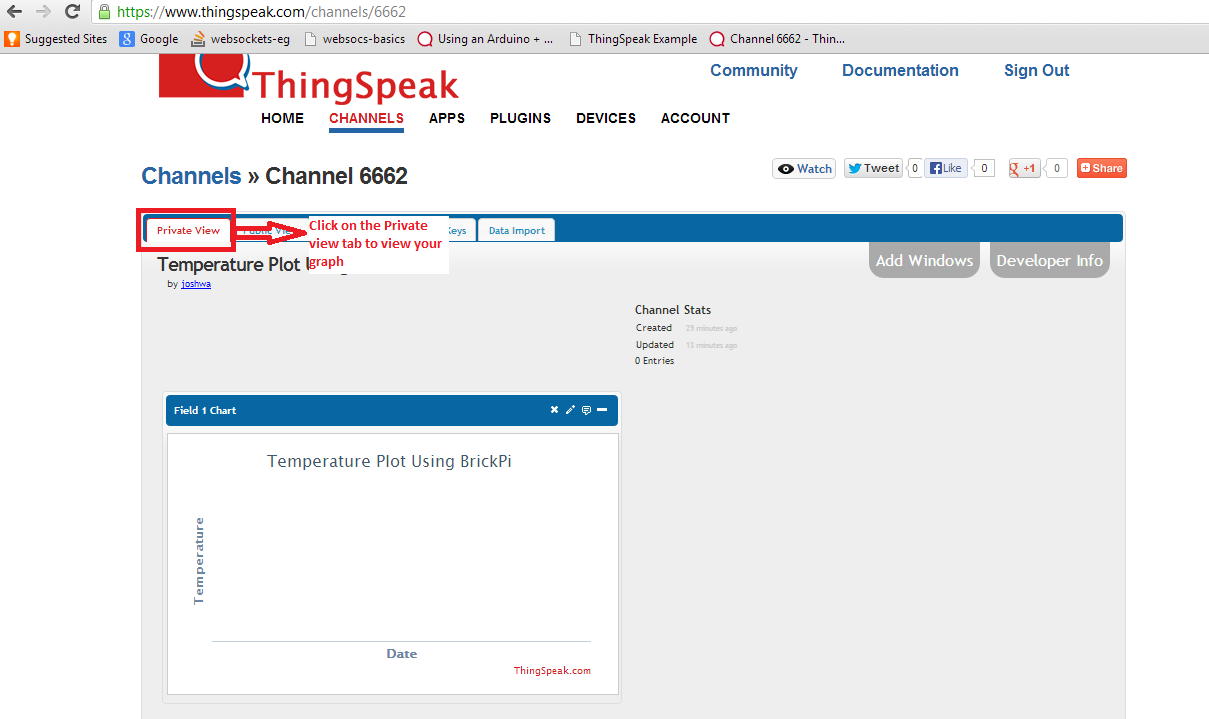
Step 7: Check the Graph
Click on the Private view tab to look at the graph. It wont show anything now since the python code isn’t running. We will come to this later.
Step 8: Open the Python Example
We wrote a quick example in the Python Examples section of the python code on Github. You can get the entire BrickPi_Python Repository by running the following commands (this is explained in more detail in our Python Programming Section here).
git clone https://github.com/DexterInd/BrickPi_Python.git
sudo apt-get install python-setuptools
sudo python setup.py install
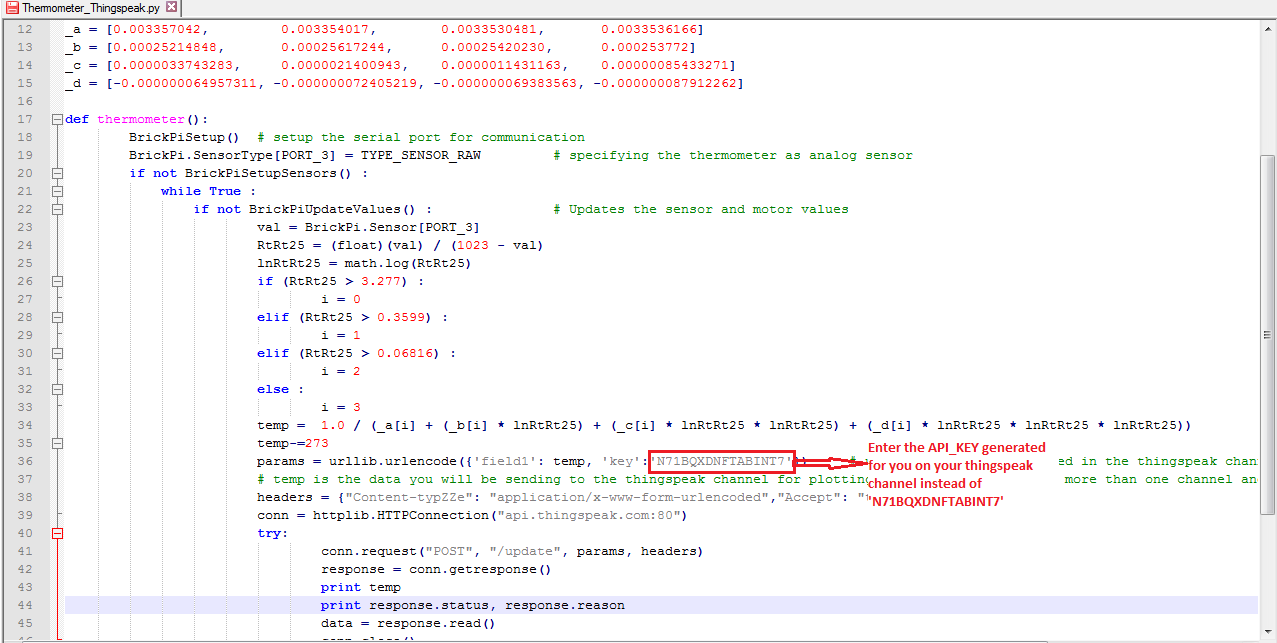
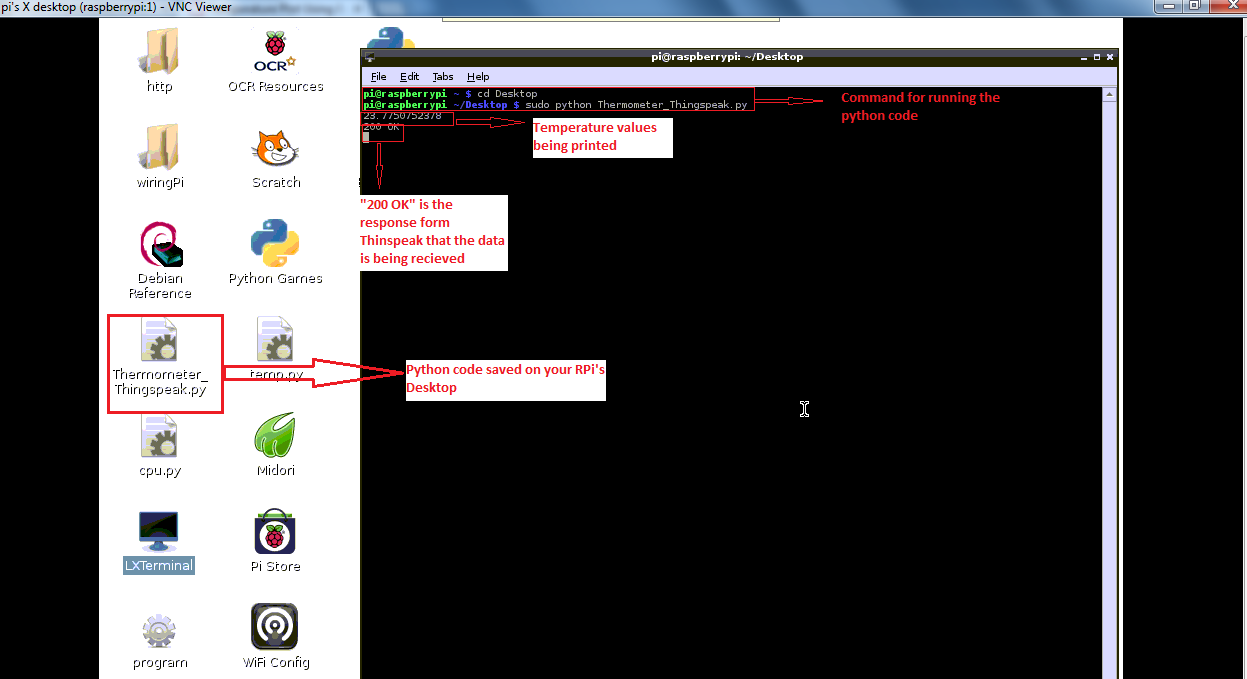
Now, open the example “Thermometer_Thingspeak.py” in the /BrickPi_Python/Project_Examples/Thingspeak_Temperature_Logging directory.
- Now in the python code and search for : ” ‘key’:’N71BQXDNFTABINT7′ “
- In place of ‘N71BQXDNFTABINT7’ type the API key value that was generated for you.
Step 9: Run the Code
Run the python code on RaspberryPi:
sudo python Thermometer_Thingspeak.py
You will be able to see the temperature values being printed on the terminal.
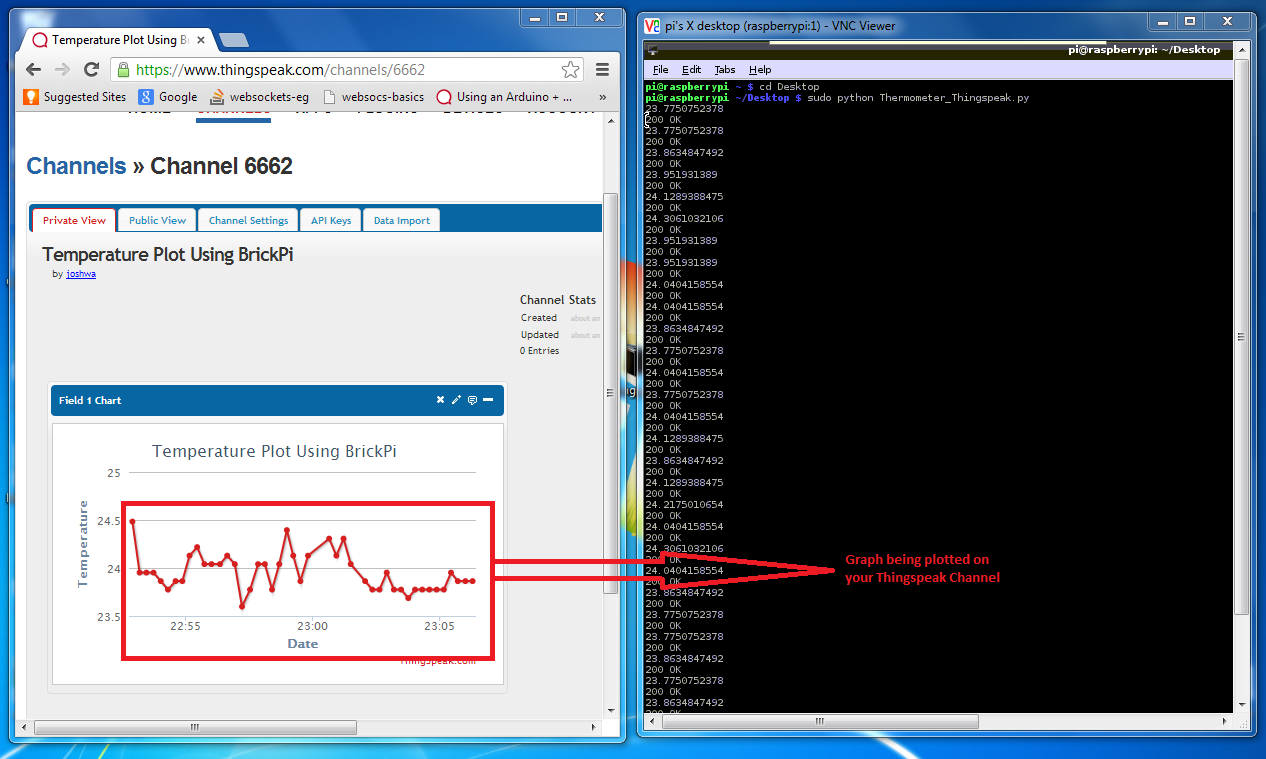
Step 10:
- Open the Private view tab on the Thingspeak Channel to see your Temperature graph plotted with the data sent from Thermometer.
- You can cross-check the graph readings with the temperature values being printed on your Terminal.