Running a blinking LED example program in Java with Maven
In the last tutorial, we’ve covered setting up the environment for the Raspberry Pi and the computer. If you haven’t gone through that tutorial, please follow it and then proceed with this on.
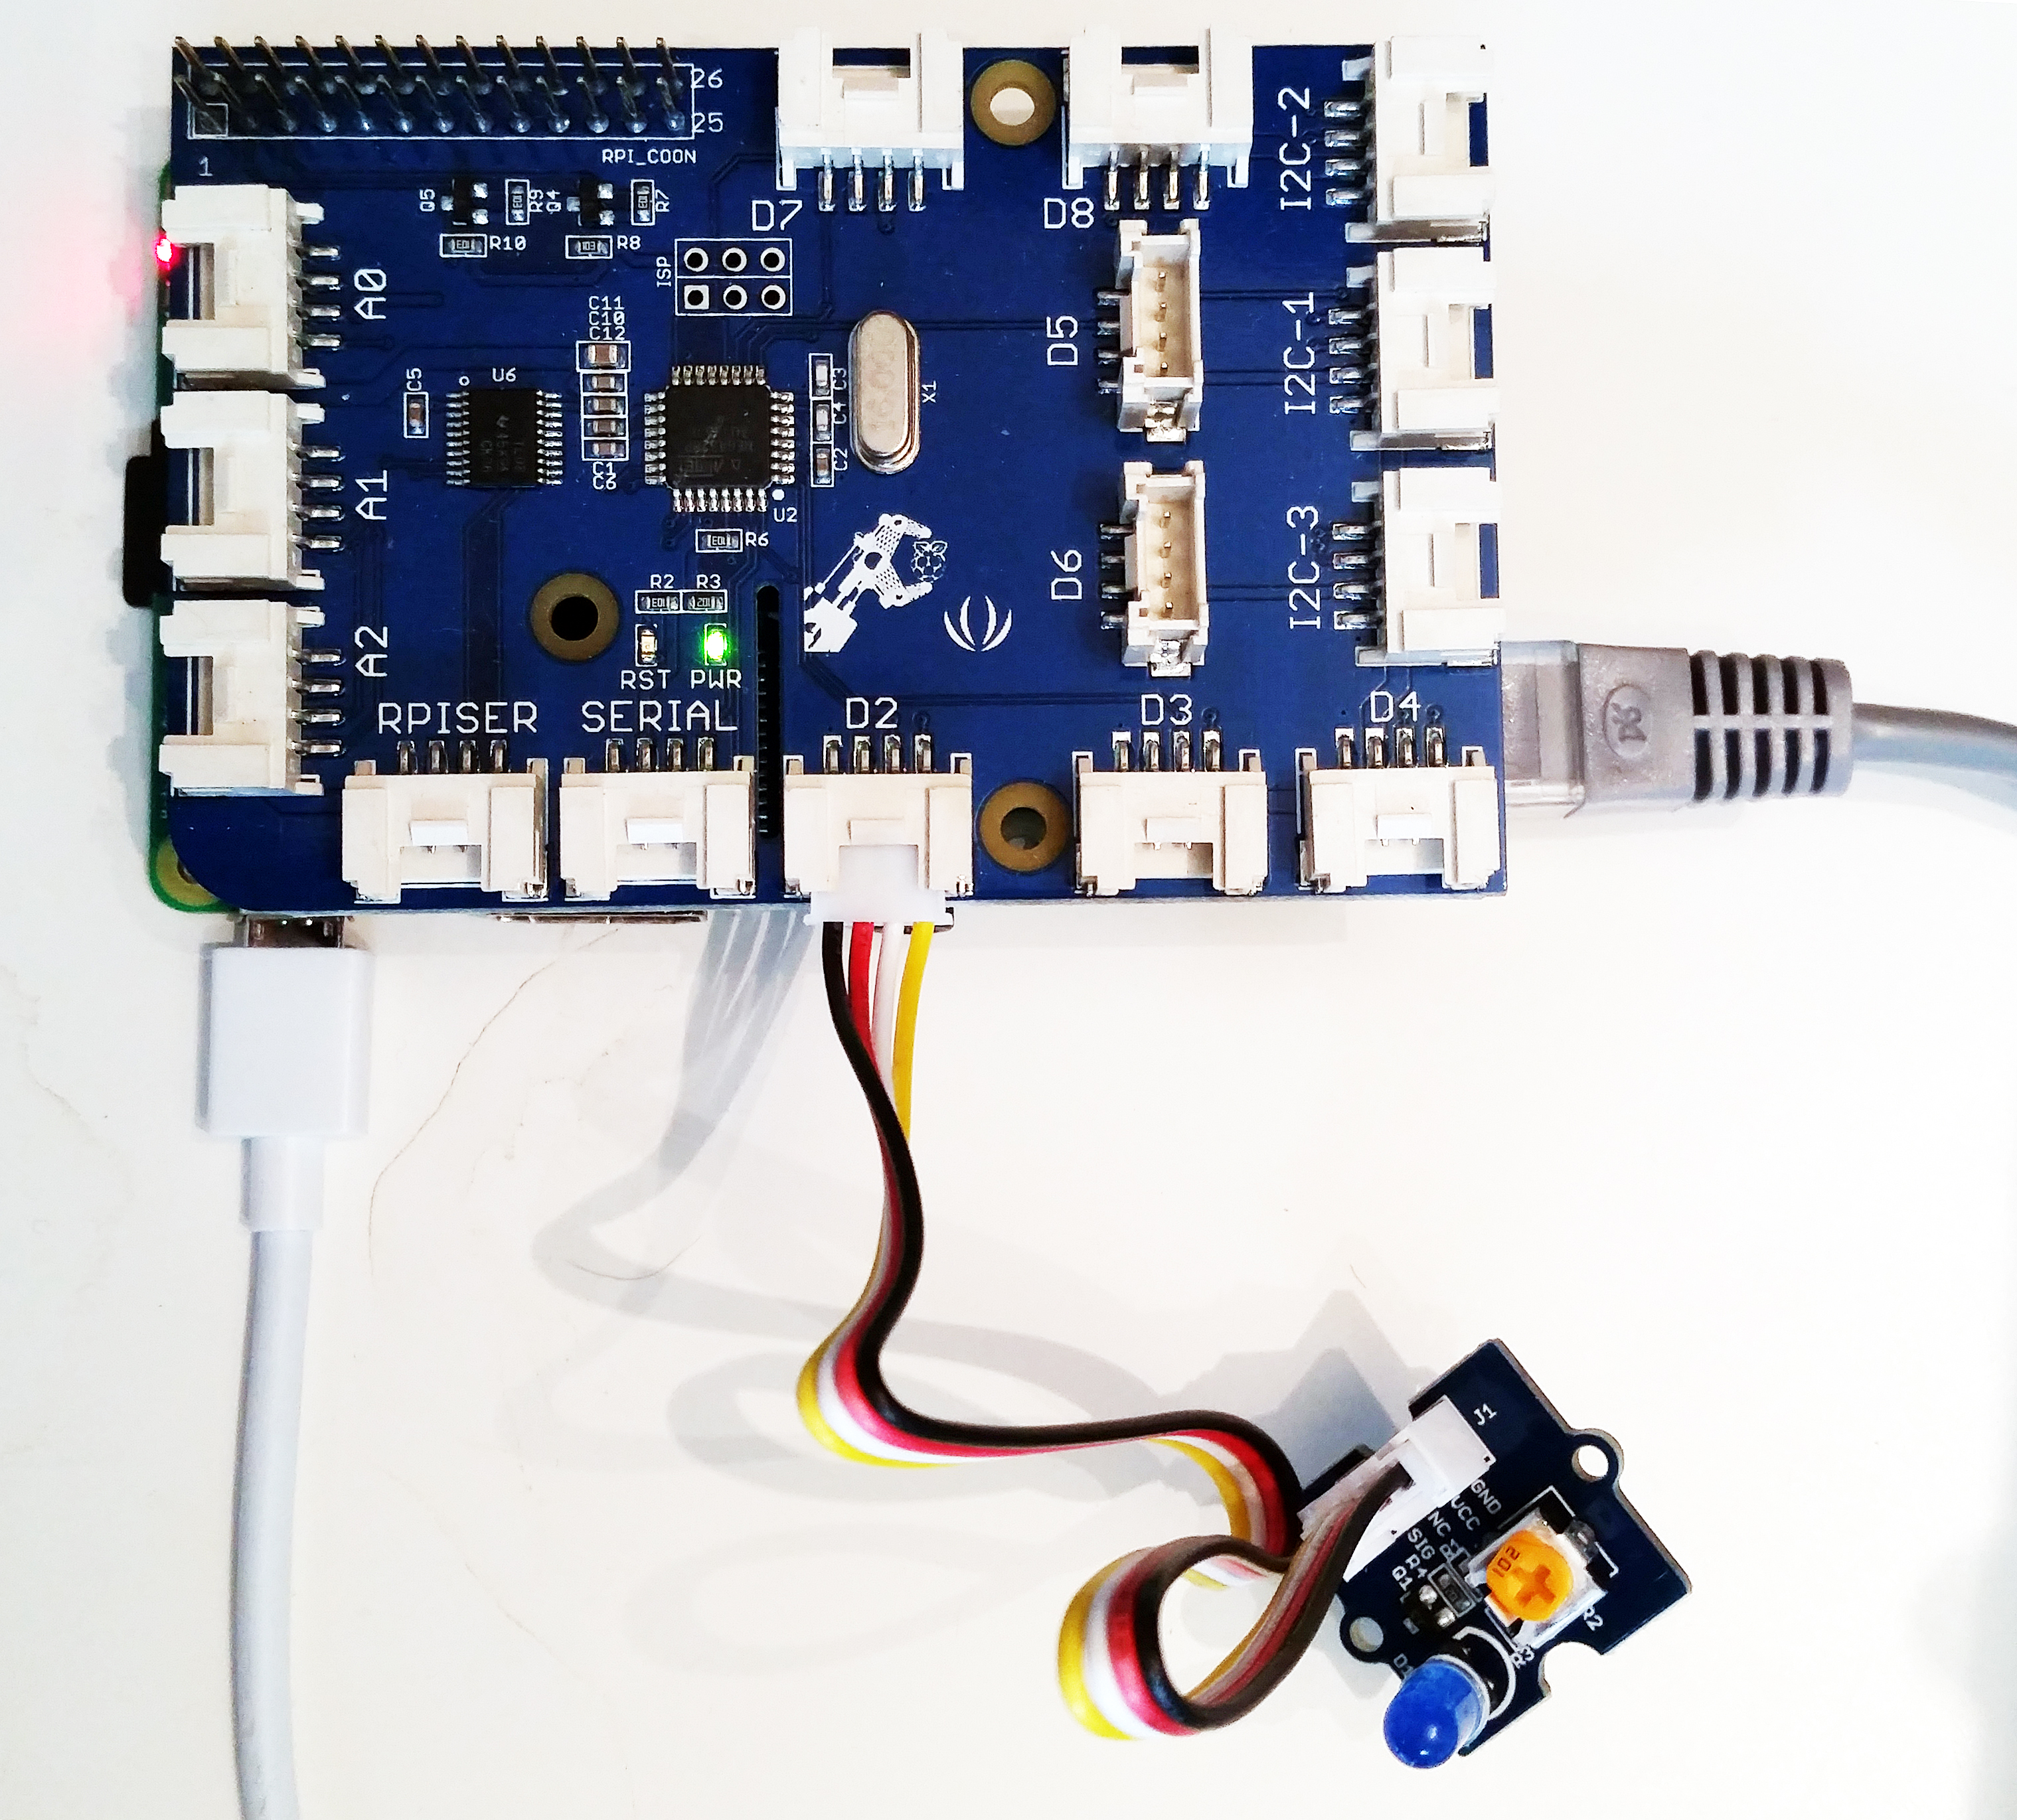
Step 1 – Setting Up the Hardware
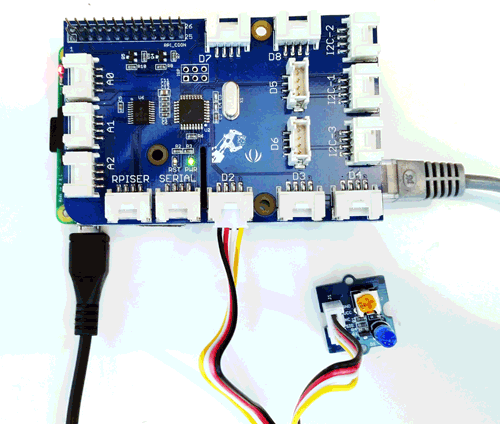
Attach the GrovePi to the Raspberry Pi B+, 2 or Raspberry Pi 3.
Make sure you have your computer on the same network as the Raspberry Pi. It can be connected by wifi to the same network, or directly coupled with an ethernet cable.
Connect the Grove LED to port D2.
Step 2 – Open Netbeans and run the Blinking LED program in Maven
This step assumes you already have gone through “Setting up your computer and Raspberry Pi” tutorial – if not, please follow the tutorial and then come back to this point.
Open Netbeans IDE on your laptop.

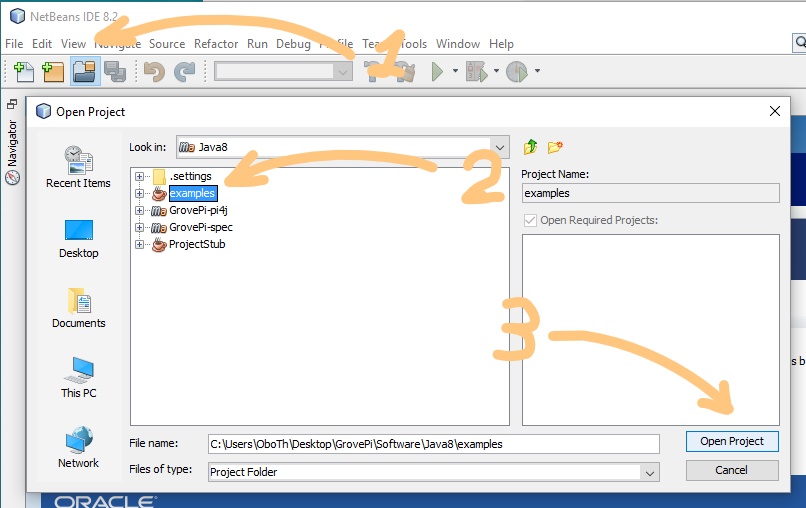
Inside Netbeans IDE, open the “examples” project we’ve set up in the previous tutorial. Following that, the project is found on your laptop in “Desktop/GrovePi/Software/Java8” directory.
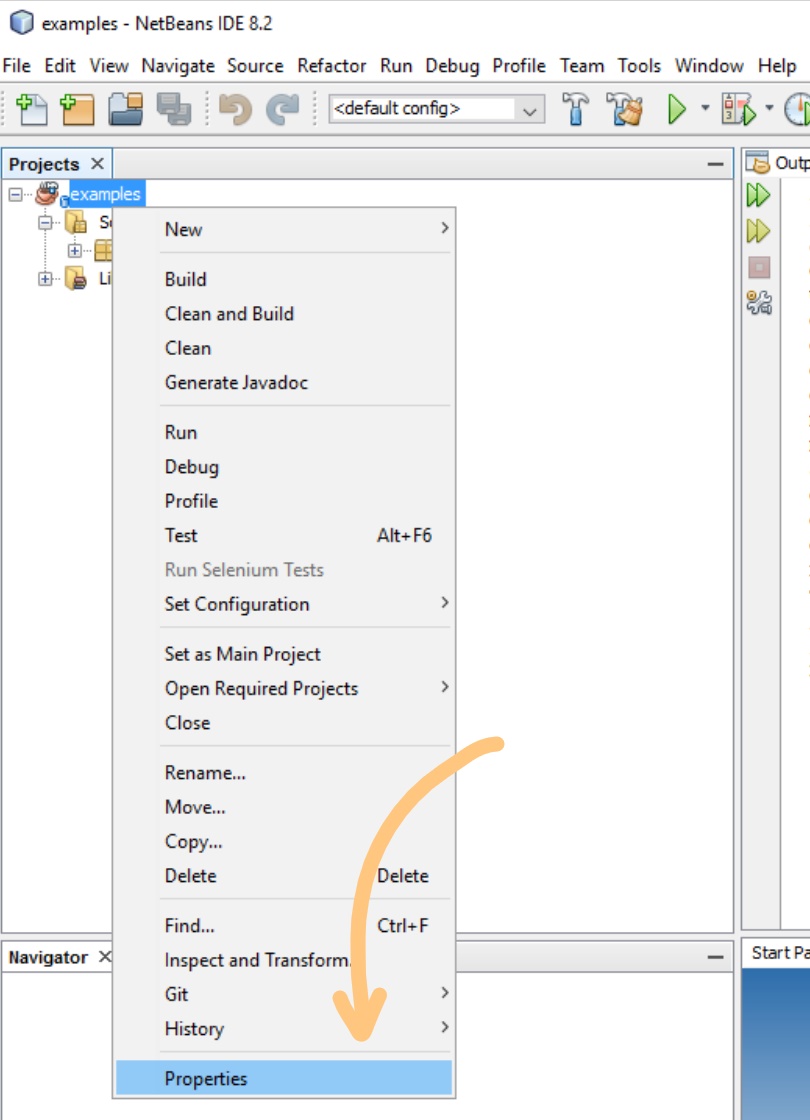
Write-click the “examples” project and click on “Properties”.
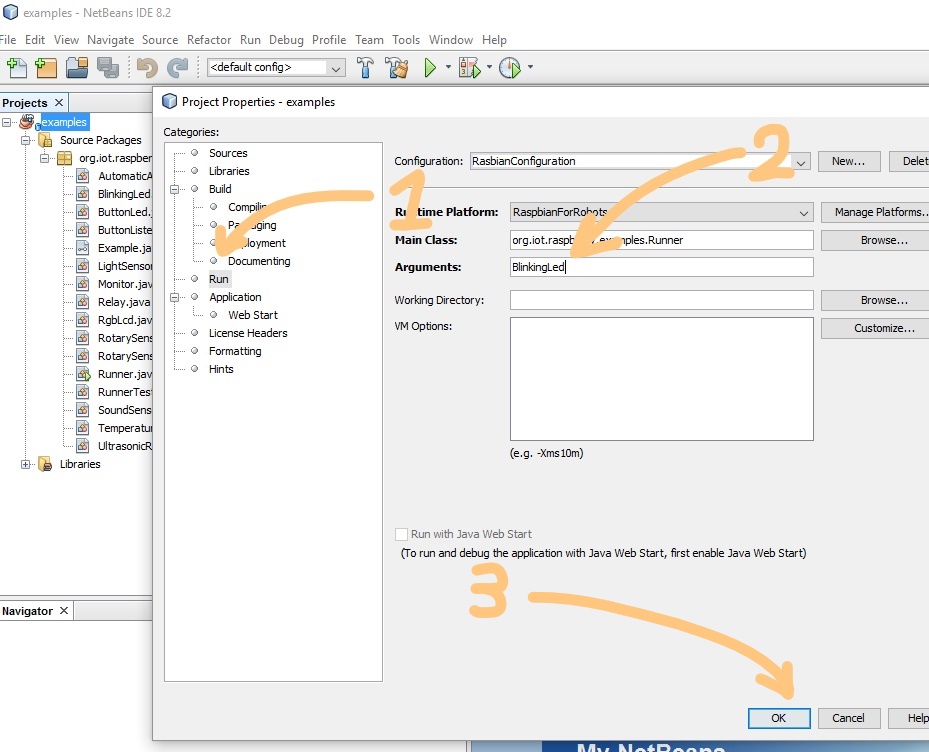
Go to “Run” section and inside “Arguments” text box insert “BlinkingLed”. Then, click “OK”.
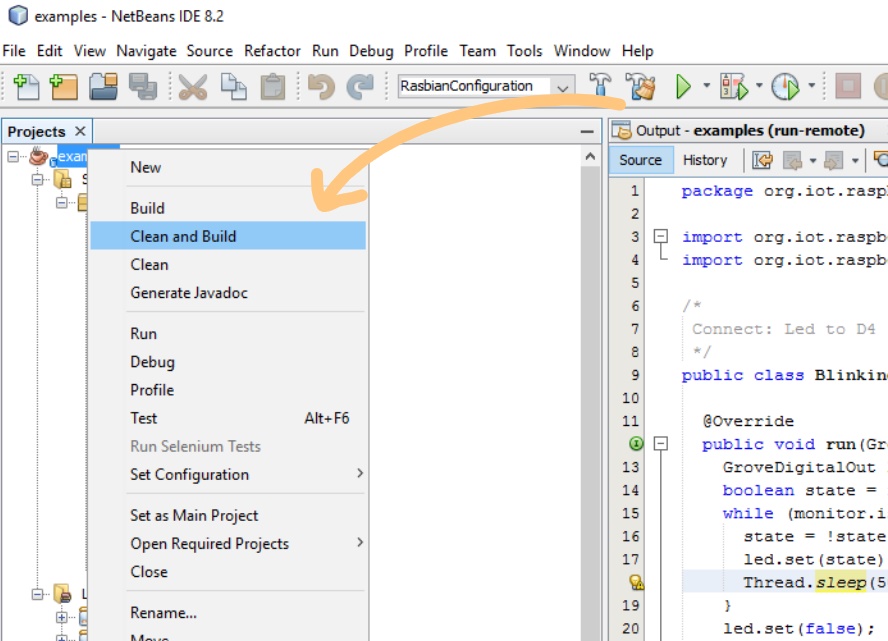
Right-click “examples” project and click “Clean and Build”.
Step 3 – Run the Blinking LED Example
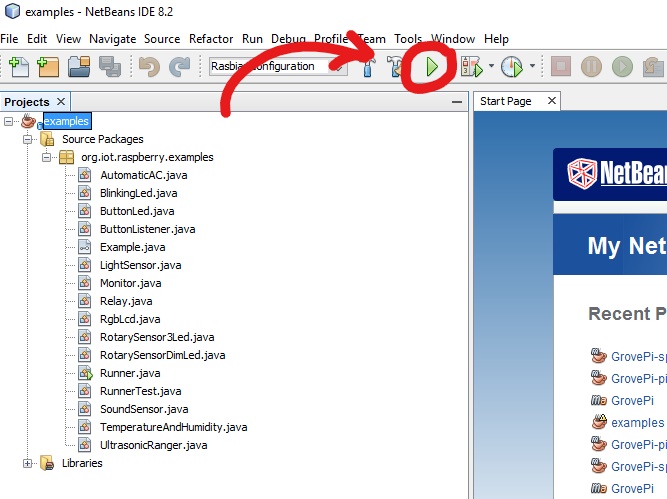
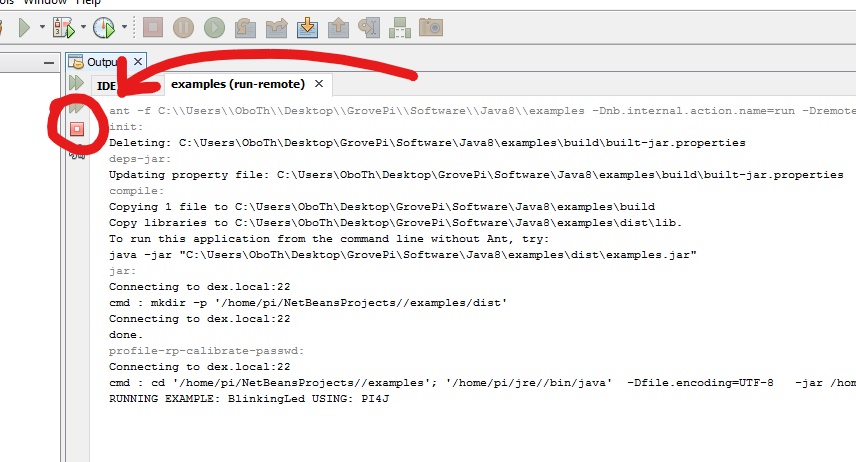
Click on the green play button on the toolbar at the top of Netbeans. See the screenshot below to locate the play button.
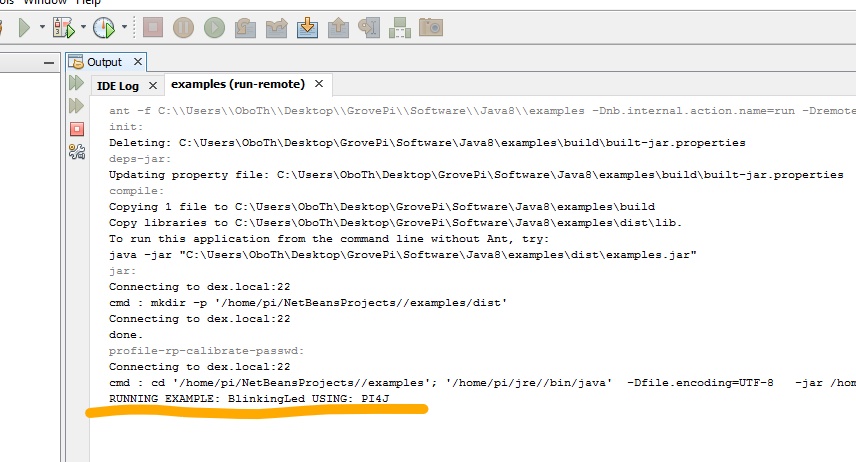
Running the example program outputs the following. If the console log is not showing up, press the key combination “CTRL+4” and log will show up.
Now, looking back at our GrovePi, the LED blinks.
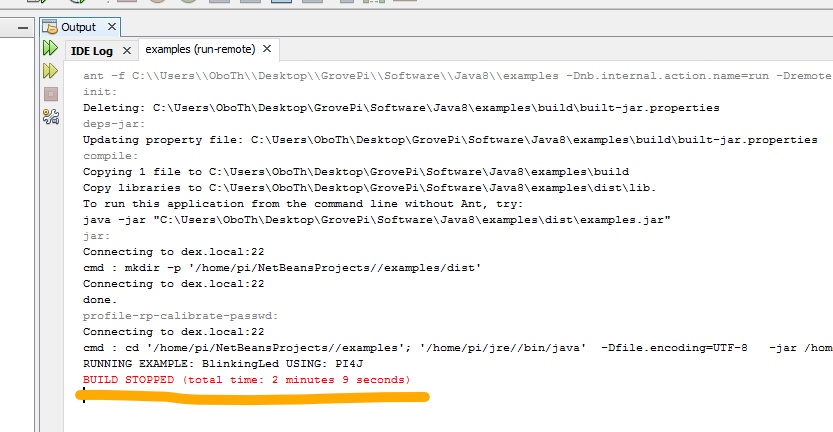
In order to stop to program, click on the red box button (aka the stop button).
After pressing the stop button, the console log will output the following.
Final Words
That’s all. We’ve run our first program on the GrovePi using Java with Maven.
Taking up to the next level is a matter of curiosity, so let’s go to the next tutorial, where we are going to find more examples to run.