In this tutorial we’ll explore a few Scratch programs for the BrickPi. Scratch is a graphical programming language developed for education by MIT. Bringing Scratch to the BrickPi means it can be programmed visually, rather than with lines of code, making it easier for kids and students to use.
Before you begin, there are directions (and two videos) on how to start Scratch with the BrickPi on the Dexter Industries website. You will need to download a few programs and get the BrickPiScratch program from Github. The step-by-step directions for downloading and installing the Scratch for BrickPi files are here: http://www.dexterindustries.com/BrickPi/program-it/scratch/
Remember to start the BrickPi For Scratch program in the background after opening your example Scratch program, but before running your Scratch program (sudo python BrickPiScratch.py).
Example 1: Touch Sensor
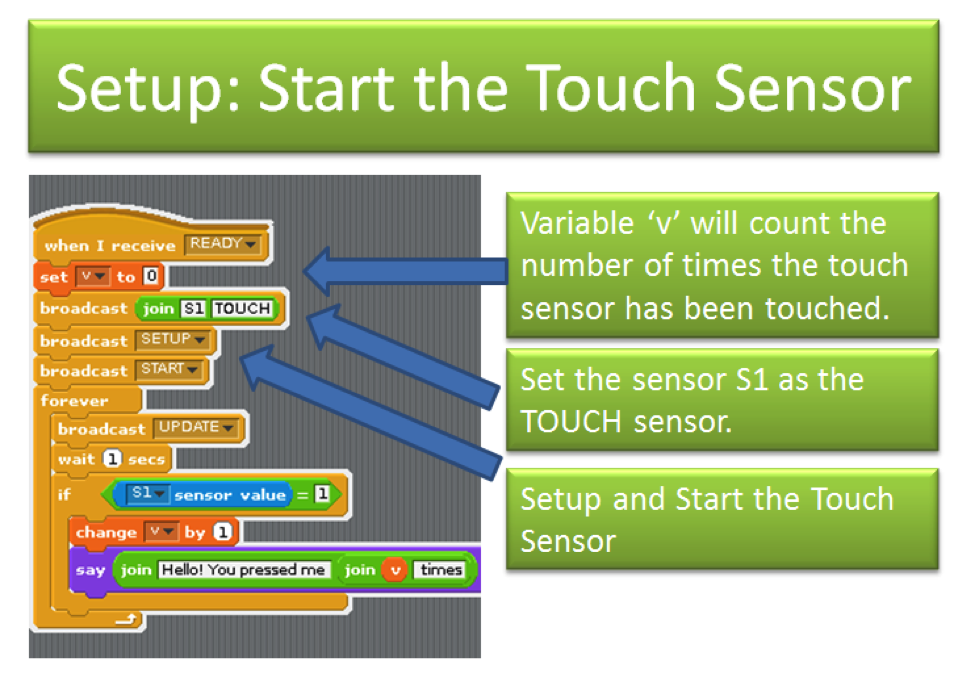
In this first example we will use the BrickPi to read a LEGO Mindstorms touch sensor. Each time we hit the touch sensor the Scratch cat will count how many times the touch sensor has been touched.
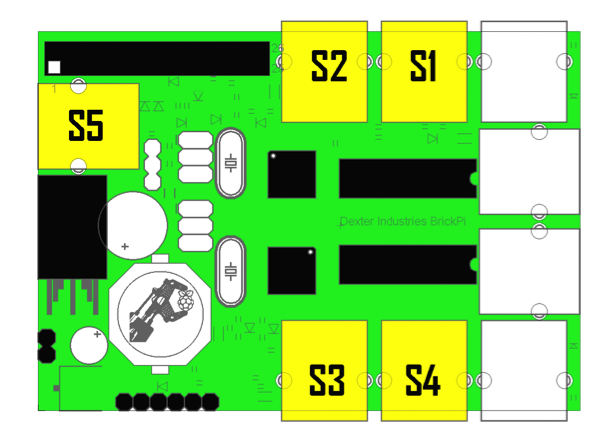
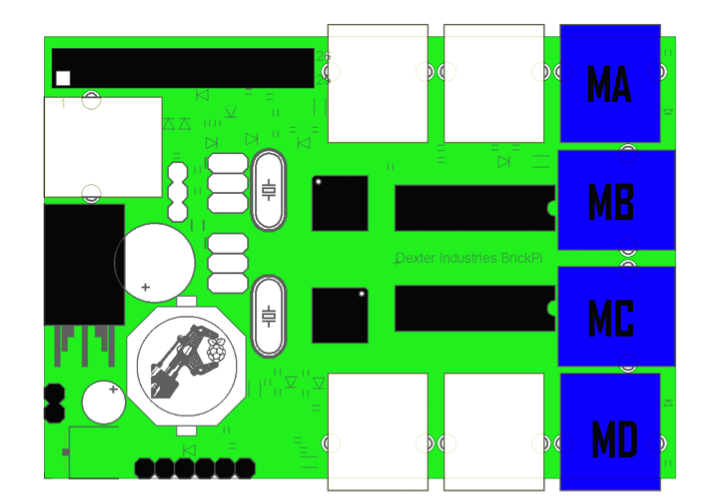
Before we begin, let’s first connect a LEGO Mindstorms Touch Sensor to Sensor Port 1 (“S1”) on the BrickPi. Here is a picture of where the sensor ports are on the BrickPi. Find S1 in the diagram, and plug your touch sensor in.
Open the example program “Touch Sensor test” under the directory downloaded from Github, BrickPi_Scratch\Examples\.
In the command line, change directory to the BrickPi_Scratch directory and run “sudo python BrickPiScratch.py” Leave this running in the background while you work in Scratch.
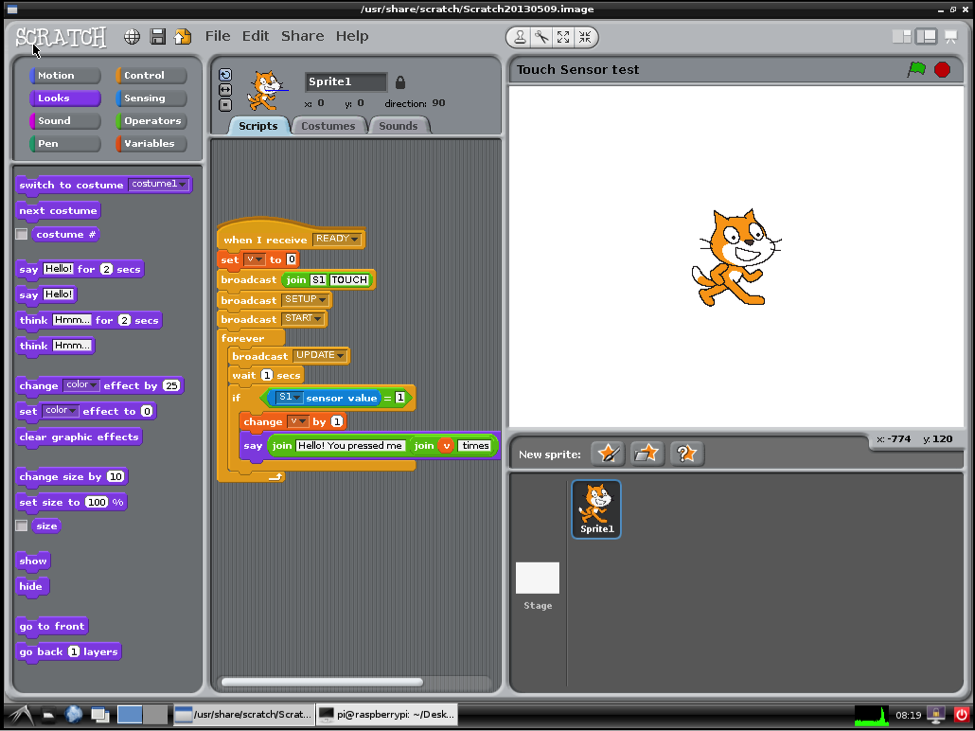
The example Scratch program should look like this:
Back in Scratch, start the program. You’ll see the Scratch Cat is stationary.
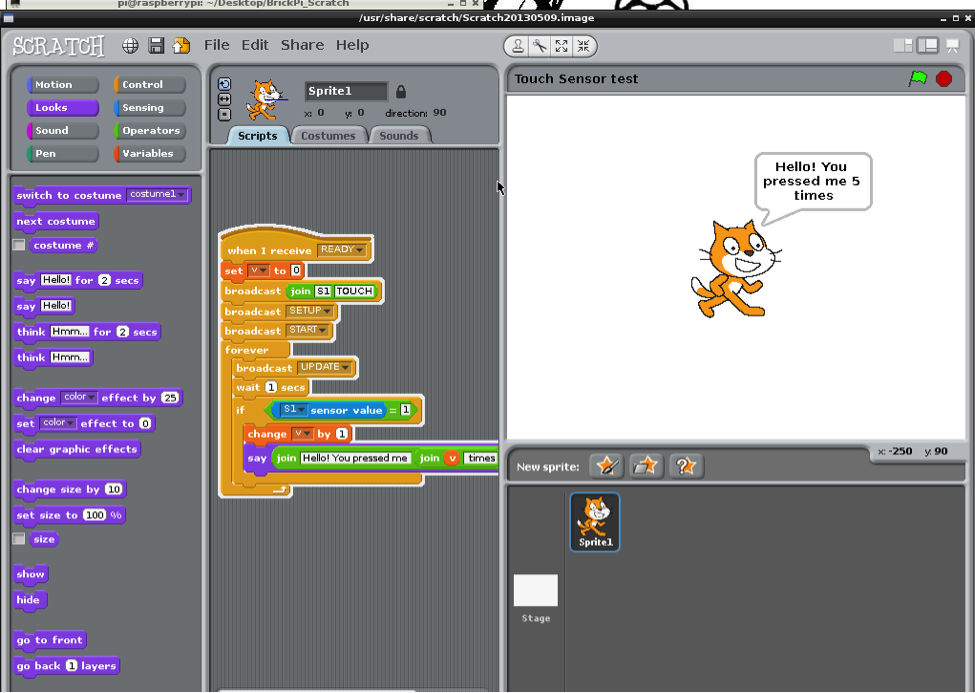
Now if you press the touch sensor, the Scratch Cat will tell you how many times it has been pressed.
Example 2: Color Sensor
In this example, we’ll use the LEGO Mindstorms Color sensor to read the color value on a piece of paper. This is a very simple version of what scanners and cameras do: reading color values on a surface. We can write a program that makes the Scratch Cat change to be the color the color sensor is scanning on the paper.
We will hook the color sensor up to Port 1 on the BrickPi again.
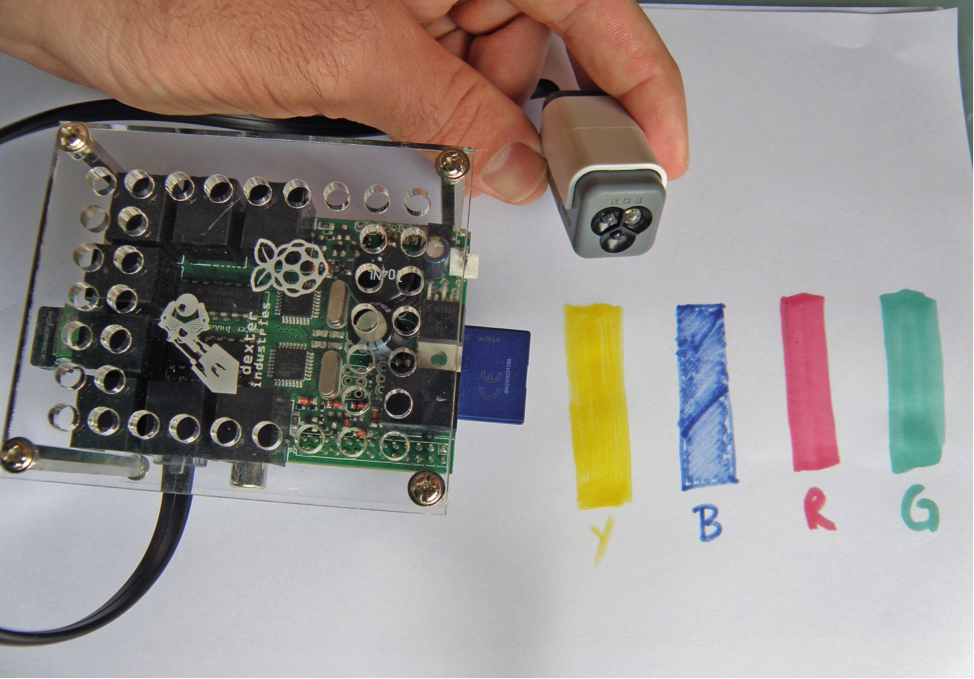
You can see we’ve drawn out some colors we want to detect on paper. Next to the BrickPi. Here’s where you can get really creative. You can modify your colors to identify things, or you can use colors to navigate, or you can use colors to tell between different items.
So let’s take a look at how to use the color sensor. First, open the example Scratch program “Color Sensor test.sb”.
Let’s take a look at the different parts of the example program. Like the touch sensor, we first have to setup the BrickPi to read the sensor by telling it which Port it is on. So before anything else, we setup the BrickPi to look for the color sensor.
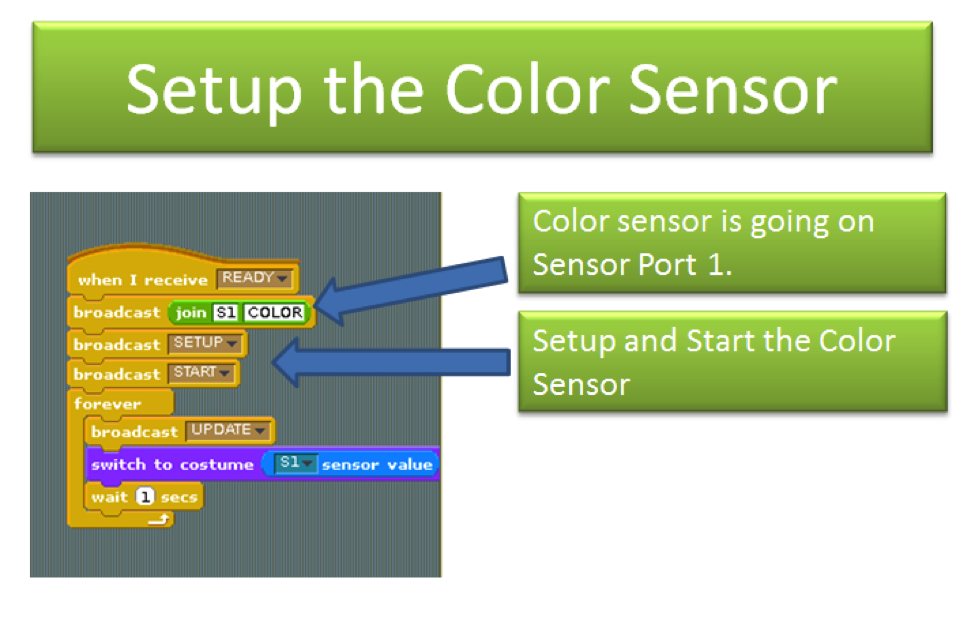
You can see where we have told the BrickPi that we’re using the sensor on “S1” (Sensor 1) port, and you can see that we’ve told the BrickPi we are using a color sensor “COLOR”. We have the “Setup” and “Start” commands as well.
Next, we will setup a “For” loop to check on the sensor over and over, every second.
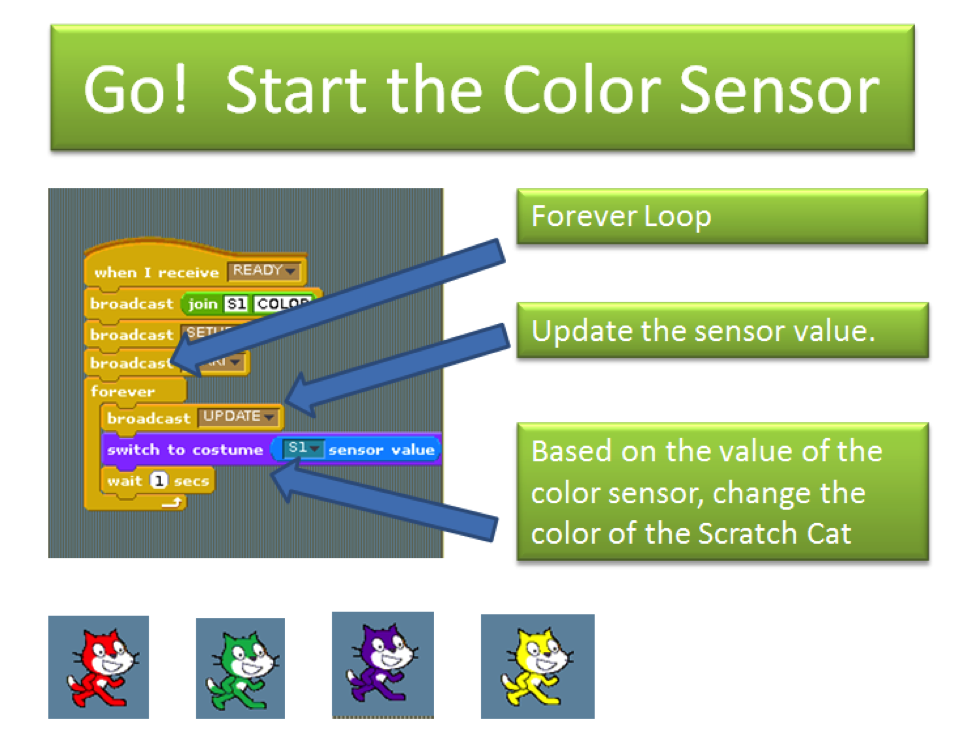
We tell scratch to check the value of the sensors “broadcast UPDATE”, and then we switch the color of the Scratch Cat depending on the color returned by the color sensor, in the switch statement.
Now, after you run your program, if you run the color sensor over a color on paper, the Scratch cat will change color!

Example 3: Making a Motor Run
The fun thing about robotics is that it’s not just taking sensor data, it’s moving. In this last example we will show you how to make a motor move, and how to control it from a keyboard.
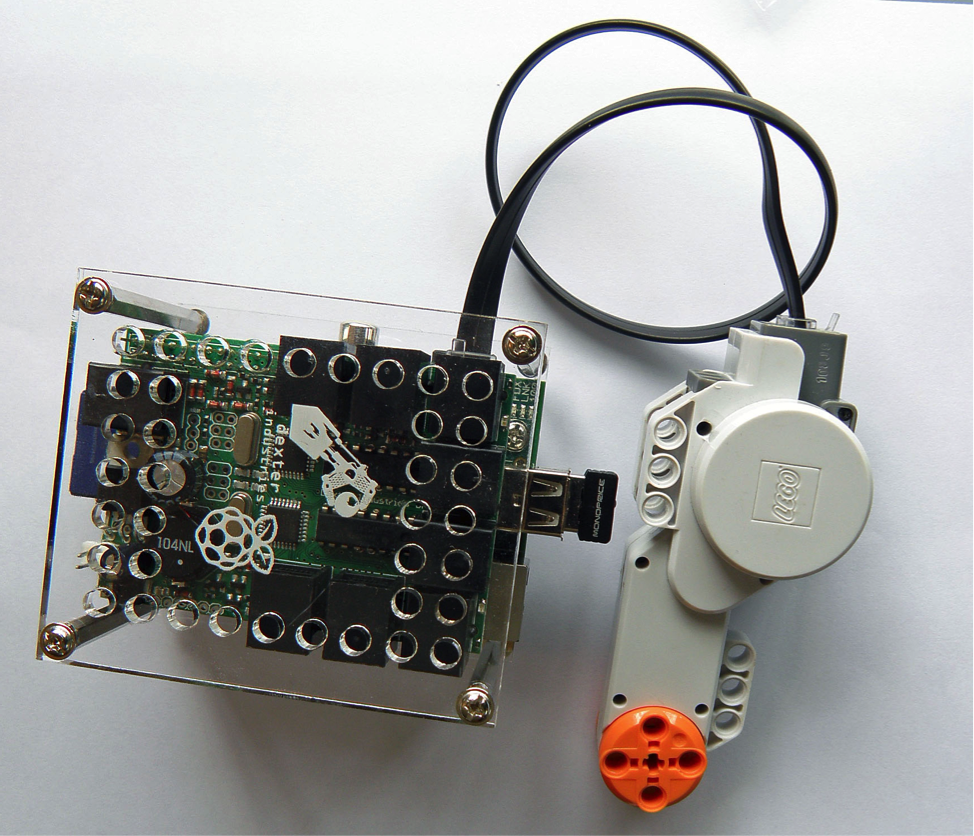
In this example we will use Motor A on the BrickPi. You can see where all of the motors are located in this diagram.
Below is a picture showing how we have hooked up the BrickPi and the motor, to Port 1.
Now with the motor attached, lets look at an example of moving the motor. Open up the example “Motor test.sb” in the “Examples/” folder.
Unlike the sensors, we don’t have to setup anything before using the motors. We can just start using them; nothing other than the motors should go on the motor ports.
So let’s look at how to make a motor do just one thing. The below example in Scratch shows us using the “broadcast” command to send commands to the motor.
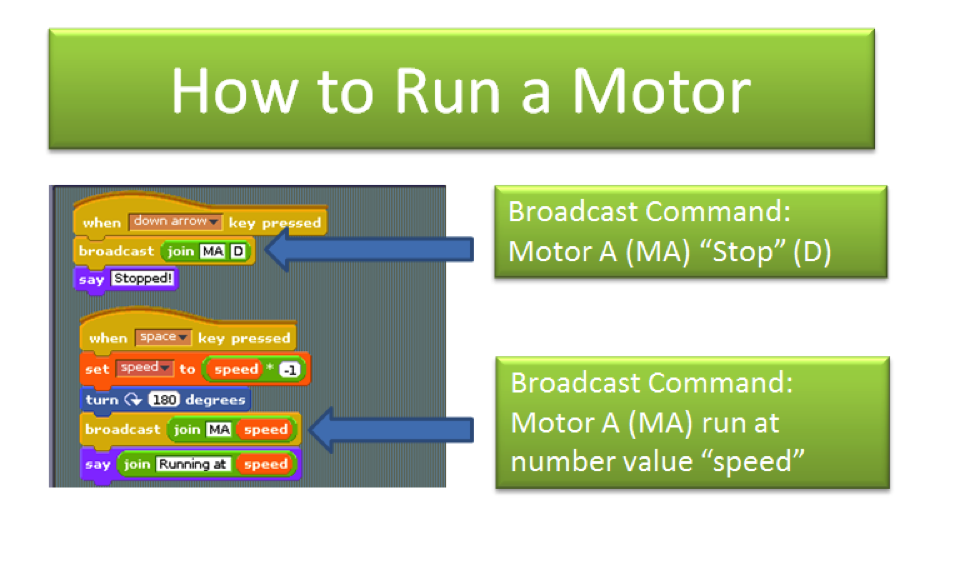
If we put this together with a few more commands, we can control the entire motion of a LEGO motor, including the speed.
Below is a more complicated example.
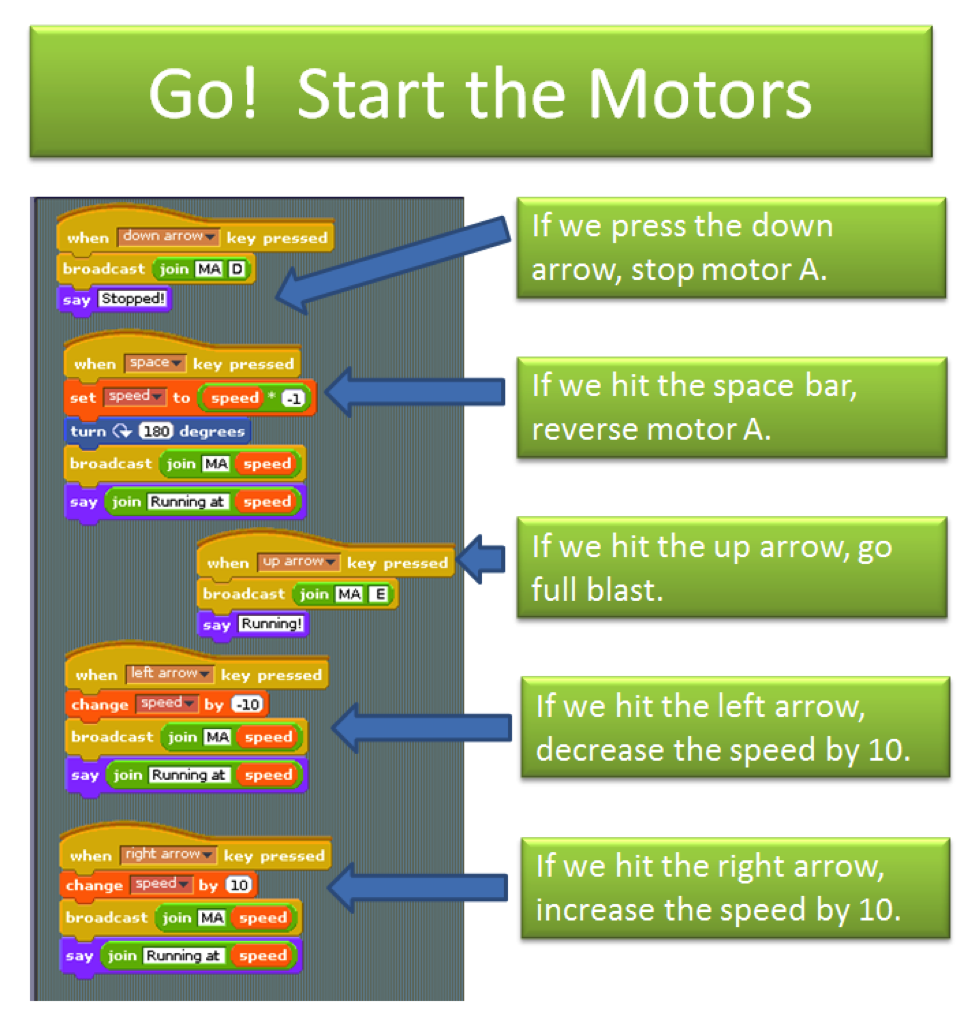
You can see we can control all the motion of the motor. If we press the down button, Motor A stops. If we hit the space bar, we reverse the direction of Motor A. Moving the up button Runs at full speed. The left and right arrows lower and raise the speed.
There are a few more examples in Github that show you how to use different sensors, including the temperature sensor, the ultrasonic sensor, and the dFlex Flex sensor.