NOTE: Sadly since we’ve written this article CHIP has filed for bankruptcy. Hackaday has covered this extensively here. We still think it was a great idea!
In this tutorial we’ll show you the easiest way to make a CHIP robot. Starting with C.H.I.P. is very simple, and making a CHIP robot can be done easily with the GoPiGo Robot kit. In this tutorial we will walk you through how to make a CHIP robot.
Wait, what’s C.H.I.P.?
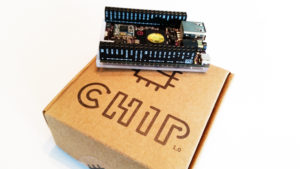
C.H.I.P. is a fun little computer that we backed on Kickstarter. We’re not sure which was more compelling: the ultra small size of C.H.I.P. or the ultra-low price of C.H.I.P. (it’s only $9). C.H.I.P. is a real computer, and can run software written in all kinds of programming languages. The board comes with WiFi, runs Linux, and has a ton of GPIO pins. The hardware and software are open-source, a big plus if you have plans to scale your robots! You can see more about the C.H.I.P. computer here on the Next Thing Co’s website.
Setup C.H.I.P. in Headless Mode
C.H.I.P. comes with an operating system based on the popular Linux Debian operating system, and feels very similar to a Raspberry Pi. We’ll need to make a few changes and install a few things to build our C.H.I.P. robot.
First, connect to Windows. In this tutorial we did all of our setup in Windows 10. Setting up from Linux or a Mac should be slightly different in how you connect. You will need to set CHIP up in headless mode, and we have a quick tutorial on this here. Once you’ve setup WiFi and are connected in Headless Mode, move along!
Software Setup
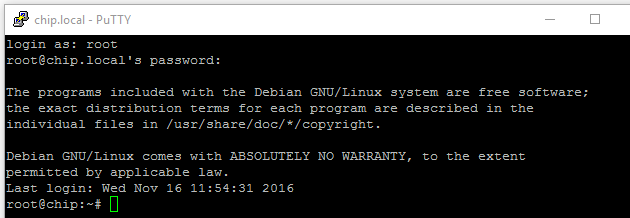
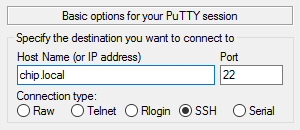 Now that C.H.I.P. is setup in headless mode, and connected to our local WiFi network, login to C.H.I.P. In SSH (we’re using PuTTY), connect to chip.local. Login as root, and the password is chip.
First, update the operating system and install the necessary packages. In the command line run:
apt-get update
apt-get install avrdude git i2c-tools python-smbus python-pip python3-pip -y
Once the packages are installed, we need to setup C.H.I.P. to run I2C. To setup I2C we followed these steps in the command line:
sudo fdtput --type u /boot/sun5i-r8-chip.dtb i2c2 clock-frequency 50000
sudo apt-get install git build-essential python-dev python-pip flex bison -y
git clone https://github.com/atenart/dtc
cd dtc
make
sudo make install PREFIX=/usr
cd ..
git clone git://github.com/xtacocorex/CHIP_IO.git
cd CHIP_IO
python setup.py install
cd ..
sudo rm -rf CHIP_IO
That should be it. We should have functioning I2C communications, ready to talk to our C.H.I.P. Robot!
 Setup the GoPiGo Software

We will need to make a few installs and changes to the software to get the GoPiGo working.
pip install future
git clone https://github.com/DexterInd/GoPiGo
Finally, we’ll need to make a small modification to the Python program “gopigo.py”. Change directories to this file
cd ~/GoPiGo/Software/Python/
It should be in this directory. The program is written for the Raspberry Pi, and to adapt it to C.H.I.P. we’ll simply delete lines 50-62 (click this link to see the specific lines to delete) on this file; everything that has to do with smbus. We will replace them with the following:
import smbus
bus = smbus.SMBus(2)
Save the file and exit!
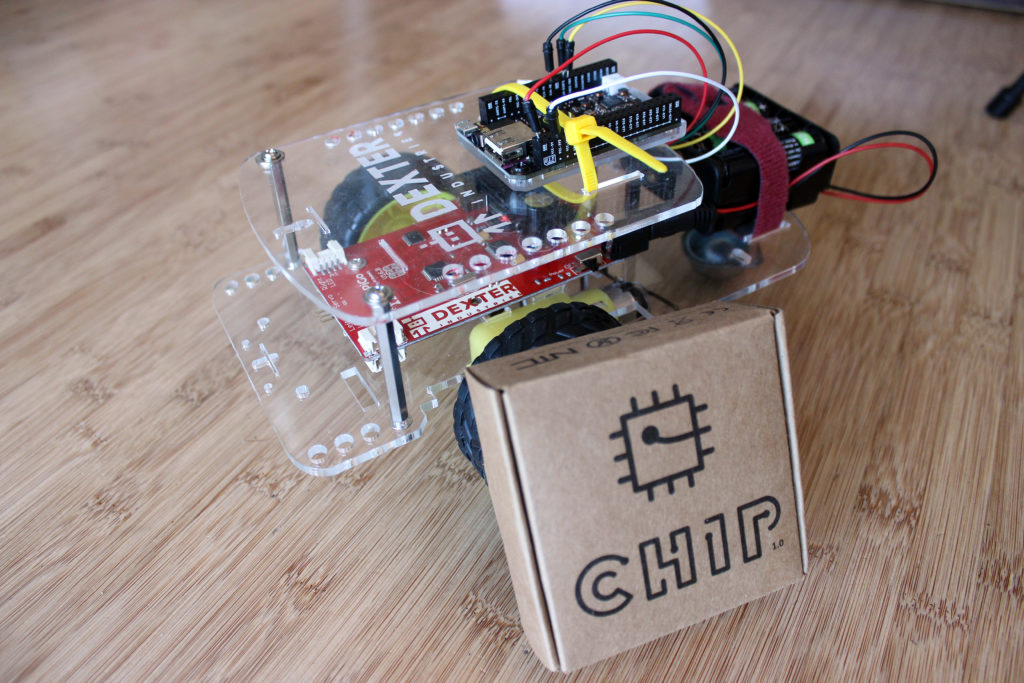
 Hardware Setup to Make a CHIP Robot
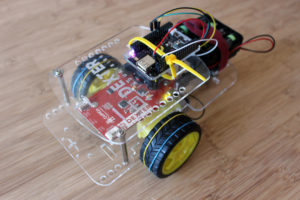
We will start with building the GoPiGo. The GoPiGo is a robot car for the Raspberry Pi, but we can adapt it to the C.H.I.P. very easily. There are step by step instructions on how to build the GoPiGo, including video tutorials, here.
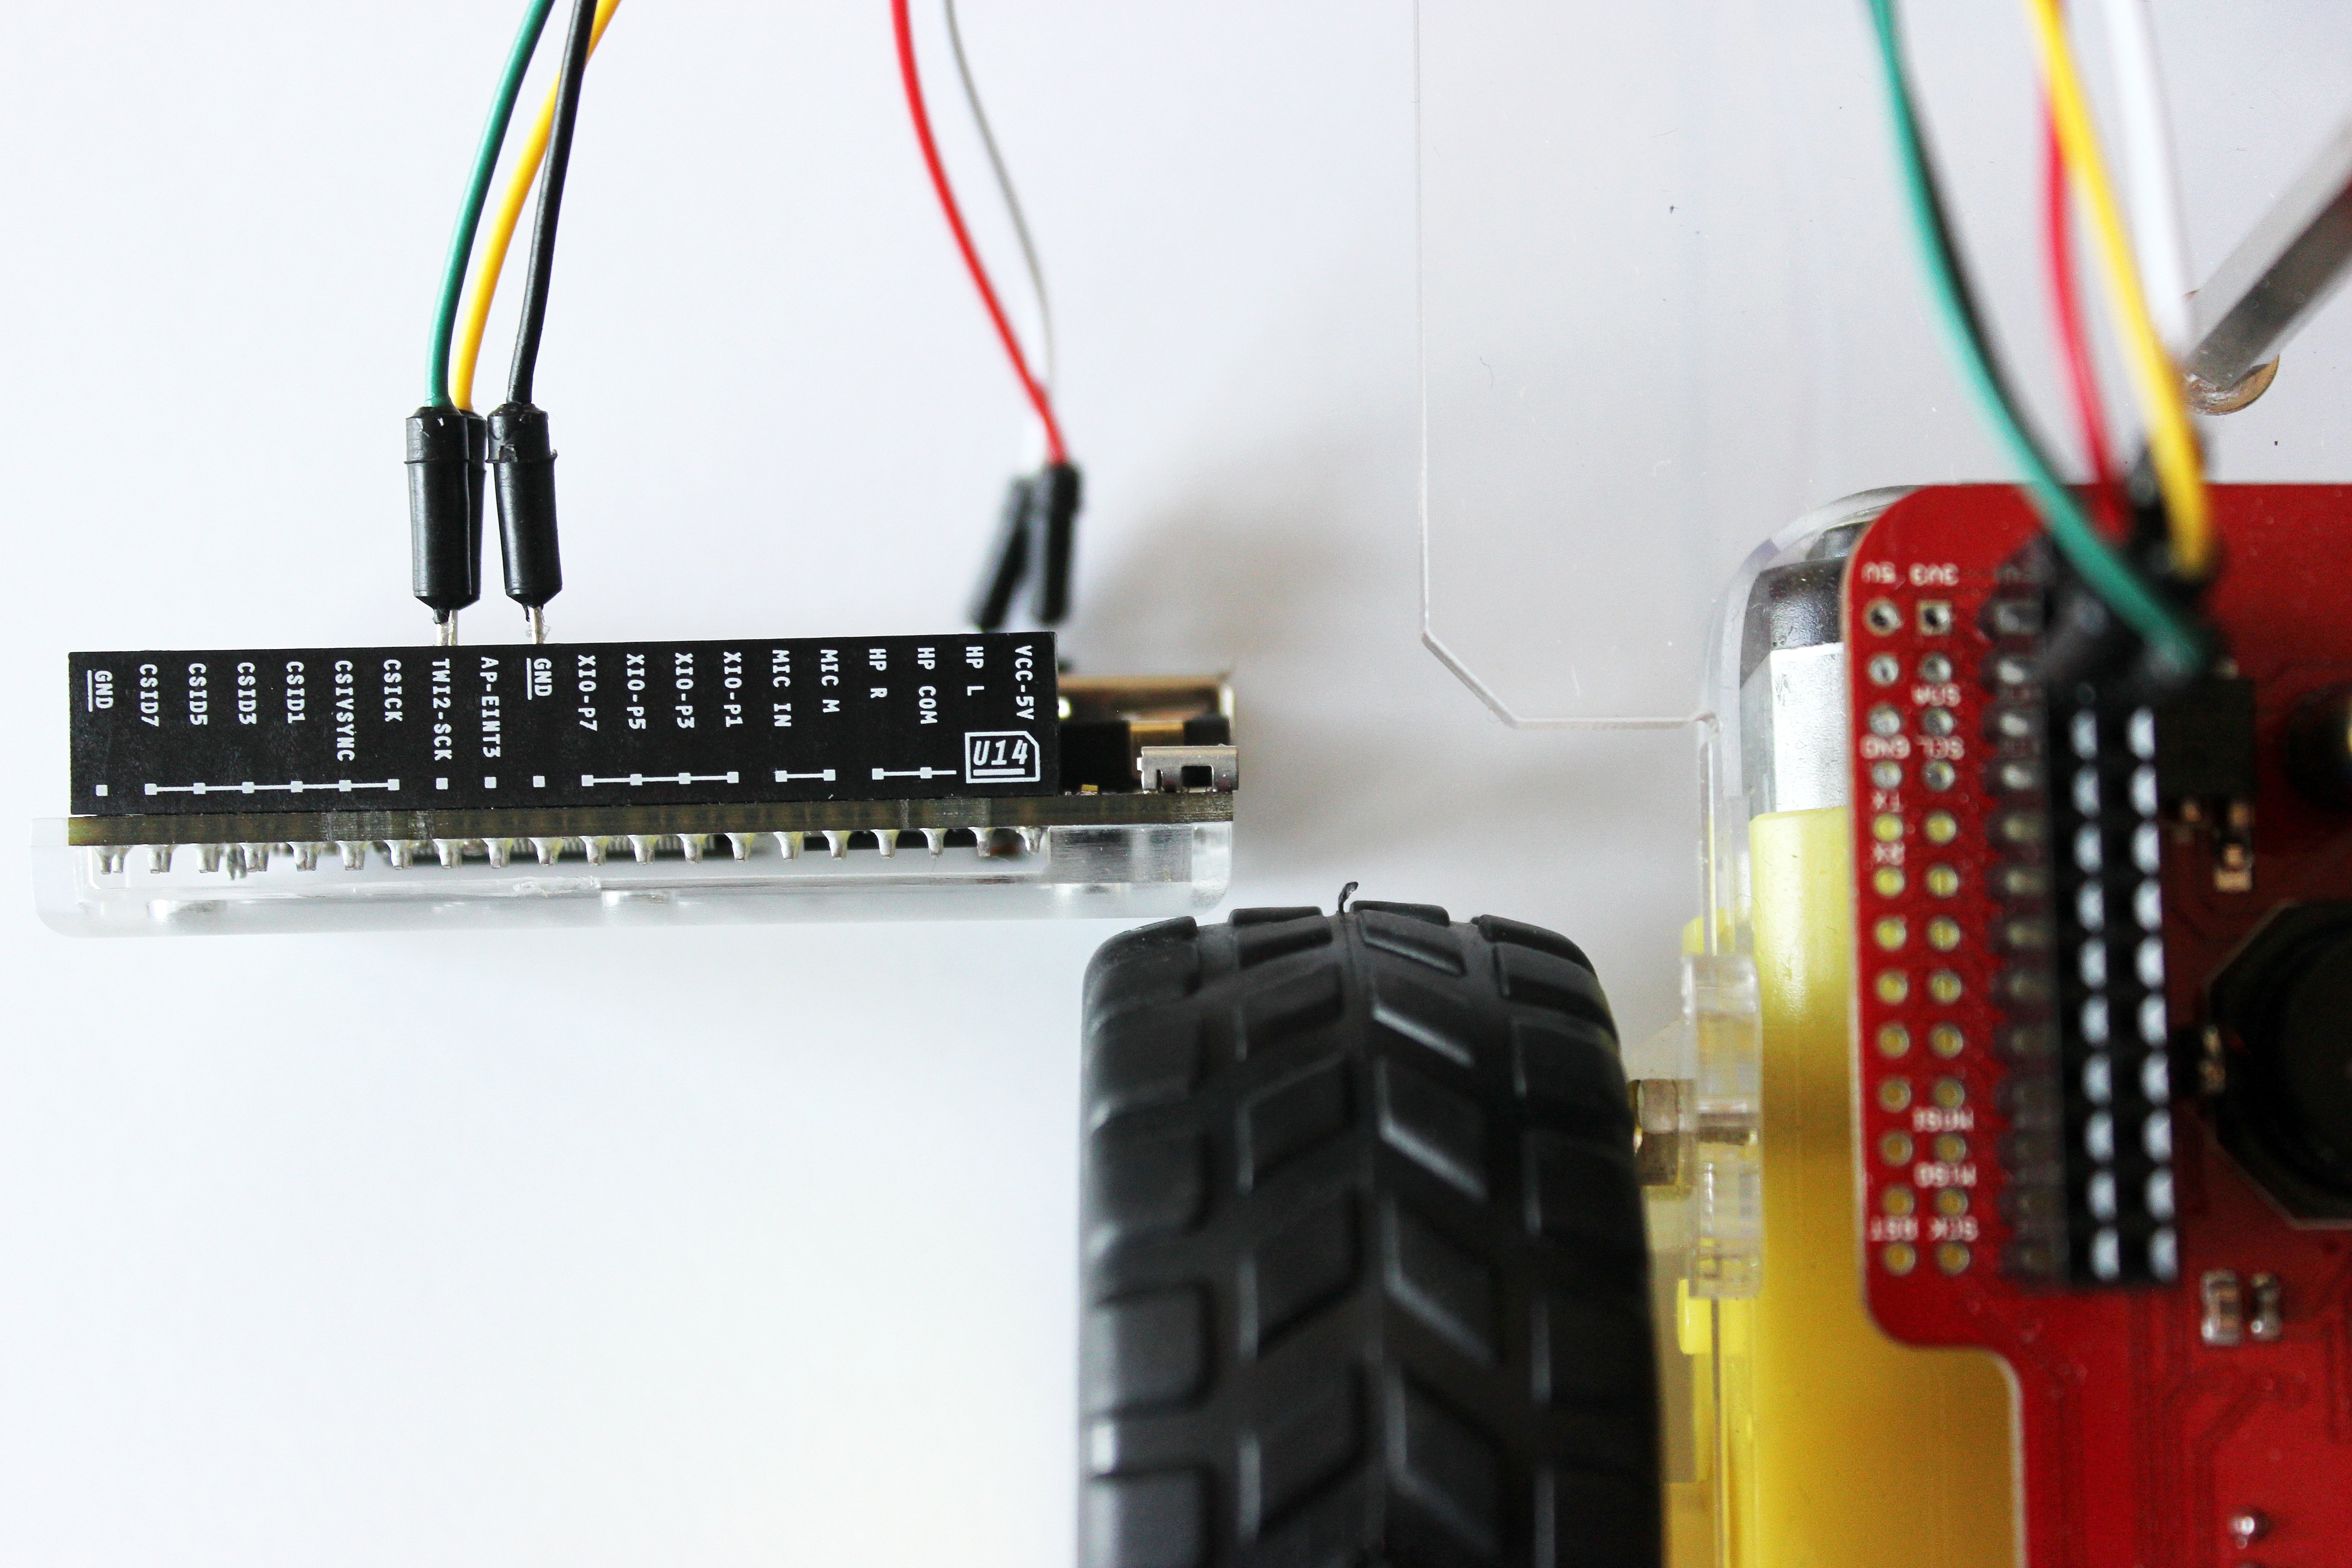
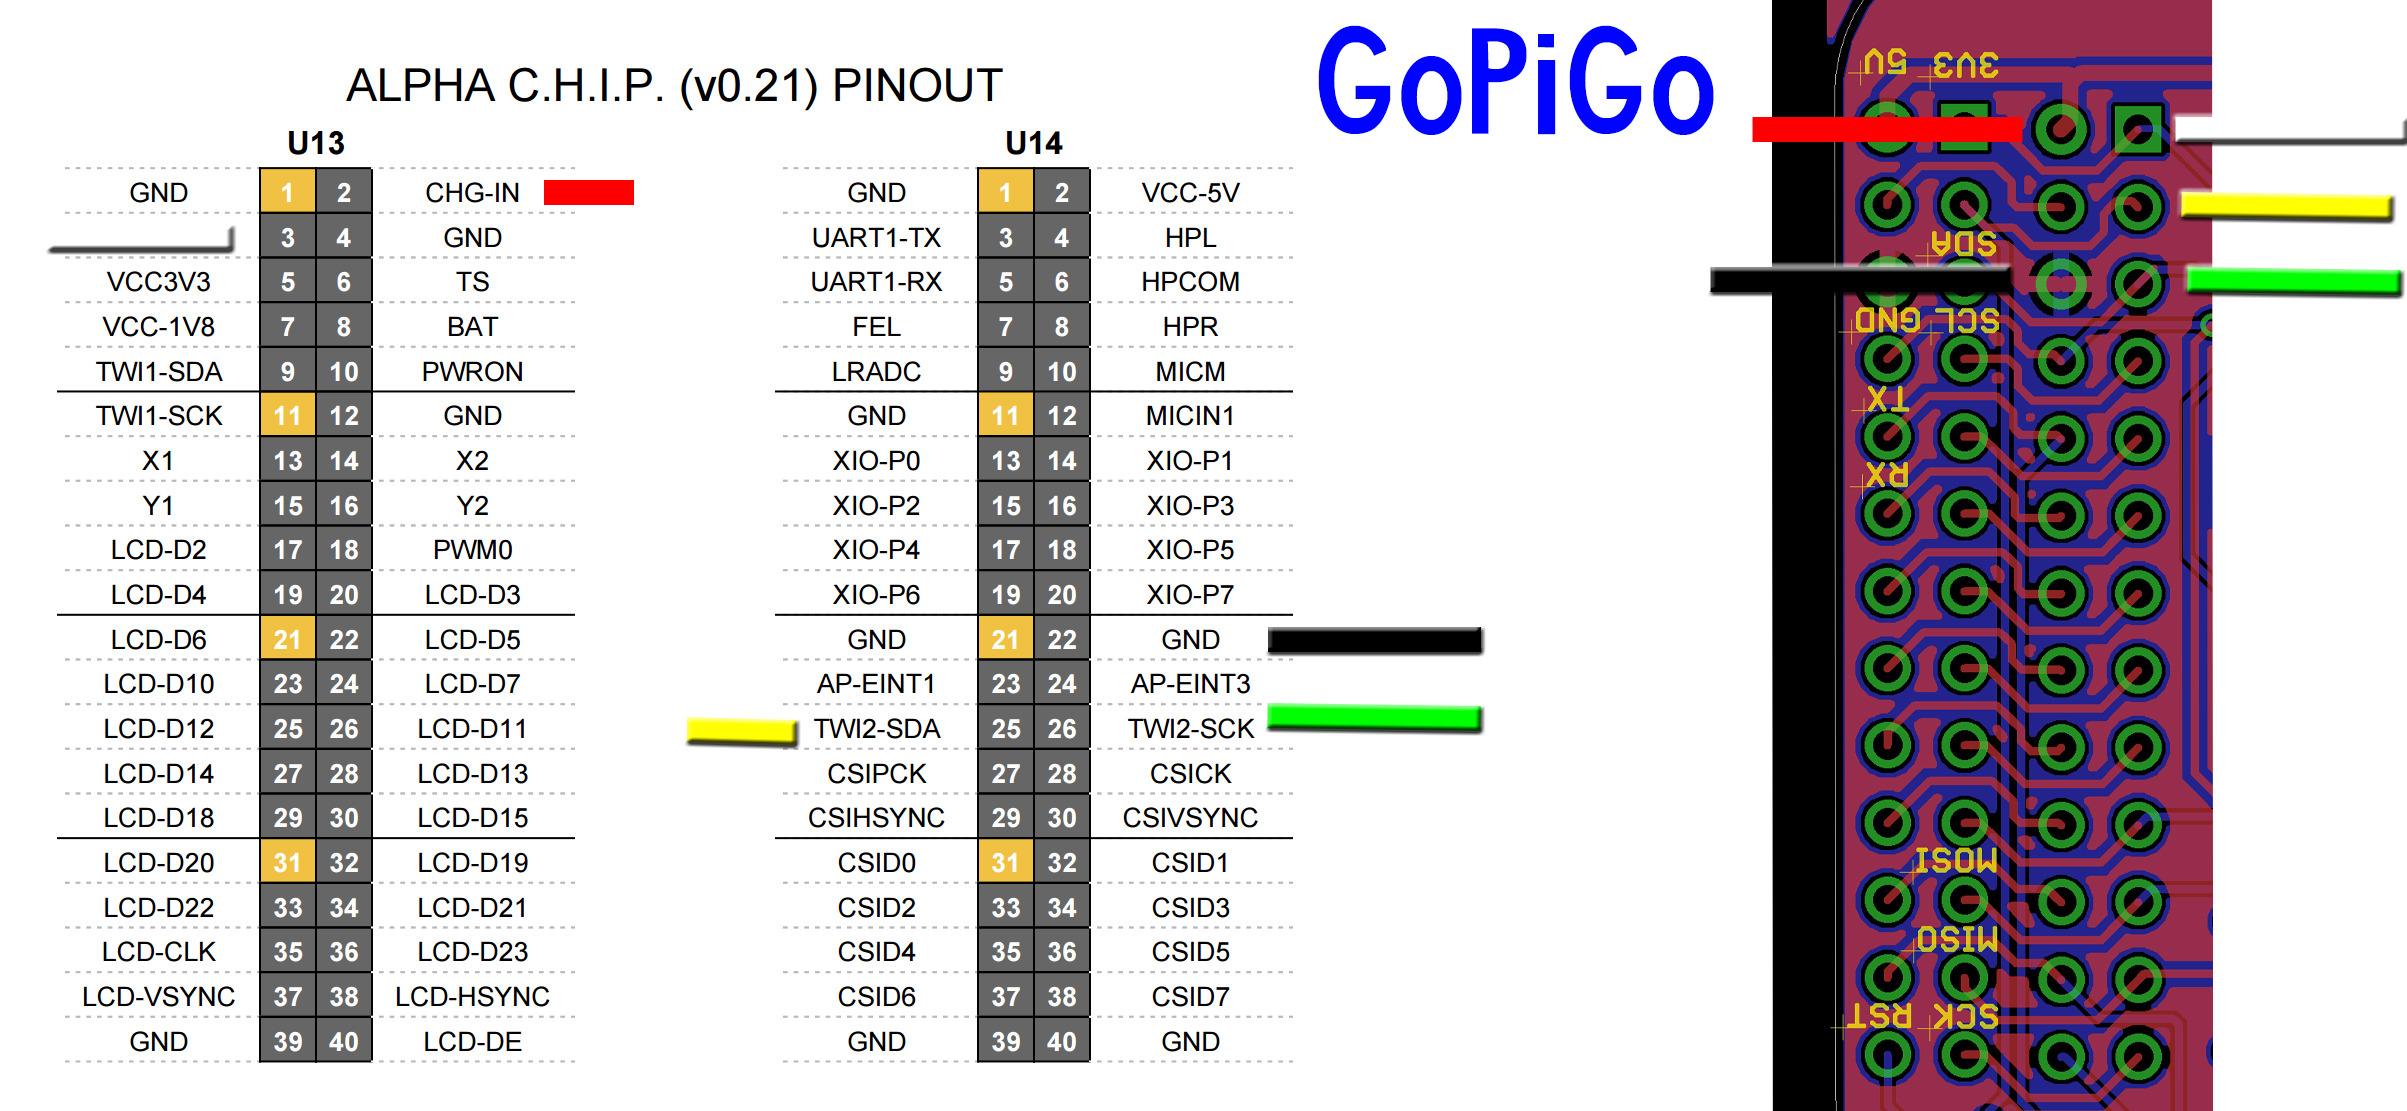
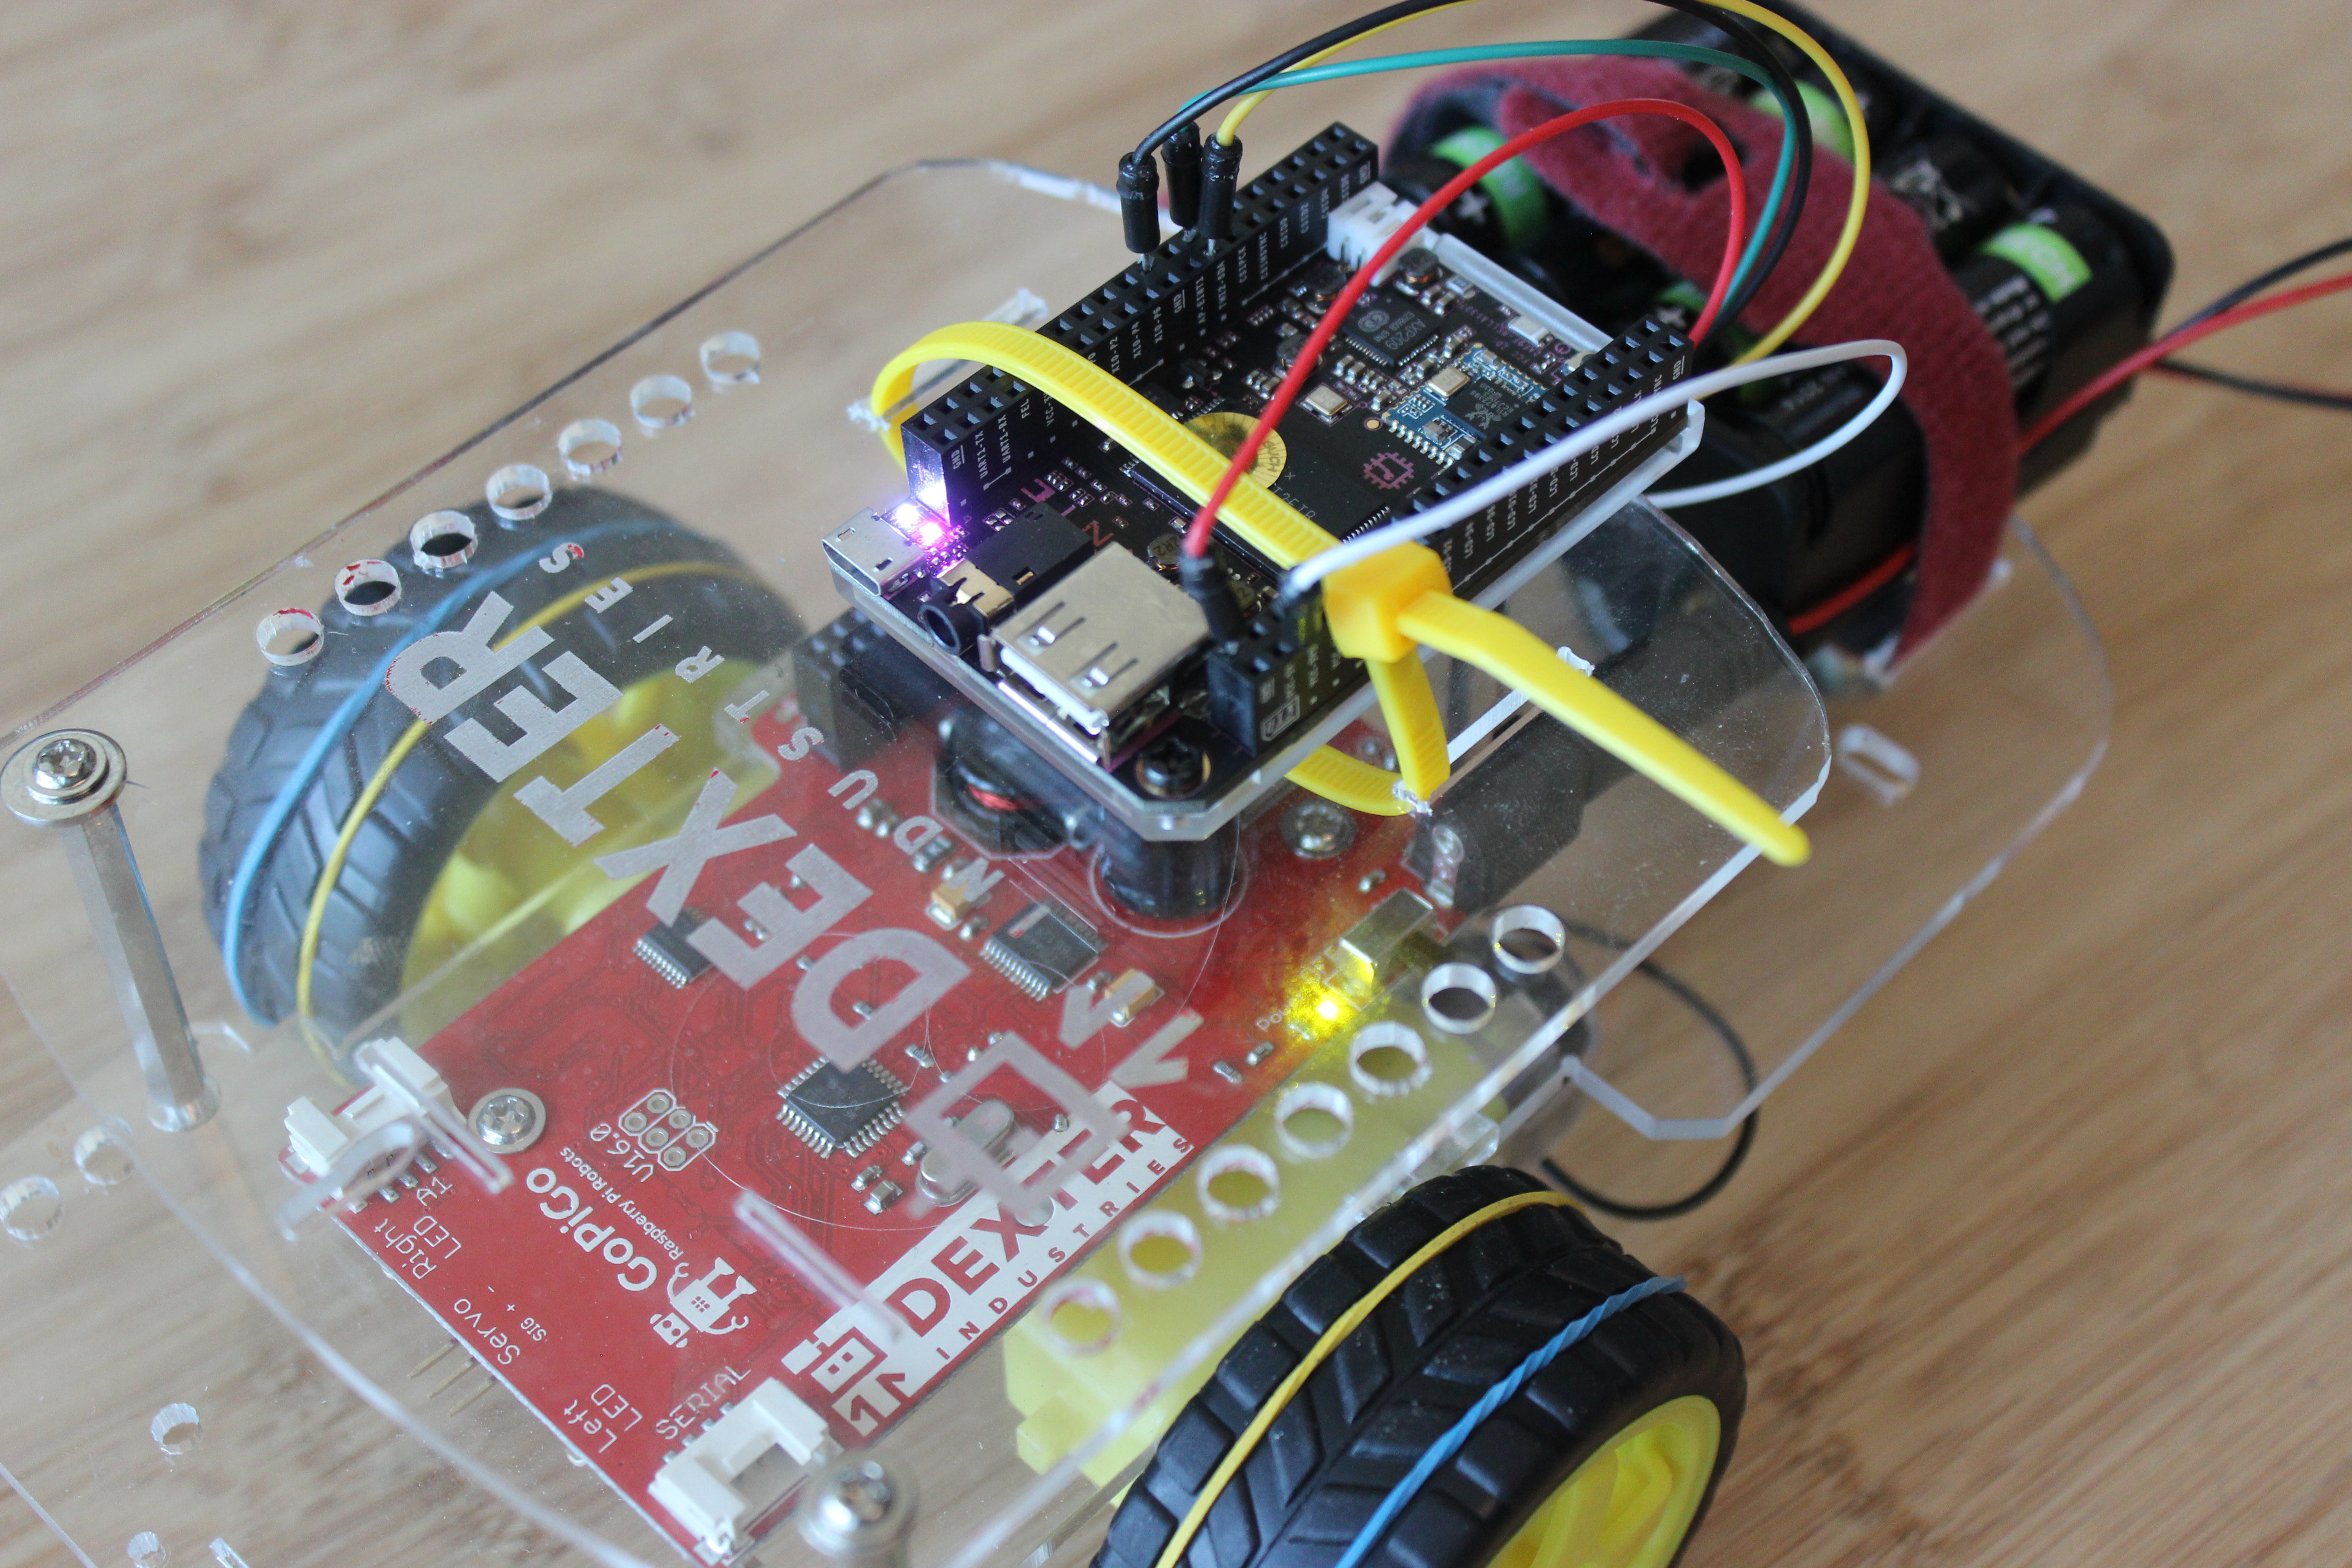
We’ll connect the CHIP robot to the GoPiGo hardware with five jumpers. We used longer, 6 inch jumper cables you would typically use on a breadboard. You can see the official CHIP GPIO Pinout here. We’ll connect the following:
- GoPiGo 5V – C.H.I.P. CHG-IN (Red)
- GoPiGo 3V – C.H.I.P. VCC-3V3 (White)
- GoPiGo SDA – C.H.I.P. TWI2-SDA (Yellow)
- GoPiGo SCL – C.H.I.P. TWI2-SCK (Green)
- GoPiGo GND – C.H.I.P. GND (Black)
Below we have the pinout diagram to make a C.H.I.P. Robot, and a picture of the CHIP and the GoPiGo Robot connected.

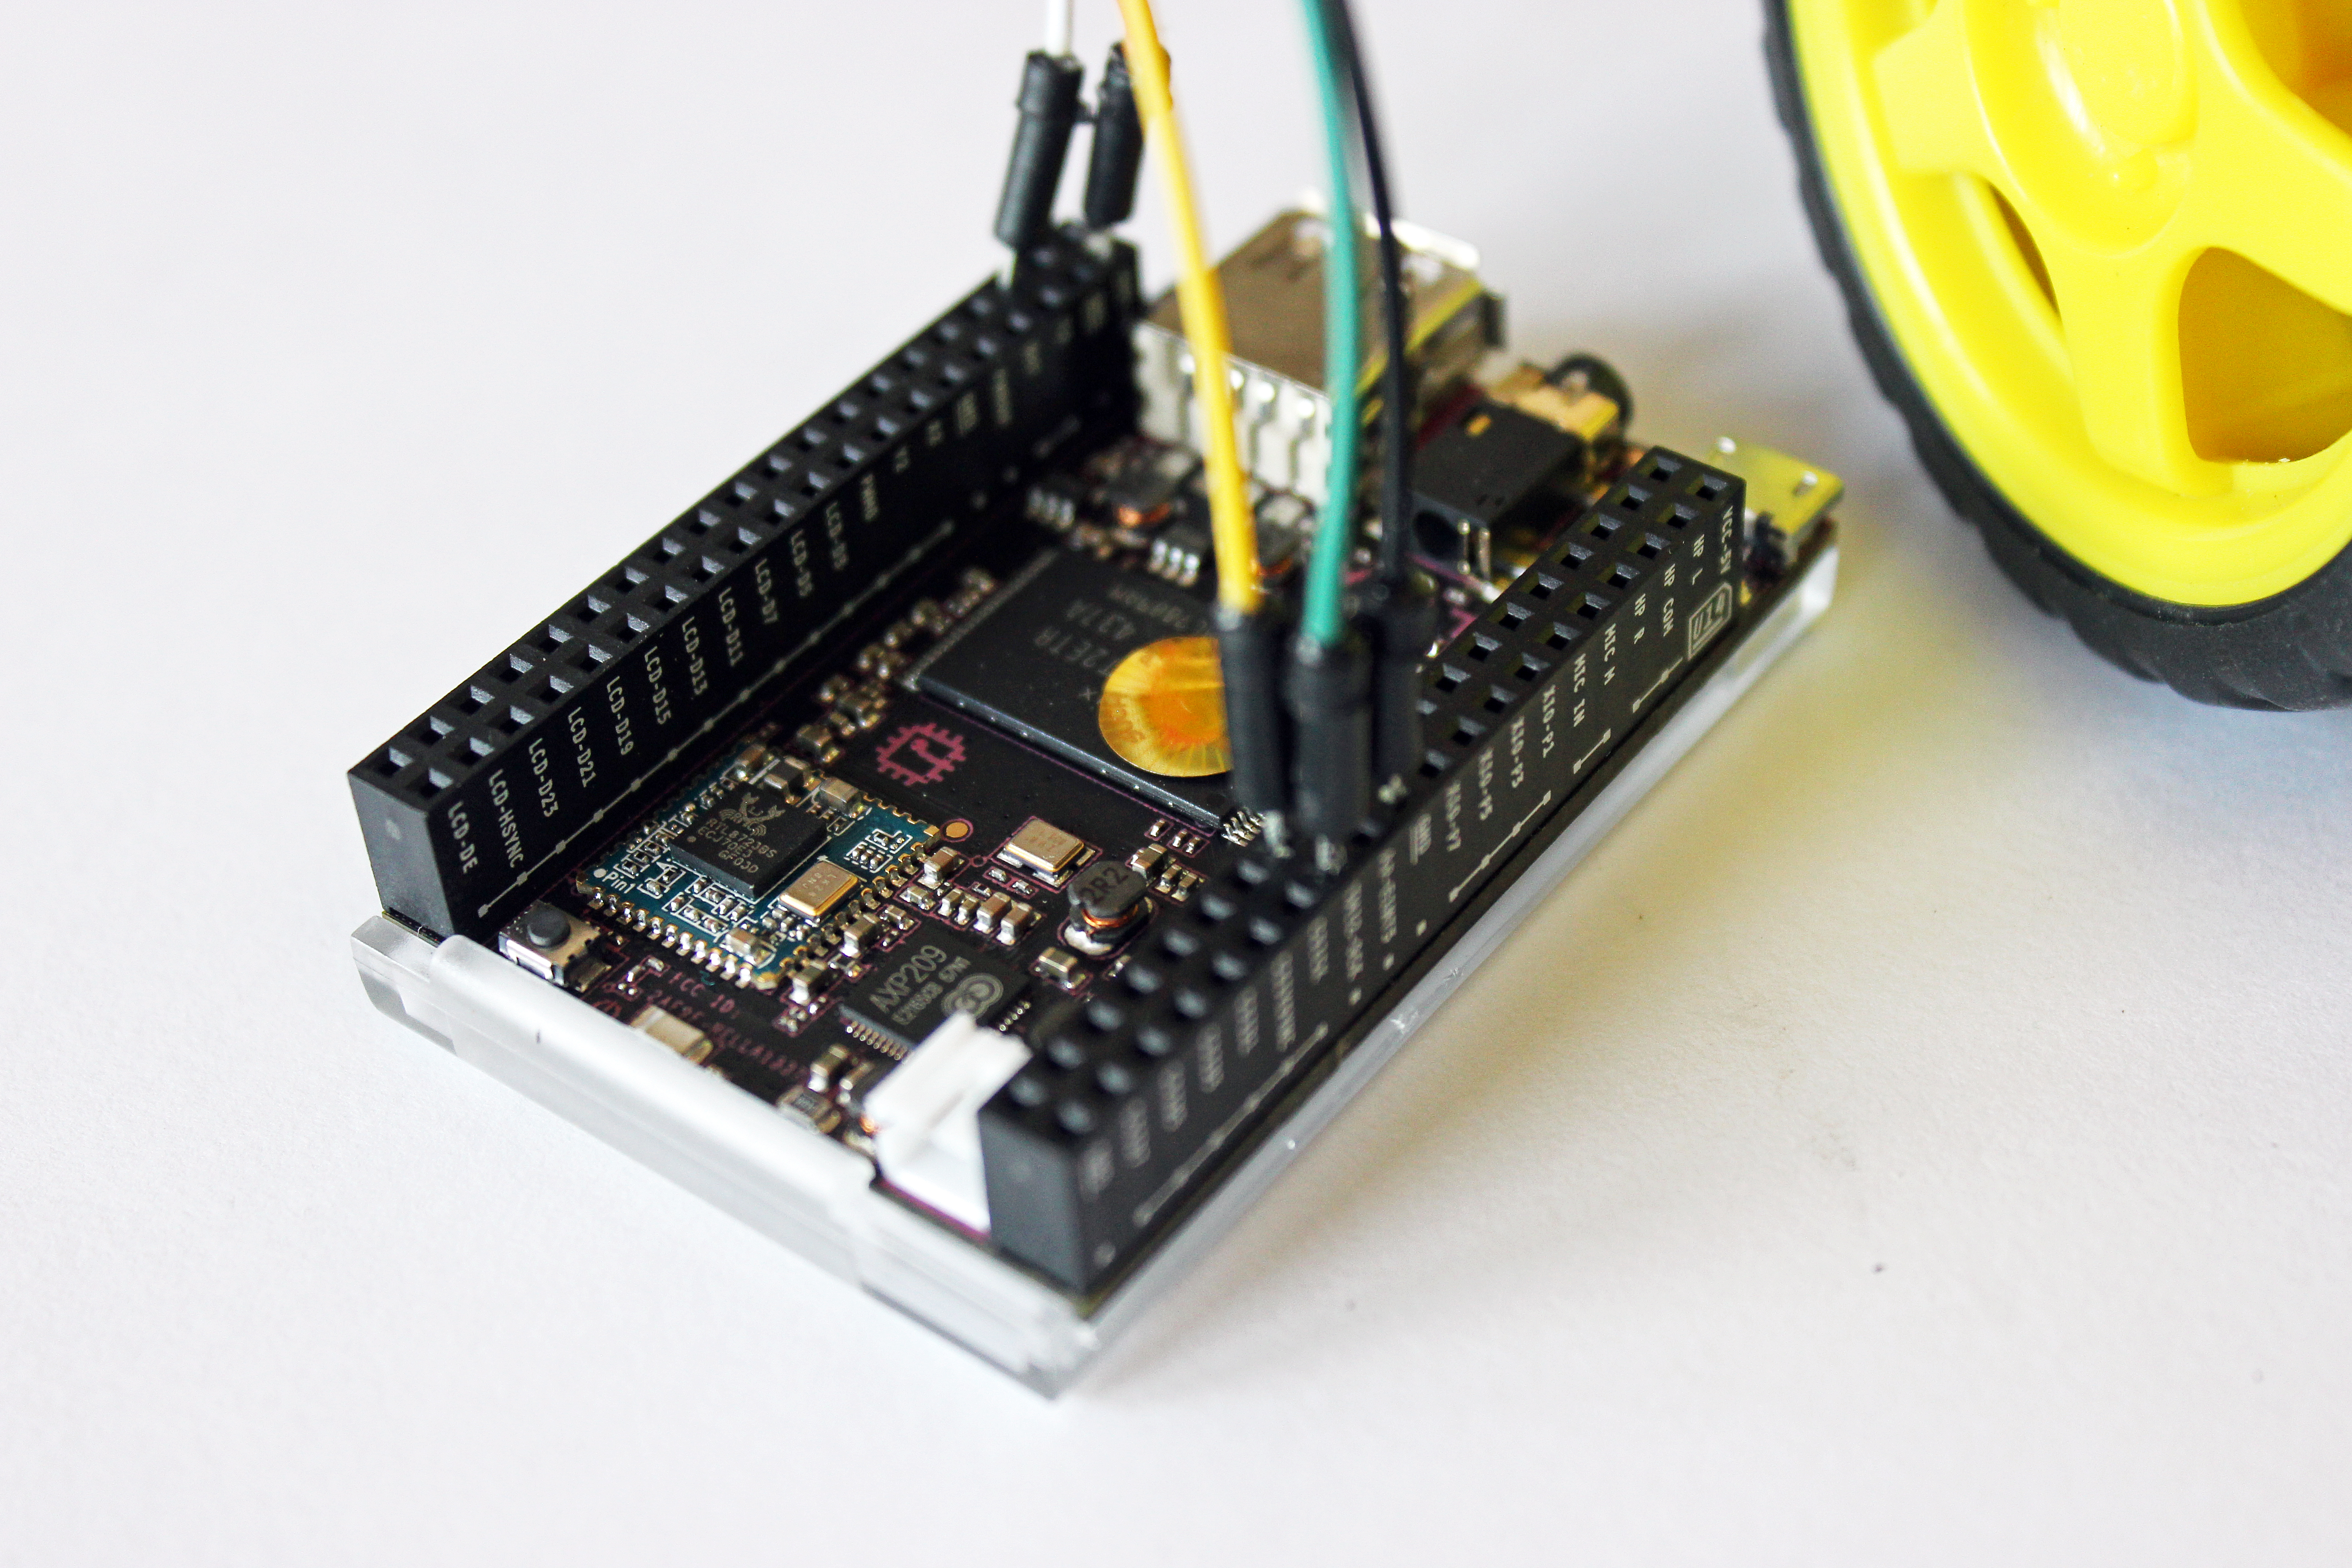
As a final hardware step, we put the canopy back on the GoPiGo, and we tie the CHIP in place on our robot with a plastic zip tie.
 Running the Example
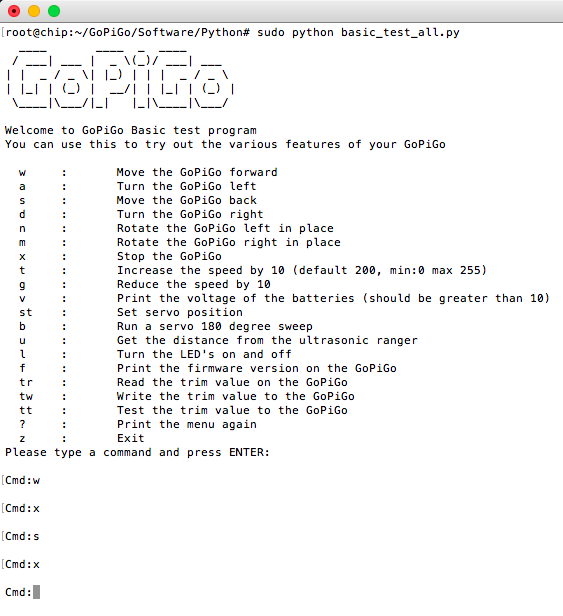
With the C.H.I.P. robot built and connected to the C.H.I.P. computer, we can run an example program. Change directories to the python examples:
cd ~/GoPiGo/Software/Python/
And run the example program:
python basic_test_all.py
You should see a controller pop up and you can now control the robot with a keystroke!
Troubleshooting Your CHIP Robot
We ran into a few helpful links while you may find useful to make a chip robot. First, a general troubleshooting page by the Chip Community website here helped us figure out how to lower the I2C clock speed. Next, while working through the forums, we found a great tutorial we built off of for I2C setup. Finally, we discovered just why we had to use I2C bus 2 on the C.H.I.P. computer here.
Going Further with Your C.H.I.P. Robot
Now with I2C connected, we had a few more ideas we’d like to work on in the near future.
We could of course add a line follower, or a few buttons, or a distance sensor which we could connect to the GoPiGo and read. We could also add voice to the robot! If you have an idea, or a project, we’d love to hear about it on our forums here!