Standard Power Setup

The parts you will need to power up your BrickPi.
To the left, you’ll see the 9V adapter, the BrickPi, and the Battery Pack.
We recommend using an 8XAA battery pack (as shown in the picture).
You can extend your battery life by running the Raspberry Pi and BrickPi from the Raspberry Pi Power Supply while programming.
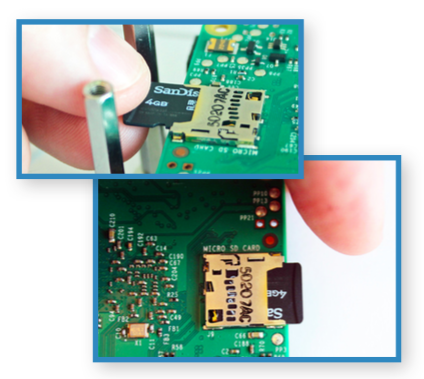
A Note of Caution: Before powering your BrickPi, make sure the SD Card is properly inserted into your Raspberry Pi. Please refer to these directions for more information on the SD Card before you power up the BrickPi. If you insert the SD Card after starting the Pi, it can corrupt and damage the SD Card.
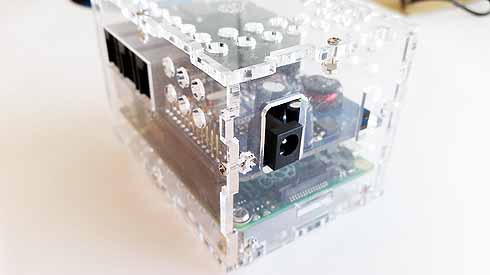
1). Locate the Power Connector on the BrickPi. You can see the power connector, which is black plastic, in the picture on the left. It is a round barrel-shaped power jack.
BrickPi Power For Raspberry Pi Robots
2). Slide the Barrel Jack into the Black Plastic Female Barrel Jack on the Raspberry Pi.
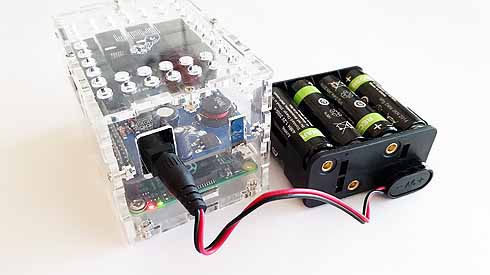
3). Power up. After connecting the battery or the battery pack to the 9V adapter, you should see the BrickPi turn on. Note the red LED is glowing on the Raspberry Pi, indicating that power is on.
Note the power lights on the lower left hand side of the raspberry pi in this picture.
Successful Bootup
This is a video of what a successful bootup with Raspbian for Robots and the Raspberry Pi looks like.
Questions? Ask on theBrickPi forum here.
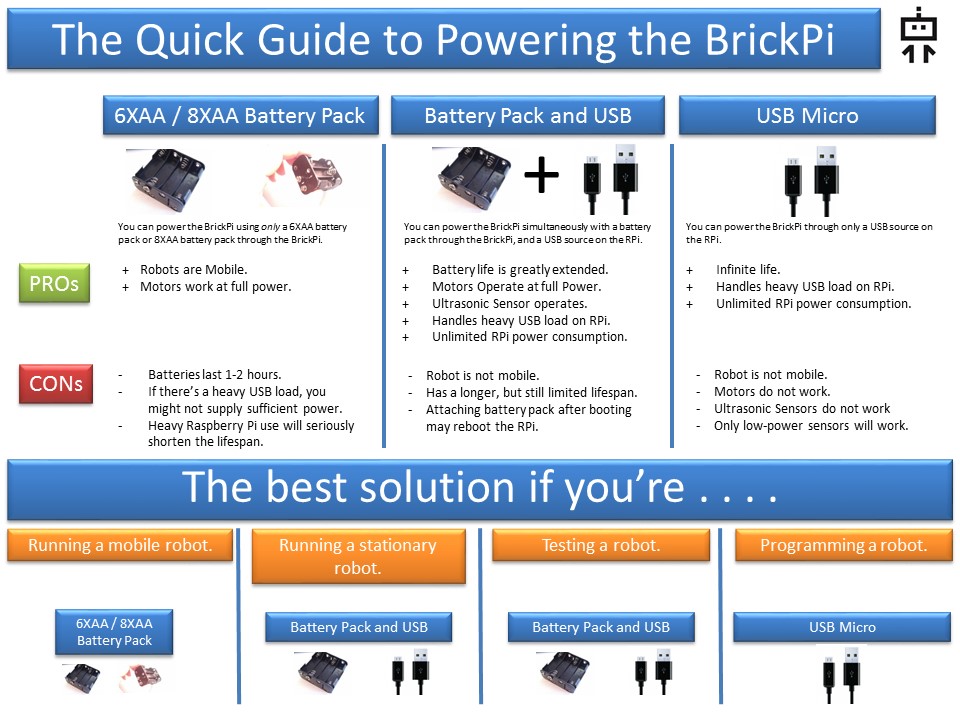
More Options
There are a few options for powering your BrickPi. Below we show these options for selecting a power source. We offer a USB Power Supply for the BrickPi+ here.

Questions? Ask on theBrickPi forum here.