Sending the Raspberry Pi in Space using the BrickPi, the Raspberry Pi, and a little bit of LEGO.
The goal of this project is to send a BrickPi into near space and learn enough to teach others how to do it. And take some nice pictures.
We made a video of the entire adventure. For more details, click on the sections below to find out how we did it and what we learned about high altitude ballooning and the Raspberry Pi.
Pre-Flight Research
Here we document some of the issues we tried to address before starting while planning the project. You could replace “Challenge” with “Fear” at this point.
Challenge: How do we track and retrieve a device?
Option 1: Cell Phone. We have an old cell phone we could use. The upside is that we own it already. The downside is that we’ll be doing this in Virginia and there are pockets without cell phone reception. The risk is a $200 – $600 phone (a used HTC phone). No text: goodbye phone, BrickPi, accesories, etc.
Challenge: Do We Have Enough Lift?
- BrickPi + RPi
- RPi Camera
- dGPS
- dPressure Sensor
- 6AA Batteries.
Multiplying by 1.5X the weight, gives us about 350g with all attached. So plan for 500g payload. We will use a 600 G balloon for this then.
Highaltitude Science has helium calculations broken out very well (including tips on how to go about getting it!). You can fly with as little as 60 cft (cubic ft) of helium.
Total Lift Required = Weight of Payload + Weight of Balloon + Positive Buoyancy (Weight of Payload / 2).
Total Lift Required = 350g + 600g + 175g = 1125g.
Cubic Feet Helium Required = Total Lift Required (in grams) * 0.035
CFR = 1125g*0.035 = 39.375 cubic feet.
Also note from High Altitude’s Tutorial:
Required Lift = Weight of Payload x 1.5
Congratulations! You can be confident you haven’t under or over-inflated your balloon. You are now ready to tie off your balloon.
Challenge: Where Will Our Balloon Land?
Challenge: Will Our Batteries Last?
We’re going to need to take some pictures. We might need it to last up to 4 hours if we don’t properly fill the balloon. Hmm.
Challenge: Are we getting the right balloon and parachute?
Well, a 600g balloon from High Altitude Sciences seems right.
And this 36″ parachute seems like it will also be enough, looking at other folks projects.
Notes and Reminders
Get up early: it’s December and the sun sets early!
The Flight
Payload
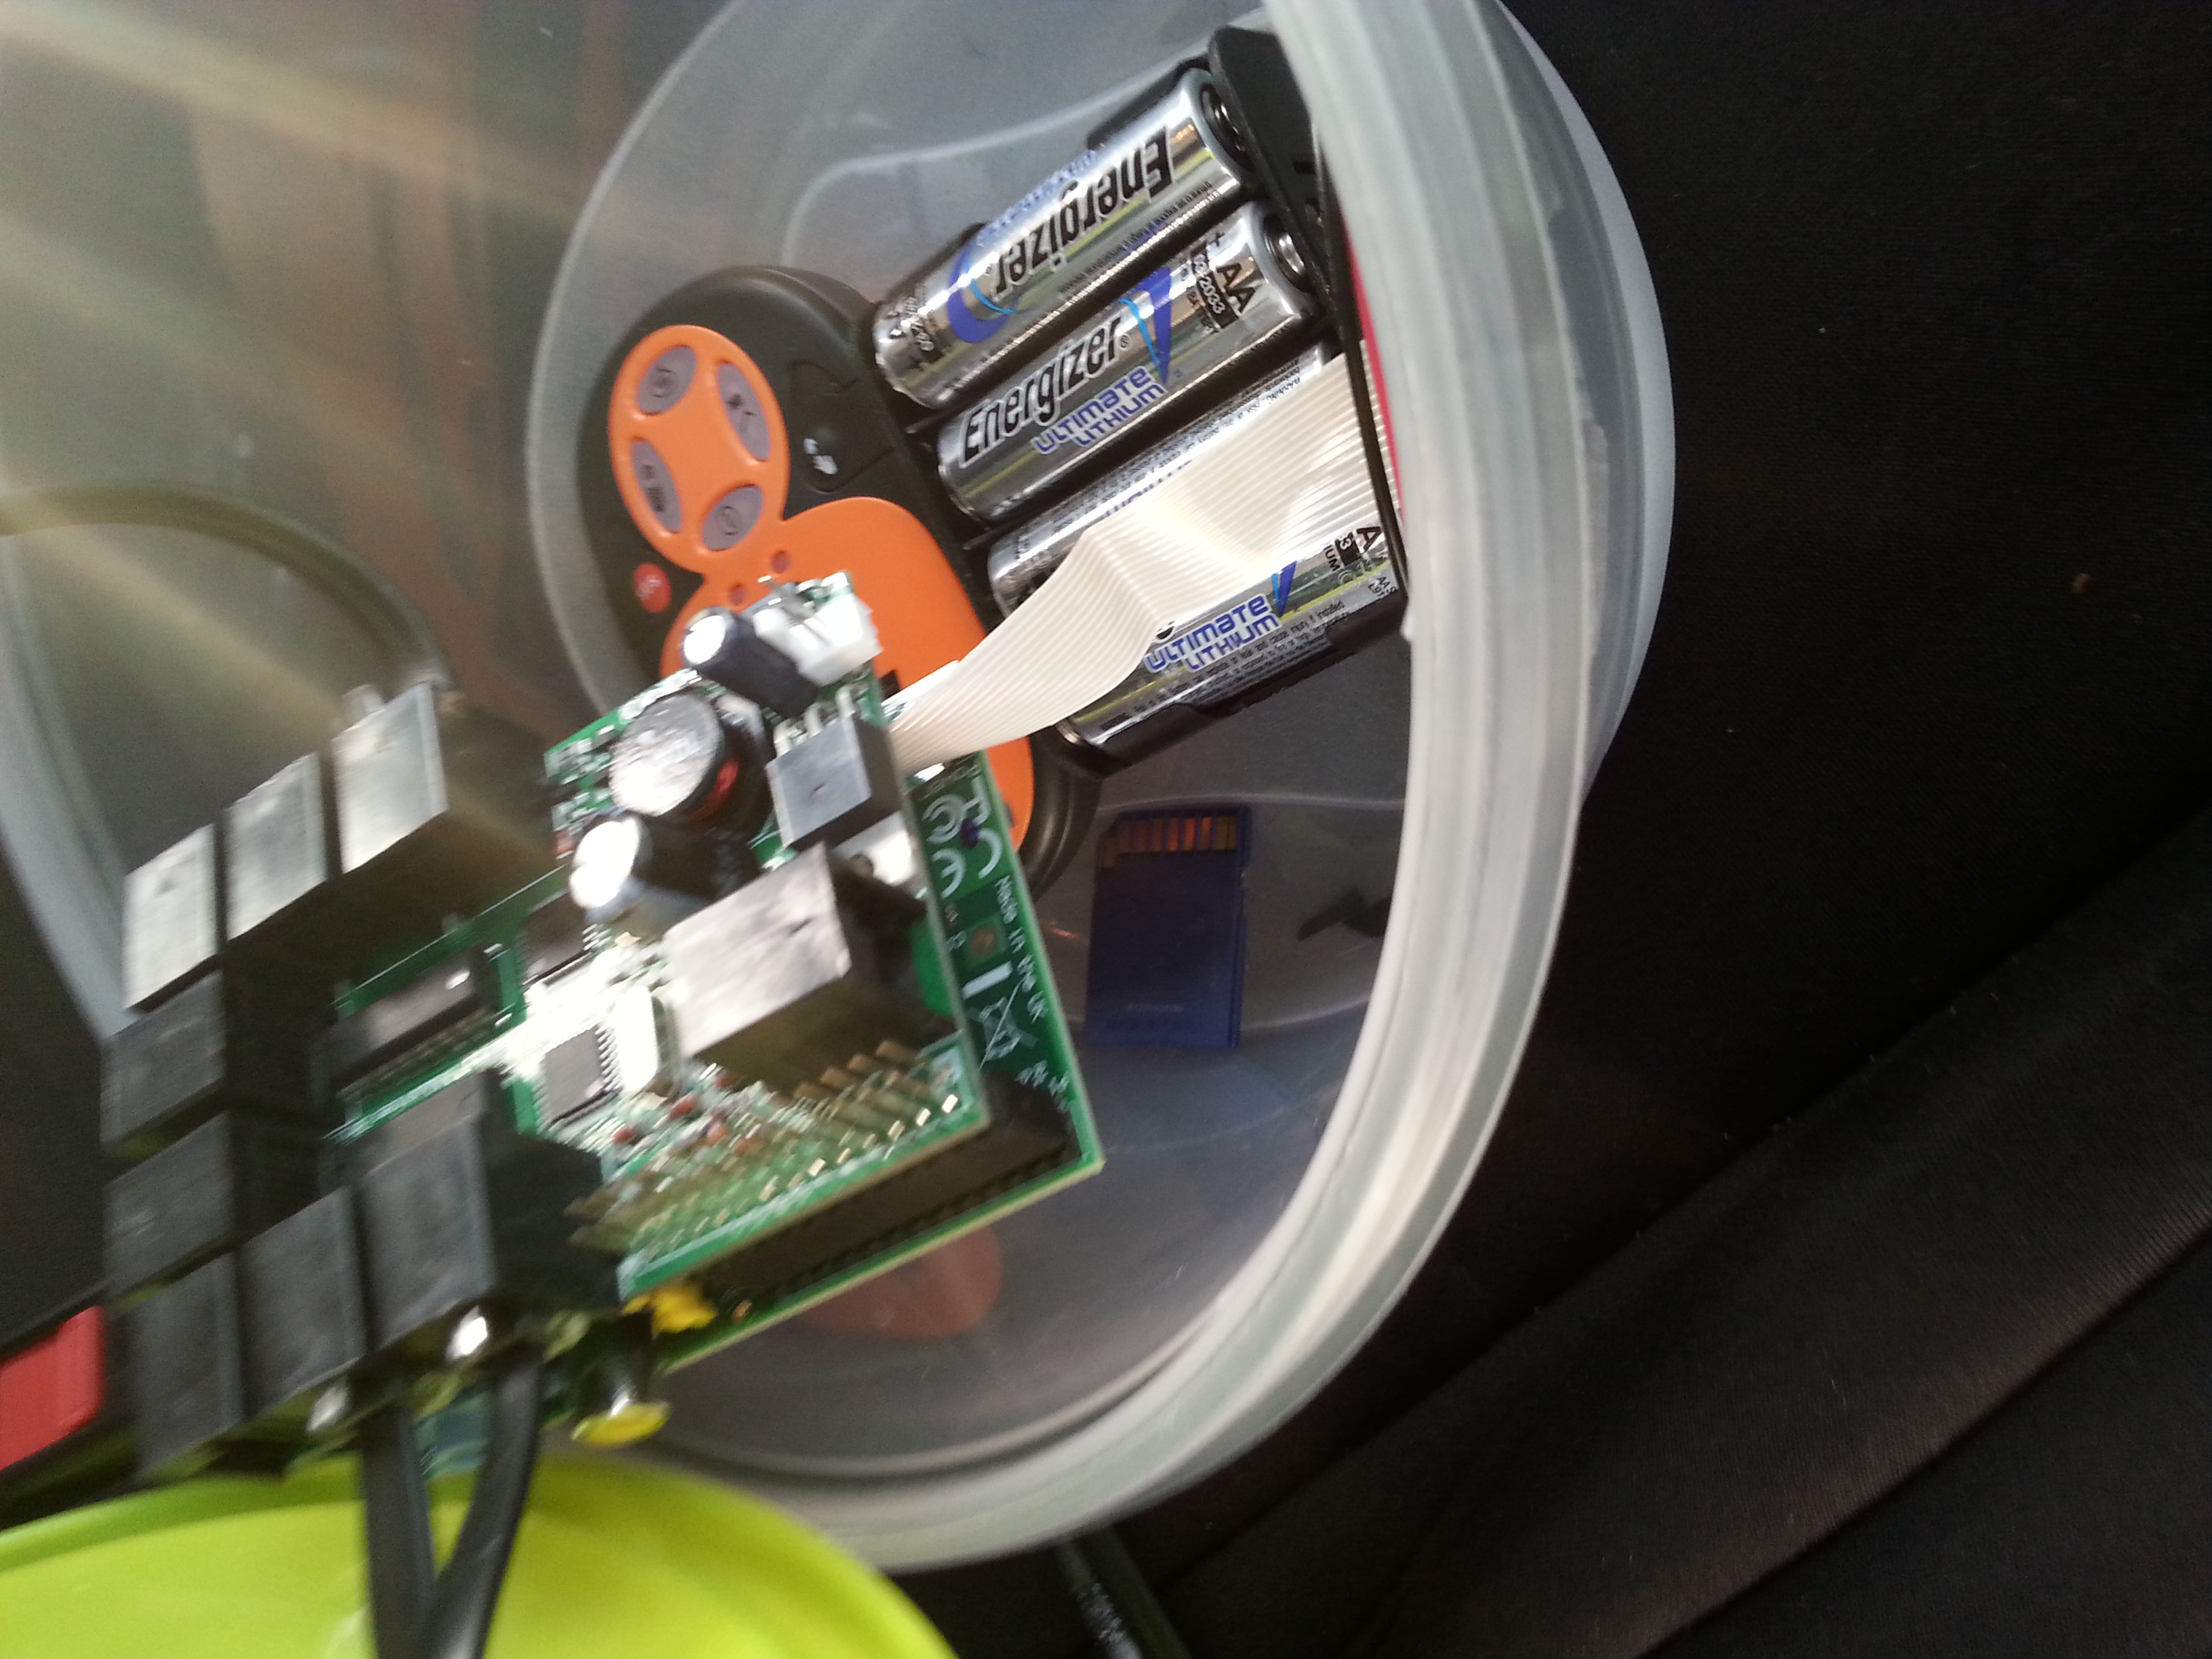
 Raspberry Pi – We used a model A because of its low power consumption.
- Raspberry Pi Camera – The first project we’ve seen that uses a Raspberry Pi camera.
- BrickPi Advanced – We used the BrickPi Advanced board for its efficient power conversion. Better power conversion conversion means longer battery life.
- USB Stick – 64 GB USB stick. This was a bit overkill for size, but better safe than sorry.
- Lithium Ion Battery – We used Energizer Ultimate Lithium AA batteries. These are expensive batteries at around $10 per pack of four. 8 of them are extremely lightweight, and run the whole payload (Raspberry Pi, Camera, BrickPi, sensors) well over 4 hours.
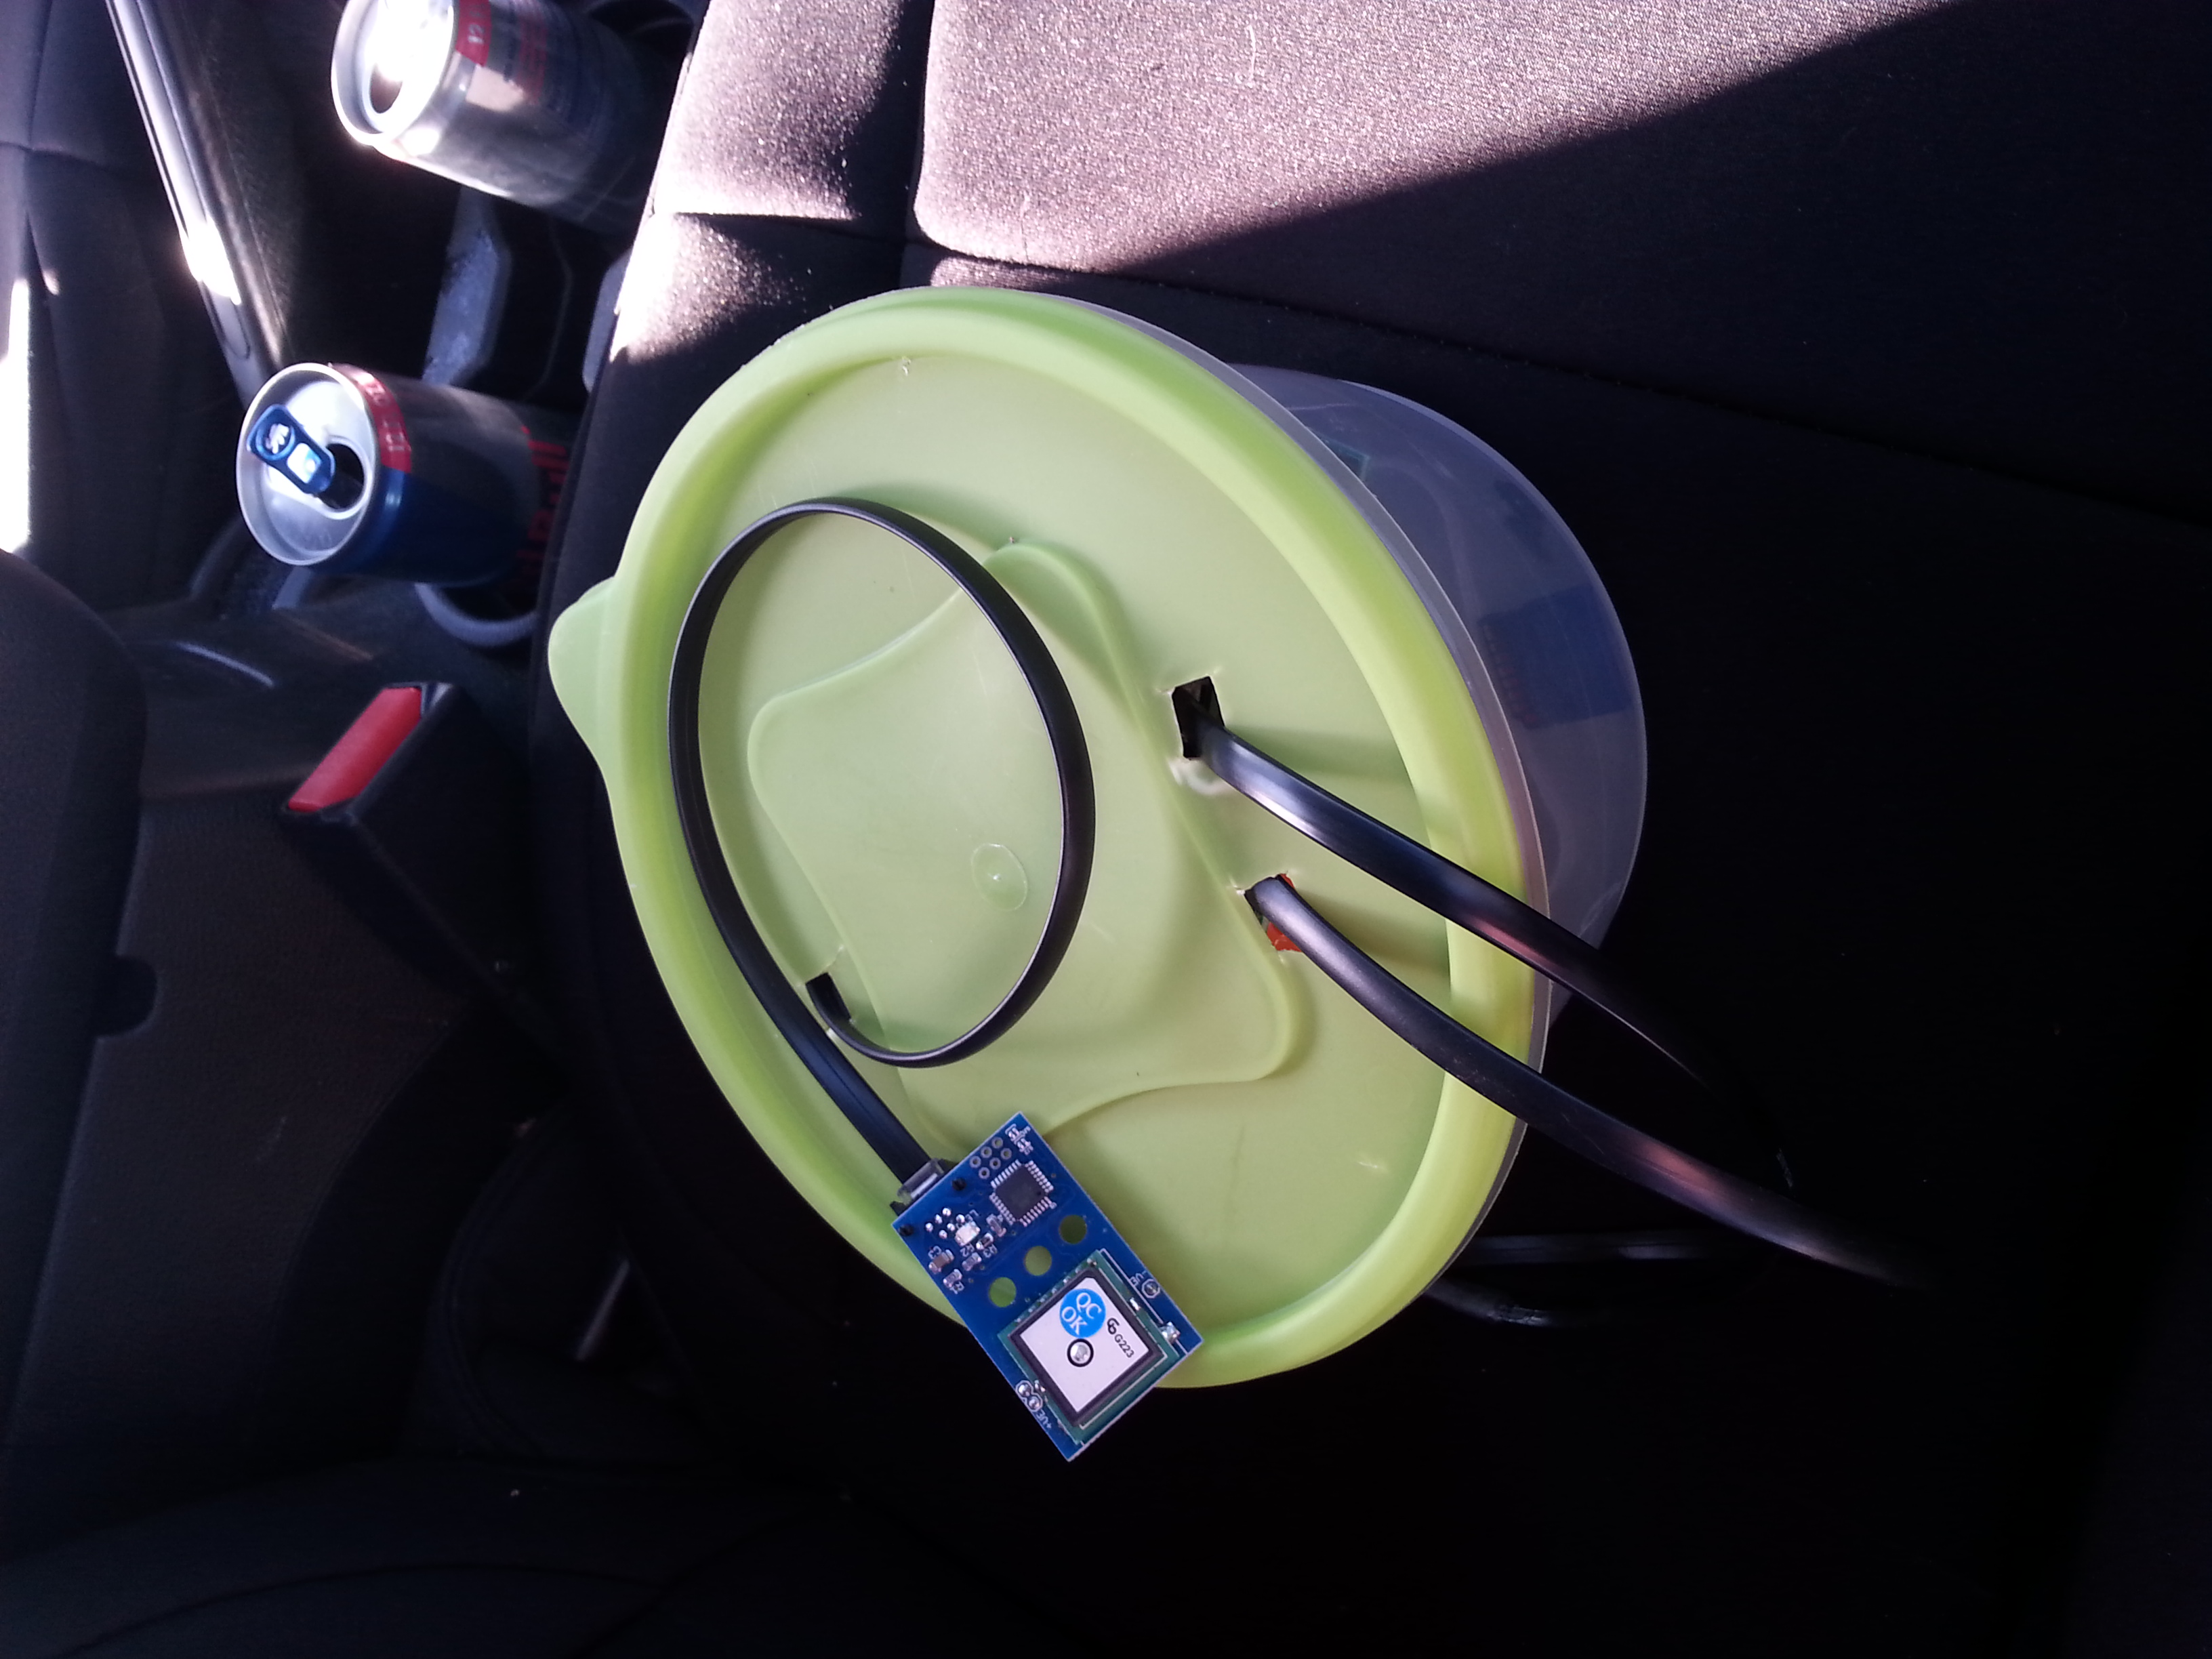
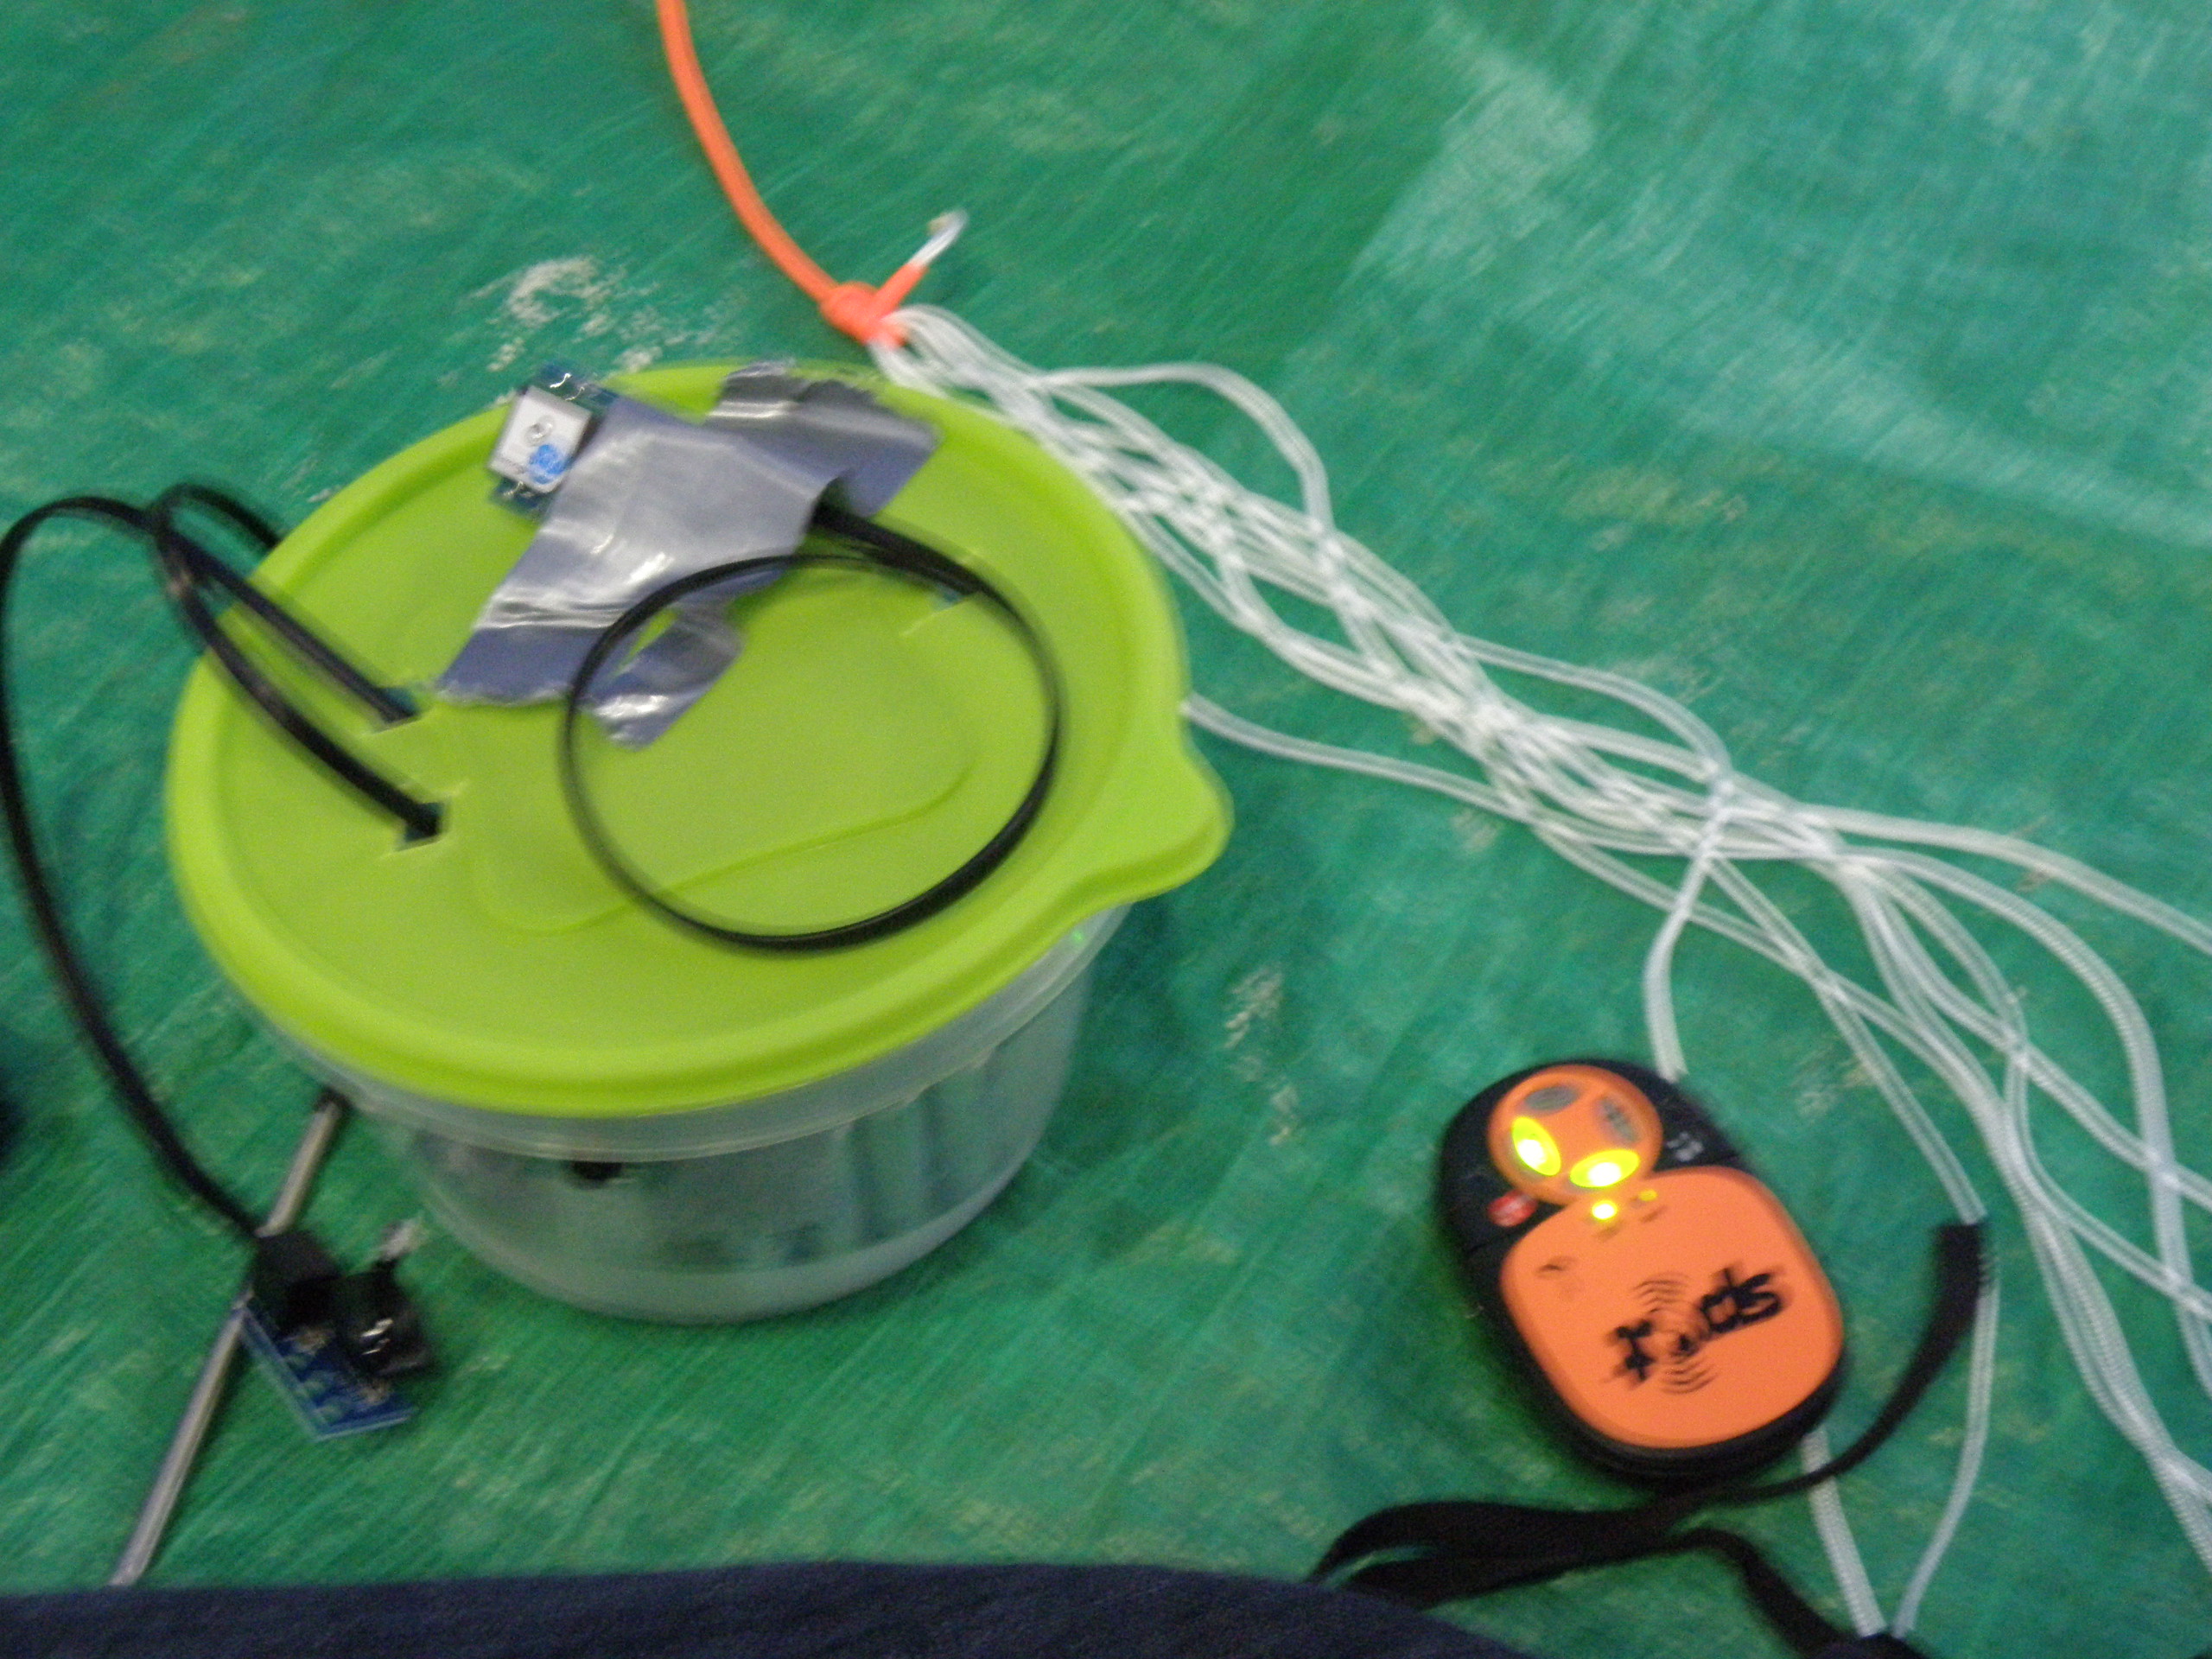
 Pressure Sensor – The Dexter Industries dPressure 250. Since this is a differential pressure sensor, we sealed one of the two ports.
- Thermometer – The Dexter Industries Protected Thermal Sensor.
- dGPS Sensor – The Dexter Industries dGPS to track time, position, and velocity.
- SPOT Tracker – This was a little expensive, but the SPOT proved really useful. If you’re not 100% sure your balloon project will land within mobile phone network range, you should consider putting a SPOT Tracker in your payload.
Materials Used
Raspberry Pi Payload
- Balloon – 600g, High Altitude Sciences Balloon.
- Parachute – 36″ Space Frontier Parachute. In Blue, because that’s our color. (You might want orange because it’s probably easier to see).
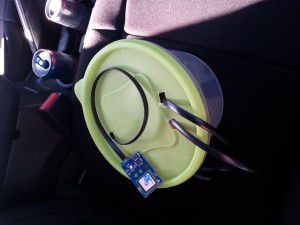
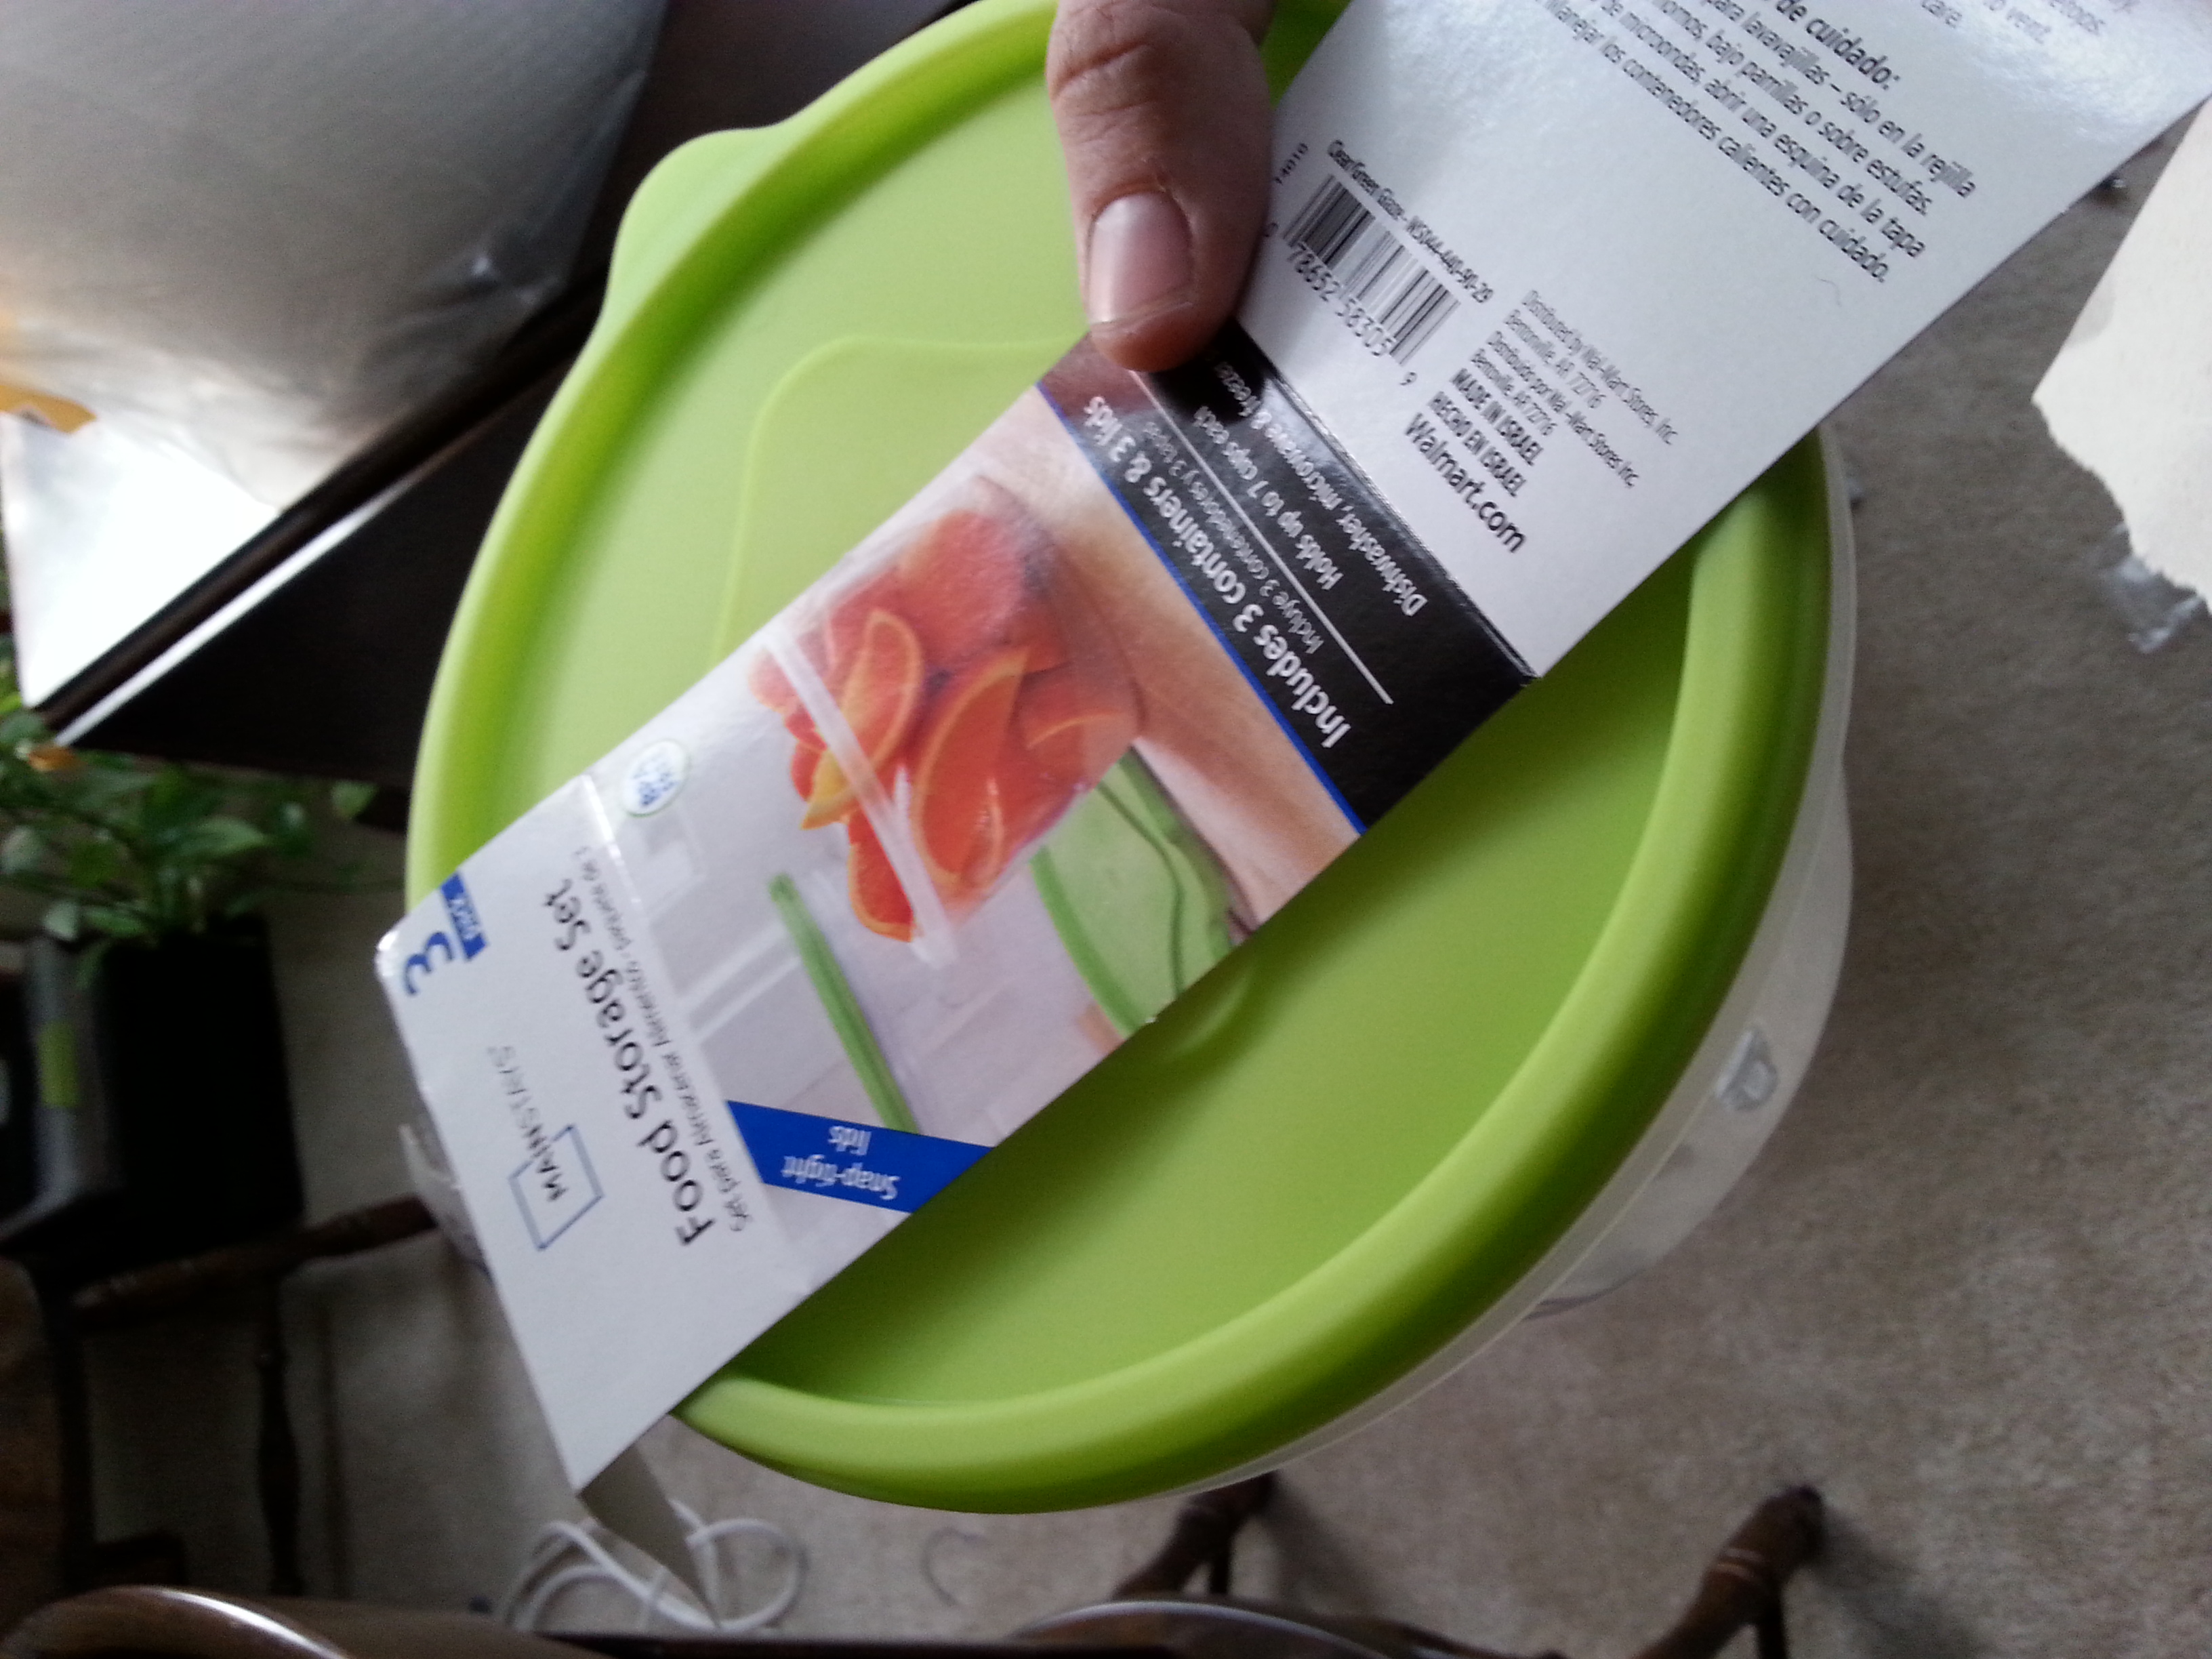
- Payload Holder – Cheap plasticware from Walmart. Even though it looks cheap, the tub was sturdy, waterproof, and we could cut a few holes to stick our sensors out.
- Parachute Chord – Parachute cord found at hardware store.
- Duct Tape – We used Duct tape to seal up the payload holder, and to double-seal the balloon.
Payload Carrier
Code
We want to take the following data:
- A picture every 10 seconds.
- A pressure reading every 10 seconds.
- A GPS reading every 10 seconds.
- A temperature reading every 10 seconds.
The data, other than the pictures, are stored in a CSV file.
We enabled the Python code to run on startup using crontab. If you type “sudo crontab -e” in the command line of your Raspberry Pi, you can designate a specific file to run on startup. With this modification, the code begins running on powering up the Raspberry Pi (it could be cumbersome to boot up the Pi, login, and start the program at the launch site) and if any error was detected, we wrote the code to just restart the Raspberry Pi.
Choose a Launch Spot and Calculating the Course
We used the CUSF Landing Predictor to calculate out where our balloon would land. The online software allows you to enter latitude and longitude, as well as anticipated ascent and descent rates, and draws the resulting balloon path across a map.
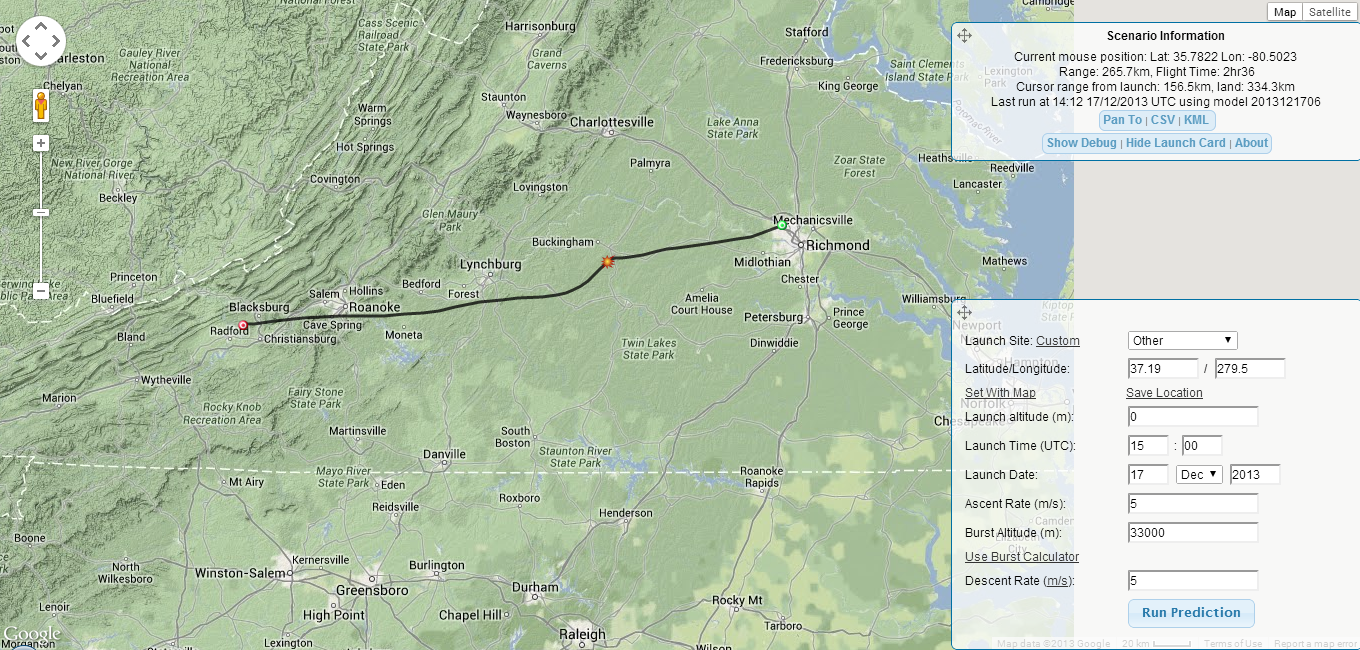
The Flight Claculator Results.
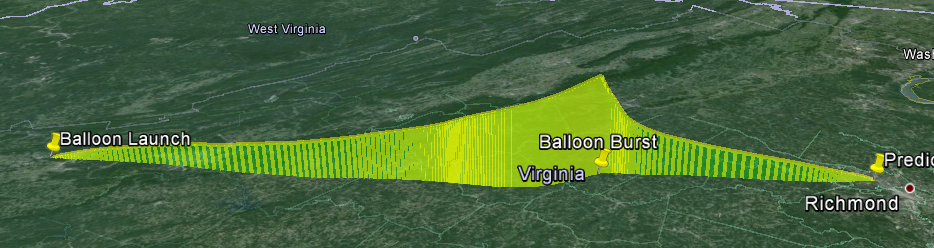
Planned Flight of the Balloon
Filling the Balloons
High Altitude Science has a great tutorial on filling the balloon and getting the volumes right. We bought our helium at Party City (there’s probably one close to you too). We have read you can also find helium tanks at welding supply shops. Party city rents you the tank for 48 hours, with a $100 deposit per tank.
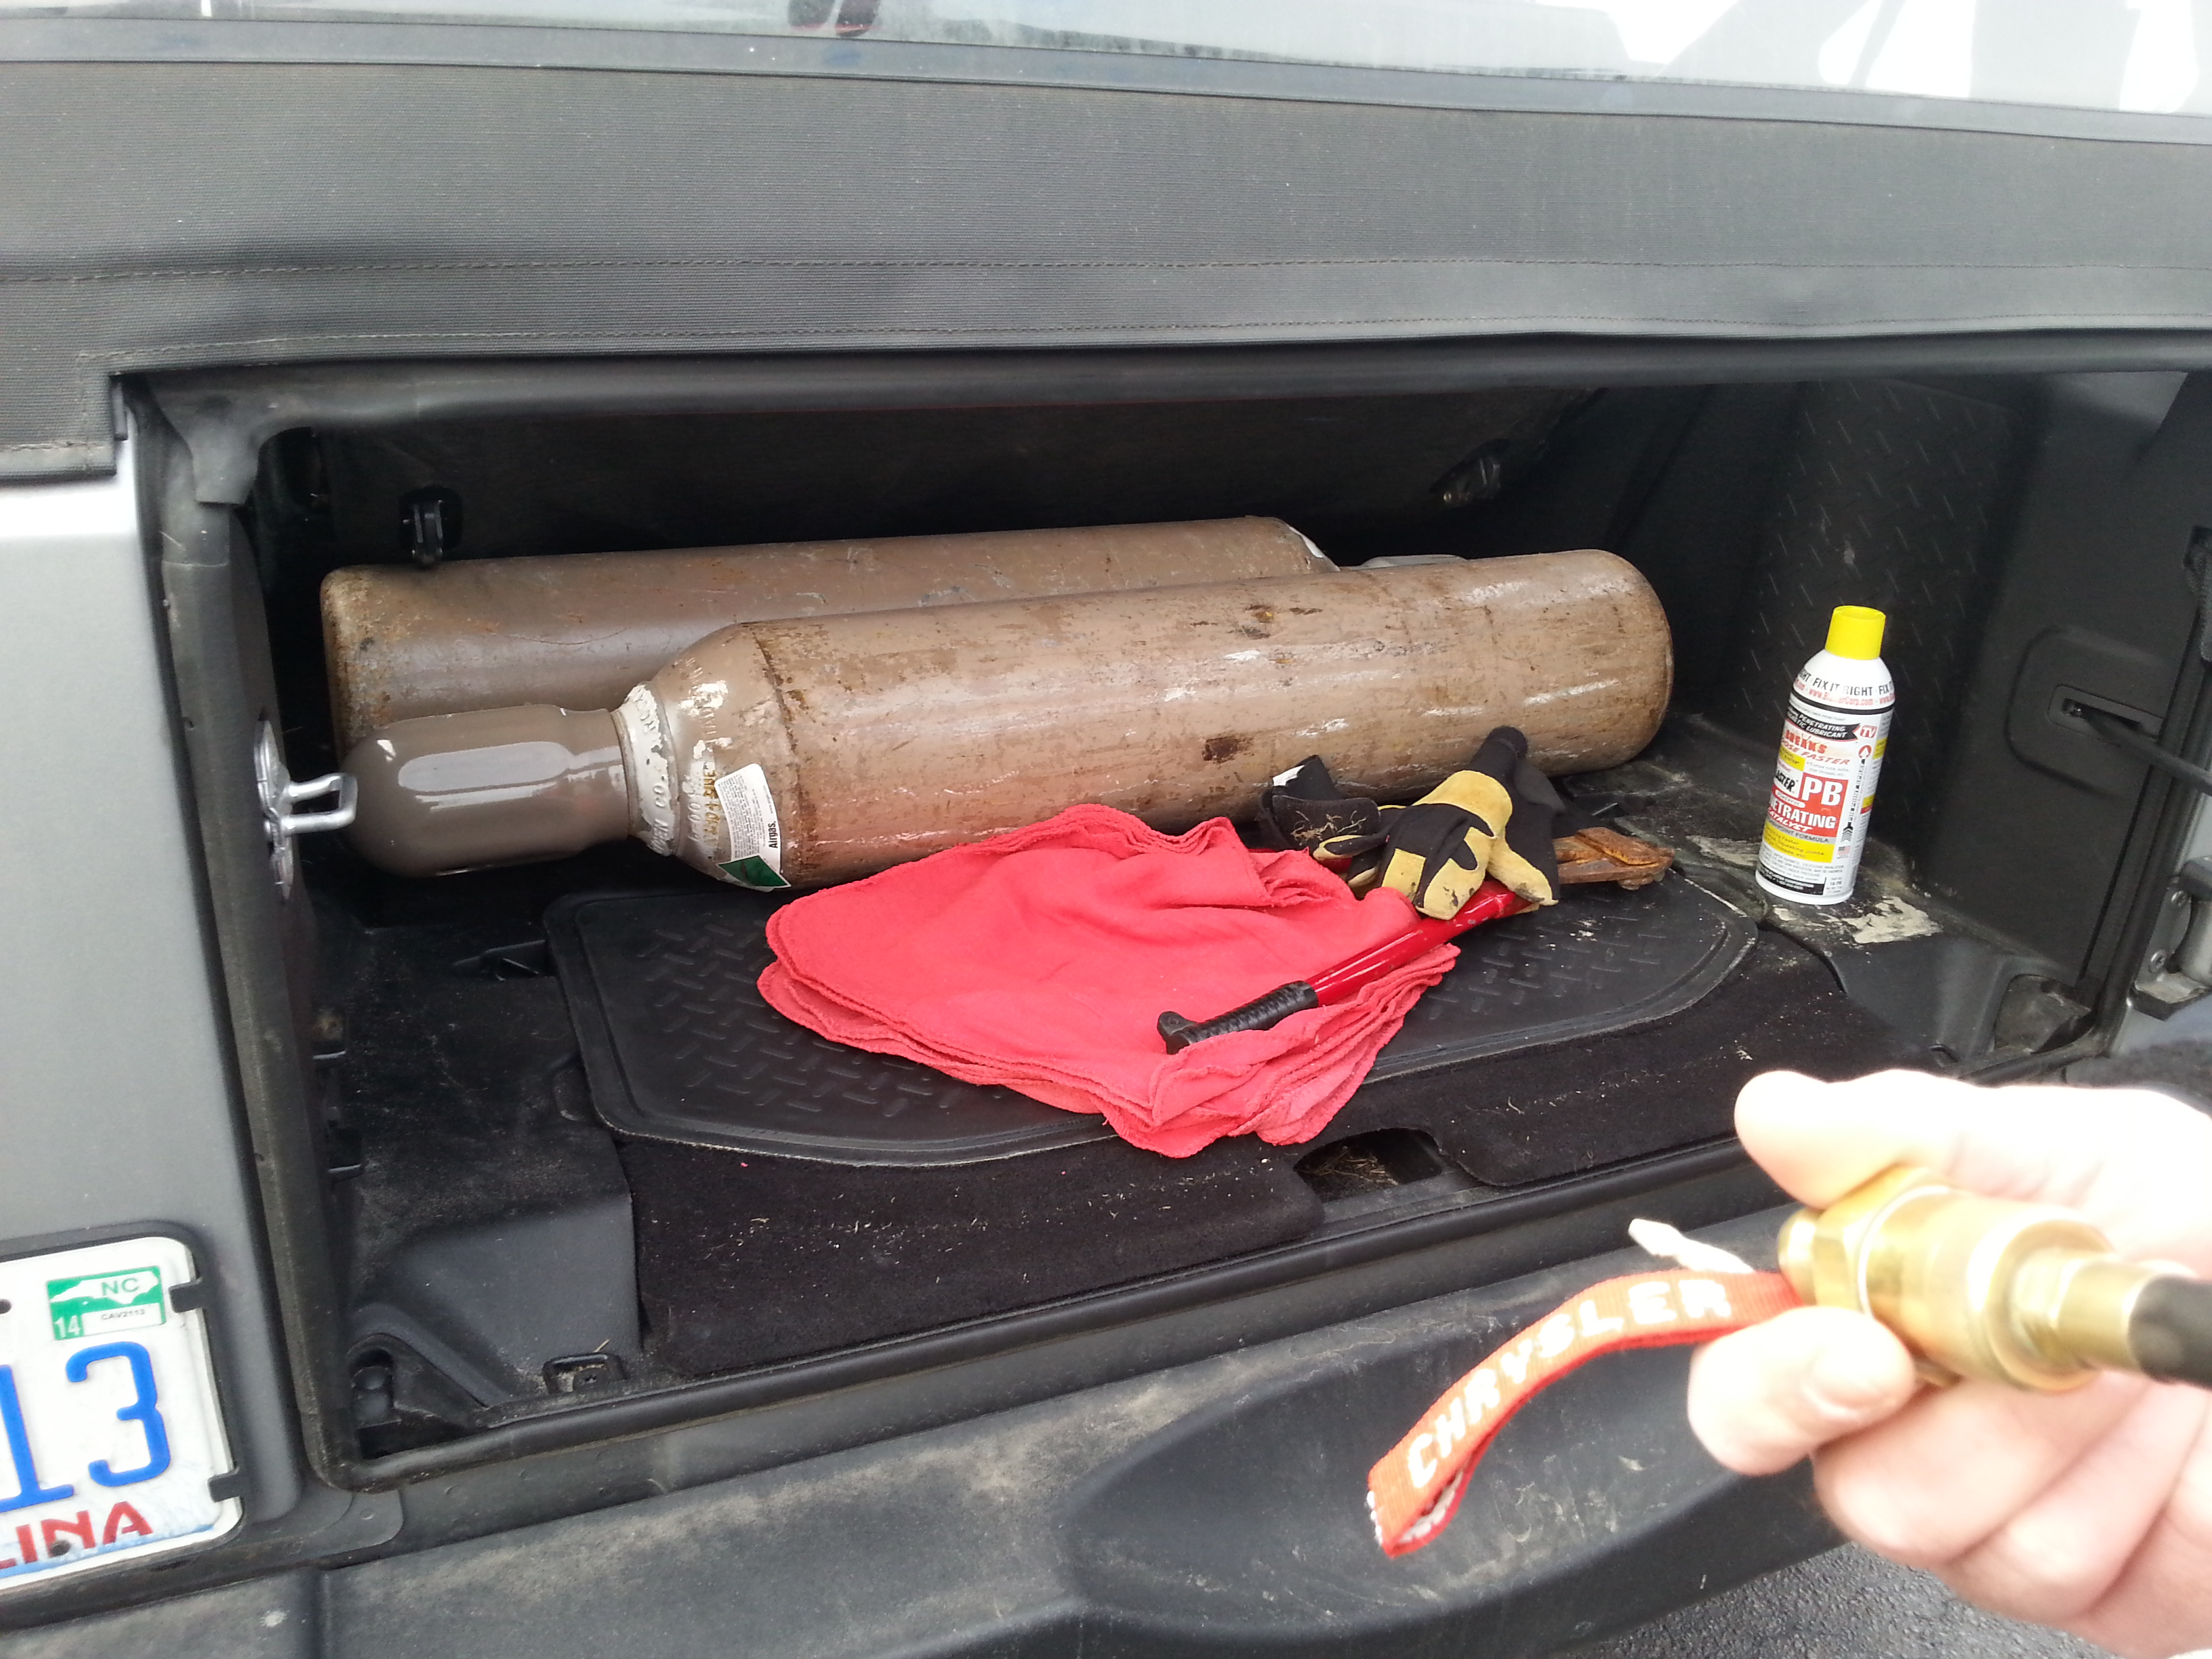
We rented two Medium tanks of helium. Each medium tank is about 80 cubic feet of helium, for a total of 160 cu feet. We didn’t use all of the helium, but a helpful hint: get more helium than you need. We planned for a 500g payload (see above in our planning section, we calculated out 350g of equipment, with some room for error).
High Altitude Science has done a fantastic job with their tutorials, for more information on helium we encourage you to check out their tutorial section.
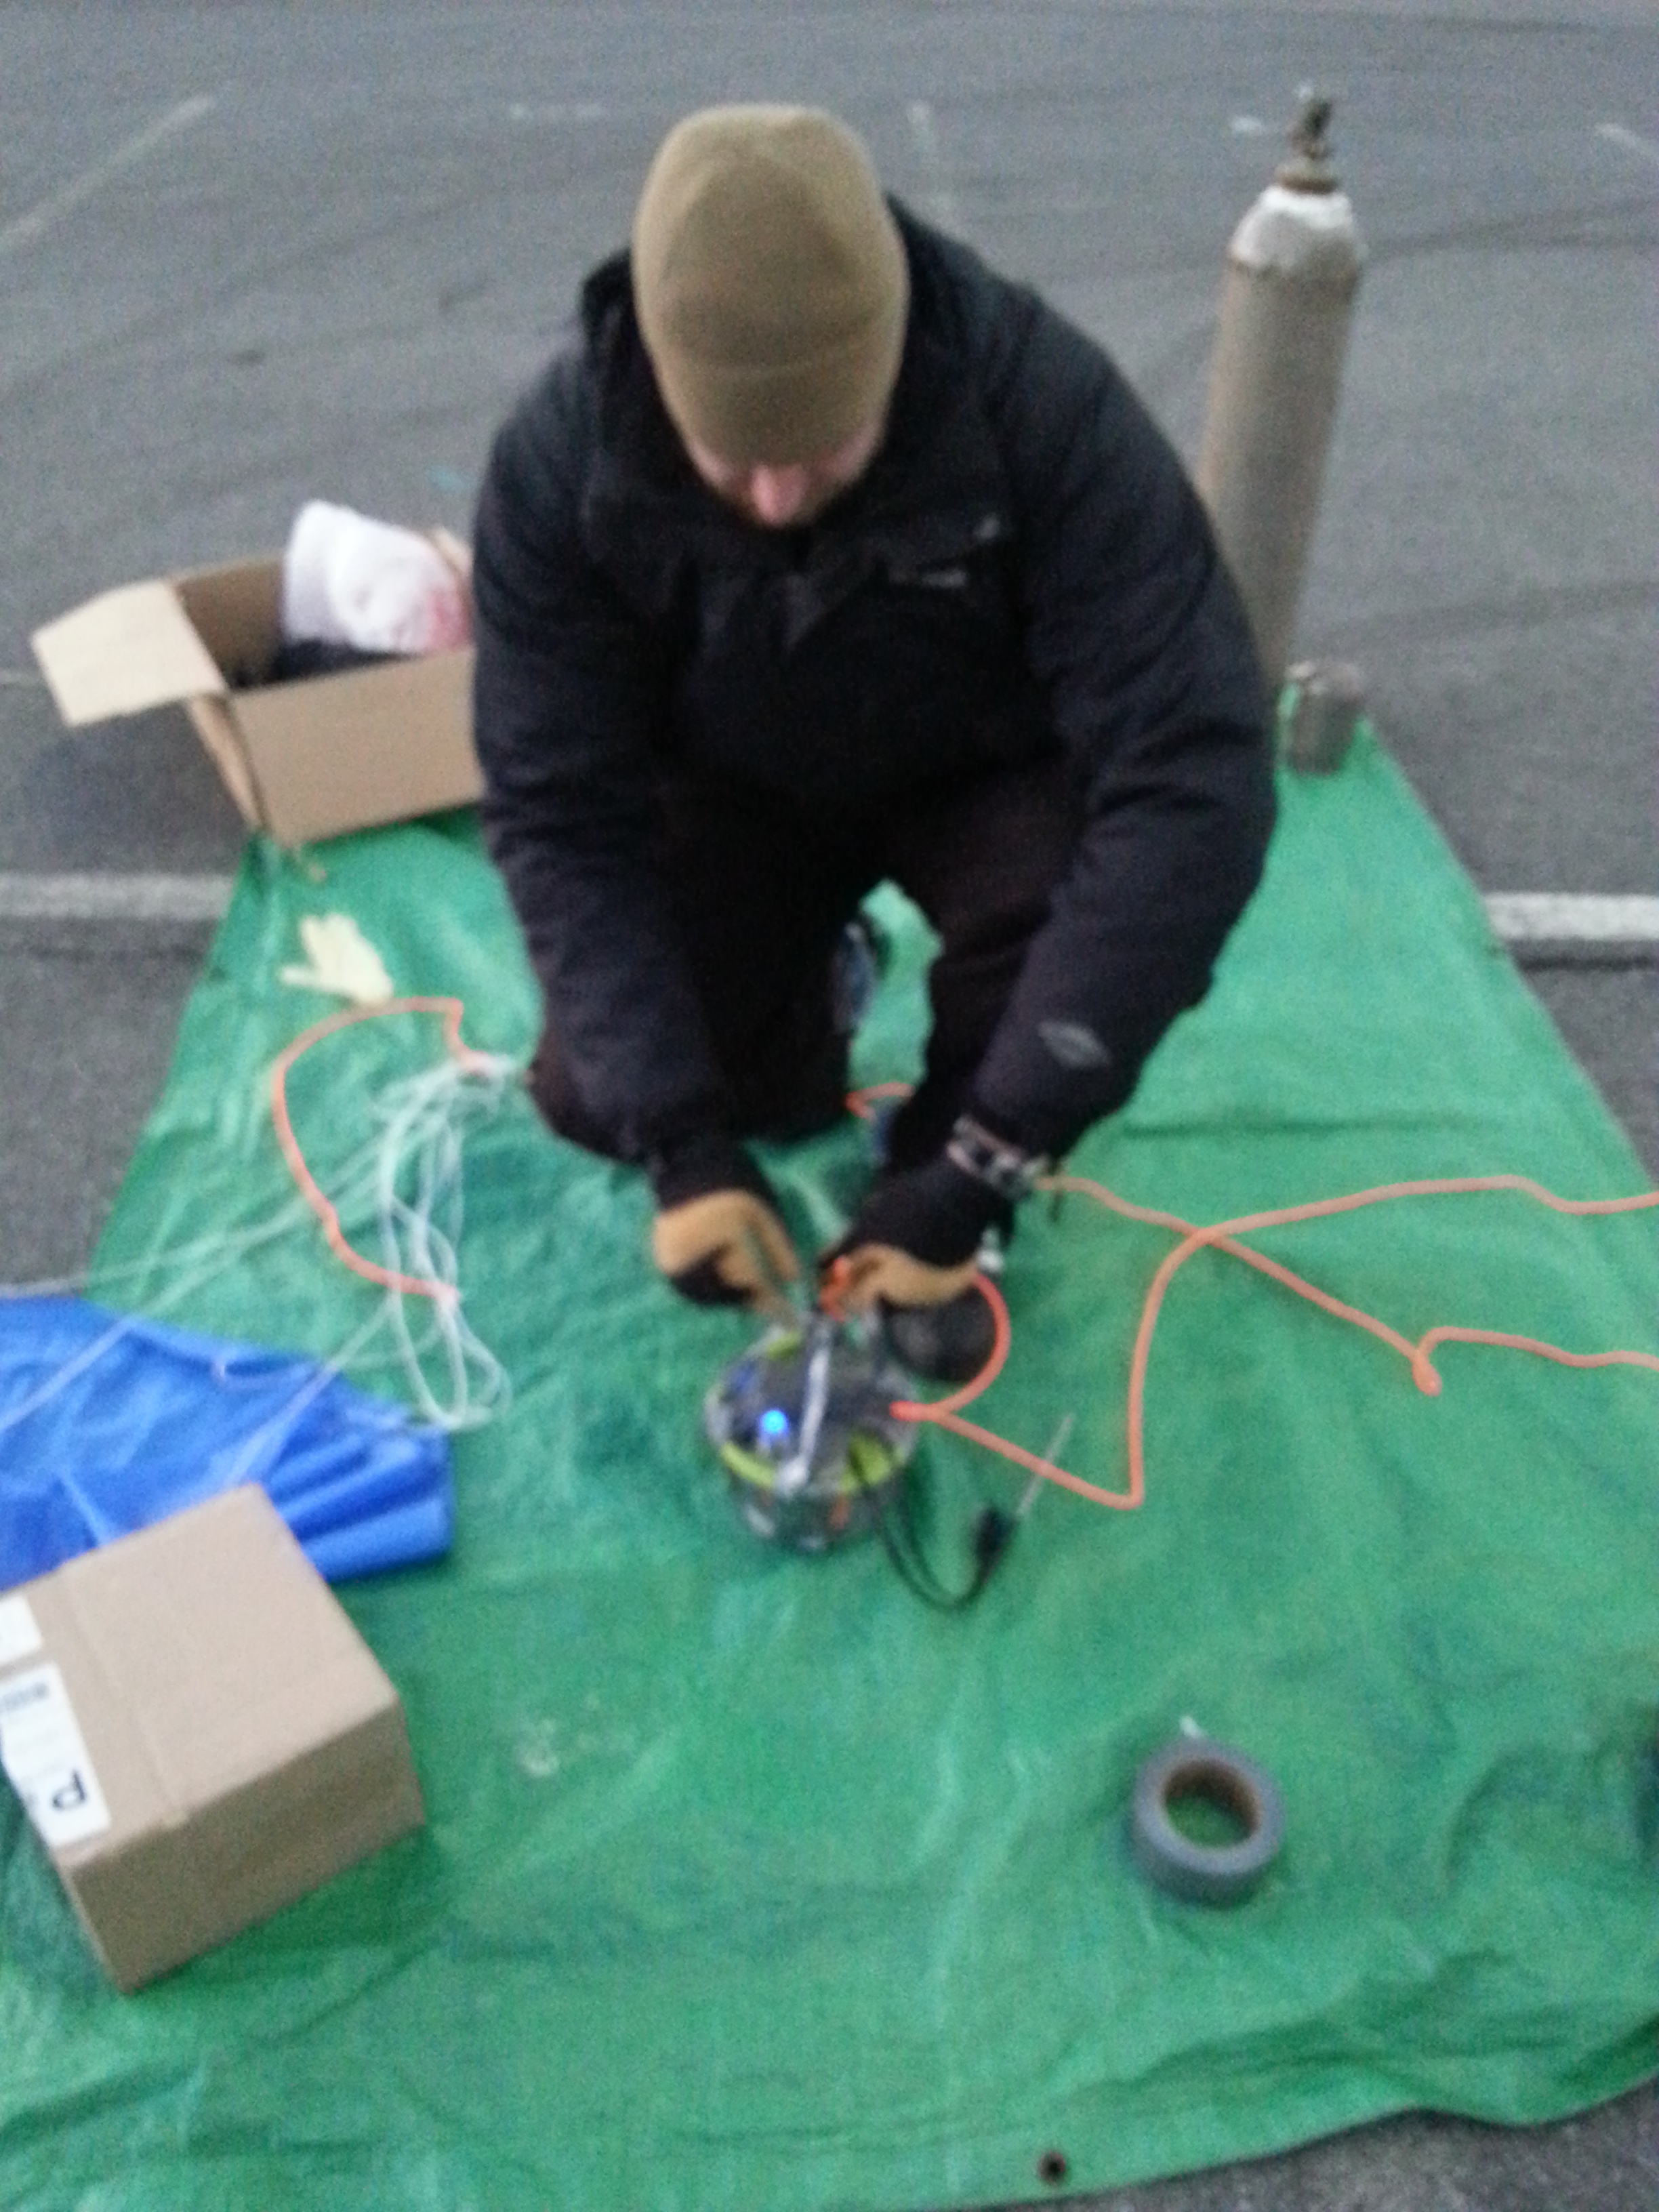
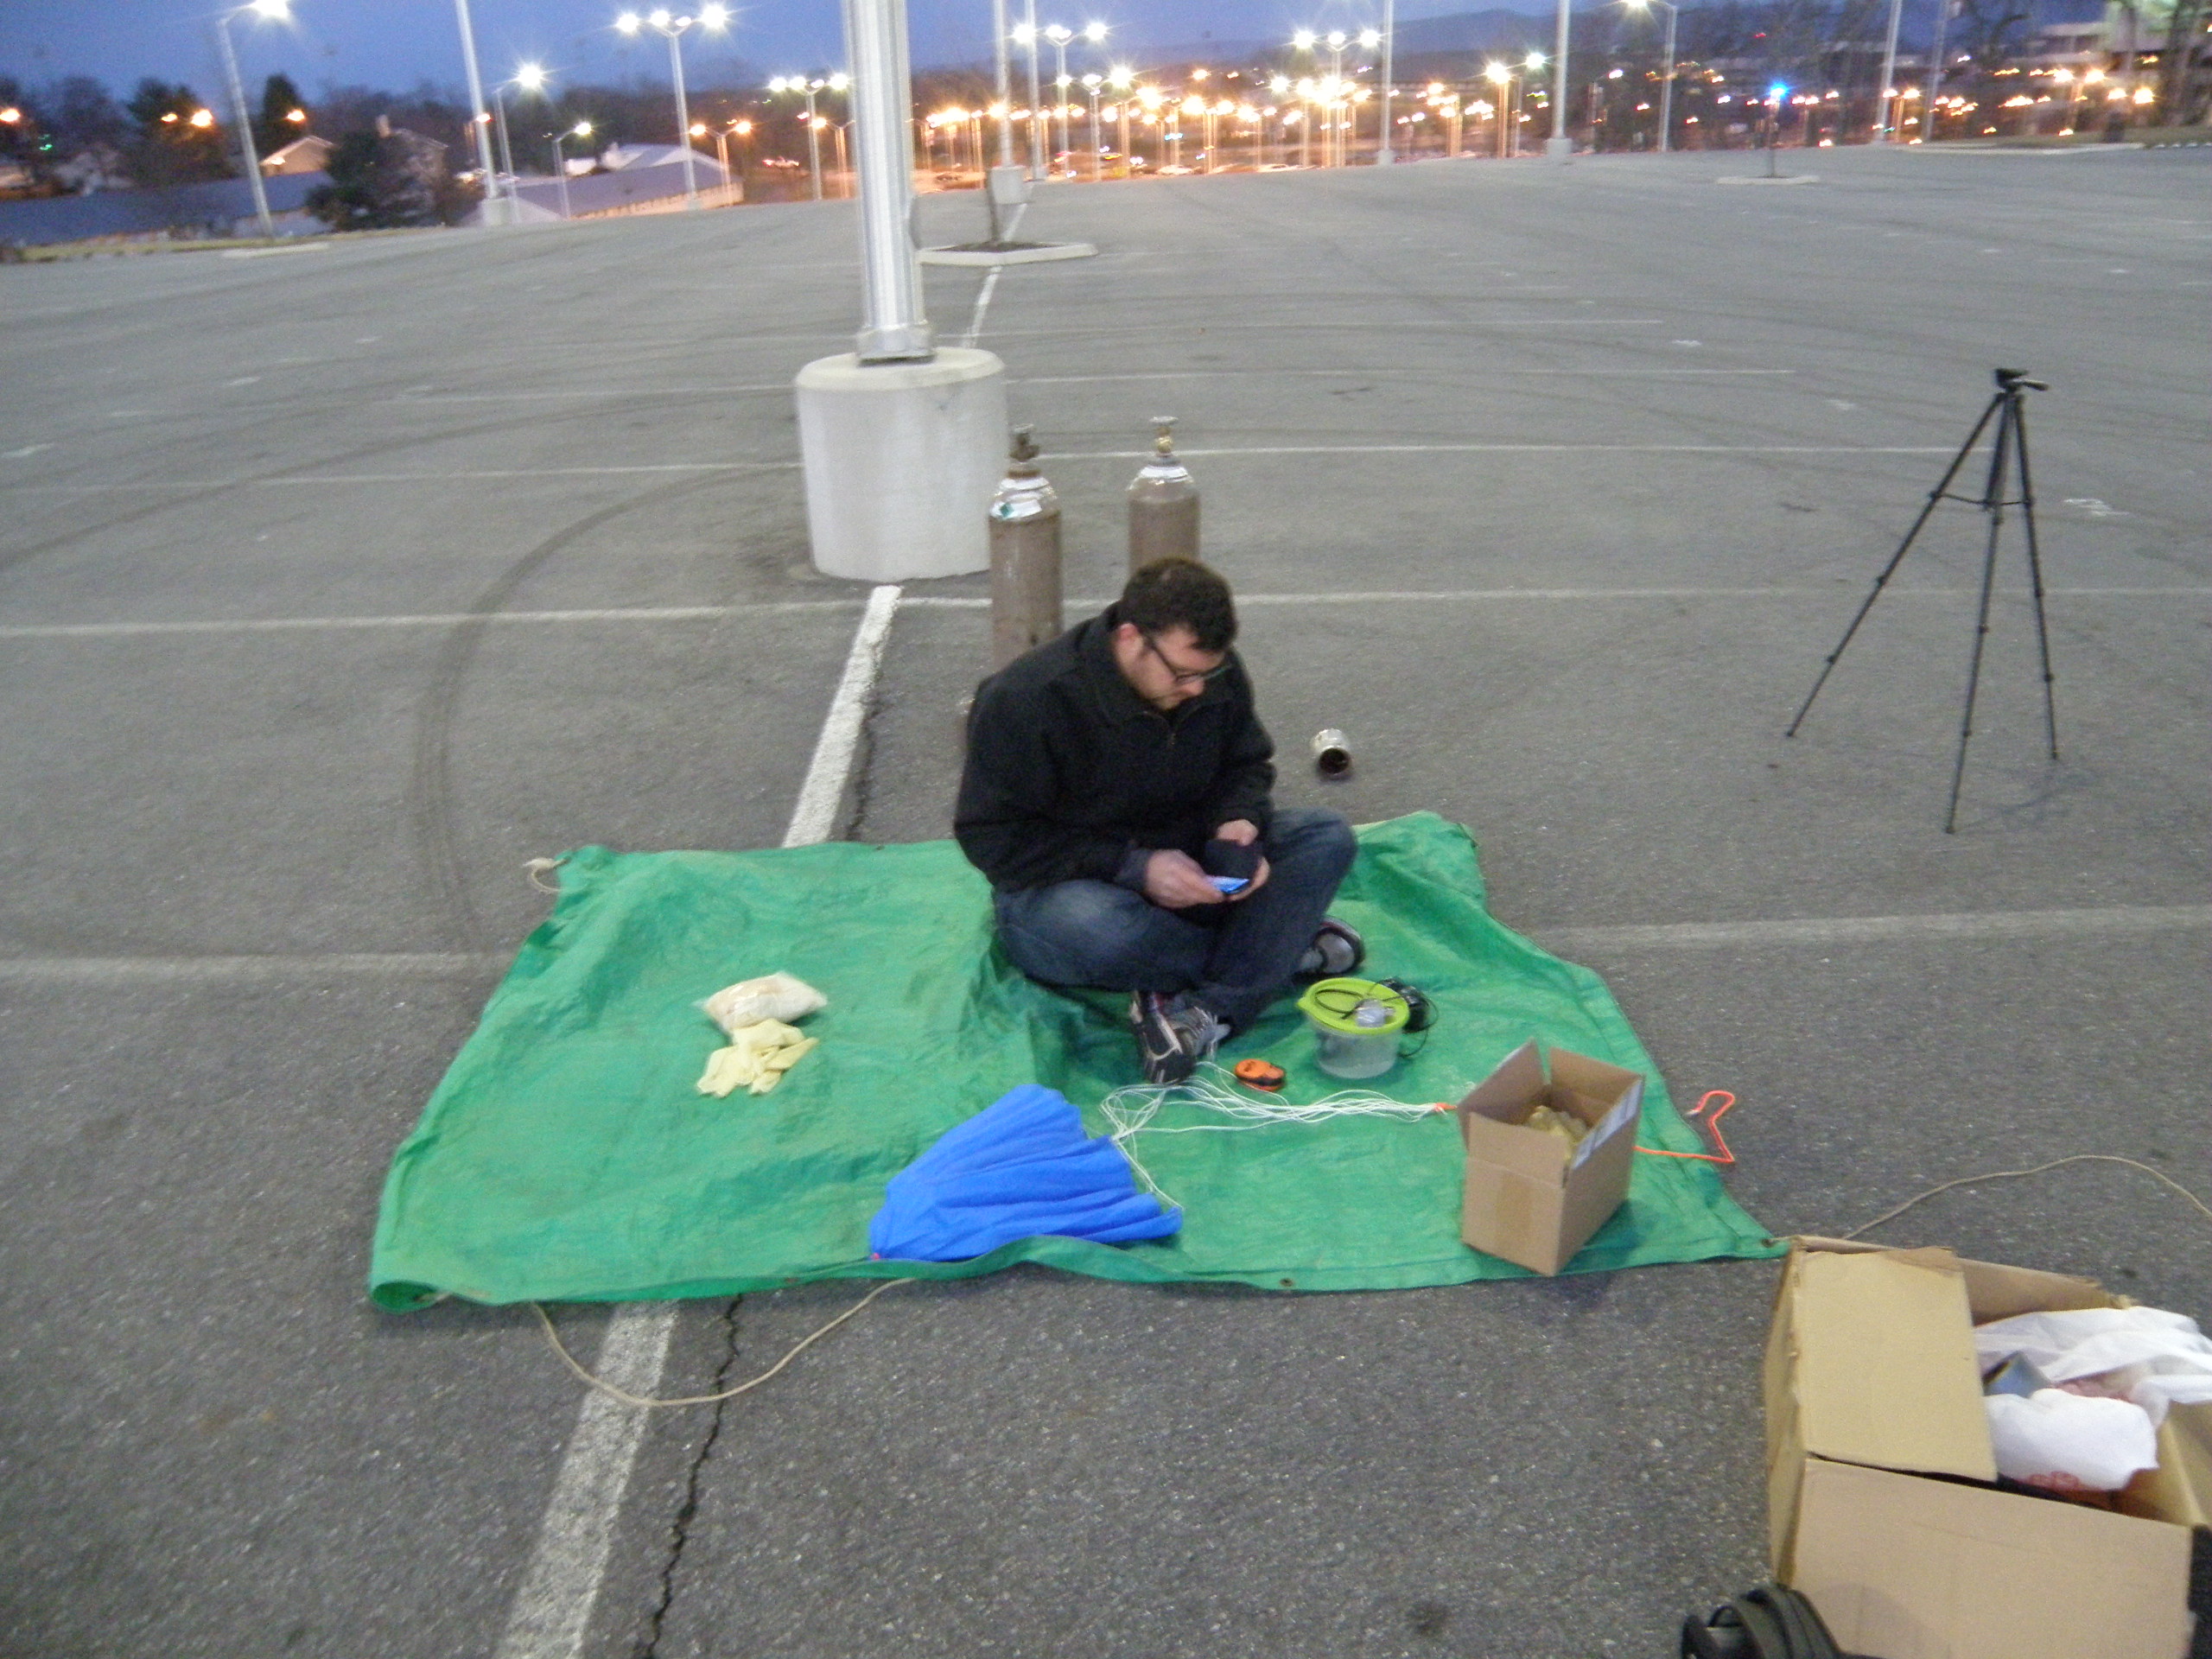
Rigging up the Balloon
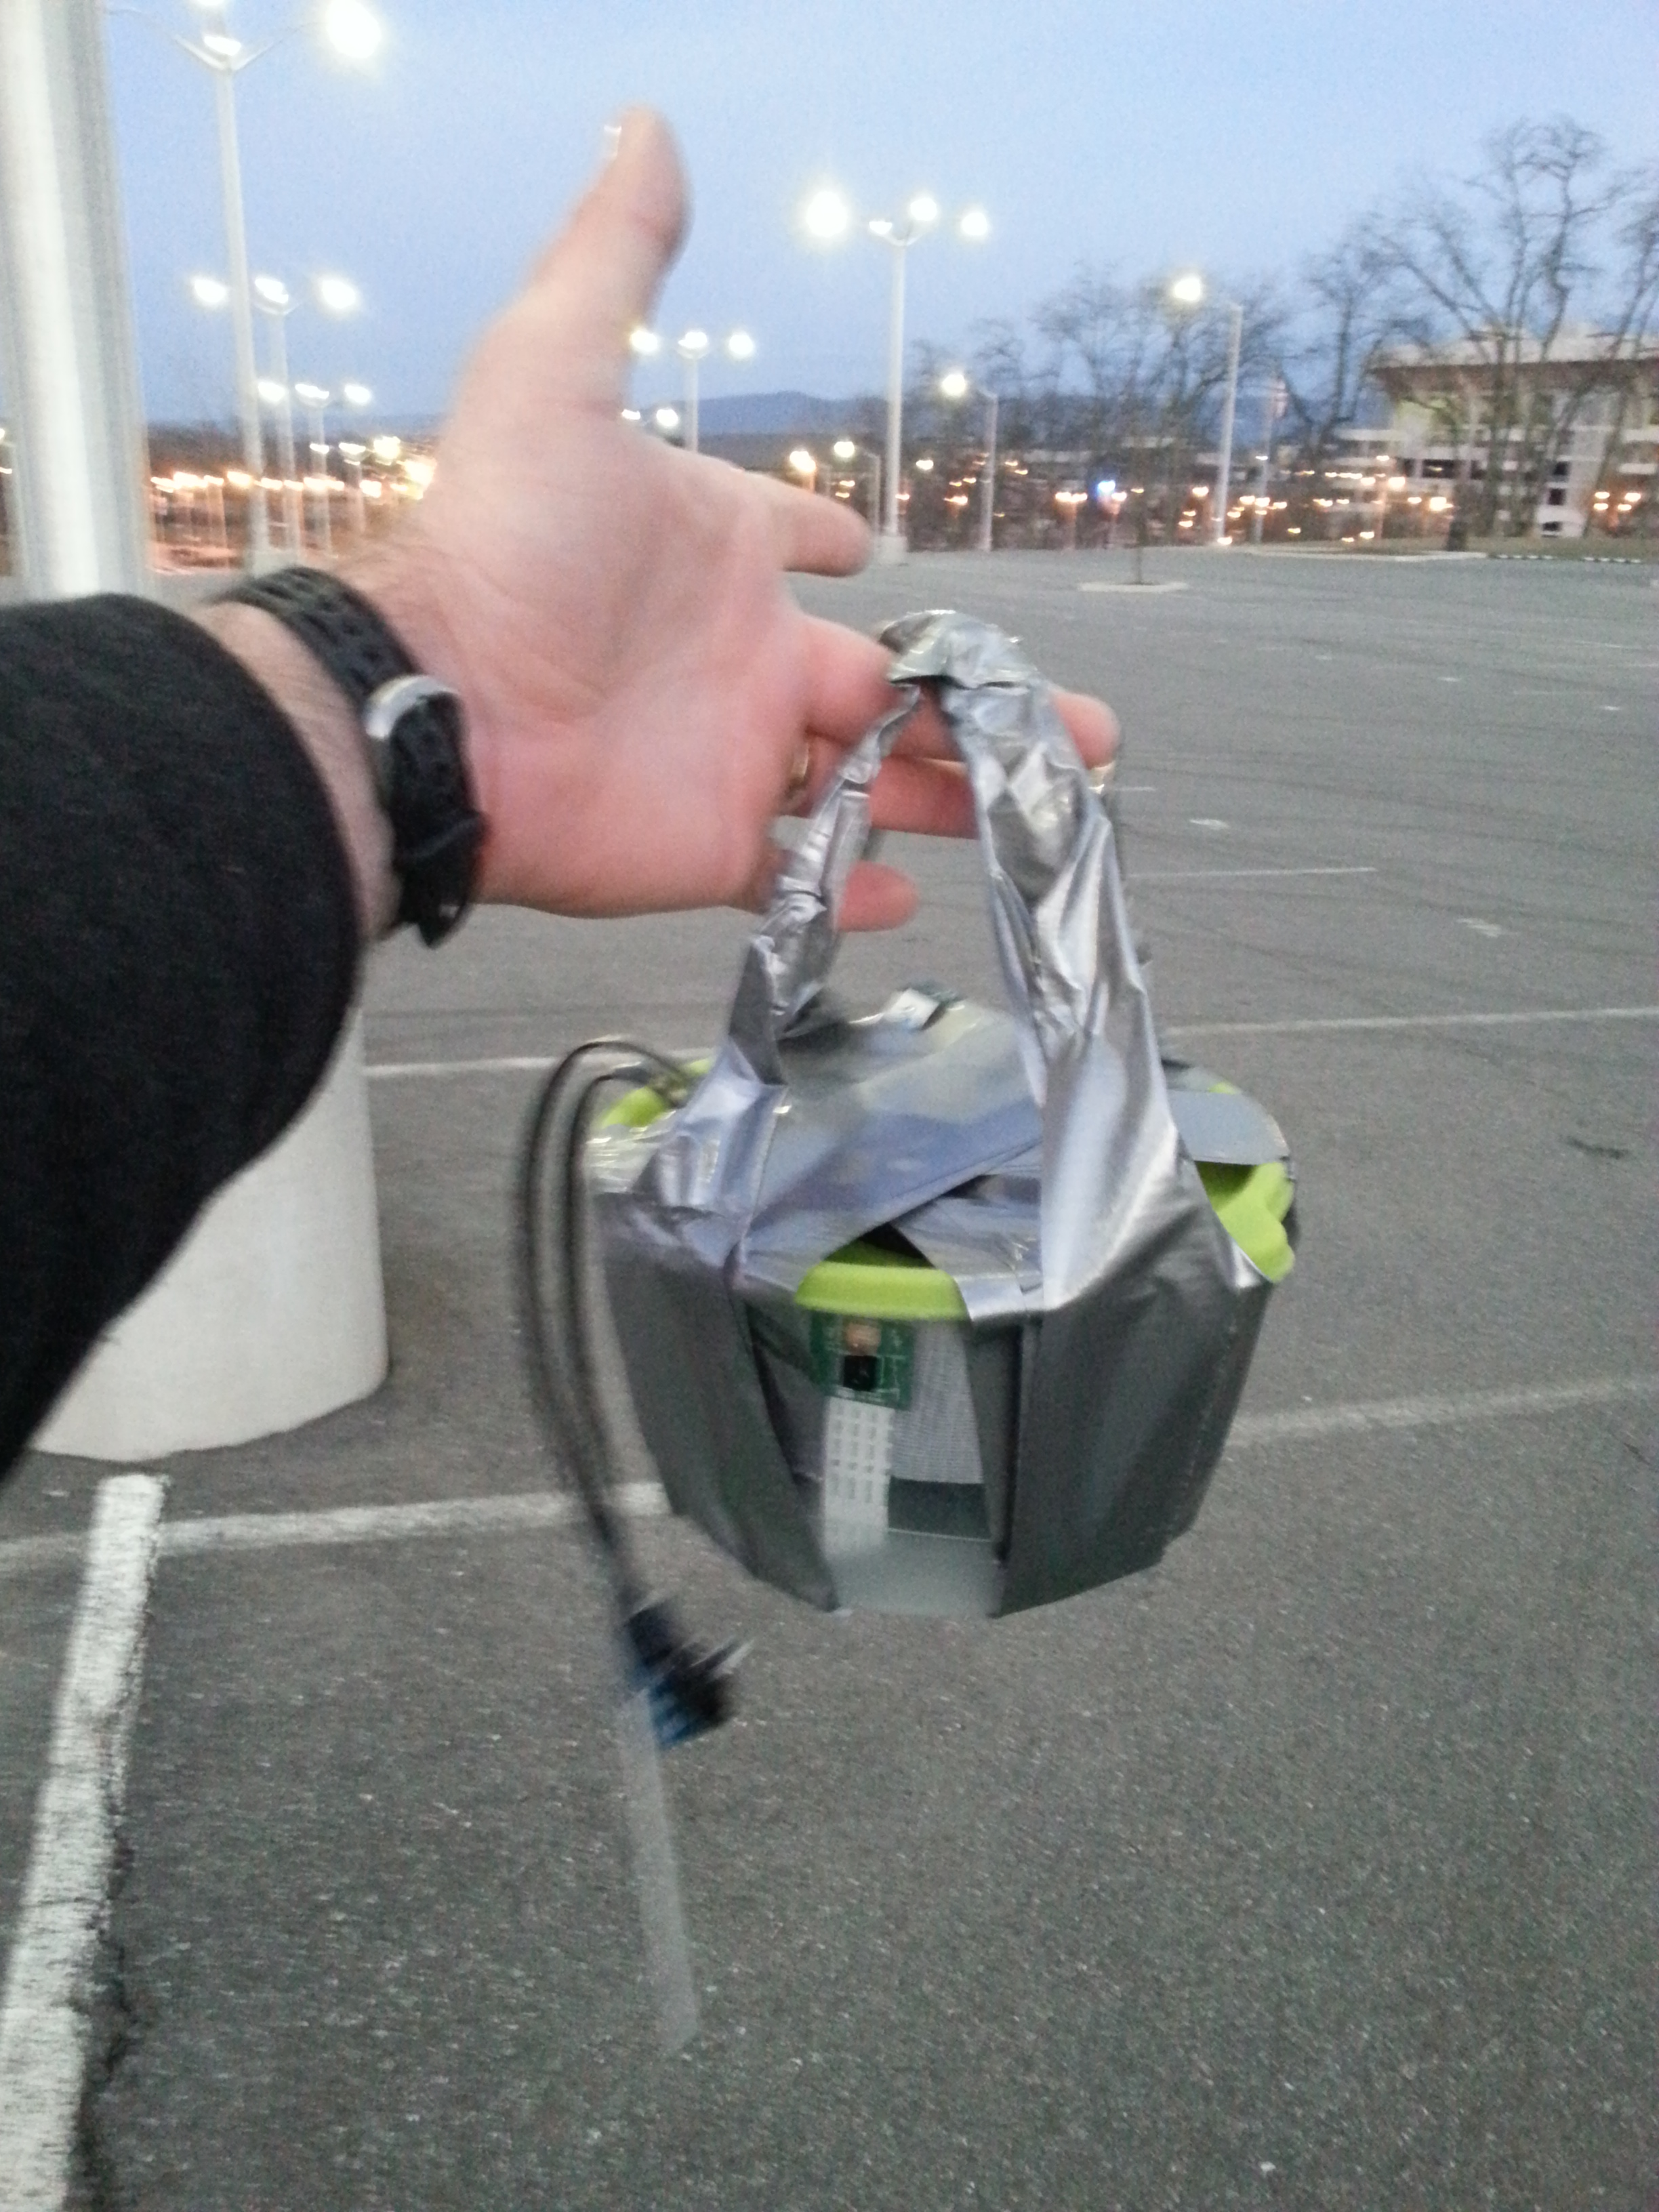
First we turned on the payload by attaching the battery pack to the BrickPi. We activated the SPOT tracker and placed both in the plastic tub.
Duct tape. Lots of duct tape and some parachute cord. We wrapped up the payload, sealing the equipment in place, and created a harness at the same time by double-looping the duct tape a few times on itself.
Before inflating the balloon we made sure we had our payload fully tied up. We tied our payload to the parachute, putting about 15 feet of cord between the payload and the parachute. We put a penny inside the top of the parachute and tied it off with more parachute cord, and left a few extra meters for tying the balloon to the parachute. This way the parachute was inline with the balloon: when it burst, the parachute would already be in place to open up (above the payload). We tied the balloon as close to the parachute as we could so there would be no large balloon parts flapping around after the balloon burst, and wrapping up our parachute cords.
SpacePi Payload
Putting the Payload Together.
We filled the balloon with the standard balloon adapter we got at Party City with our rental. This part was the most physically painful. It was cold and the pressure drop of the emptying helium tank made our hands feel colder. The standard balloon adapter did not give us great control over the balloon but we managed to get it onto the adapter and hold it there.
Tying off the balloon was pretty simple. Again, High Altitude Science has the best tutorial on this. We tied the balloon with an initial knot of the payload cord, folded the nipple of the balloon back on itself and tied it again. Then we duct-taped the whole thing just to make sure it wasn’t going anywhere.
Launch

Just about to launch.
We did a last minute check on the payload: the Raspberry Pi camera was still clicking away and the SPOT tracker was still blinking. The dGPS “Satellite Locked” LED was on. Everything was working.
We timed the wind bursts and used the two man team. When the wind was about to slow down, we first slowly let the balloon go while holding onto the payload. Then with the balloon aloft, we let go of the payload.
Right after we let the balloon go, we checked our SPOT Tracker. Nothing. We were dismayed. The best explanation we can find for why it stopped tracking less than 10 minutes into the flight was that it shot above its maximum operating ceiling altitude. It may also have been blocked by the electronics in the payload (see lessons learned).
It was a long two hour wait. For a while, we thought the balloon and payload were gone forever. However, two hours after launch, we suddenly got a position signal from the SPOT tracker.
It was in Richmond, about a 3 hour drive to the East. We got out of Blacksburg and headed towards the balloon. The location looked like it might be near a residence, and we weren’t sure if the balloon or payload would be moved (or worse stolen) by someone who came across it.
This part of the process didn’t go as well as planned. Since the SPOT gave out and stopped reporting, we had a few nervous hours in between launch and landing. We were hoping we would get some real-time results and be able to follow the balloons progress. After a few hours of considering the mission a loss, we were grateful it reported back!
Recovering
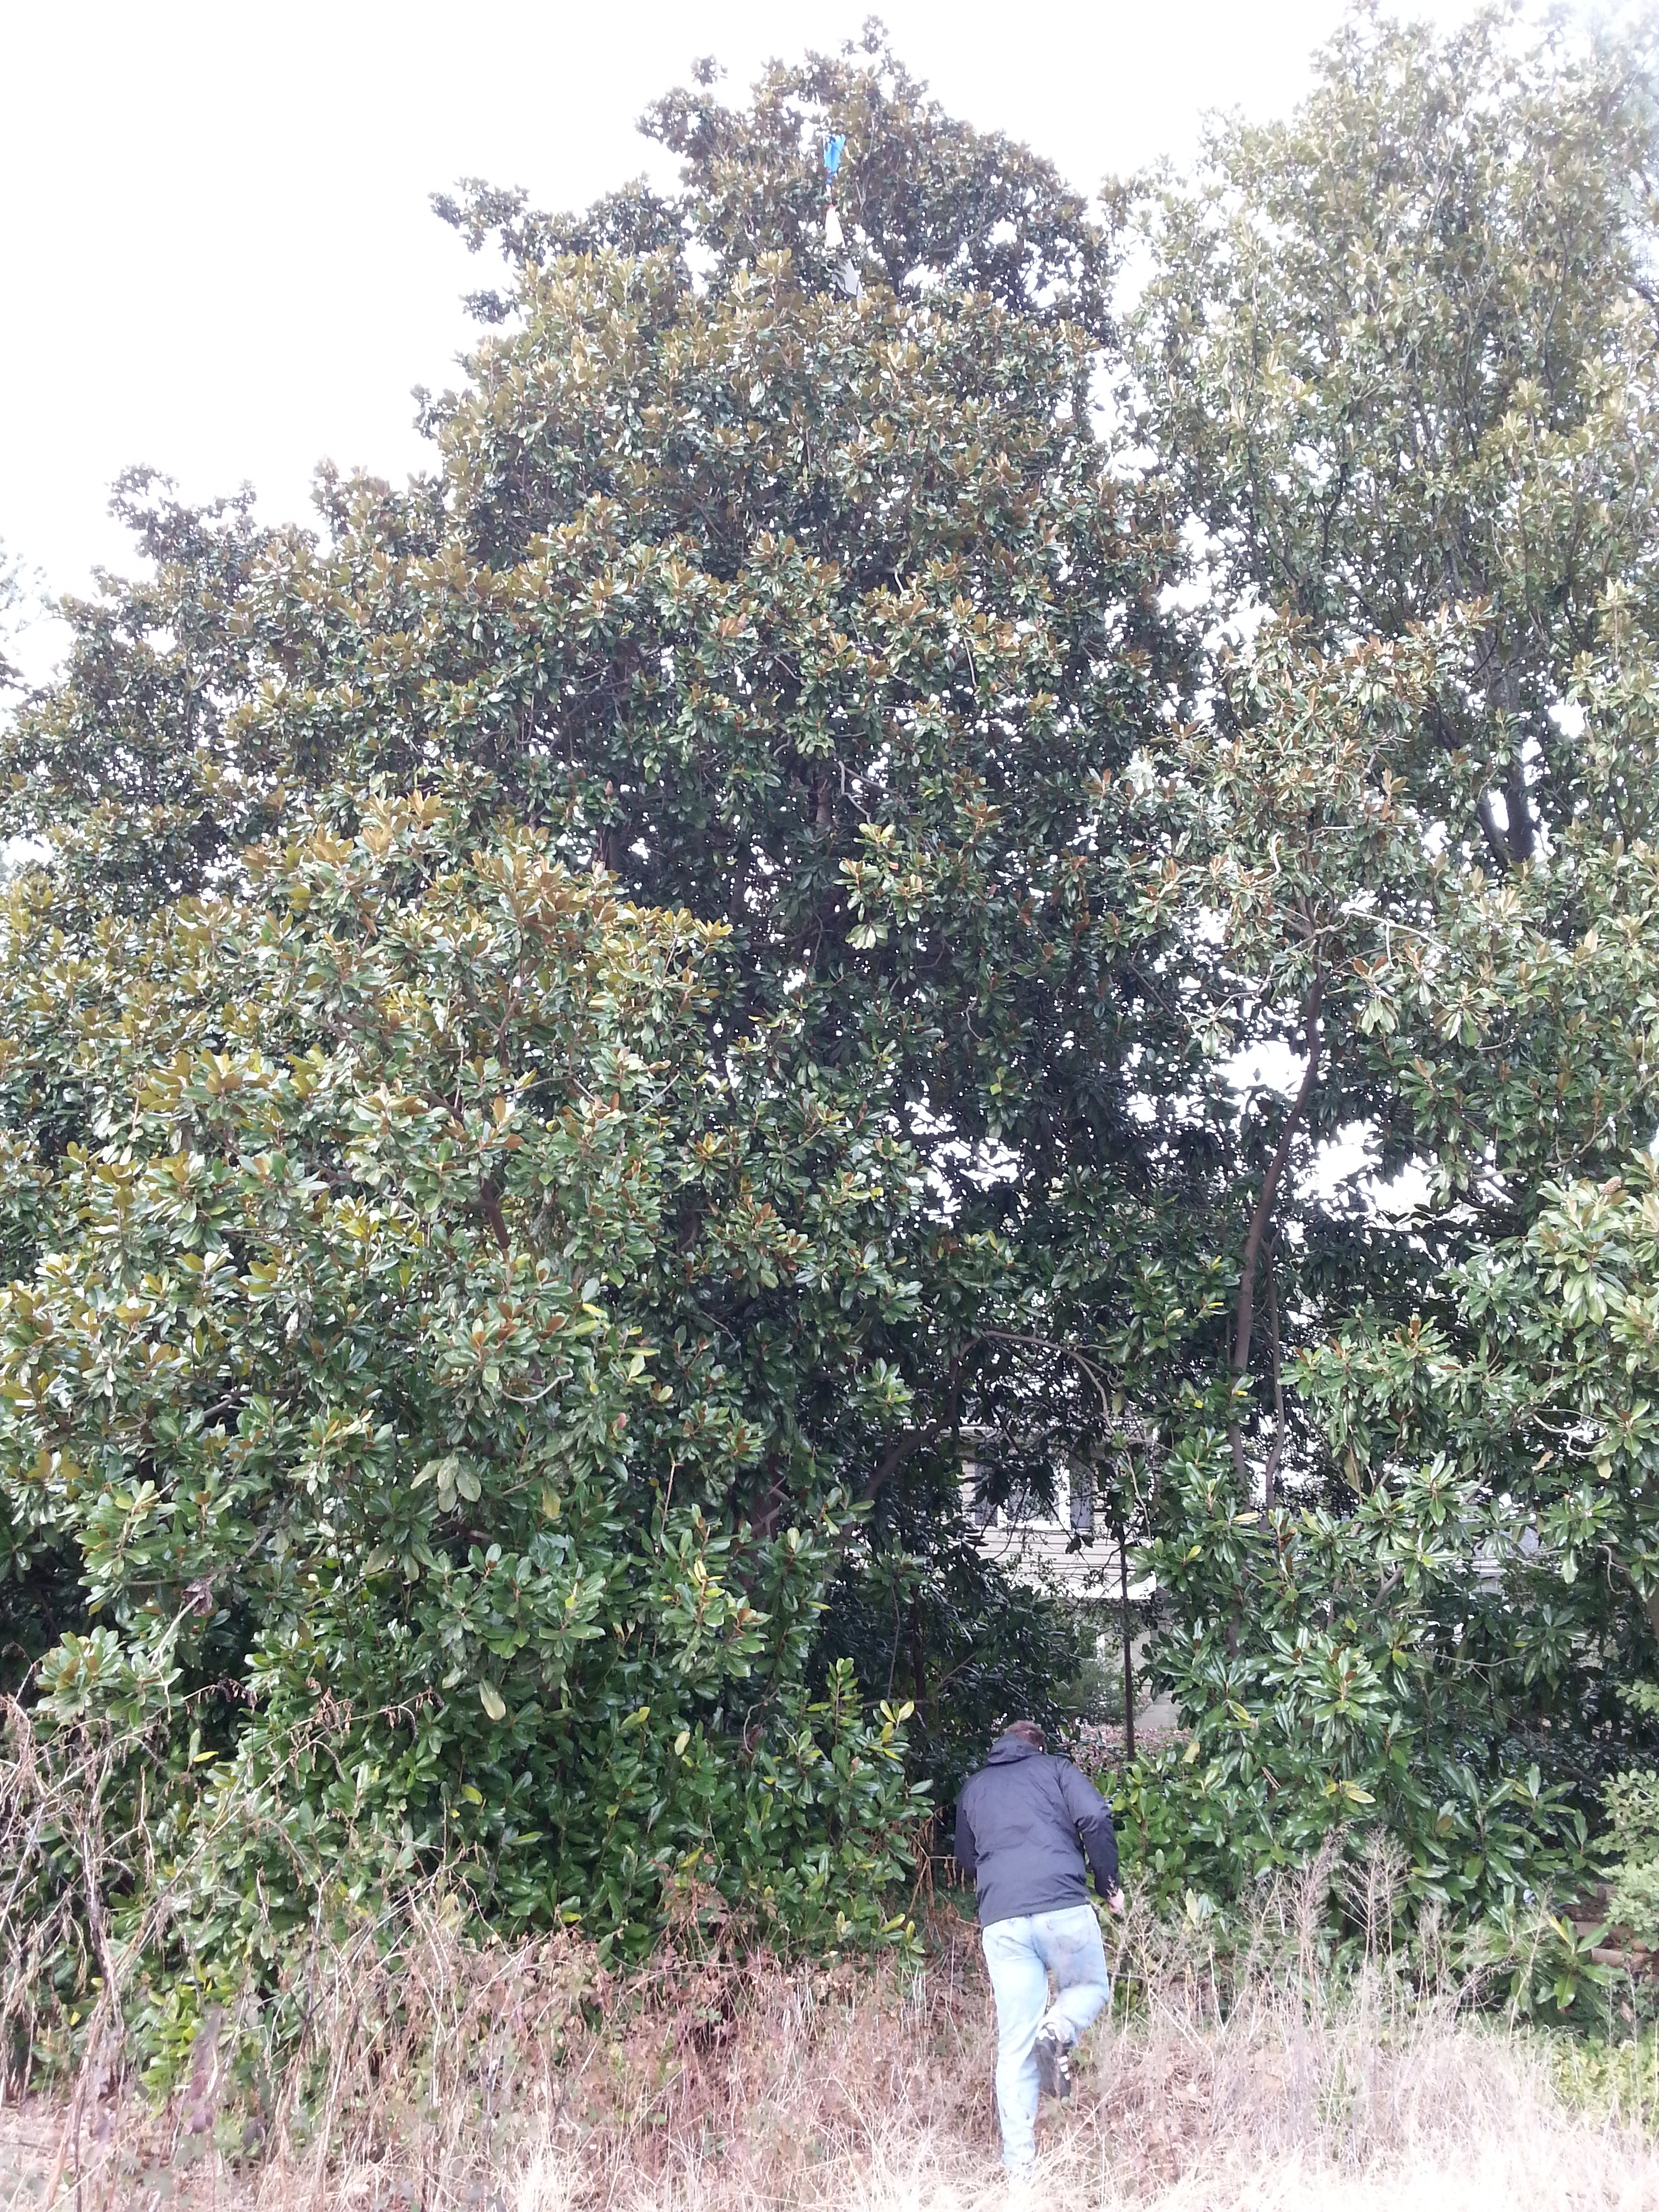
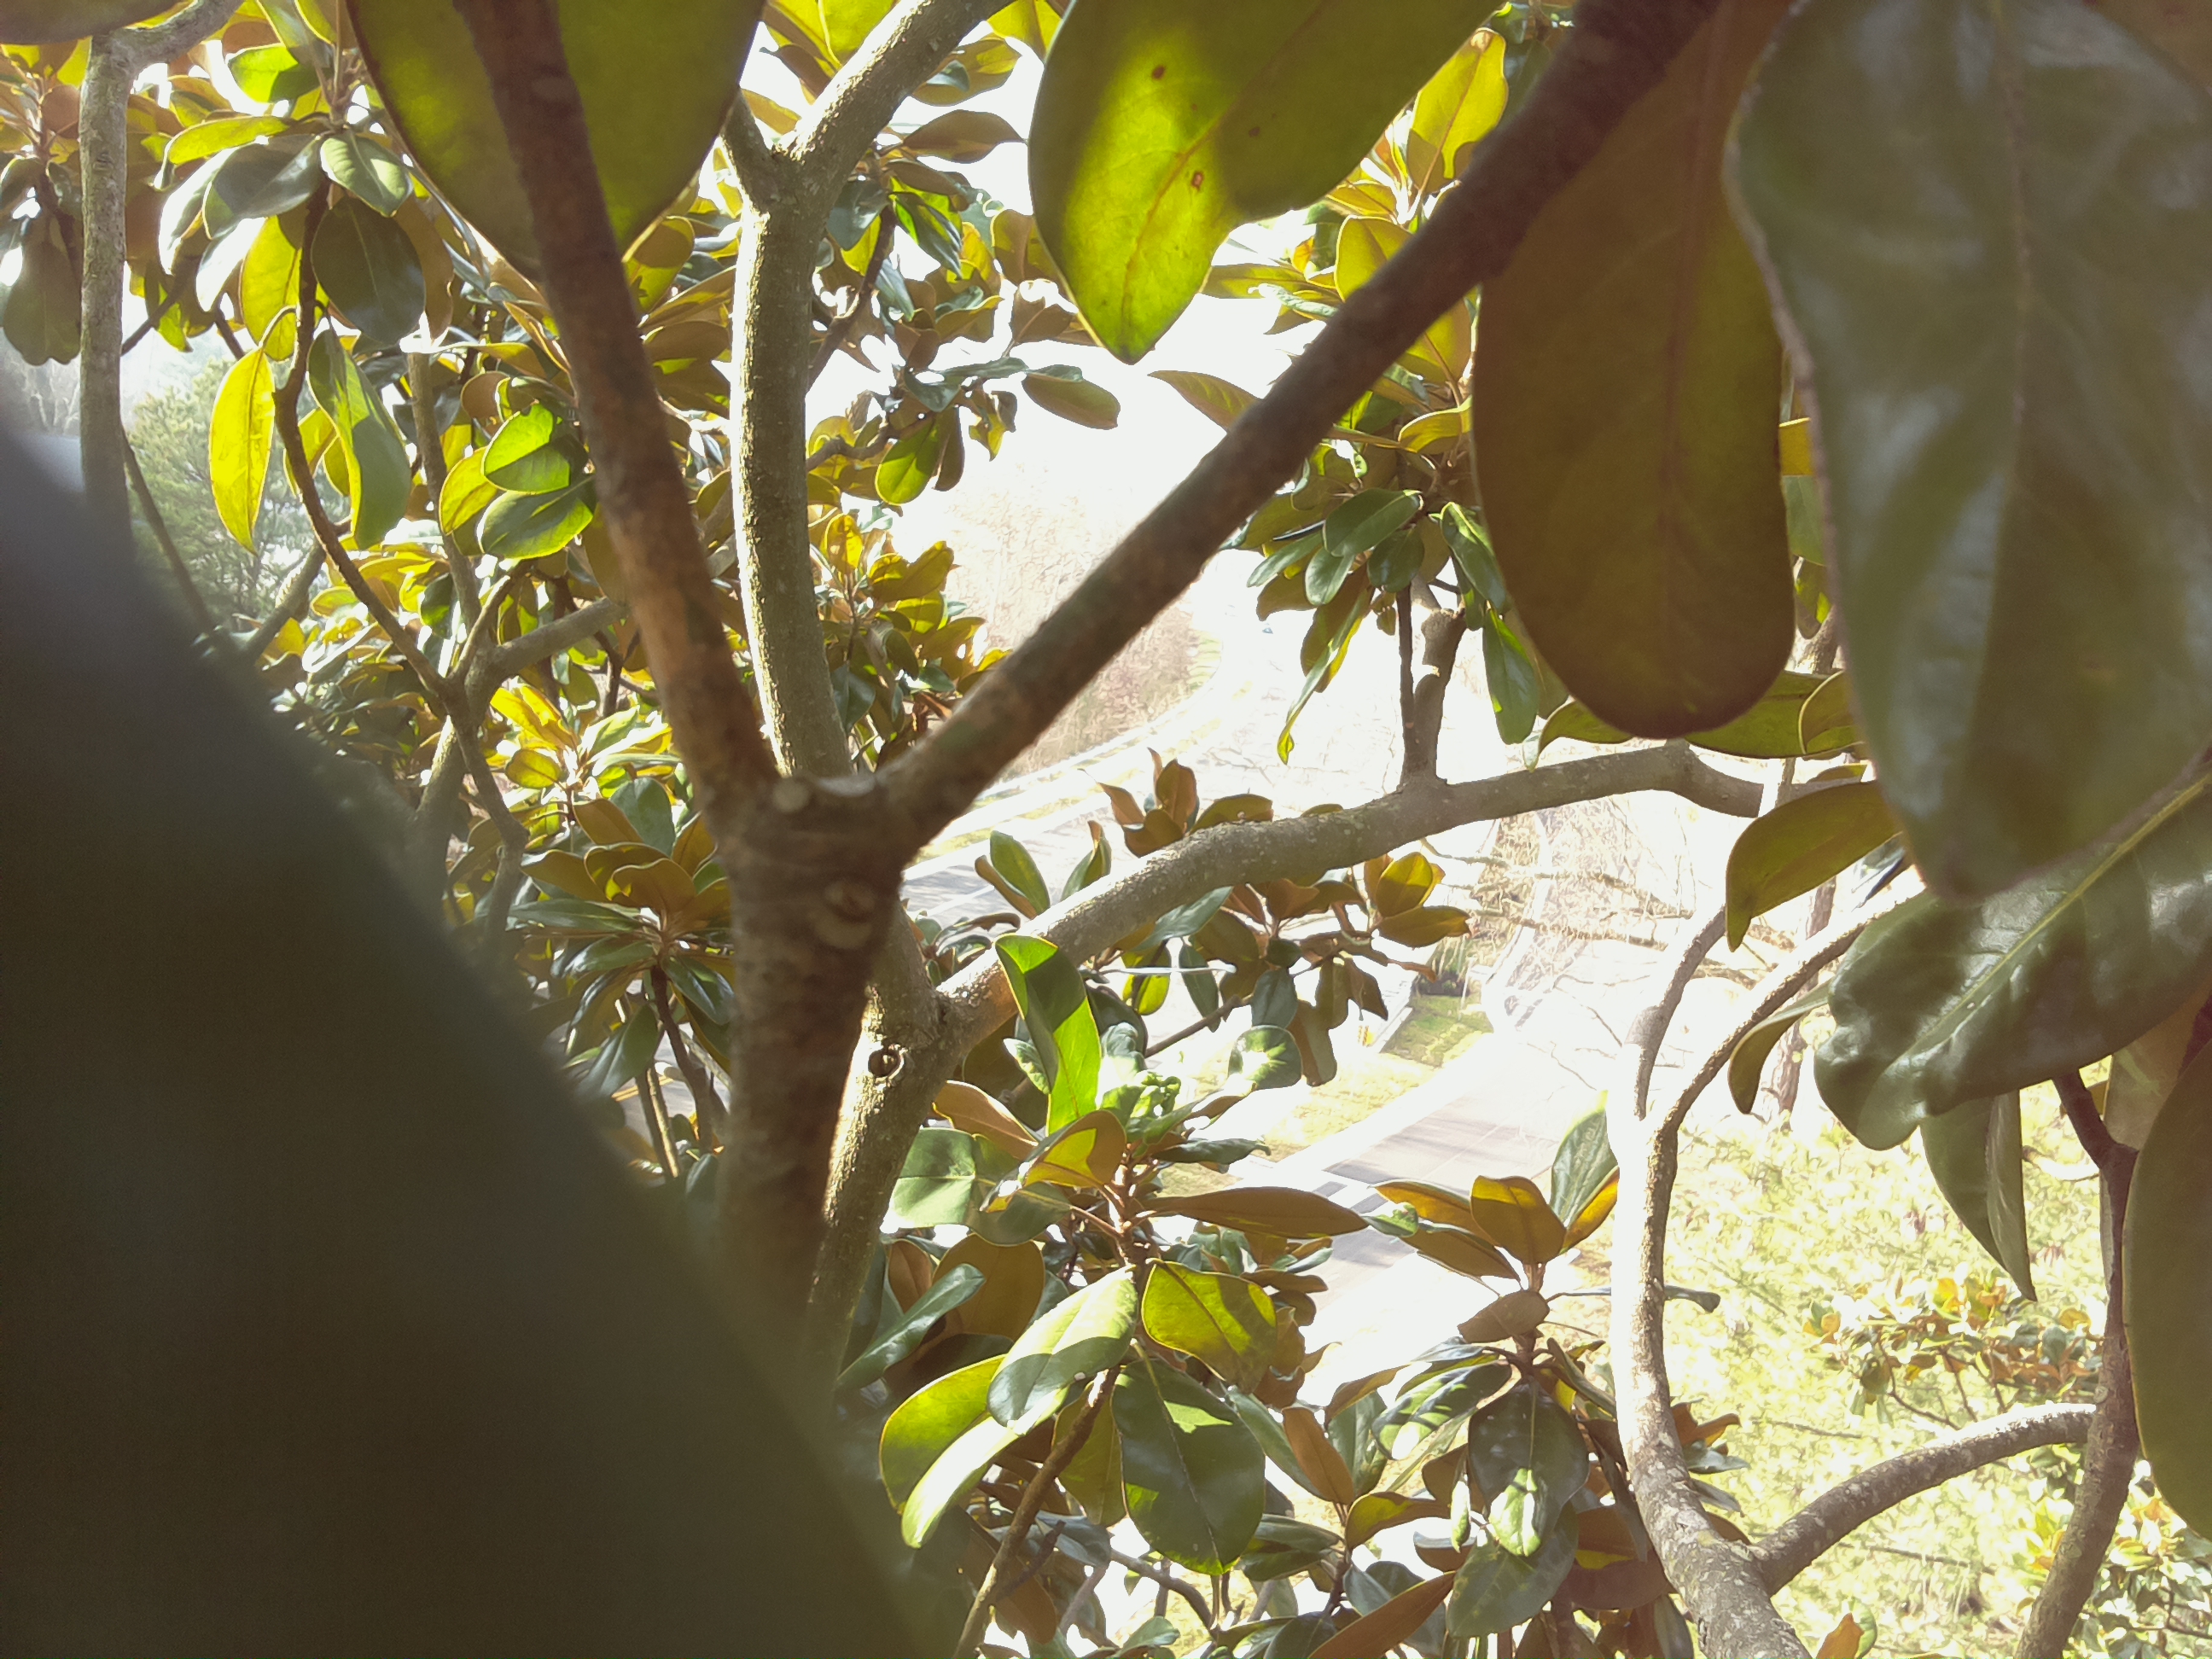
The payload landed here.
Three and some hours later, we were in the middle of Richmond, near the GPS coordinates of the payload. As we parked nearby and started walking towards the spot, we looked up. Way up. The payload was up in a tree, almost 40′ up in the air.
Steve tried to climb the tree, but the parachute was stuck in an inaccessible part of the tree that would not support his 250 lb frame.
Recovery Efforts
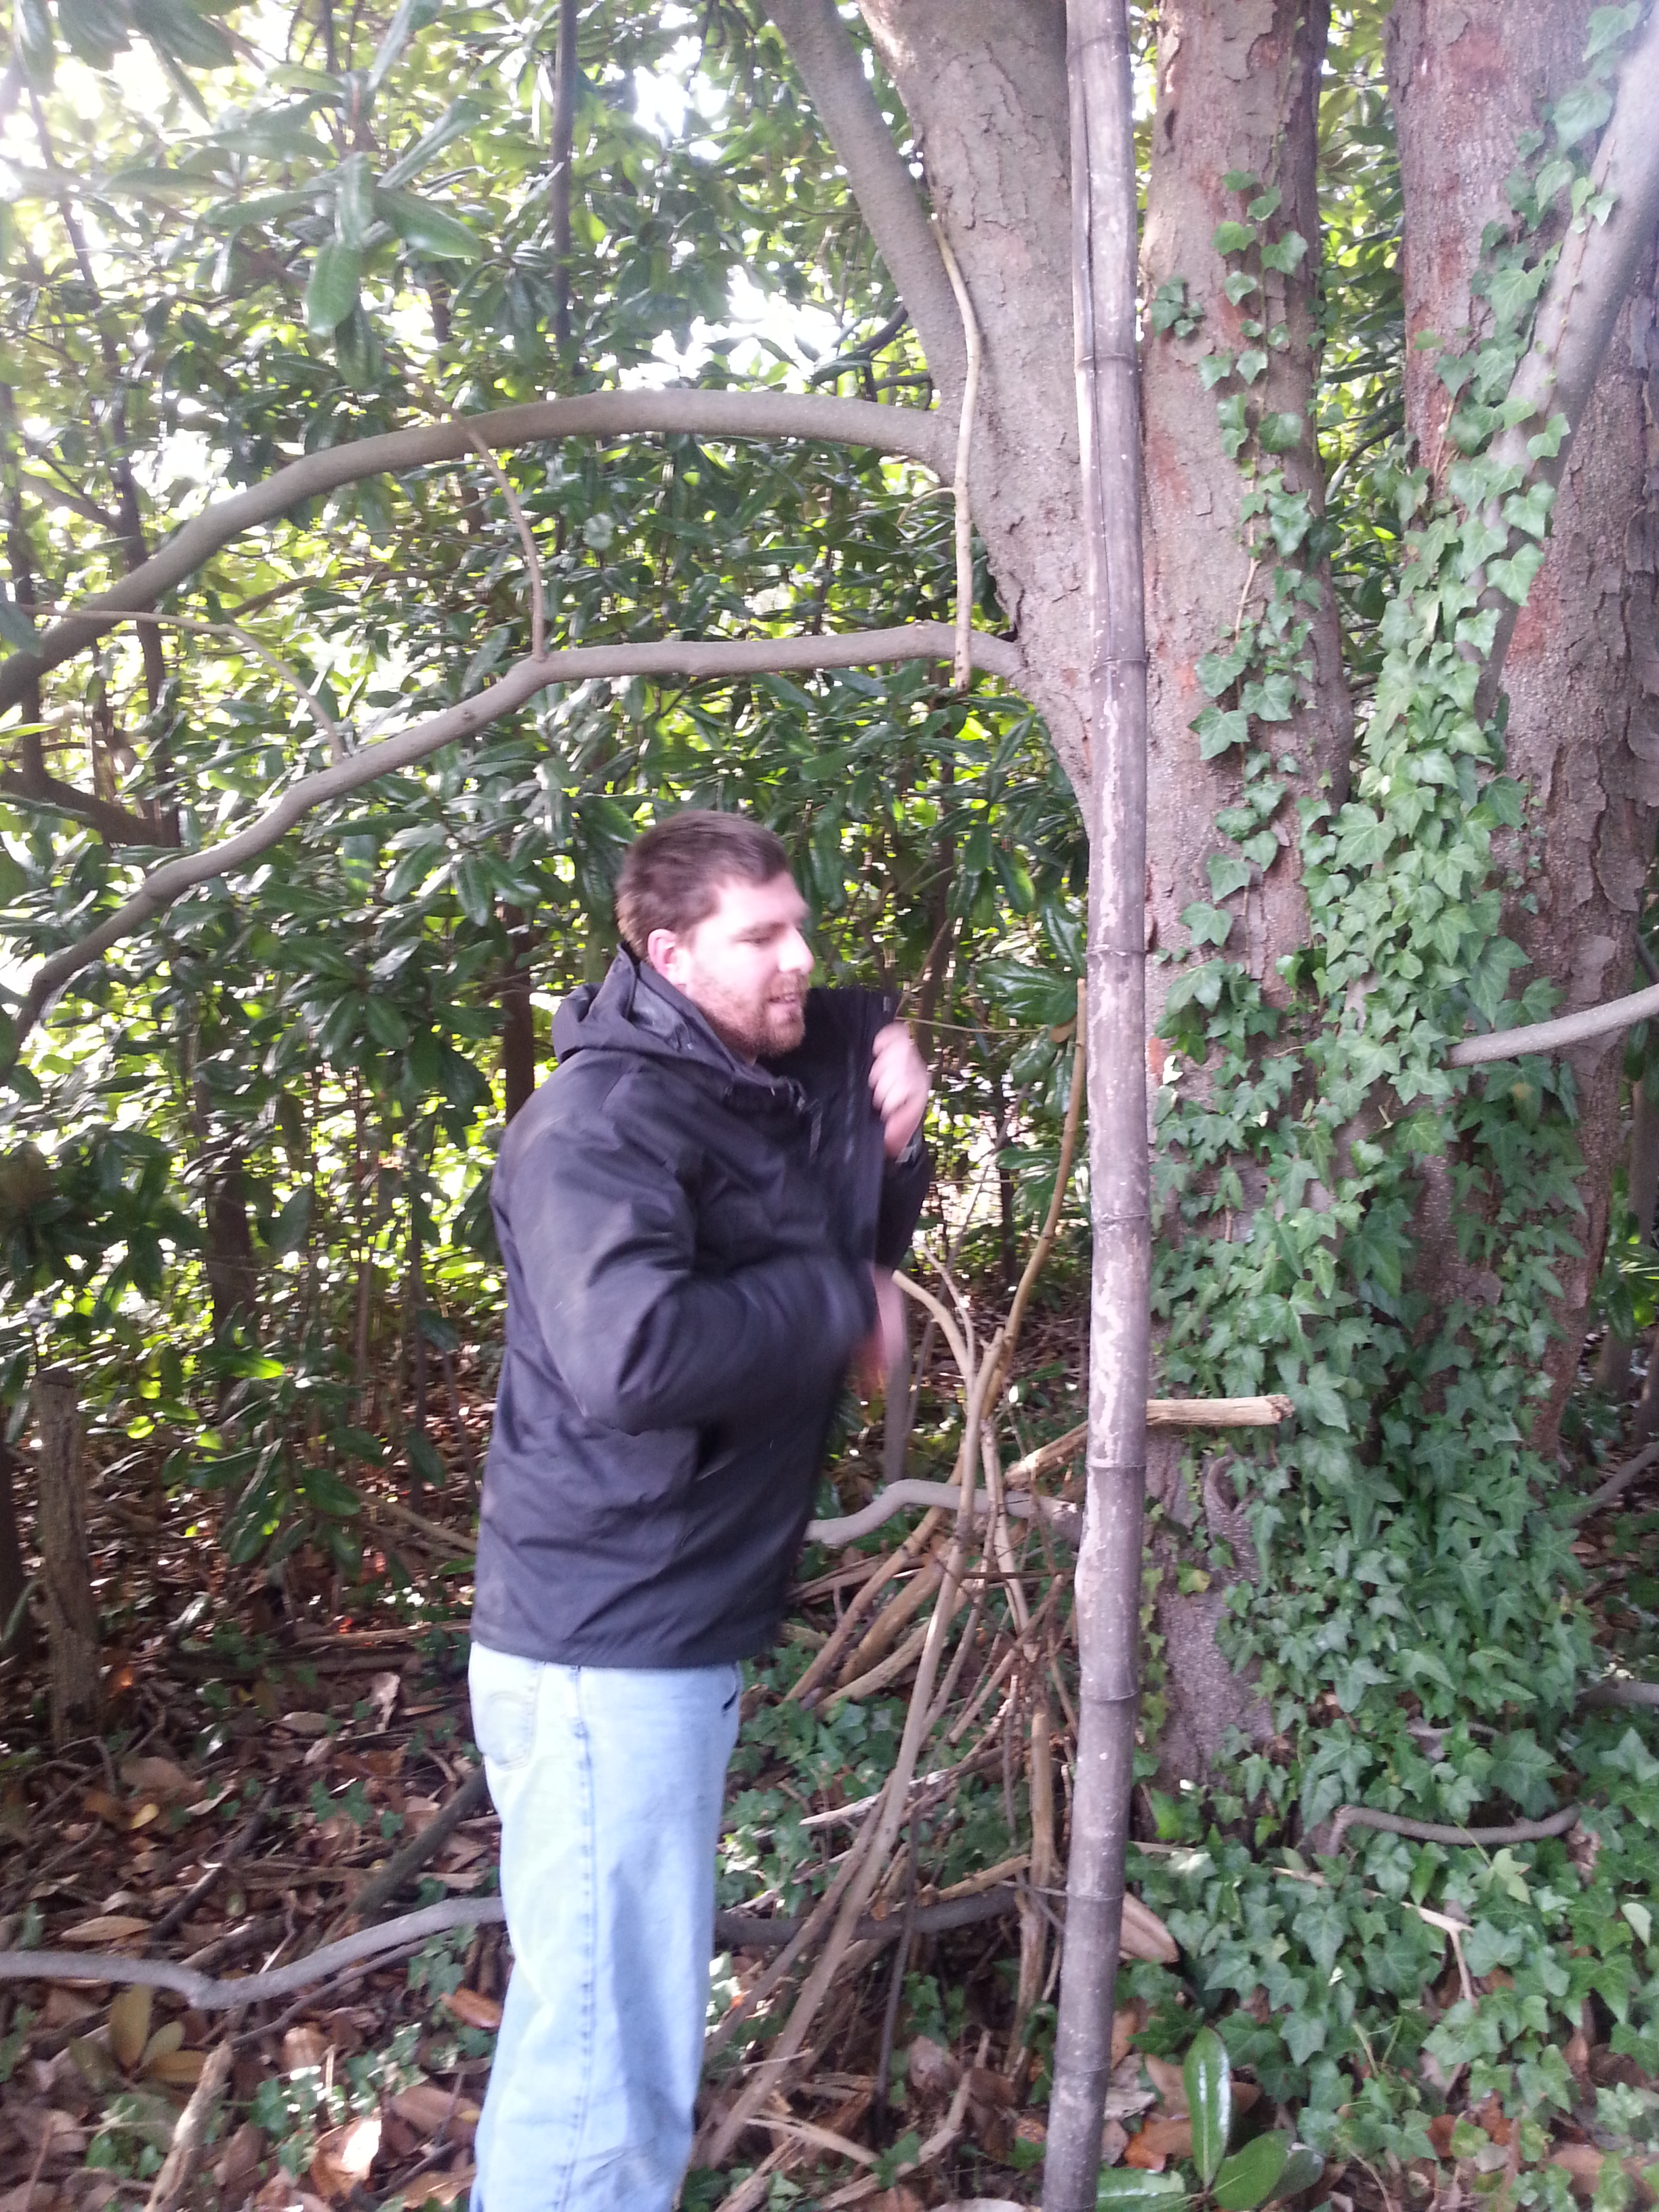
Stumped, we called in one other engineer we knew was close-by, Adam. Between the three of us, the Google machine, and some divine intervention we devised a plan to get our payload out of the tree. We found a bendable aluminum hook by the side of the road, there happened to be a huge bamboo forest a block away, and we had a lot of duct tape left over. Putting the three together, along with Steve’s super-human climbing skills we devised a plan to climb halfway up the tree, and reach the payload with our bent-aluminum-hook-and-bamboo tool.
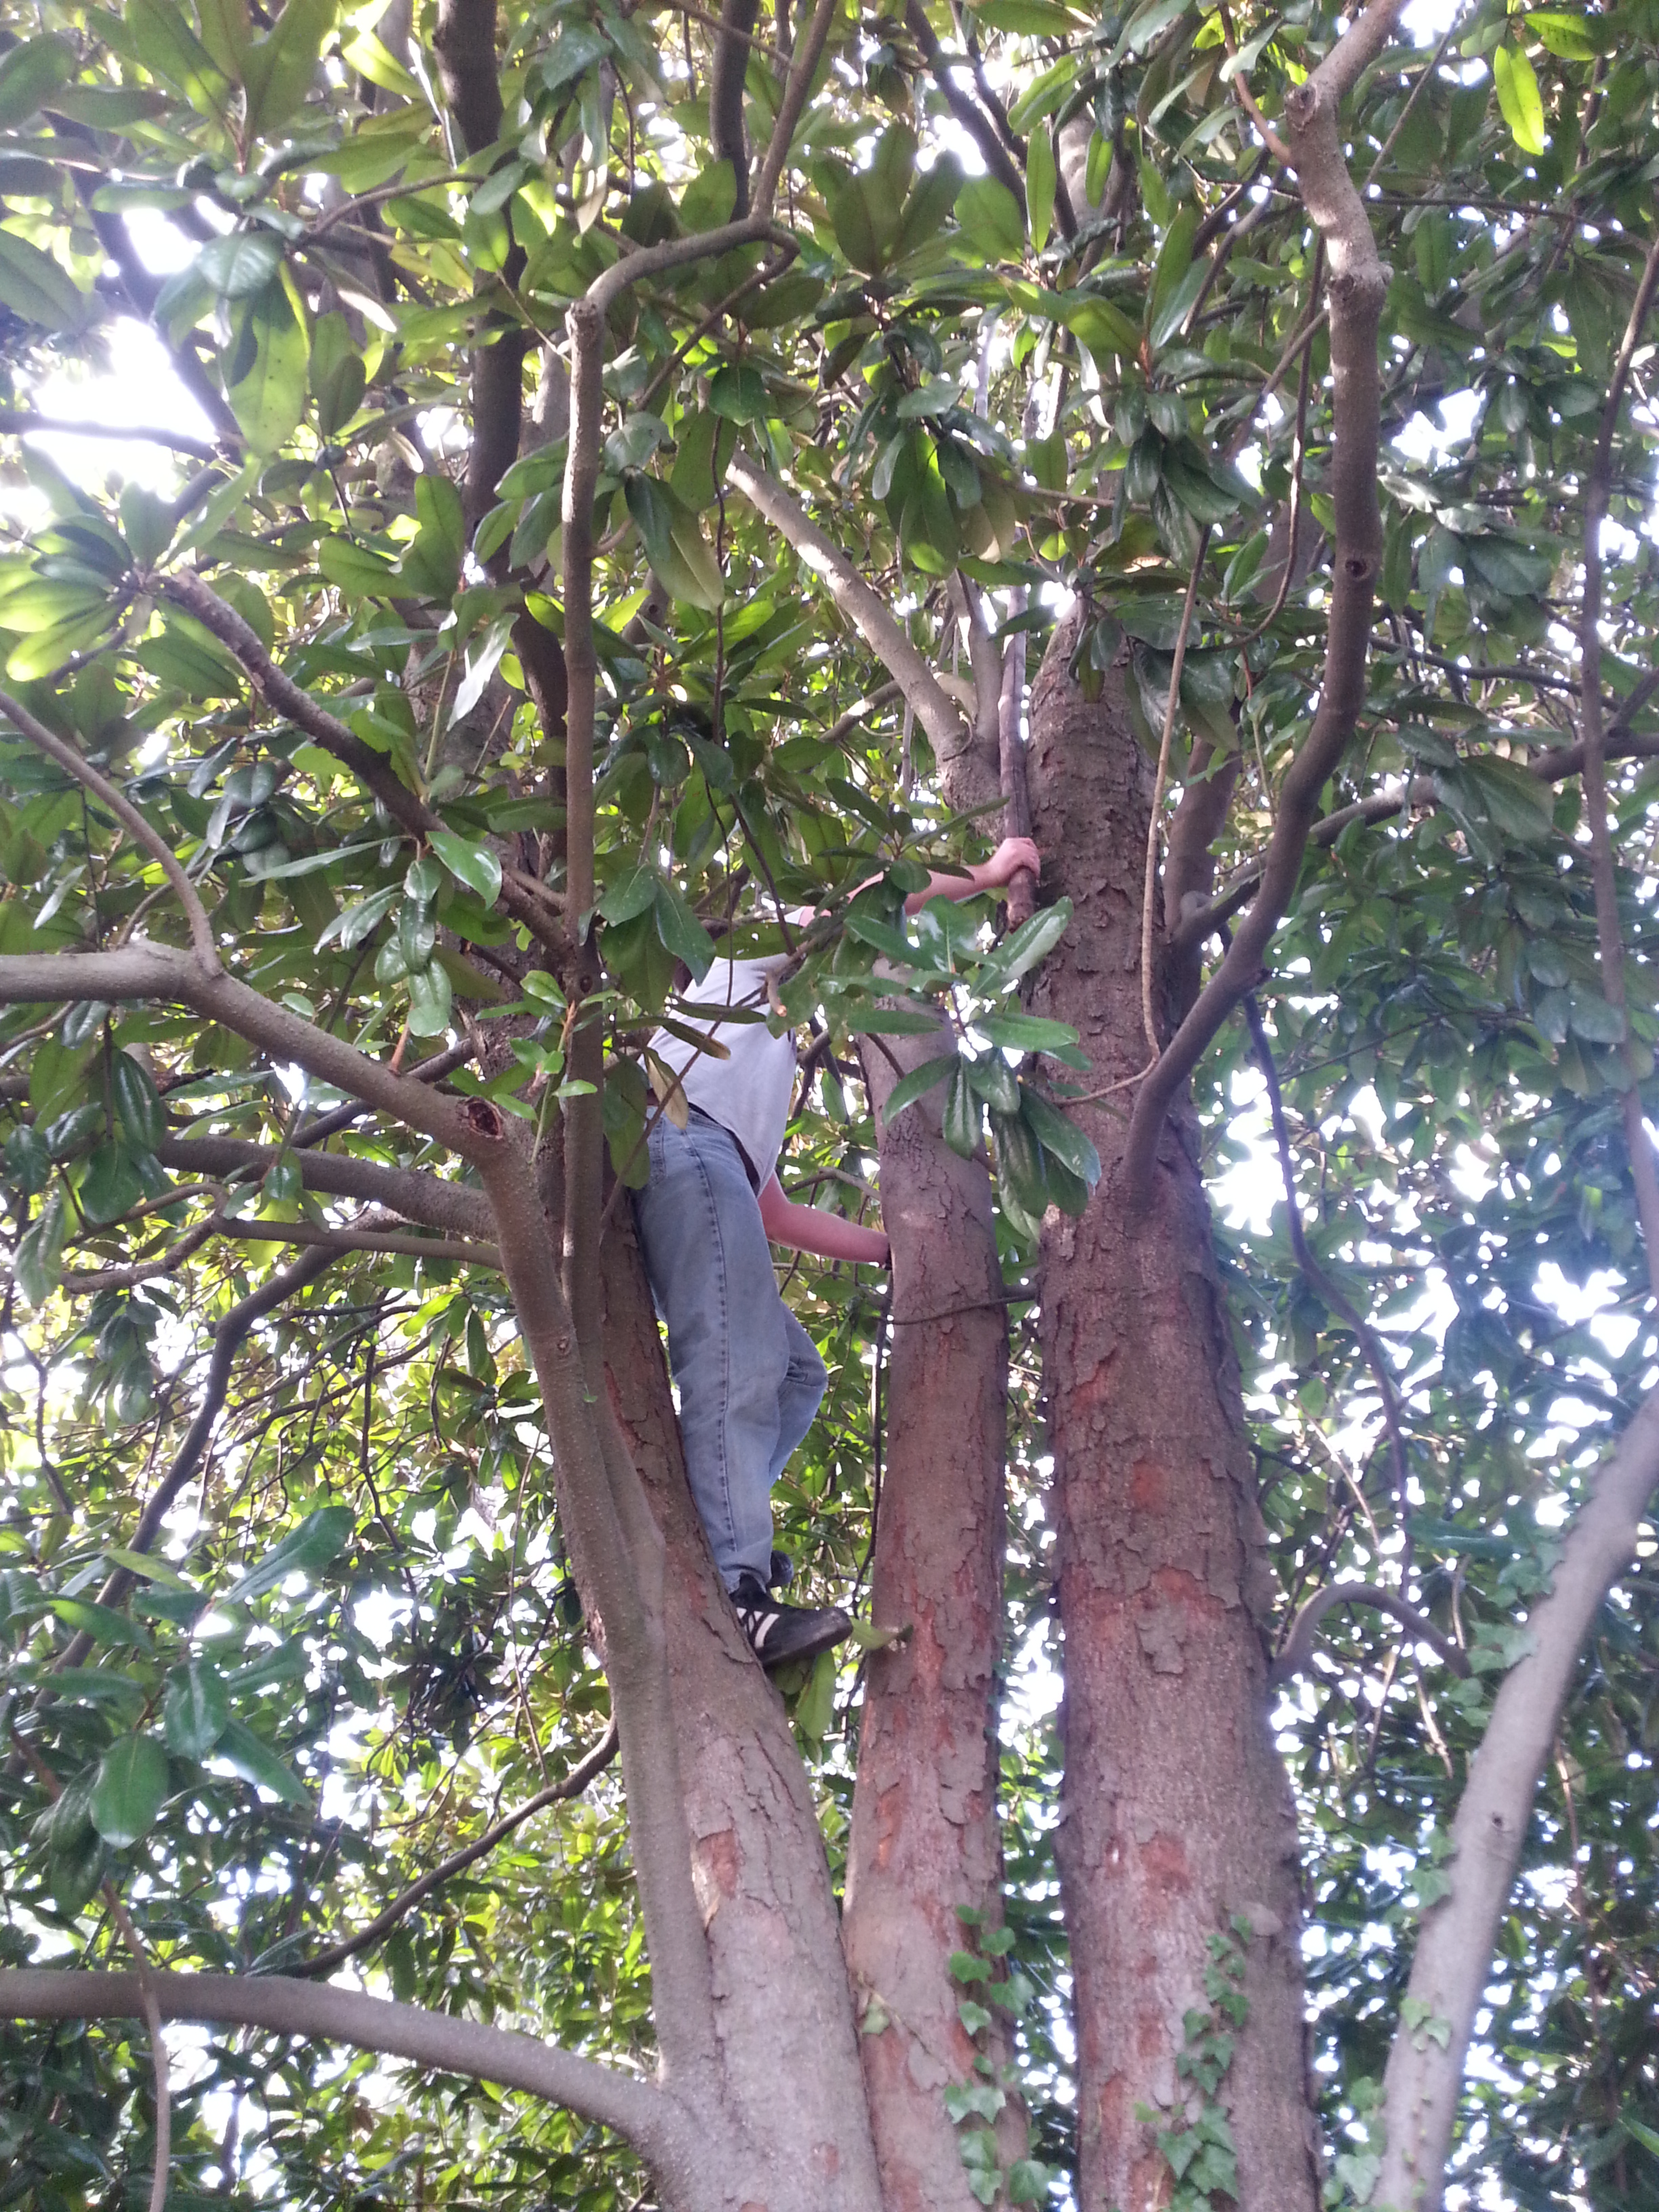
Recovering the SpacePi required some climbing.
It worked! We were able to hook onto the parachute cord and twist the bamboo so the hook held onto the cord, pull, and drag the whole ensemble down from the tree! Payload intact, we got back to the car and fled the scene.
Pictures
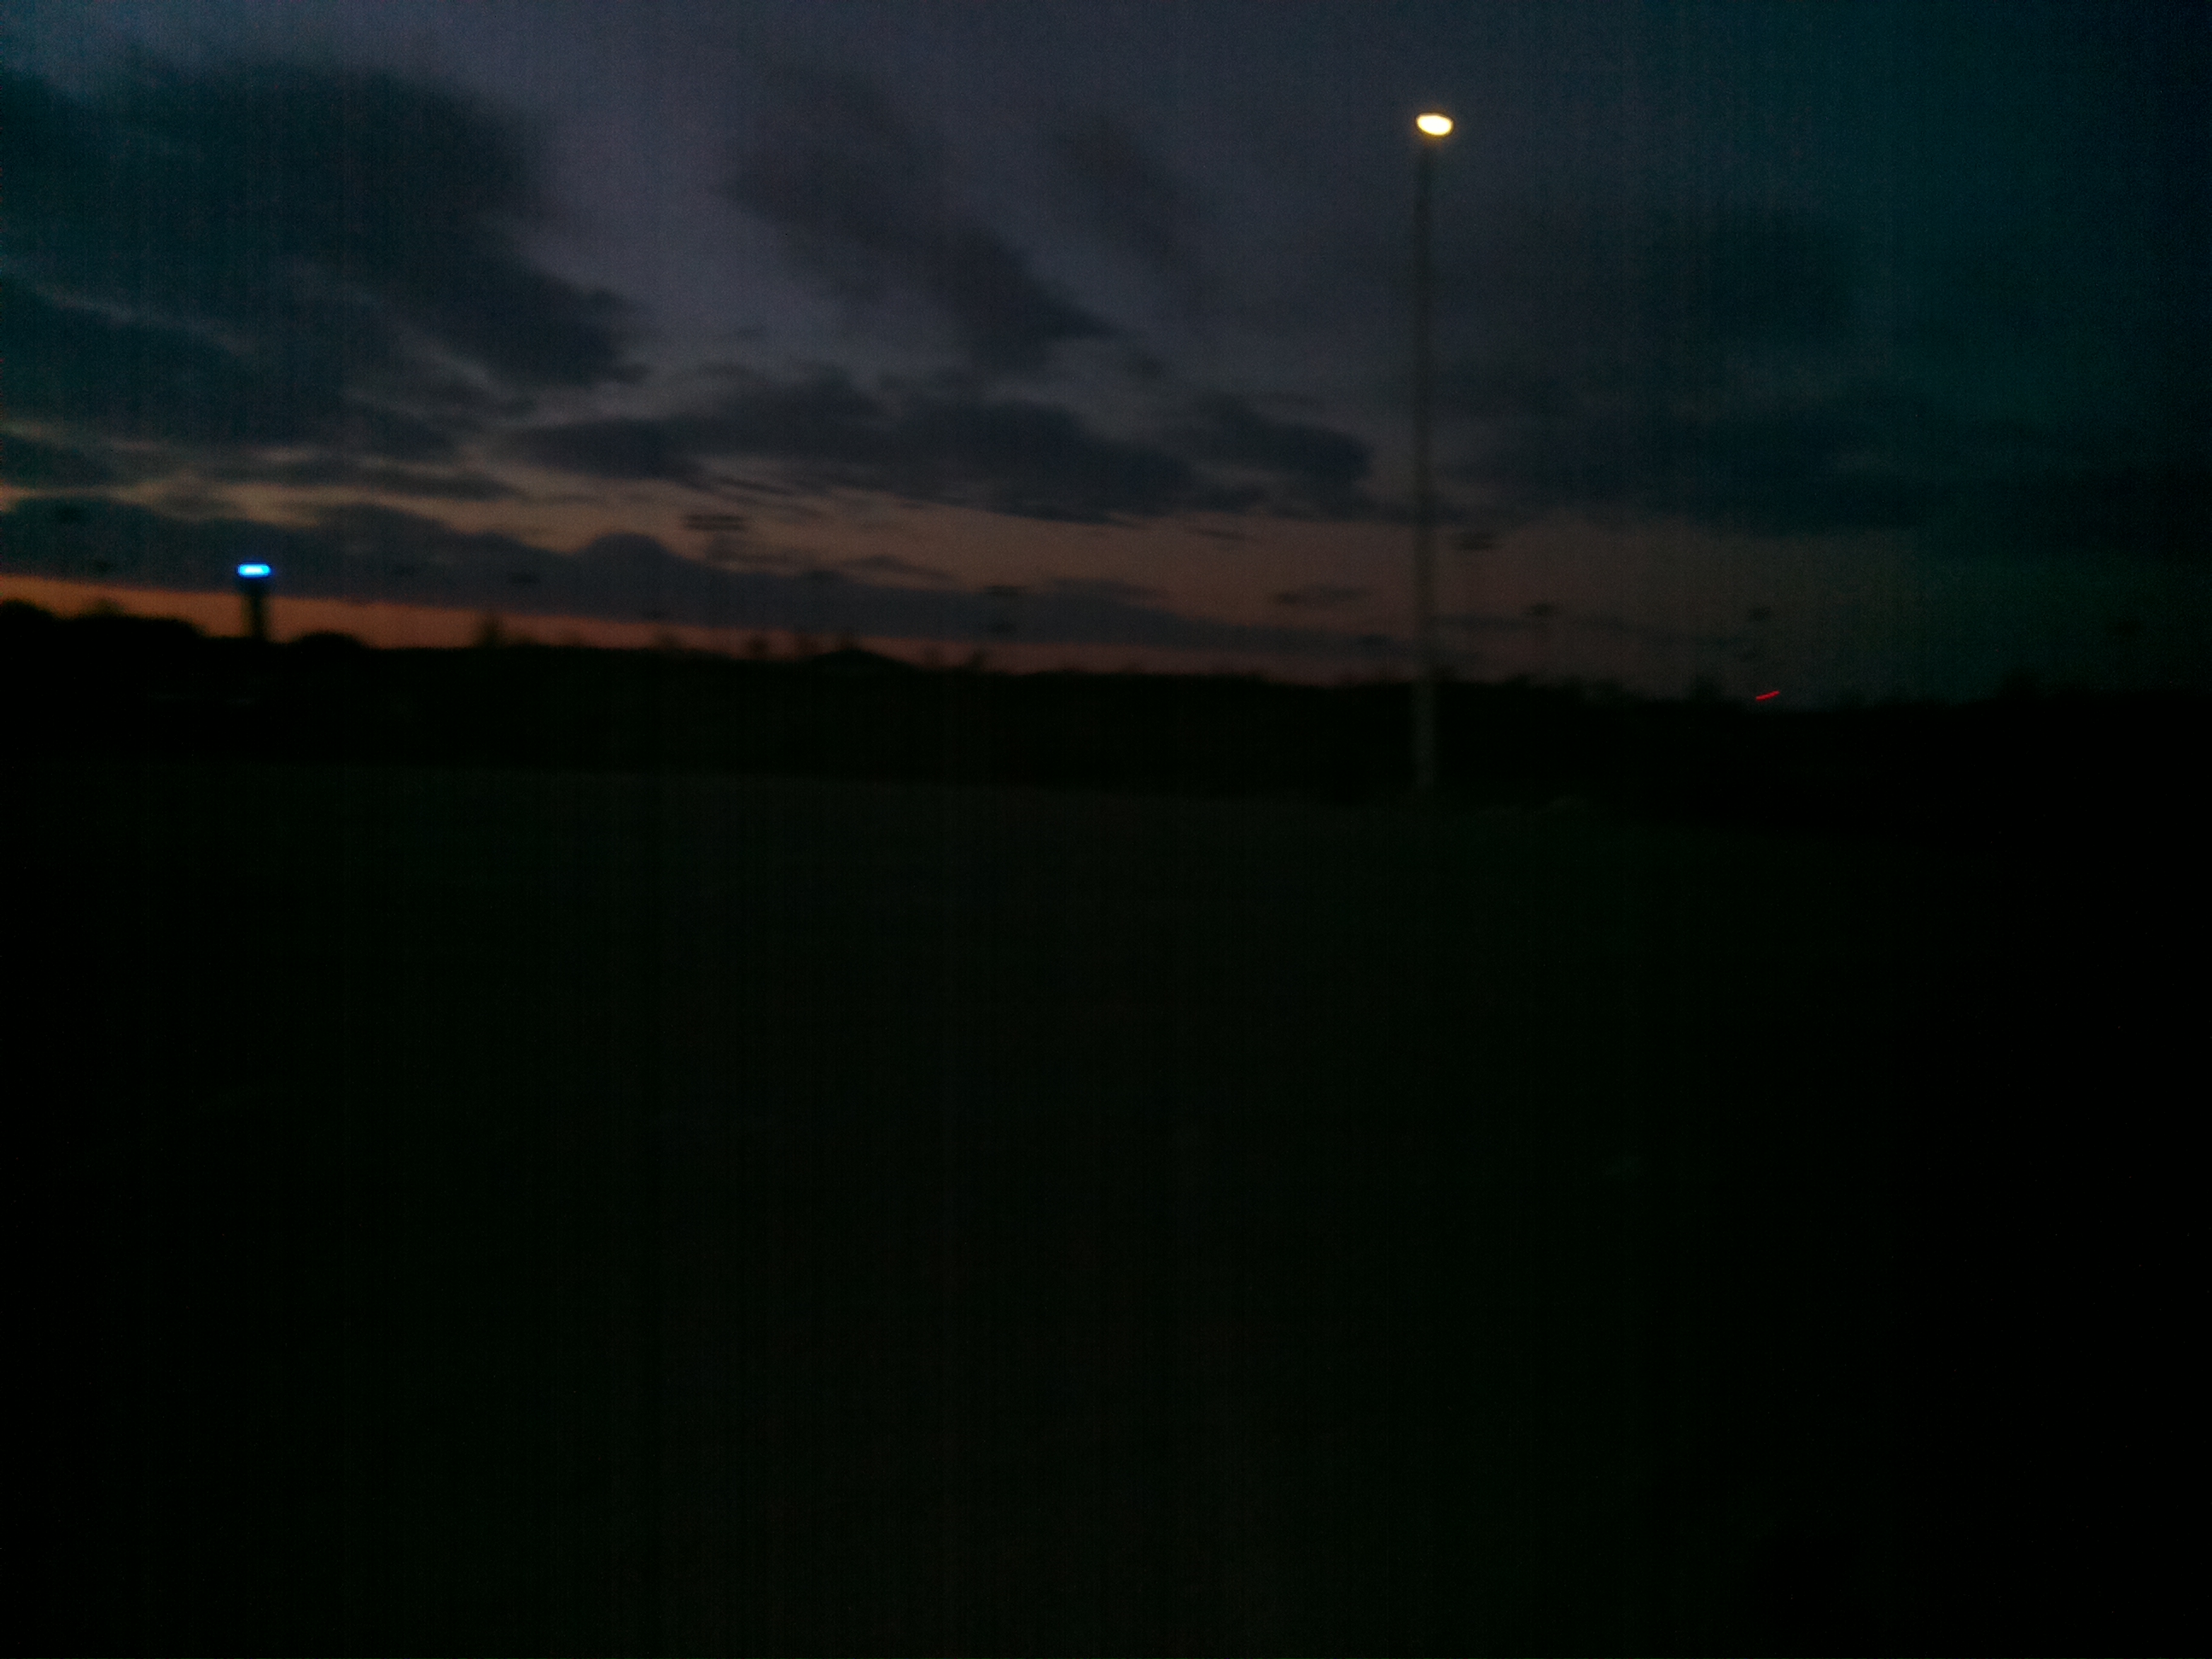
Early in the Morning before takeoff.
Right before launch.

Launch

Blacksburg from Above
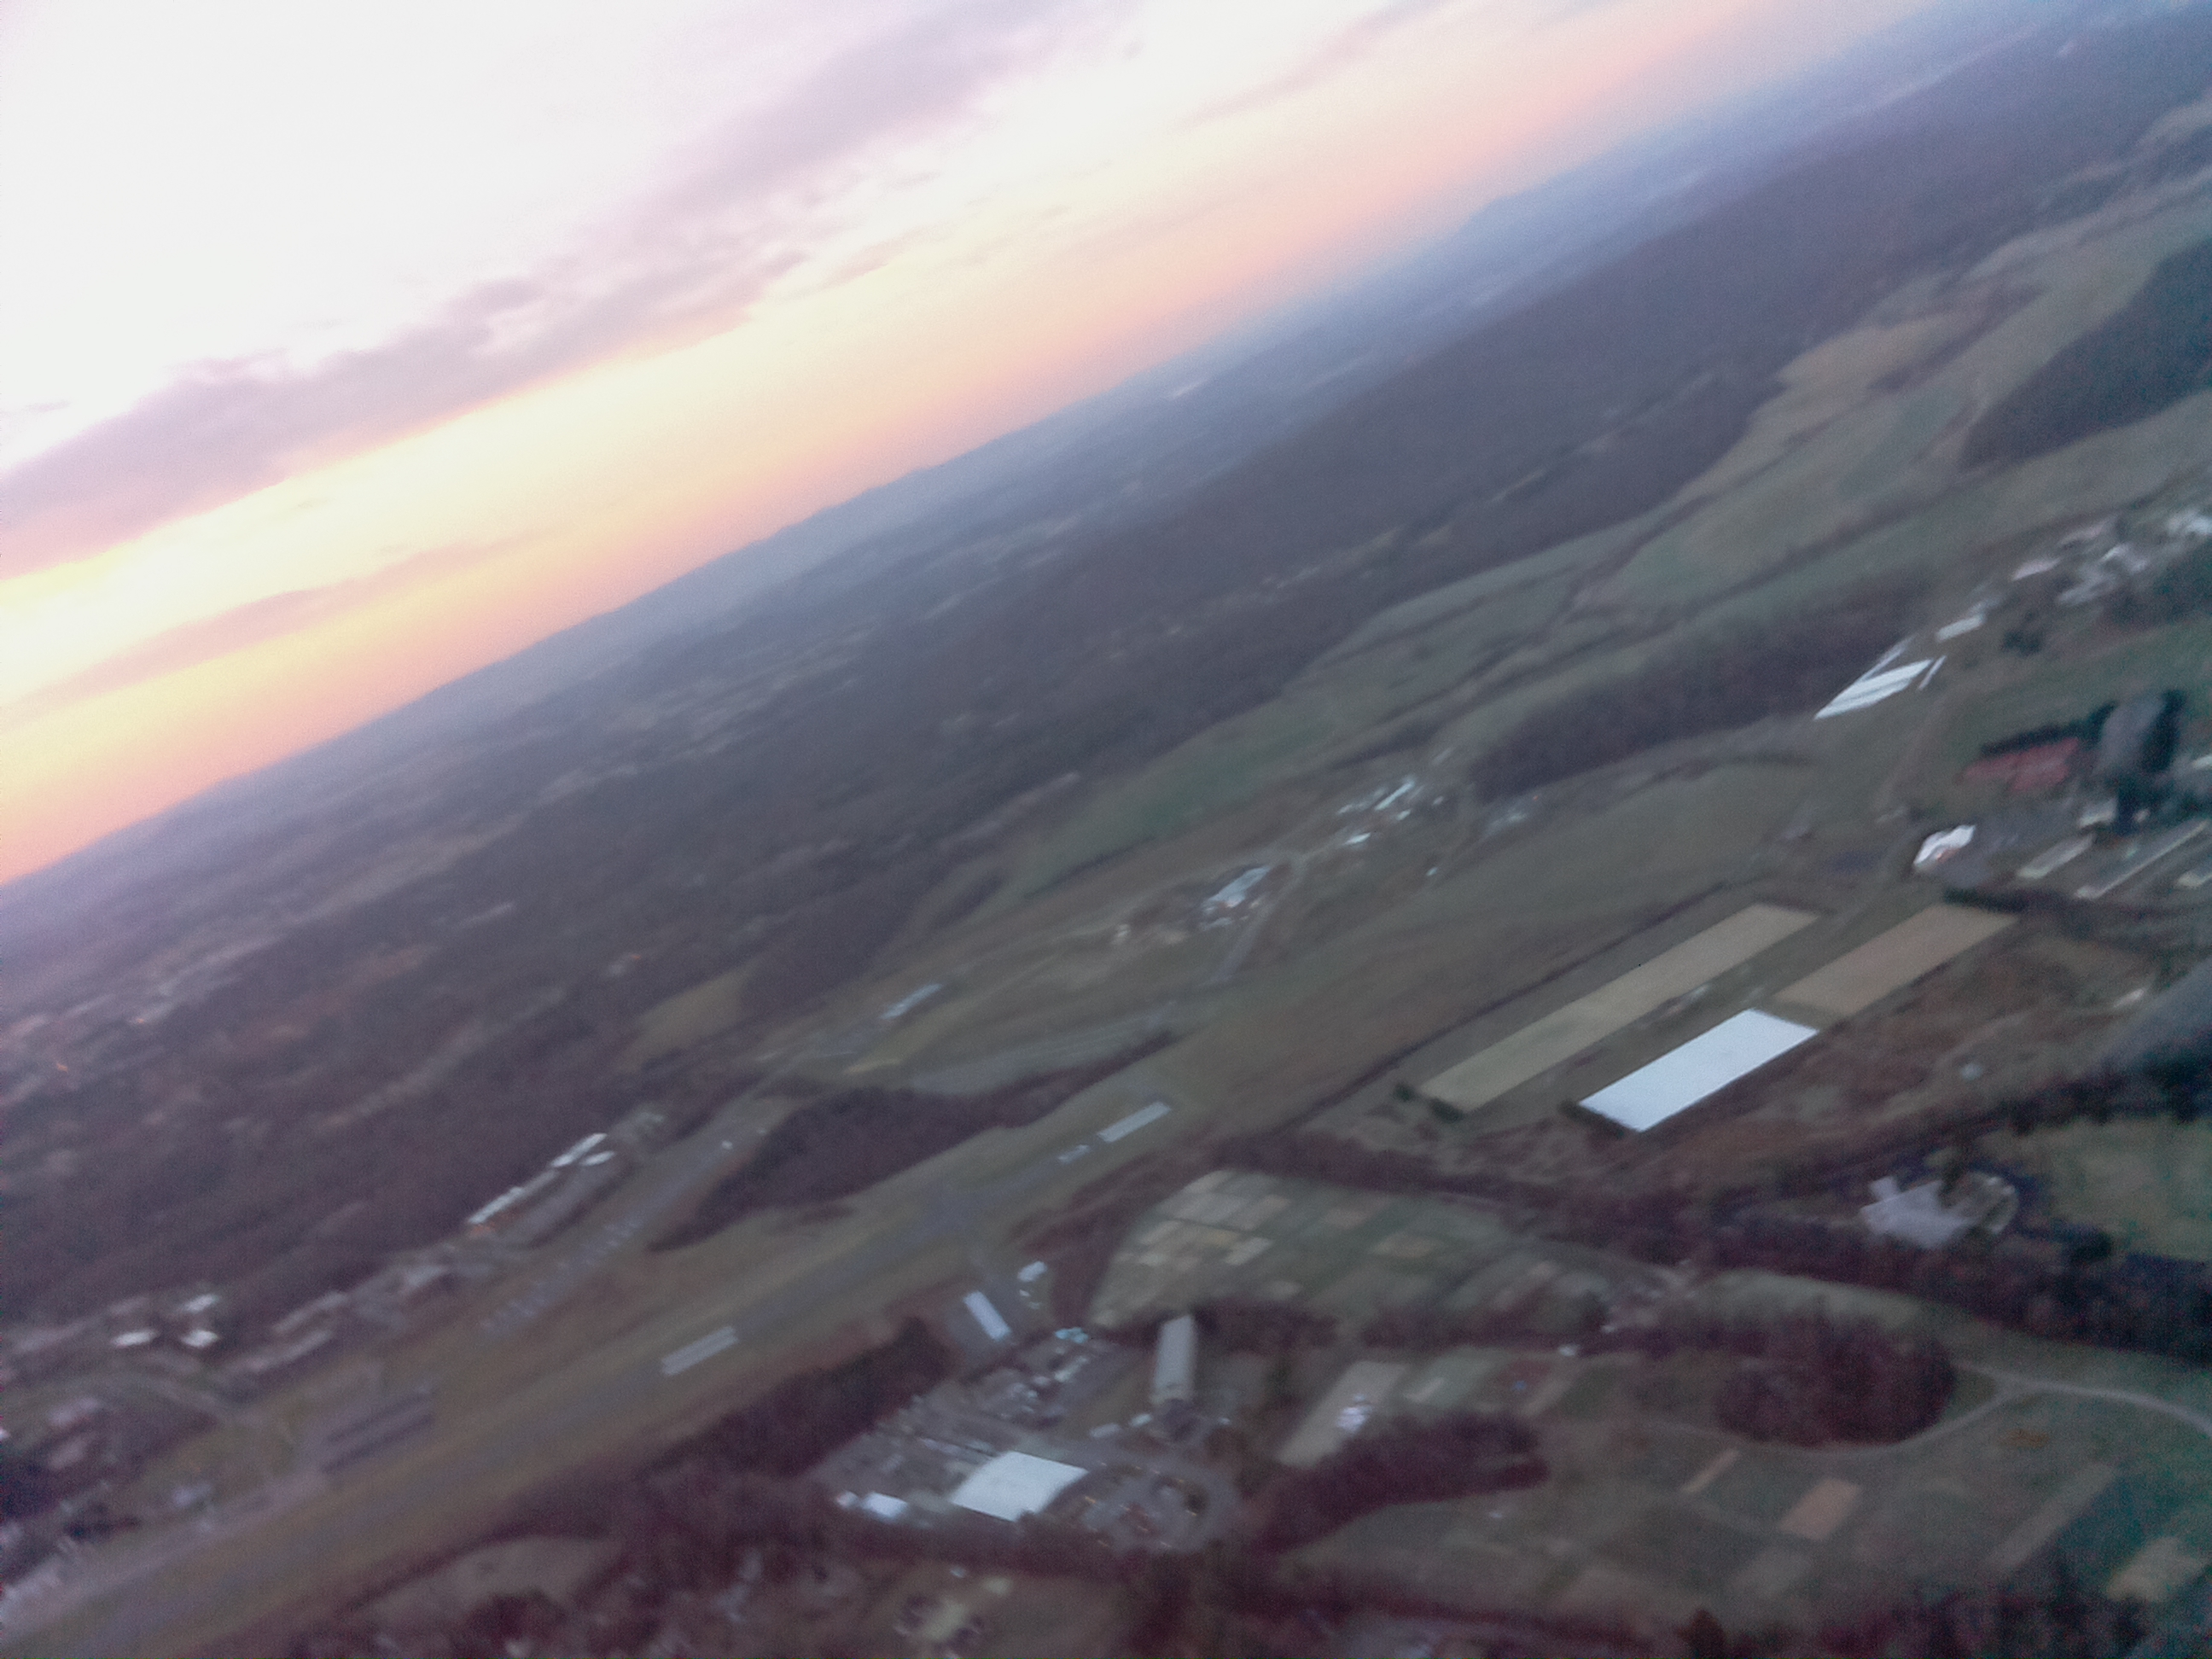
Midflight shot.

Virginia from above.

Closer to burst.
On landing.
Lessons Learned
Some lessons we learned about high altitude balloon launches with the Raspberry Pi. In no particular order.
- Don’t do this in the winter. It’s cold and the winds can move faster, making your recovery travels a lot longer. We had some issues with the camera not performing at higher altitudes, and this probably had something to do with frost buildup. This might be a problem in warmer periods, but maybe less of a problem.
- Add a radar reflector. We forgot to add a radar reflector. This can be anything that helps planes see your payload, even a simple tin pie pan.
- Think about the recovery. Trees happen and you want your electronics back. We’re not sure how to do this better, but some string with a weight dangling might have brought the payload closer to within grasp in our case.
- Use the handwarmers. We bought them, and didn’t use them. Throwing a handwarmer into the payload probably would have prevented the camera from freezing up.
- Attach the SPOT tracker to the outside of the payload. Or dangle it in a second payload before the first. The tracker may have failed for part of the time because the electronics were blocking it. We’re not sure. But to be safe, either tape the tracker, face upward, on top of the payload, or place it below, again facing upwards, to make sure it can send a continuous broadcast of position.